DIY Tiered Metal Plant Stand
Learn how to build a DIY tiered metal plant stand using aluminum brazing with a blow torch with detailed tutorial, video, and plans. It makes a great display for all your plants!
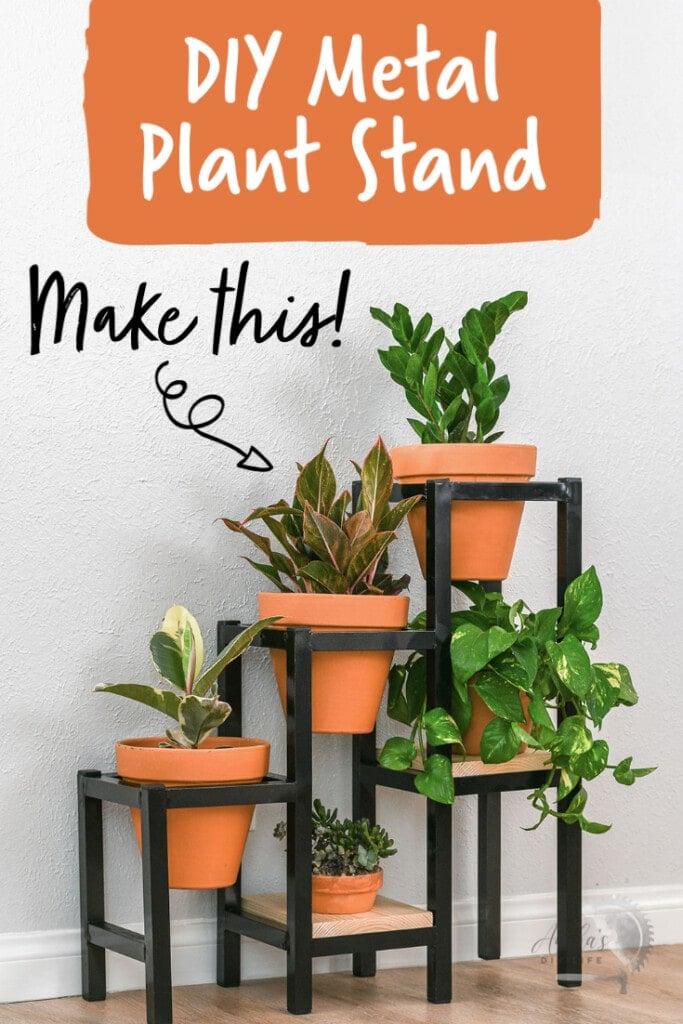
I am all into plants now! Since I have been able to keep a bunch of them alive, I can’t have enough of them. I am always thinking of fun and unique ways to display them.
This tiered plant stand is the perfect way to display multiple plants and easily fits into a corner of your home.
For this plant stand, I decided to go the route of using metal – aluminum tubes to be specific. I joined the aluminum tubes using a process called brazing.
What Is Aluminum Brazing
Aluminum brazing is the technique of joining two pieces of aluminum using a filler material to create a strong joint. The aluminum joint is heated up to the melting point of the filler material, which then fills the joint through capillary action.
The joints created by aluminum brazing are pretty strong and can be used in various projects. I have made a bench and coat rack in the past using this technique.
This is different from welding because it uses lower temperatures and doesn’t need expensive equipment.
Is Aluminum Brazing Hard?
Not at all! It needs the patience to wait for the joint to heat up and some practice to get clean joints. Another thing to remember is to make sure everything is clean and free of any oxidation or impurities to get a strong joint. Be sure to watch the video below to see exactly how this works.
Let’s get to making!
***This project is sponsored by Bernzomatic. All opinions are my own. Thank you for supporting the brands that make it possible to bring you new projects.***
***This post contains referral or affiliate links. It is a way for this site to earn advertising fees by advertising or linking to certain products and/or services. Please read my full disclosure here ***
Material Needed
- 1″ square aluminum tubes
- 1×8 boards
- Bernzomatic BZ8250HT Hose Torch
- Bernzomatic Aluminum Brazing Rods
- Bernzomatic MAP-PRO hand torch cylinder
- Flat metal file
- Wire brush
- Acetone
- Spray paint in the color of your choice
- Heat resistant gloves
Tools Needed
How to Make the Metal Plant Stand
I have a full step-by-step video showing you exactly how to build this plant stand. Watch it below. The full written tutorial follows as well.
Click here to subscribe to my YouTube Channel for more great videos!
Step-By-Step Tutorial
Step 1 – Cut the Aluminum Tubes
- Start by cutting the aluminum tubes per the plans.

Aluminum is a relatively soft metal that can be cut using most woodworking saws and blades. The trick is to go slow so there is no build up of heat. If you are making many cuts like for this project, take breaks between every few cuts to allow the blade to cool down.
Step 2 – Clean and Prepare Tubes
- Clean all the tubes with acetone to remove all the gunk and residues.
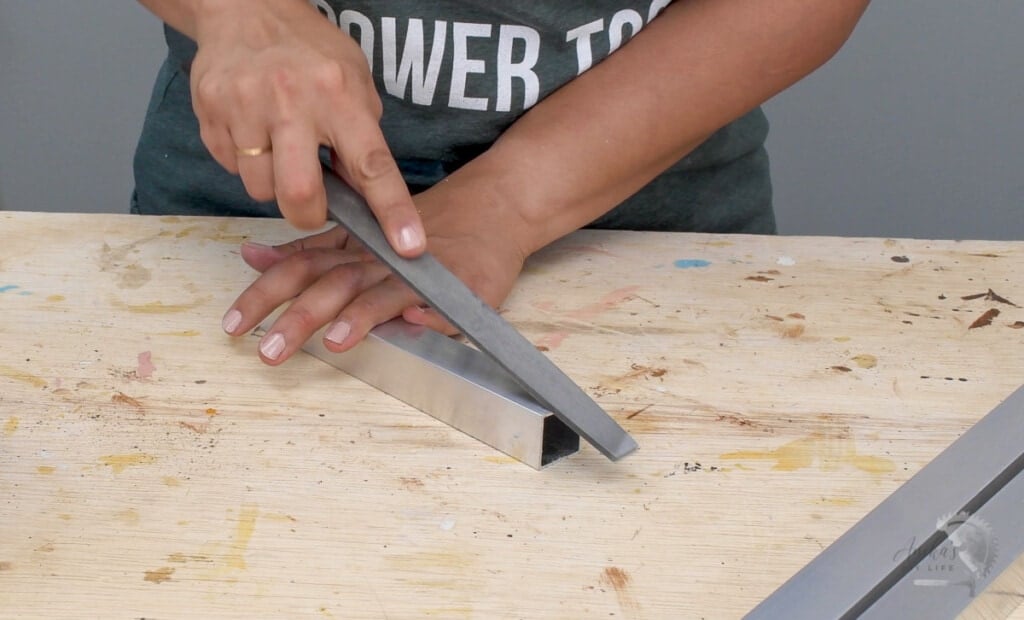
- Using a metal file, slightly bevel the edge on all sides of the tubes that will be brazed. This creates a channel for the filler metal to travel into and fill the joint.
- Use a wire brush to clean the edge – this is akin to sanding and helps remove any oxidation.
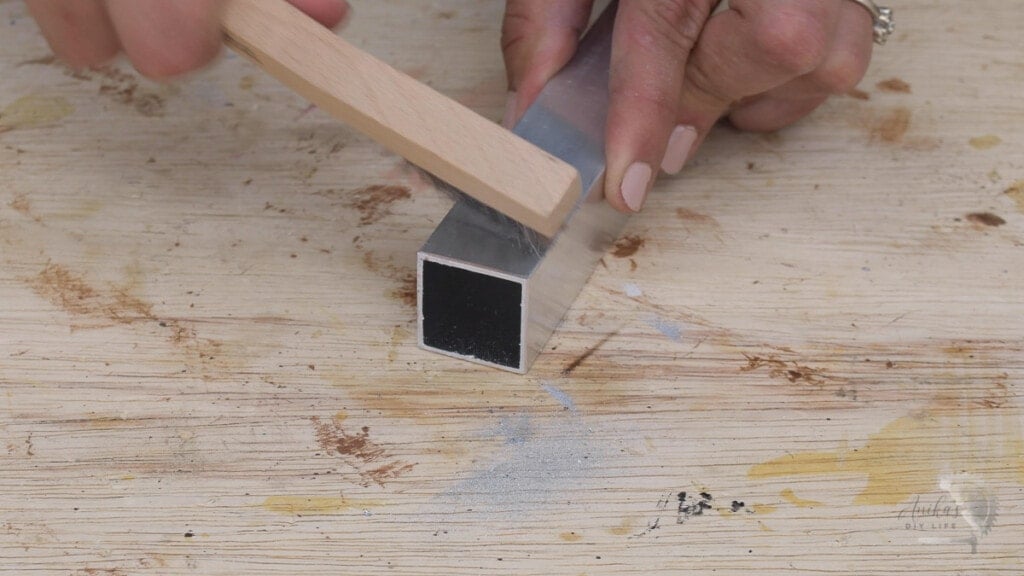
Cleaning and preparing the tubes are extremely important steps to get the best and strongest joint.
Step 3 – Set up the Joint
- Set up the metal pieces you want to join and hold them together using a metal clamp. Be sure to use a speed square to keep everything square.

It is important to use a metal clamp for this project as the aluminum tubes get really hot, and the clamp comes in contact with the flame. Plastic will not survive.
Step 4: Braze!
This is the fun part! Although the technique is quite easy, as I mentioned before, it also takes a lot of patience.
I used the Bernzomatic BZ8250 Hose Torch with the Bernzomatic MAP-PRO gas fuel cylinder. It comes with a holster to hold the cylinder making it really easy to handle the torch and cylinder while you work on the joint.
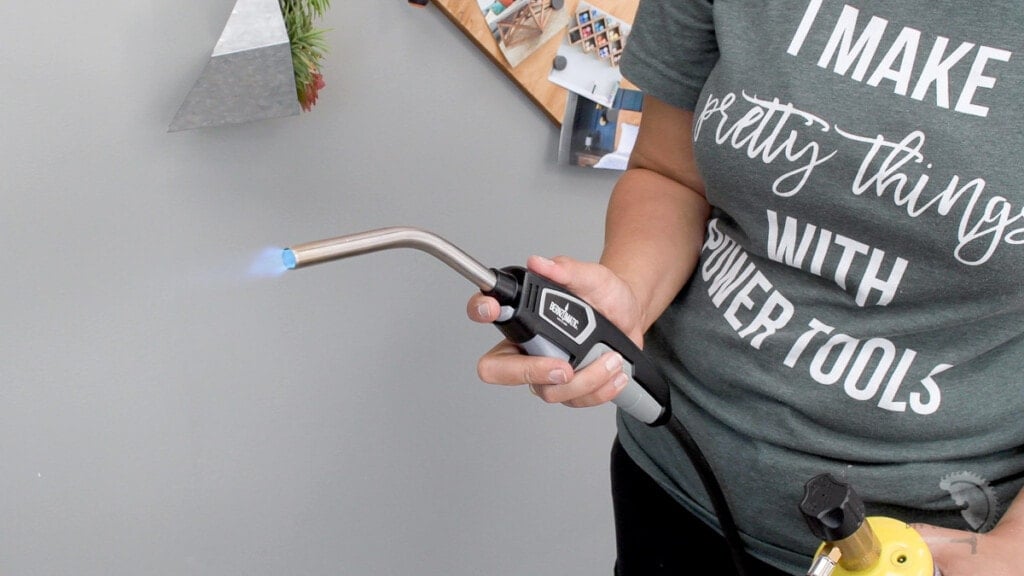
Here is the basic technique to braze the joint –
- Apply the flame to the joint. The edge of the blue flame is the hottest point.
- When you expect that the joint is hot enough, move the flame away but still keep very close to the joint. Quickly touch the brazing rod to see if it melts on contact with the joint.
- If it melts, move it across the joint to fill it with the brazing material.
- If it doesn’t melt, go back to applying heat and repeat above.
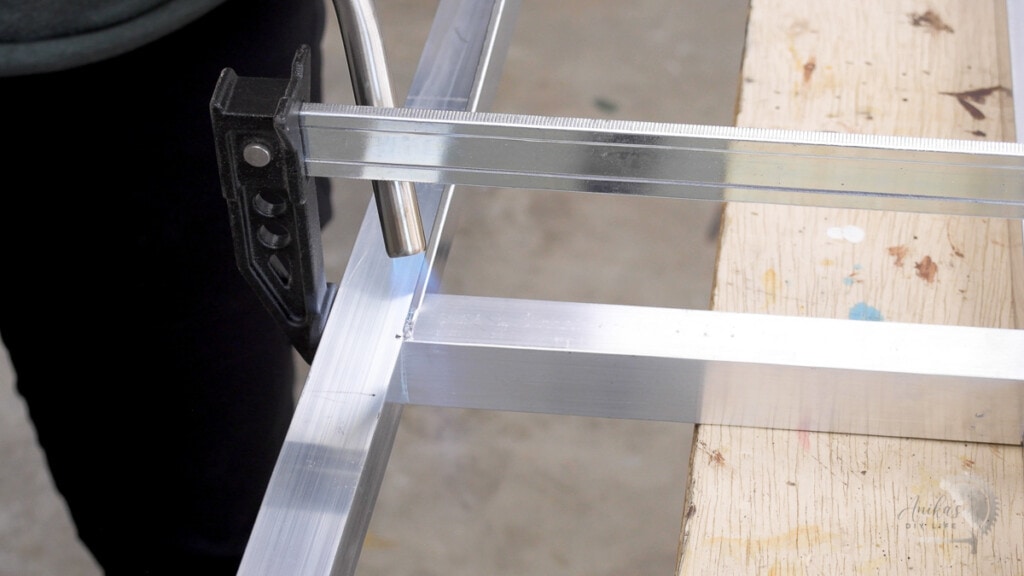
- Once one side of the joint is brazed, quickly go to each consecutive side in sequence and repeat the above. The heat from the previous side makes the process faster.

Once you braze a couple of joints, you should get an idea of how long it takes to get the joint hot enough. It took me about 5 minutes to braze two joints so 8 sides but it may differ based on the ambient temperature.
I have two metal clamps so I had to braze two joints at a time.
Between each set of joints, you want to be very careful to let it cool before touching the tubes or clamps – even with the heat-resistant gloves.
I built the vertical frames first.

Then attached the middle pieces to build the frame.

Step 5 – Clean and Paint
- You may have drips of the brazing material, which can be very sharp. These can be filed down with the metal file.
- Clean the frame again with acetone to remove any dirt or oils from touching it.
- Prime and paint with the spray paint of your choice. I used a glossy black finish.
And that’s the plant stand! I designed it to fit 8-inch terracotta pots which fit perfectly.

I added plastic tube stoppers to keep the feet of the plant stand from scratching the floor.
The lower levels make for a good spot to set a wooden board and keep more plants. I didn’t attach this. It sits pretty nicely in the space.

The joints are nice and strong and take the weight with no problem.
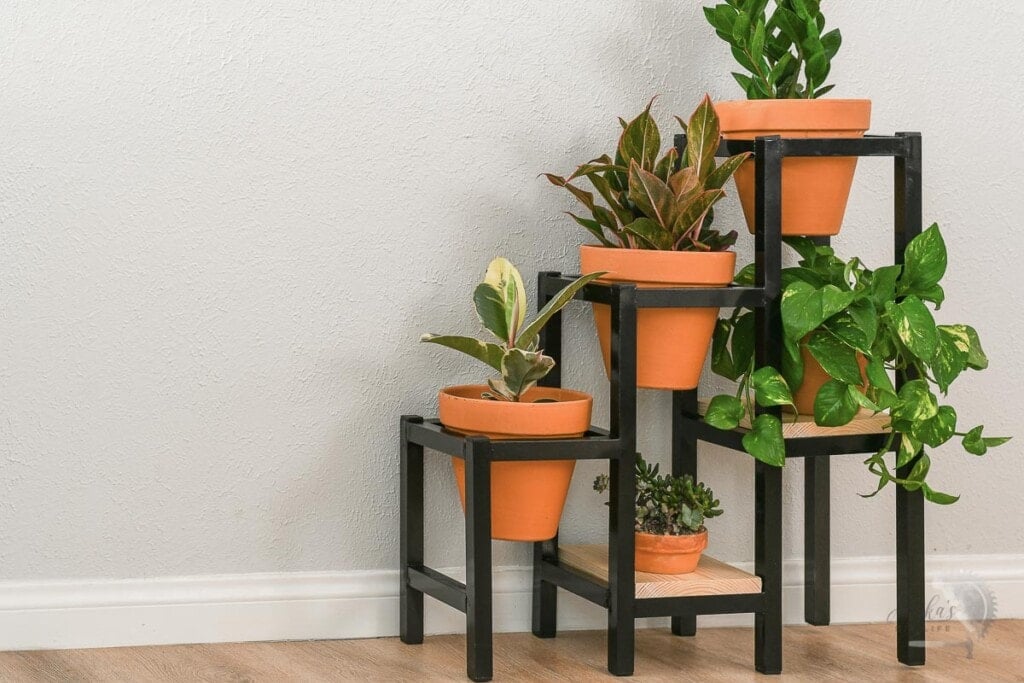
Did I convince you to give brazing a try? It needs a bit of patience and time, but the process and technique itself are extremely simple and straightforward and honestly, a lot of fun!
Now excuse me while go buy more plants and try to come up with more ideas on displaying them.
Printable Plans for the Plant Stand
Click the link below to get the woodworking plans for this project. The plans have all the dimensions plus step-by-step instructions with illustrations to help you make this plant stand.
More Projects Using Blowtorches
Anika's goal is to inspire and empower beginners with woodworking, DIY, home improvement, and home decor ideas.
She wants everyone to unlock their creative potential and experience the feeling that comes with making something. Nothing feels better better than seeing something and saying "I can make that!"


You’re getting to be quite a pro! Good looking plant stand!