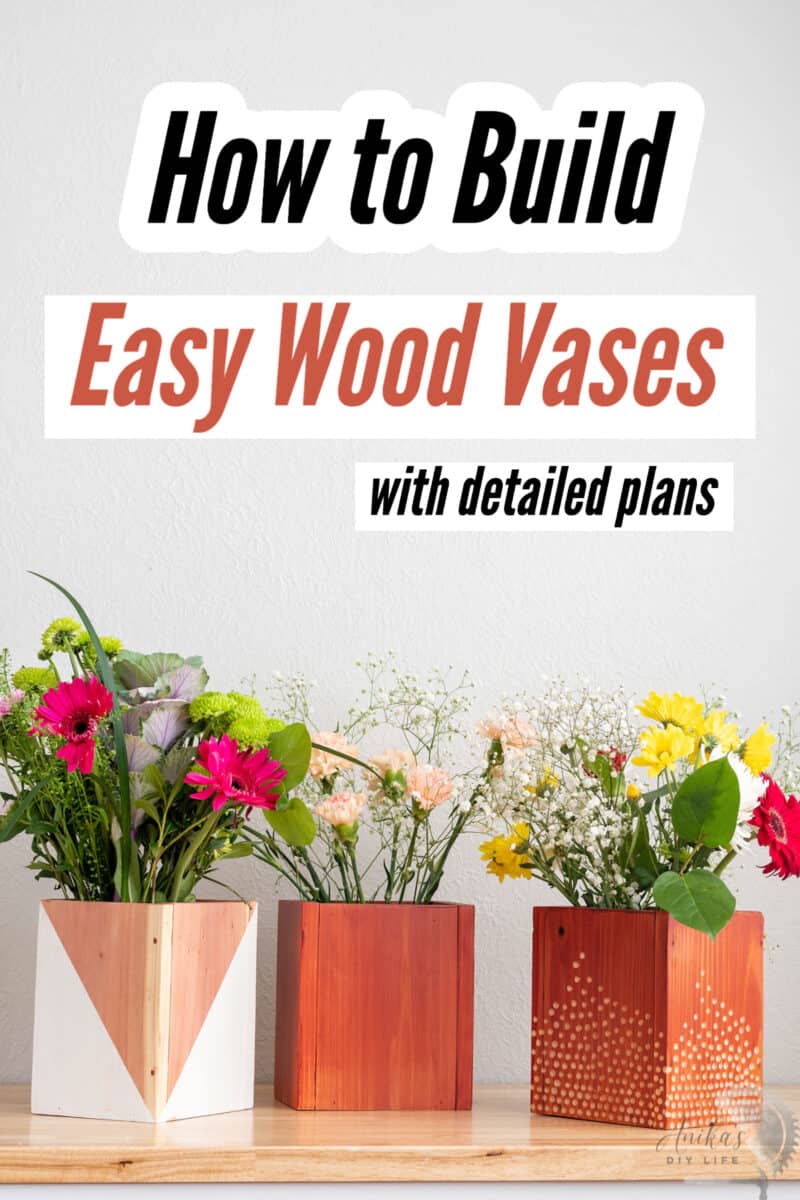
How to Make the Easiest DIY Wood Vase
Learn how to make easy wood vases or planters using inexpensive fence pickets to add to your home and give as a gift or wedding, or baby shower centerpiece.
If you want a creative, quick, and fulfilling woodworking project perfect for beginners, I have the easiest DIY wood vases (or planters) you can build.
With just a few basic tools and materials, you can transform humble redwood fence boards into stunning and functional vases that add a touch of natural beauty to any space.
The best part about this project is its simplicity.
You don’t need fancy woodworking skills or a workshop full of specialized tools. You only need a saw, wood glue, and a Brad nailer (or a power drill). These basic tools, combined with the affordability and accessibility of the fence pickets, make this an ideal project for beginners or anyone looking for a quick and satisfying project.
These vases do not directly hold water in them. A glass vase with water and flowers goes inside the wooden box.
You can also finish these DIY wood vases in many ways, and I show you three of them.
Let’s dive in!
***This project is sponsored by Mendocino Redwood. All opinions are my own. Thank you for supporting the brands that make it possible to bring you new projects***
What Type of Wood to Use
A project like a wooden vase will almost always see a fair share of moisture, even when you aren’t directly adding water. Hence, you want to ensure that the wood you use is weatherproof.
I picked redwood fence pickets because it is naturally weather-resistant and super lightweight. AND it is absolutely gorgeous when finished. Plus, fence pickets are extremely budget-friendly!

Over the years, I have built many projects with Mendocino redwood – a chair, a dining table, potting bench, and a hammock stand, and I love the rich, gorgeous color.
Mendocino Redwood is grown and harvested according to some of the world’s highest environmental standards. From conserving energy to absorbing greenhouse gases, no other building material offers the environmental advantages that come naturally with redwood.
You can read more about Redwood here.
If you do not have redwood available, cedar is also a great choice.
***This post contains referral or affiliate links. It is a way for this site to earn advertising fees by advertising or linking to certain products and/or services. Please read my full disclosure here ***
Material Needed
- Lumber per the plans. Mendocino Redwood is available at The Home Depot.
- 1 1/4″ trim head screws or 1 1/4″ finish nails
- Exterior wood glue
- tape measure
- speed square
- Sanding sheets in various grits. These are my new favorites.
- Weatherproofing stain. I used a weatherproofing transparent stain in the color “redwood.”.
- Wood filler (optional). I like using this one, which is stainable.
- Top Coat. A Spar Urethane is the best for outdoor protection.
- ISOtunes Bluetooth Hearing Protection. Use code ANIKA10 for $10 off.
Tools Needed
- Miter saw
- Drill/Driver or Brad Nailer
- Random Orbital Sander
- Rotary tool. I used this one. A Dremel works as well.
- Wood carving burr
How to Make the Wooden Vases
Step 1: Prepare the Boards
Picket boards can be pretty rough to start with. They need to be sanded to get them smooth to look good as a vase.
Usually, I cut the boards and then sand the pieces, so I only need to spend time and energy on sanding the pieces that I need.
These vases, however, need small pieces, which can be hard to sand once cut. So, it is best to sand the boards before cutting. Each vase needs about 40″ of the board.

Be sure to follow the guide on how to sand wood to get the best results.
- Once the boards are sanded, cut them to the sizes needed per the plans. Many pieces are the same size. This is an excellent opportunity to set up a stop block to make repeated cuts.

Step 2: Build the Vase
Building the vase is relatively straightforward.
To attach the vase, you must use outdoor wood glue.
You can use either Brad nails or trim head wood screws to attach the boards. I prefer using trim head screws because they are made to pull the two boards together for a tight joint. Brad nails, on the other hand, just hold the joint as tight as you can.
- Start by attaching two sides to the bottom.

- Attach the remaining two sides to complete the vase.
Note: To prevent cracking, you may need to pre-drill holes for the trim head screws.
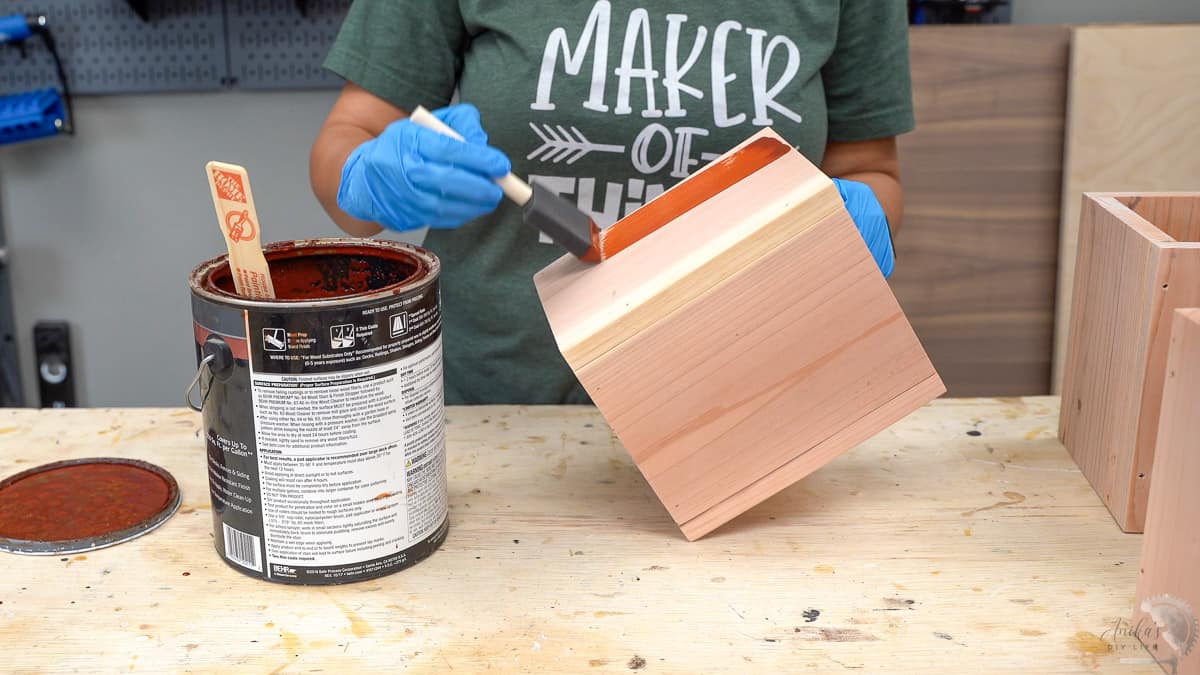
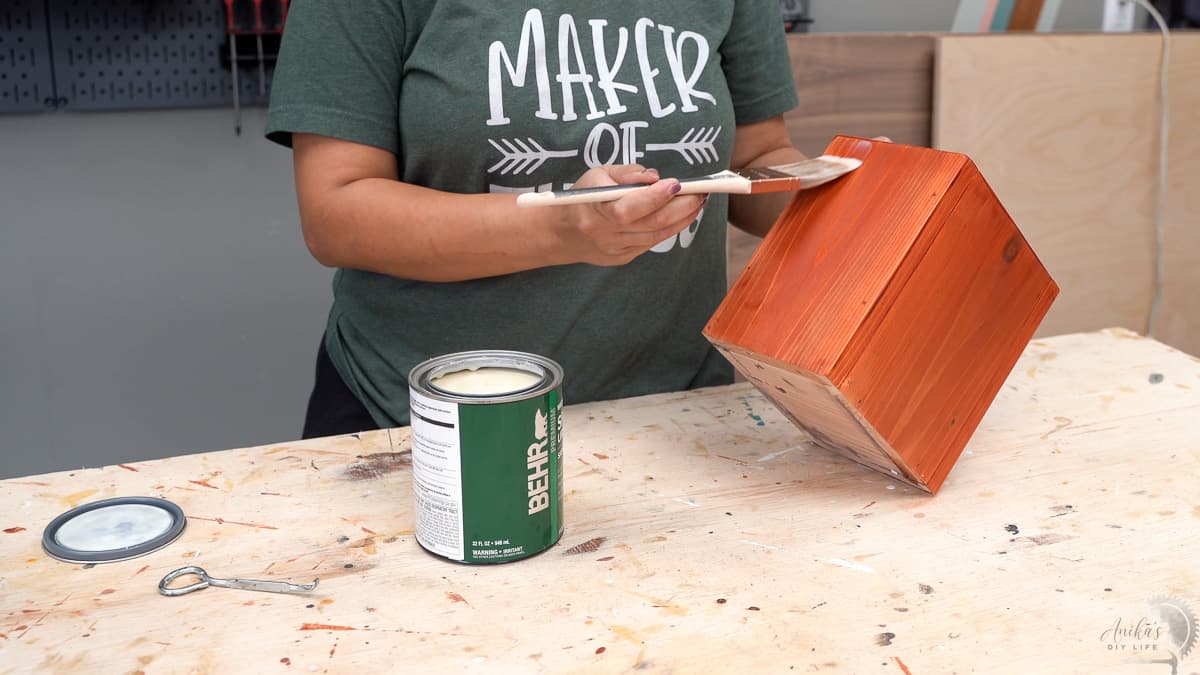
Step 3: Finish
- Stain the vases in the color of your choice. I used Behr waterproofing deck stain in “redwood.”
Both the Brad nails and trim head screws are very tiny and you can possibly leave them as is. But if you are looking for a more finished look, you can use a tintable wood filler. It is especially useful when staining the project.

- Apply an outdoor finish. I used Spar Urethane to protect it against moisture.
Ideas for Vase Designs
There are many ways you can finish the vases. Of course, you can simply stain it and let the wood grain shine through.
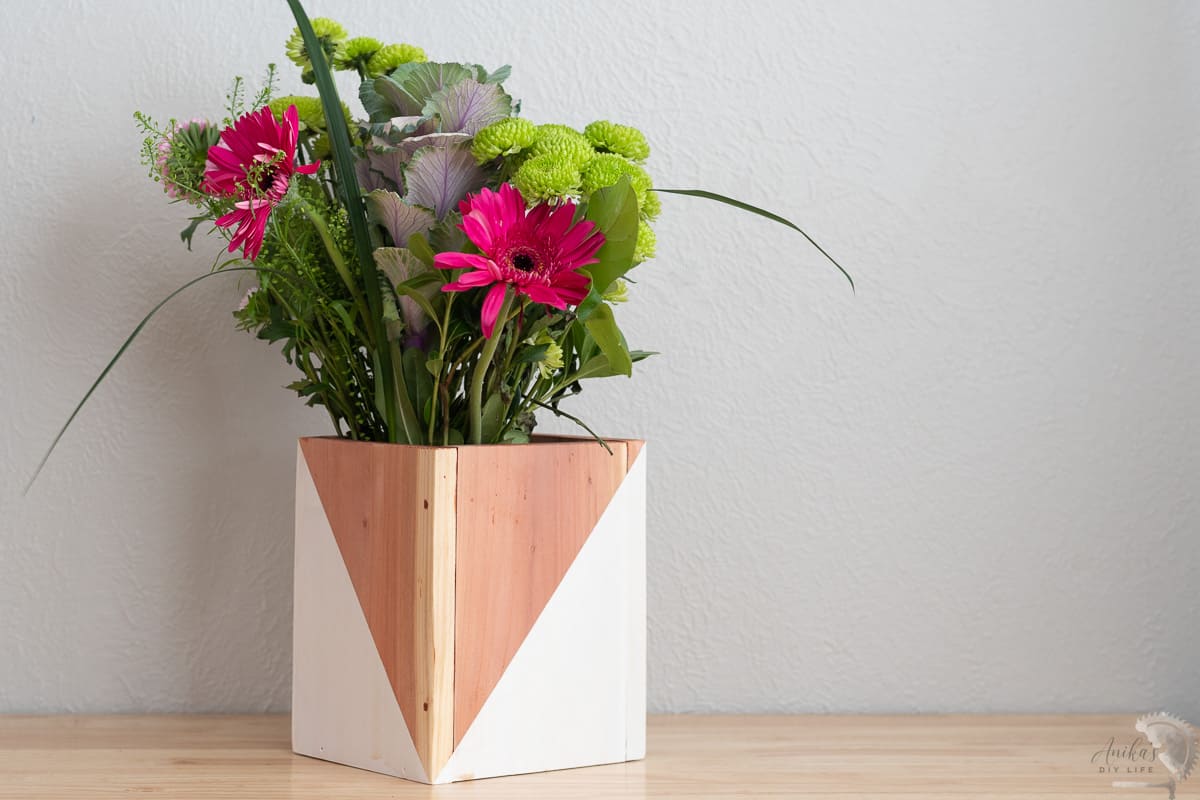
You can also use paint and painter’s tape to add geometric designs. I decided to use white paint and left the rest of the redwood bare. Before applying paint you want to make sure to use primer made for wood surfaces. Then I coated everything with Spar Urethane.

Another idea is to use a carving bit with a rotary tool to make carved patterns after staining but before the final finish to create contrasting design. This one is definitely my favorite.

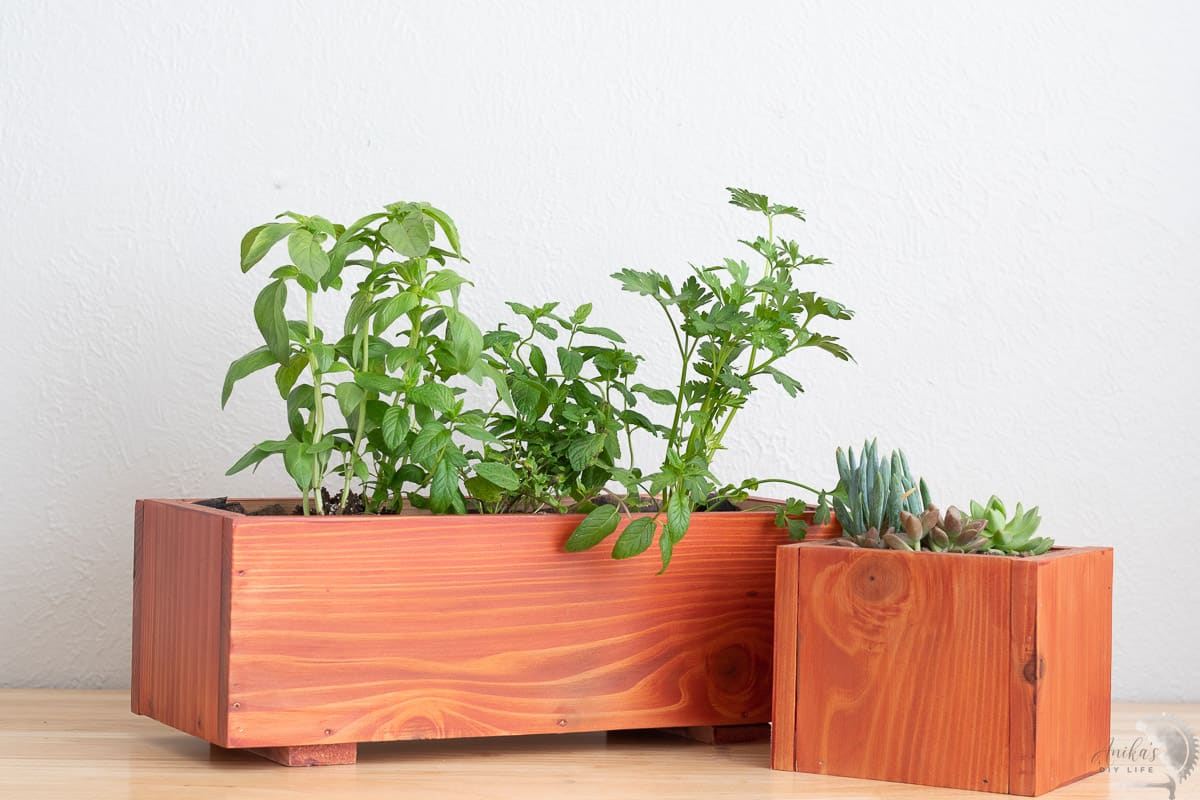
Here are the three vases I built.
To use these as a vase, you can add a glass vase inside with water and flowers to it.

And because I was on a roll and I had a few boards left, I went ahead and also built a couple of other boxes and planters in various sizes. To use these as planters, I drilled drainage holes and stapled landscape fabric inside before planting.
I have the plans available for you with the dimensions and the cut list for all of these versions.
DIY Wood Vase Plans
Get the detailed cut list and step-by-step plans for building your own vases and planters below.
There you have it.
A super simple and easy project. It uses only two power tools and makes a great gift or addition to any home.
More Redwood Project Ideas:
Anika's goal is to inspire and empower beginners with woodworking, DIY, home improvement, and home decor ideas.
She wants everyone to unlock their creative potential and experience the feeling that comes with making something. Nothing feels better better than seeing something and saying "I can make that!"