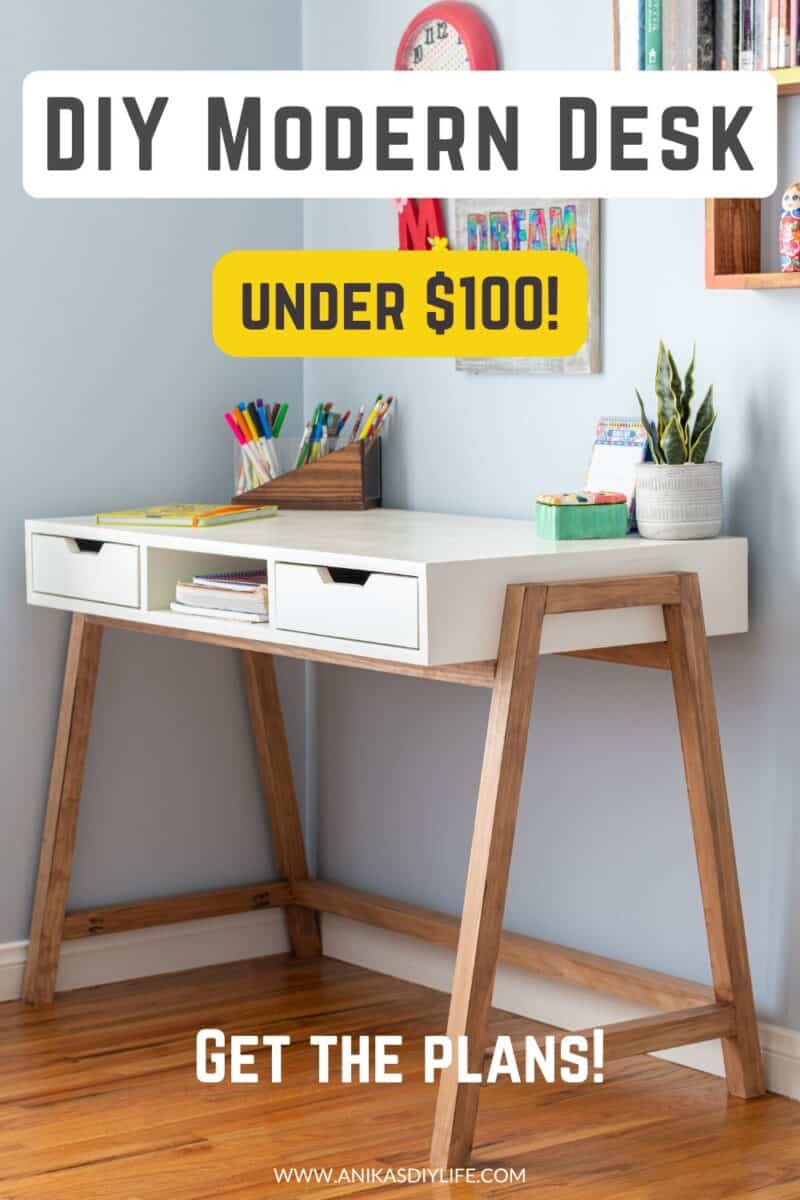
How to Build a Modern DIY A-Frame Desk With Drawers (Beginner-Friendly)
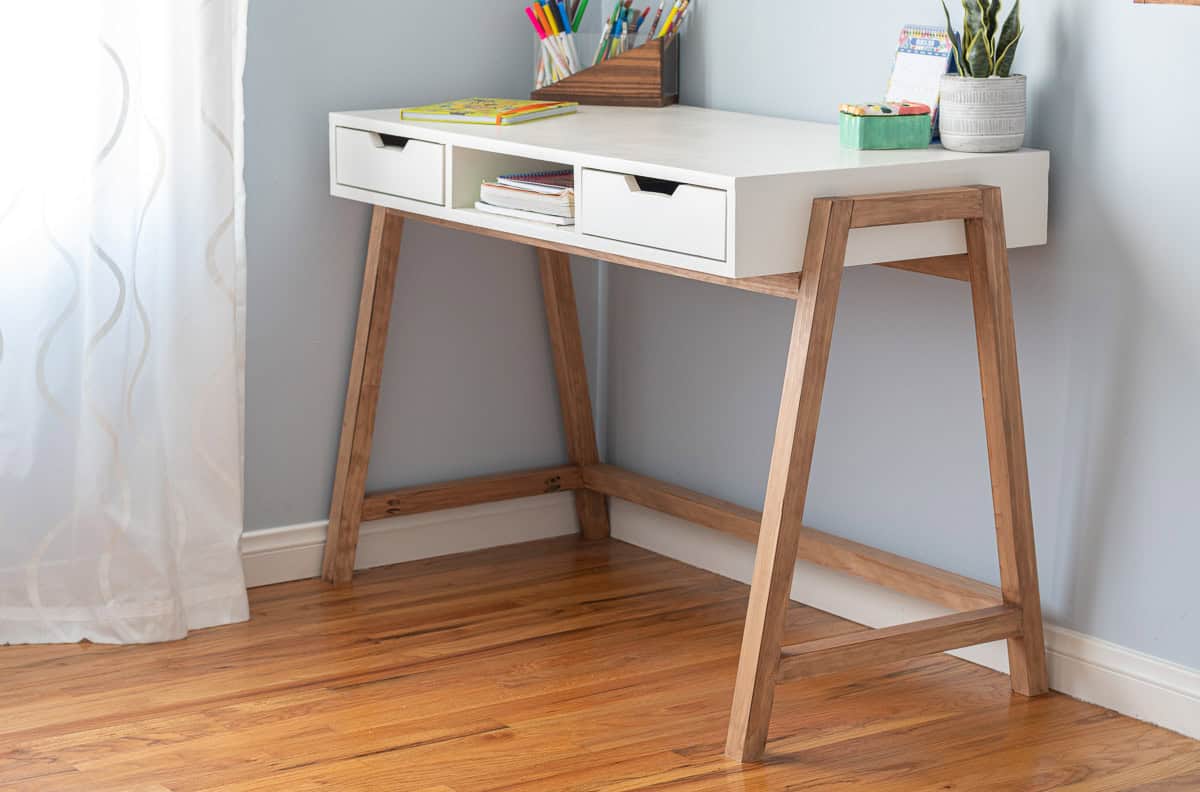
Build a modern DIY A-Frame desk with drawers for under $100! These beginner-friendly plans use just 4 power tools and 1 sheet of plywood. Perfect for a kids’ homework station or a small home office.
Originally published: March 2020
This desk has been a long time coming.
When my daughter turned 10, she had officially outgrown the desk with storage I built for her 5th birthday.
She had been waiting a long time for a replacement, but I didn’t want to just build anything. I had been working on a design that hits three specific goals: fun, functional, and capable of growing with her.
Finally, I found the solution.
RELATED: DIY Modern Farmhouse Desk
Why You’ll Love This Design
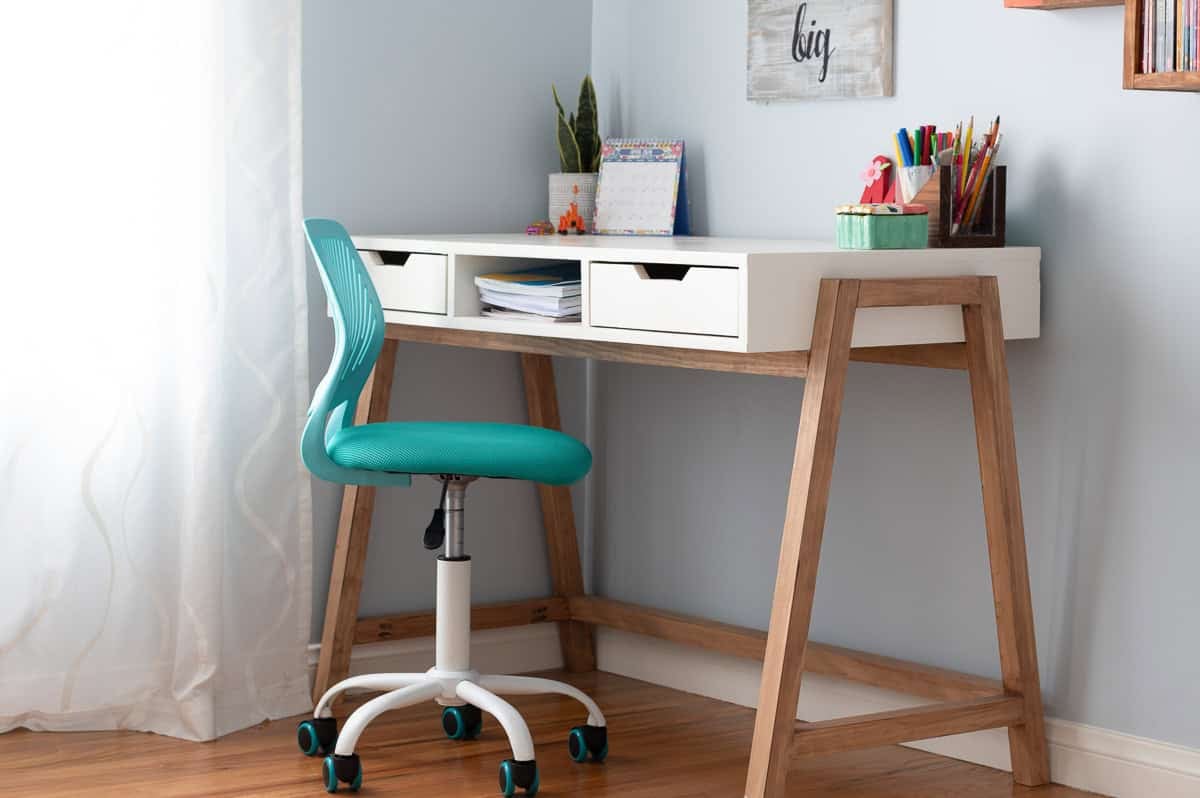
- Grows With Them: The modern A-frame aesthetic is timeless. While perfect for a 10-year-old, the design is sophisticated enough to transition into a teen desk or even work for a home office.
- Budget-Friendly: By using standard lumber and just one sheet of plywood, the total material cost was under $100.
- Minimal Tools Required: You don’t need a pro workshop. This entire project was built using only 4 power tools: a drill, a miter saw, a circular saw, and a sander.
In fact, I am partnering with a bunch of other talented ladies to bring you more projects that can be built with 5 basic tools or less. Be sure to take a look at them at the bottom of this post!
***This post contains referral or affiliate links. It is a way for this site to earn advertising fees by advertising or linking to certain products and/or services. Please read my full disclosure here ***
Material Needed
- Lumber per the plans
- Kreg Rip Cut
- Kreg Jig
- 18″ Drawer Slides
- 1-1/4″ pocket hole screws
- 2-1/2″ pocket hole screws
- 1-1/4″ finish nails
- 1-1/4″ finish screws
- Wood filler and Joint compound
- paint or stain of your choice
Tools Needed:
DIY A-Frame Desk Plans
You can download the detailed build plans including the cut list and step-by-step schematics by clicking the button below.
How to Build the Modern A-Frame Desk
The full video showing how I built the A-frame desk is below! As always, the step by step written instructions follow below.
Step by Step Tutorial
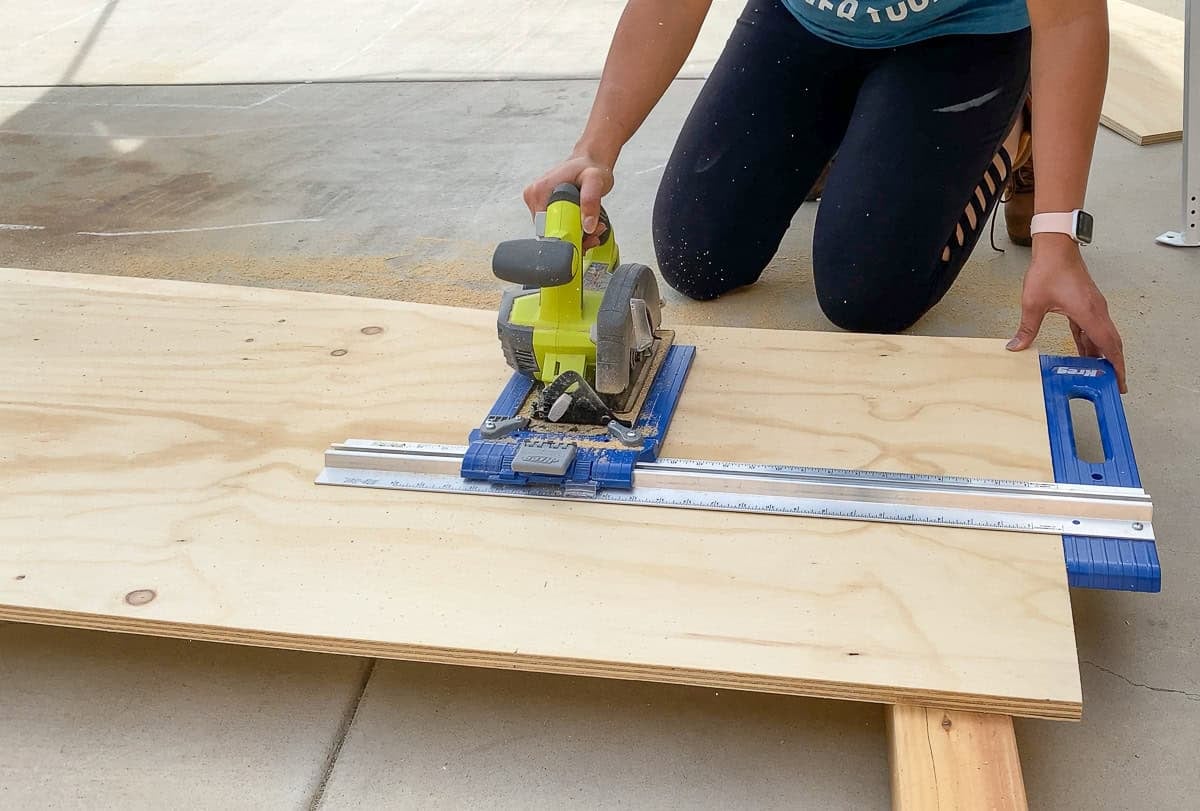
Step 1: Make Cuts
- Cut the plywood per the plans using a circular saw.
I like using the Kreg Ripcut when cutting down plywood. It makes it really easy to make repeated identical cuts. It only cuts between 1″ and 24′ wide. For wider boards, a straight edge guide is helpful. See more about how to cut plywood here.
- Cut the 2×2 boards for the legs and the supports. on the miter saw. The legs and a few supports are cut at 10-degree angles.
💡 Tip: When cutting angles, I like to set the saw to the angle once and then flip the boards over to make all the cuts so the angles are completely identical.
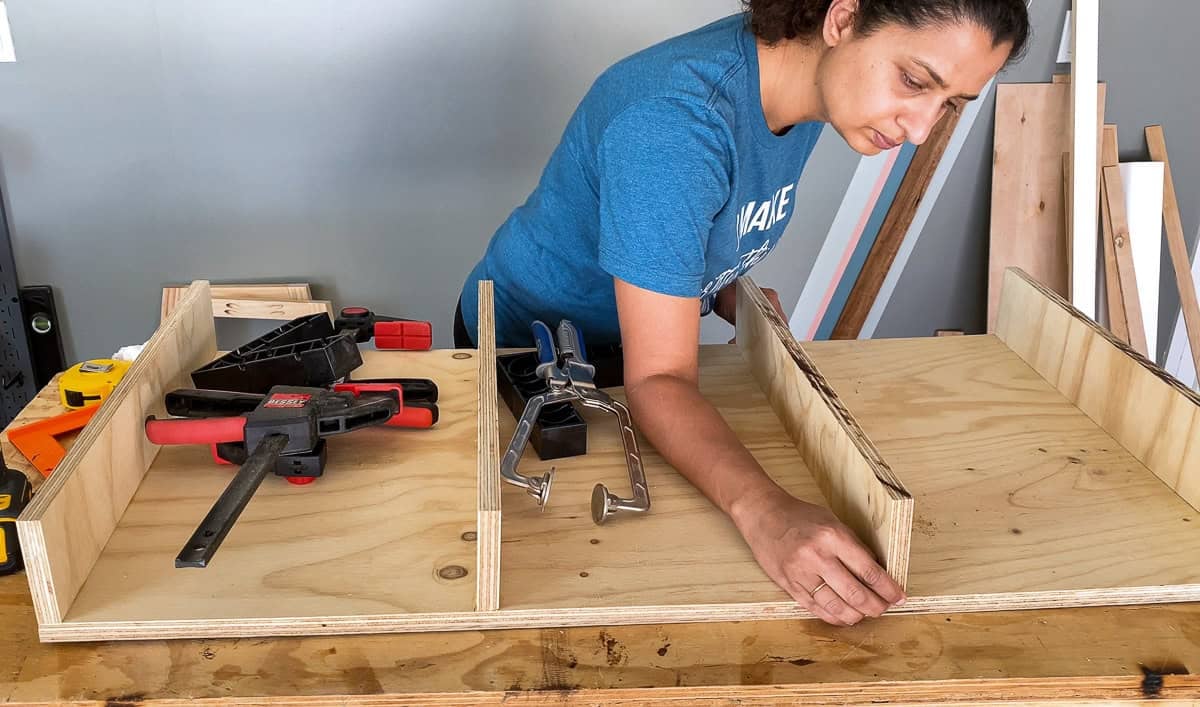
Step 2: Build the Top Frame
- Make pocket holes in the plywood as shown in the plans. Remember plywood has a special setting for the Kreg Jig. Read all about it here.
- Build the frame that will become the top and will have the drawers using pocket hole screws and wood glue.
It is very important to keep all the boards perfectly at 90-degrees as you attach. Be sure to use lots of clamps. I really like using these clamp-it clamps to hold everything in place to attach. Its like having a whole bunch of extra hands that just hold boards in place for you.
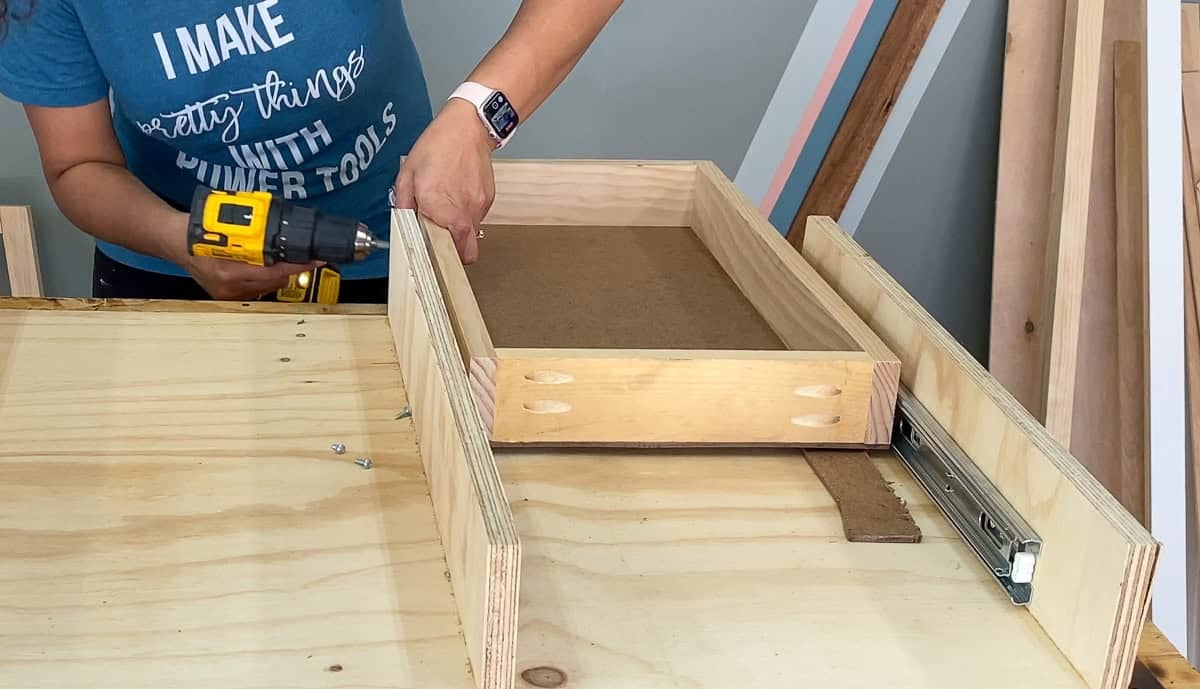
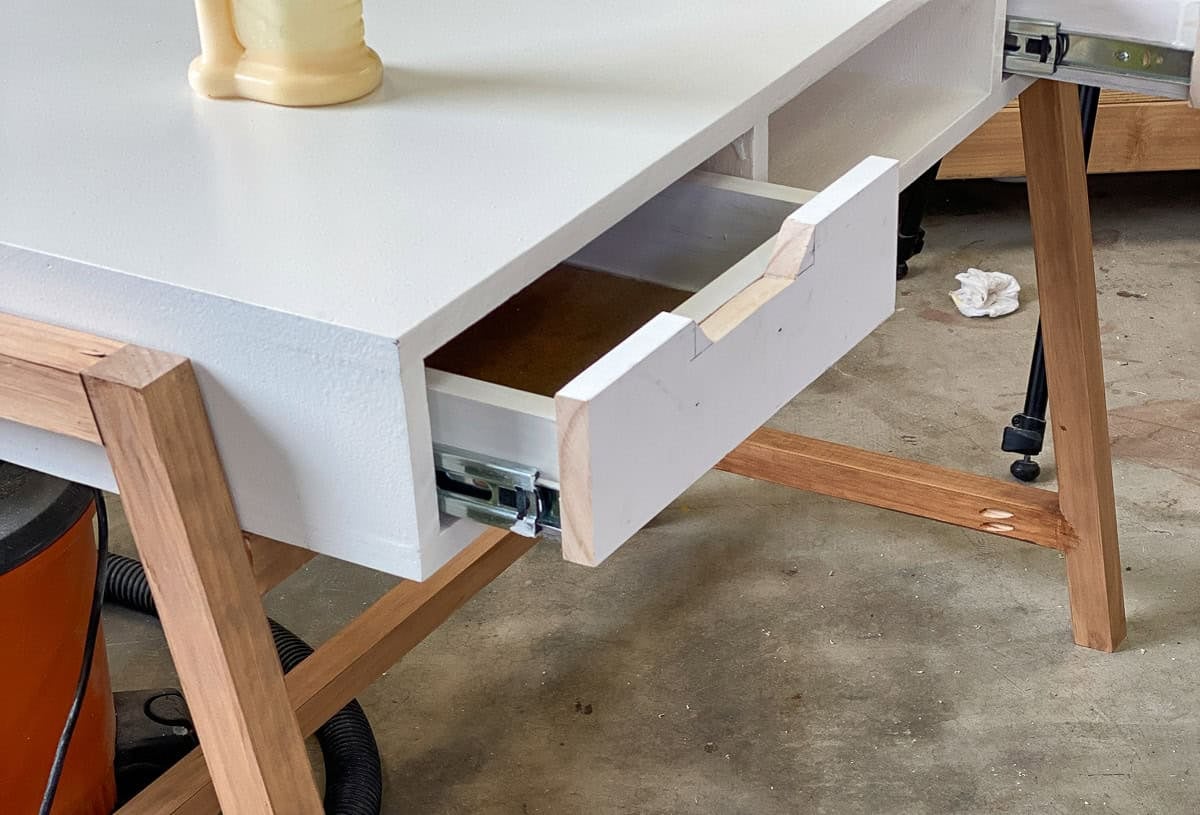
Step 3 – Build and Install the Drawers
- Build the two drawers using 1×3 boards. Be sure to check out my guide to building drawers for beginners!
💡Tip: Check and correct for square.
- Install the drawer slides in the top frame and then install the drawers.
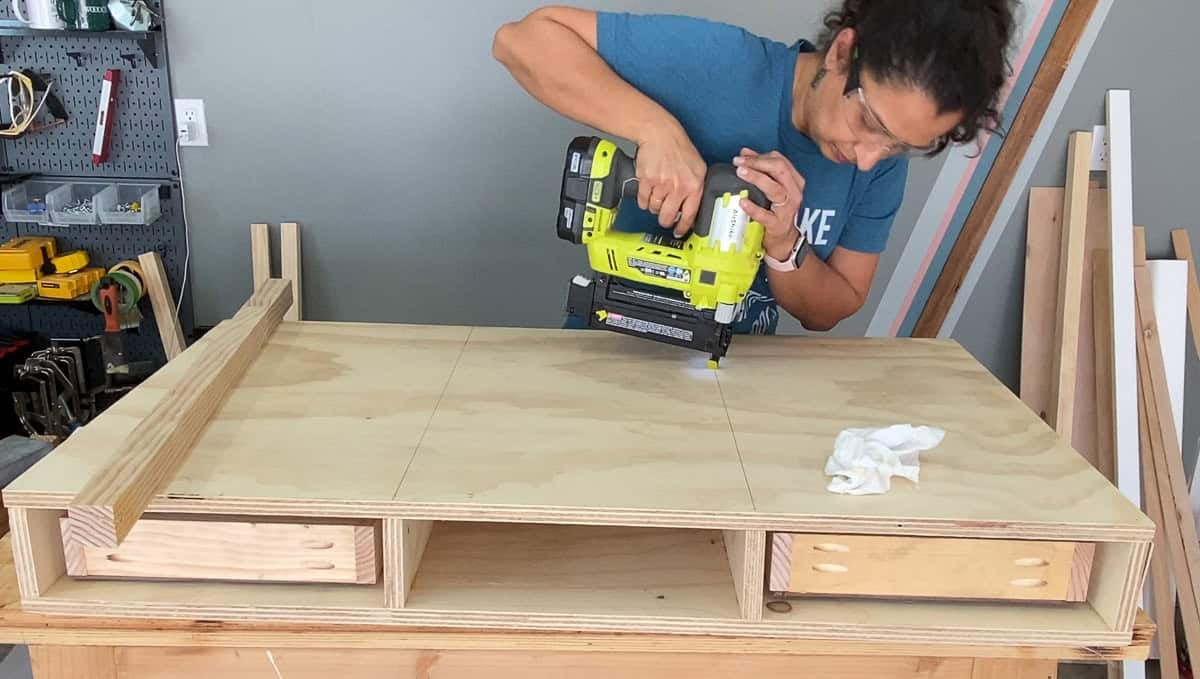
Step 4: Attach the Top
- Once the drawers are in place, attach the top using wood glue and 1-1/4″ finish nails.
💡 Tip: Be sure to mark the location of the center supports so you can add nails accordingly.
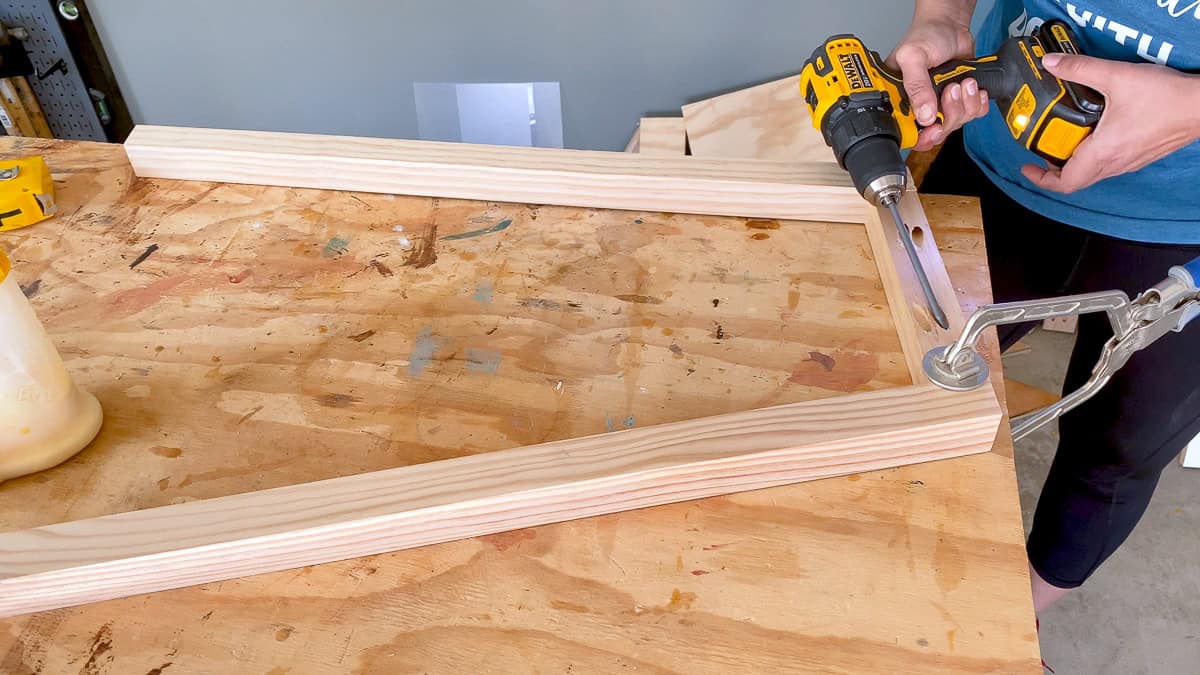
Step 5: Build the Legs
- Build the two A-frame legs using wood glue and 2-1/2″ pocket hole screws per the plans.
Be sure to make sure the pocket holes are facing down on the bottom rails and inside for the top rails.
Step 6: The Finish
This is a good time to apply the finish.
I decided to go with a dual-tone – warm brown and white to match the rest of the furniture in my daughter’s room. Since it is dual-tone, I finished the legs and top separately before attaching.
I was going to paint the top, and ideally, I would not have used sanded plywood for this project, but I couldn’t find birch plywood at my store.
Sanded plywood isn’t very smooth. To get a smooth finish, I coated the entire top with joint compound and sanded it back. Be sure to read my full tutorial on how to paint plywood for a smooth, professional finish for all the details.
I stained the legs in my current favorite “Nutmeg” gel stain.
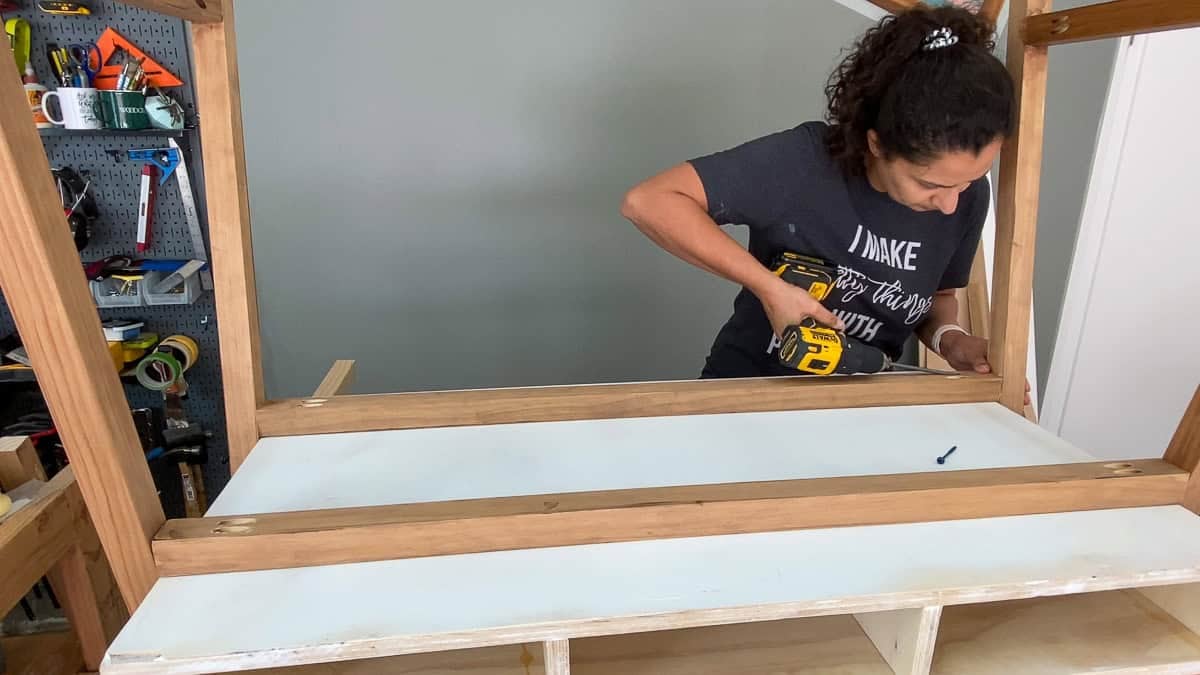
Step 7: Assemble the base
To assemble the base, I decided the best approach was to do so around the top frame so everything was aligned and fit well.
- Place the top upside down on a workbench. I made sure to protect the workbench with a drop cloth so the top doesn’t get scratched.
- Place the legs on both sides (I used 2×2 boards to offset the legs from the top) and attach the supports pocket hole screws and wood glue.
- Attach the bottom support rail in the back. To do this, I found it easier to lay the leg frame on its side on the floor.
Step 8: Attach the base to the top
- Attach the leg frame to the top using 2″ wood screws. Be sure to predrill before adding the screws so you don’t split the boards.
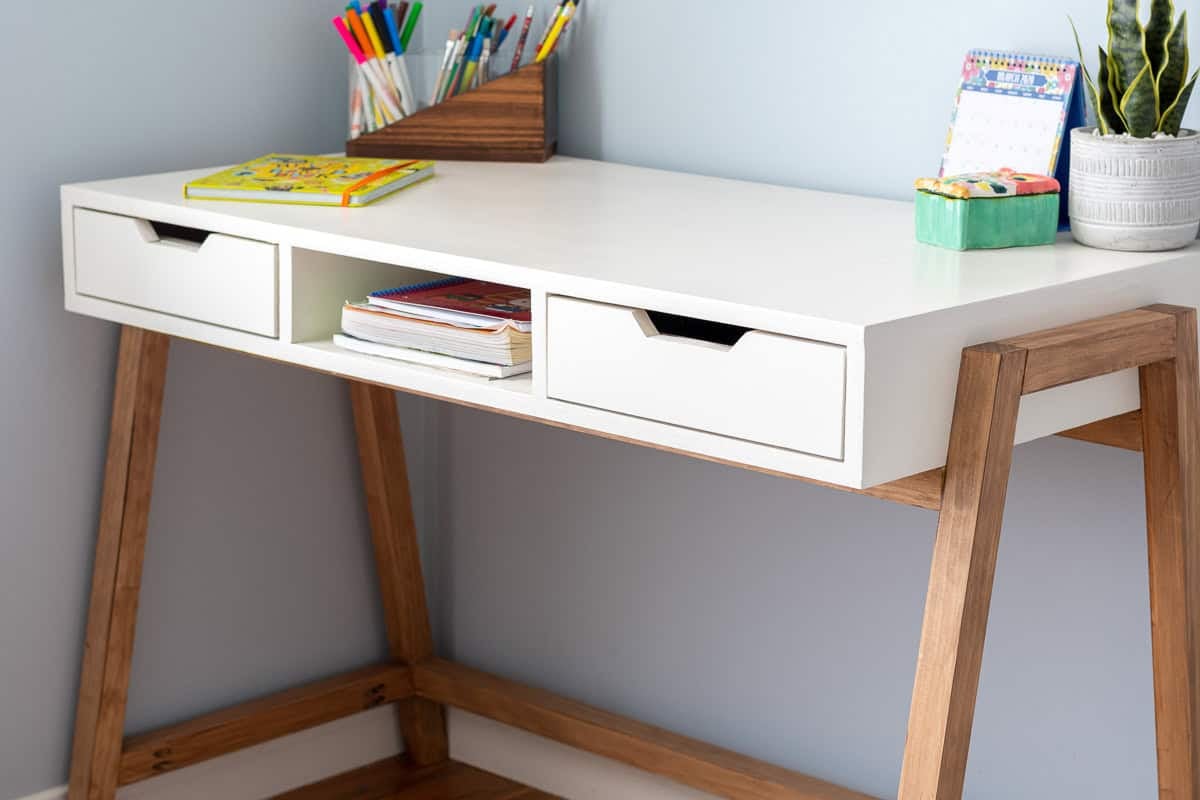
Step 9: Add the drawer faces
- Attach the drawer faces using finish nails and wood glue from the front and then attach with finish screws from the inside. The nail holes can be easily filled before painting.
Instead of drawer pulls, I decided to cut out the top of the drawer faces using a jigsaw. Nothing fancy, I just measured out and down 1″ to draw the angled line.
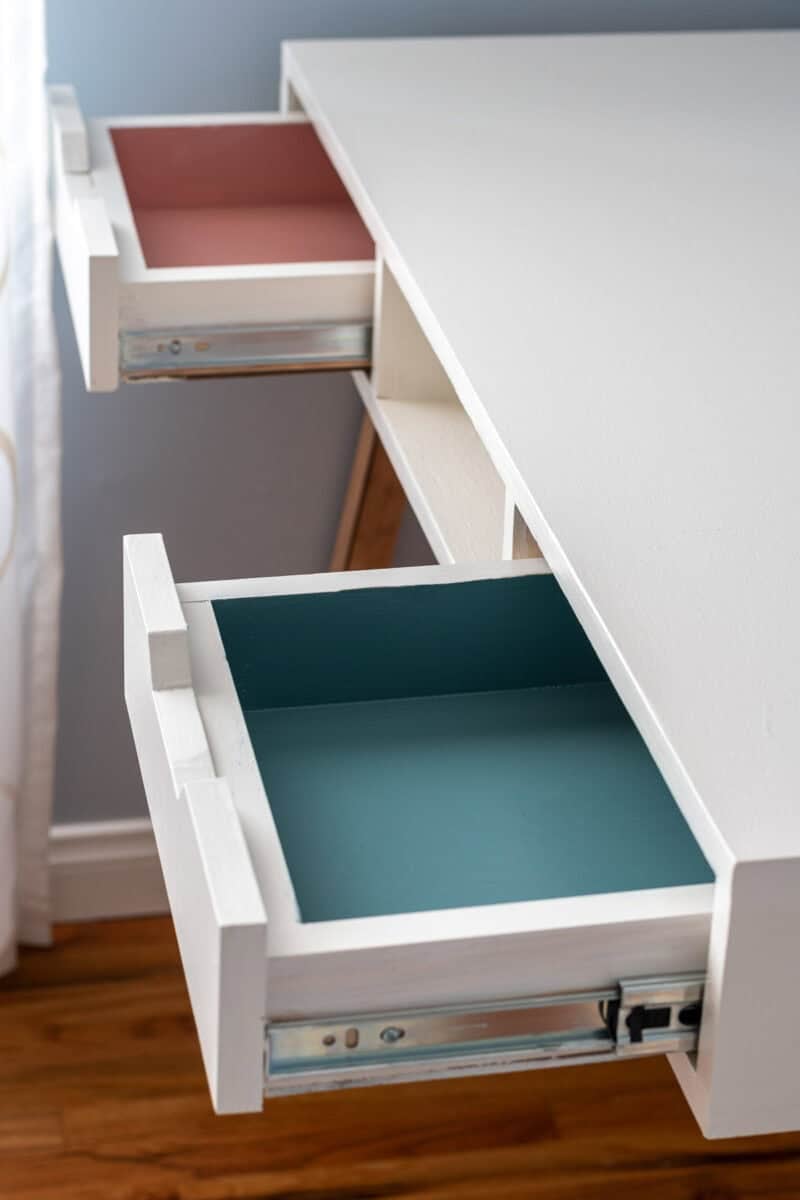
As a special surprise, since my girl loves color, I painted the insides of the drawers in turquoise and pink!
And there it is! My daughter loves it, and I do too…
Plans for the DIY Modern Desk
You can get the detailed plans to build this desk by clicking below!
And now, here are my friends with their projects using 5 basic tools or fewer –
- Addicted 2 DIY
- Spool bed bench by My Repurposed Life
- Simple side table by Jaime Costiligio
- Modern shiplap hall tree bench by The Awesome Orange
- Rustic Wooden Bench by At Charlotte’s House
Reader Projects
I love seeing you build my projects! Here are some of your projects.


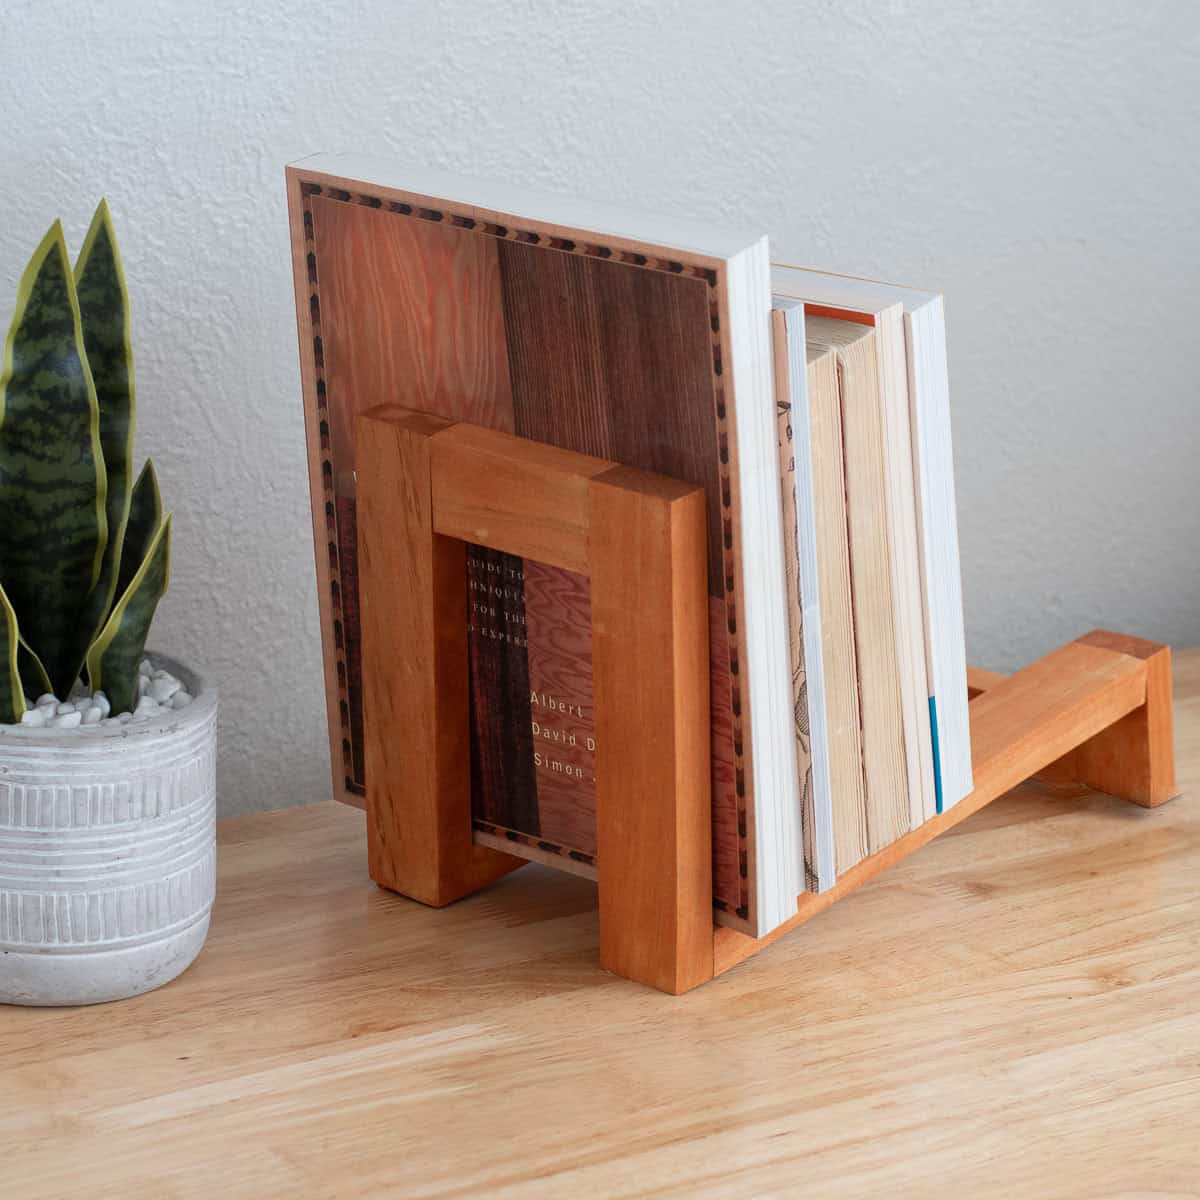
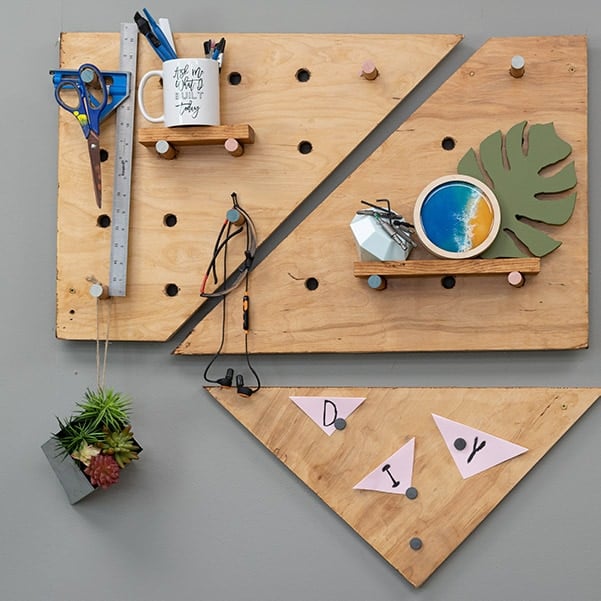
DIY Desk Accessories
Here are some ideas to make your desk more awesome to use


Anika's goal is to inspire and empower beginners with woodworking, DIY, home improvement, and home decor ideas.
She wants everyone to unlock their creative potential and experience the feeling that comes with making something. Nothing feels better better than seeing something and saying "I can make that!"


I LOVE this design! It’s the perfect combo of sleek and storage. Also… joint compound to smooth out plywood is genius.
I love your a frame desk Anika! I had a drawer section similar to this once. Now I wish I had put it up on legs like you did with your diy version.
I use joint compound 99% of the time with my wood projects. It’s so economical. 😉 In other words, I’m cheap!
pinned!
gail
Perfectly simple, functional with storage and pretty! Love those contrasting angled legs.