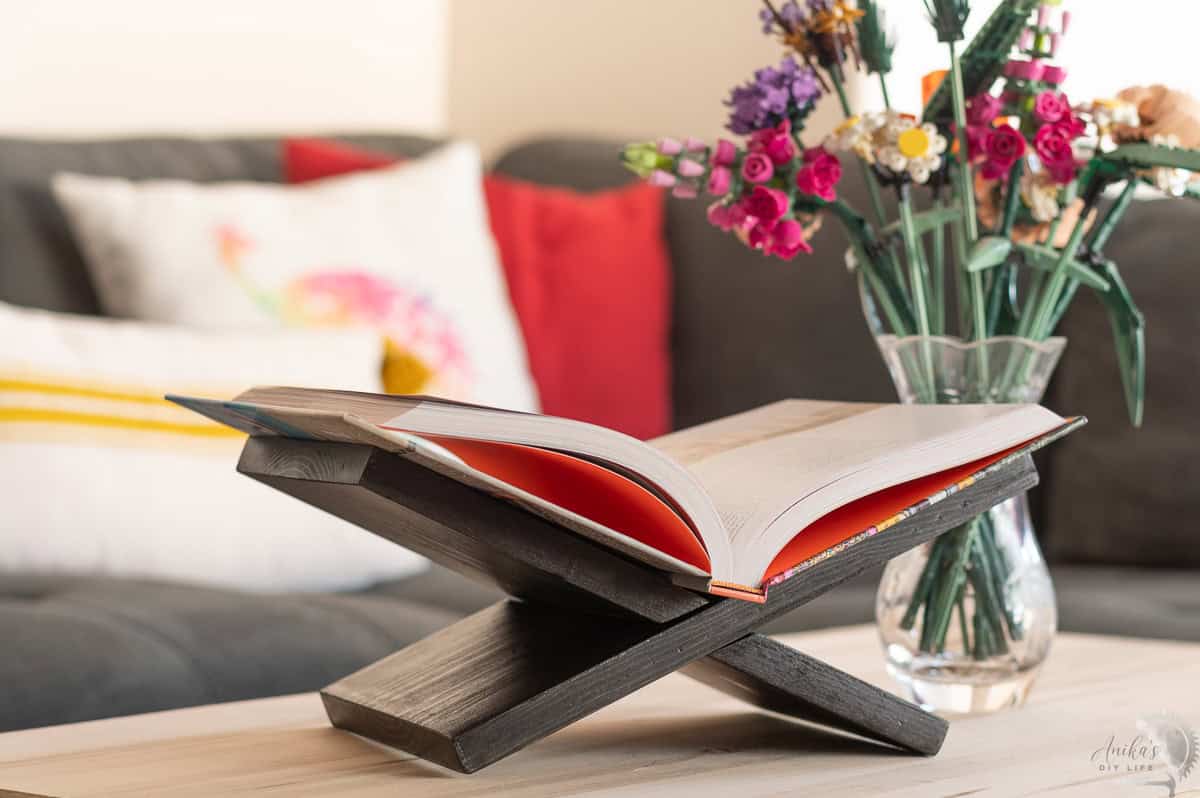
How to Build a DIY Book Stand
Learn how to build a DIY book stand that makes a perfect addition to any space and displays any book you want to highlight.

This book stand is an easy way to add style and function to your home. It gives your favorite book a special place and makes it easy to display and enjoy.
It is a versatile piece and looks great on a coffee table but also on a bookshelf, in the kitchen for a cookbook, or anywhere you want to showcase a book. With two wood boards and a circular saw, this is a super easy and quick project to make.
***This post contains referral or affiliate links. It is a way for this site to earn advertising fees by advertising or linking to certain products and/or services. Please read my full disclosure here ***
Material Needed
- Lumber of your choice. See plans for details on dimensions.
- Sandpaper in various grits
- Chisels – 1/4″ is best
- Clamps
- Multimark tool
- Finish of your choice. I used stain and top coat.
Tools Needed
DIY Book Stand Plans
You can get detailed printable plans with dimensions, cultist, and diagrams for this book stand by clicking the button below.
How to Build the Book Stand
The book stand is basically made with two types of cuts – the cut to cut down the board and the cuts to make the half-lap joints.
The plans show you all the measurements you need for this project.
Step 1: Cut the Boards
- Start by cutting down the boards to the size you want. I use 13″, but you can use larger or smaller depending on the size of books you would like to display. The 13″ size works well for most small to medium-sized books.
Step 2: Mark the Half-Lap Cuts
This is the most critical part of the entire project.
- The width of each slot on each board is the thickness of the board plus 1/8″, and the length is half the width of the board. The 1/8″ helps with sliding the boards together.
- Draw the measurements on the boards. I like using my multi-mark tool for this. The plans show you the measurements.

Remember that the bottom of the book stand is smaller than the top, so the half-lap cut markings will be shifted toward the bottom and will not be in the center.

Make sure that the markings are identical. This is important for the proper functioning of the stand.
Step 3: Make the Cuts
For the half-lap cuts, I decided to use a circular saw to show how to make them with it. The same cuts can also be made using a table saw with a cross-cut sled as well.
- Set the circular saw to 45 degrees.

- Carefully line up the saw blade with the first line. Be sure to take the kerf into account.
- Make the first cut.

- Carefully line up the saw blade along the second line, taking kerf into account, and make that cut.
- Now, you can make multiple cuts between the two cut lines.

Be careful to stop at the half-width mark.
Once all the cuts are done, you can turn over the board. You will notice that the cuts did not go all the way. This is because of the shape of the blade.

- Repeat the cuts on this side with the circular saw to remove as much of the material as possible.
You will notice that there is still some material left close to the end of the cut. This needs to be cleaned out with a chisel.
- Use a chisel to clean out all the remaining material in the slot.

Repeat on the second board and the two boards are done ready.
Step 4: Finish
- Sand the boards using a random orbital sander and stepping through various grits.

- Inside the slot, you can use a rotary tool or sandpaper rolled around a pencil.
- Apply the final finish of your choice. I went with an ebony wood stain. See how to stain wood.
- Apply the final top coat to seal the stain. See how to seal wood.

That is it! The book stand is done.
Just slide the two pieces together, and you will have a nice place to display your favorite book.

Note about assembly – it may take a few iterations to figure out exactly what direction the boards go together. Remember that the short sides are on the same side and as far apart as possible.
Can we just talk about how awesome this book stand looks? It’s such a simple project, but it adds so much charm to any space. Whether it’s on the coffee table, a bookshelf, or even in the kitchen holding a cookbook, it makes a great gift idea!

And seriously, it was so easy to make! Just a couple of boards, a few cuts, and a bit of sanding—that’s it. You don’t need fancy tools or a ton of experience to make it.
Plus, you can flat pack it to gift wrap it easily!
More DIY Gift Ideas:
This is Day 3 of the DIY Gifts Week!
I am teaming up with my friends Shara from Woodshop Diaries and Kati from Houseful of Handmade to bring you new DIY gift ideas every day this week.
See Day 1 Projects here.
See Day 2 Projects here.
Click on the project below to go check out all the projects for today.
Anika's goal is to inspire and empower beginners with woodworking, DIY, home improvement, and home decor ideas.
She wants everyone to unlock their creative potential and experience the feeling that comes with making something. Nothing feels better better than seeing something and saying "I can make that!"


