How to Make a DIY Cutting Board Stand
Learn how to make a countertop DIY cutting board stand with simple tools and easy steps by following the step-by-step tutorial and plans.

Cutting boards – especially beautiful wood cutting boards – can be beautiful additions to a kitchen. But when they’re just piled up on the counter, they can look like a bit of a mess.
That’s where this DIY cutting board stand comes in!
It’s a simple way to keep your boards organized and easy to grab while also giving them the spotlight they deserve as part of your kitchen decor.
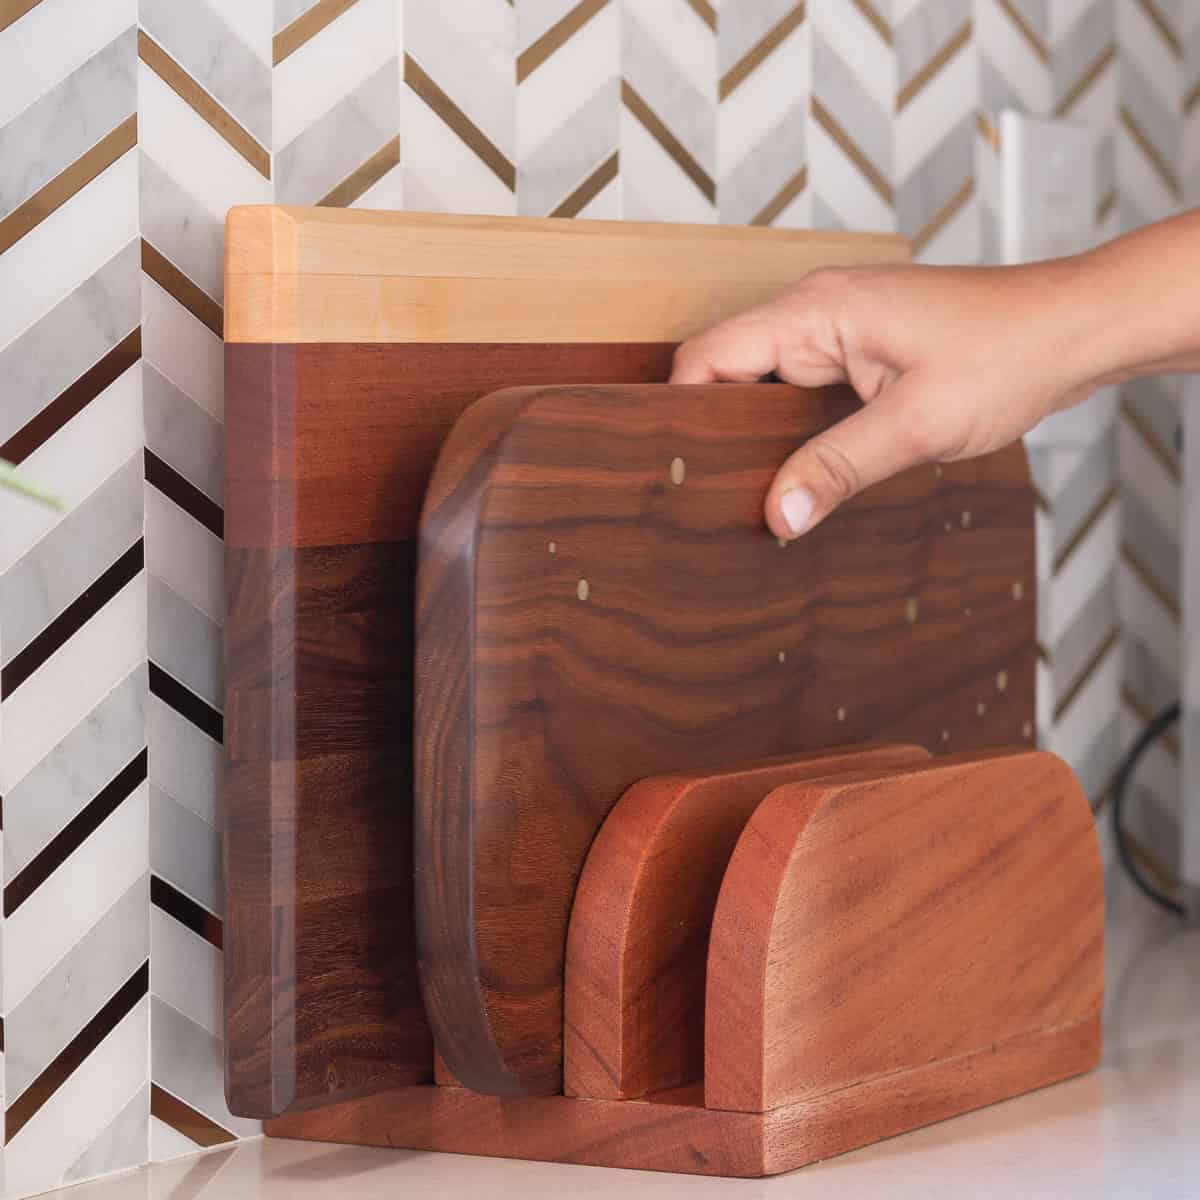
I recently made three different cutting boards— a classic walnut board, a mixed wood board with walnut, mahogany, and maple, and one with a brass inlay. Each one has its own style, and I wanted a way to display them without cluttering the counter.

I used mahogany for this cutting board stand because I already had some remaining from previous projects, but you can use any wood that complements your boards or kitchen vibe.
The best part? This stand is super easy to build and only needs a few basic tools, making it a great beginner project, too. All you need is a saw and a power drill to make this project in no time.
***This post contains referral or affiliate links. It is a way for this site to earn advertising fees by advertising or linking to certain products and/or services. Please read my full disclosure here ***
Material Needed
- Lumber of your choice. See plans for details on dimensions.
- 1 1/4″ wood screws
- wood glue
- countersink drill bit
- Sandpaper in various grits
- Clamps
- Finish of your choice. I used this wood finish.
Tools Needed
- Miter saw
- Jig saw with a top and bottom cut blade
- Power drill
- Sander
Cutting Board Stand Plans
You can get detailed printable plans with dimensions, cultist, and diagrams for this cutting board stand by clicking the button below.
How to Make
Here’s a video showing you exactly how I made the cutting board stand. The detailed step-by-step tutorial is below.
Step 1: Make the Cuts
- Cut the boards to length using a miter saw or circular saw. The plans show you exactly the length I used. However, you can decide how long you want your cutting board stand to be based on the size of the cutting boards you intend to display.

I am making this stand for three boards, but you can also increase or decrease that and change the width of the bottom and the number of dividers accordingly.
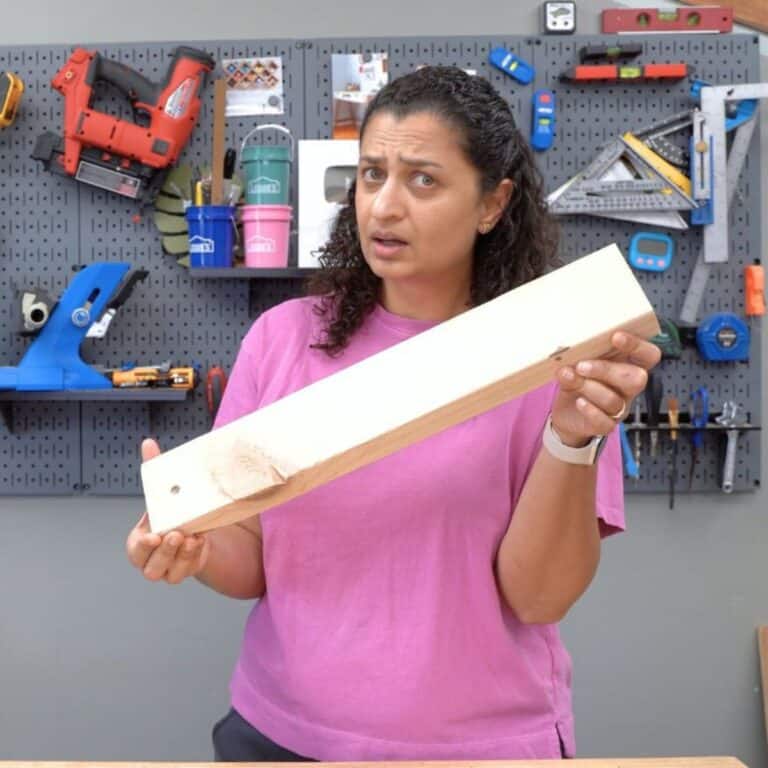
- Draw the curved edges. I used a masking tape roll for this. This is an optional step, and you can skip it and keep the sides straight. You could even make them angled instead of curved.

- Cut out the curves using a jigsaw. I highly recommend using a top and bottom cut blade to get a good cut finish on both sides of the board.

Tip: Cut one board and then use that to draw the cut lines for the rest of the boards. You can also clamp a couple of boards together and cut at the same time with the jigsaw. This will help get identical cuts and shapes on all the pieces.
Step 2: Sand the Boards
- Sand the boards to make them smooth and splinter-free.
Start by using a lower grit sandpaper, like 80 or 100, to remove any rough spots or saw marks on the wood. This will help even out the surface and make sure all edges are nice and smooth to the touch. Then work your way up through higher grits—try 150 and finish with 220 grit. See how to sand wood for more details.

Be careful when sanding the curves because you do not want to over-sand and distort them.
Tip: Tape all the dividers together and sand away any unevenness. This keeps them all the same shape.
Consider using a foam sanding pad to help sand the shapes without distorting them.
Step 3: Assemble the Holder
It is time to put it all together. I decided to space the dividers such that two openings are 1″ and the third opening is 1 1/2″ wide. This will accommodate all my cutting boards. You can change this based on the boards you have. Remember to decide this first because cutting up the boards.
- Apply a small amount of wood glue to the bottom of the divider and place it in its position.
- Clamp the divider in place. Make sure that the divider stays aligned in place.

- Drill a countersunk hole using a countersunk drill bit.
- Add a 1 1/4″ wood screw.

Add at least three wood screws per divider.
Use spacers to define the spacing and align the next divider. For the 1 1/2″ spacing, I used two 3/4″ boards and for the 1″ spacing, I used two pieces of 1/2″ plywood.

- Repeat for all dividers.

Tip: Be sure to wipe off any glue squeeze out as you go. It will be very hard to come back and wipe it through those dividers.
That is it! The cutting board stand is done. It is time to clean it up and finish.
Step 4: Final Finish
- Clean the entire stand using a tack-cloth or lint-free cloth.
- Apply the final finish of your choice.

You can stain it if you like. I used this wood honey to bring out the rich mahogany color and also seal it. It is the same finish I used on the cutting board.
If you opt to stain it, be sure to apply a top coat to seal the stand and allow it to cure completely. See all about the top coat to use.
And there you have it.
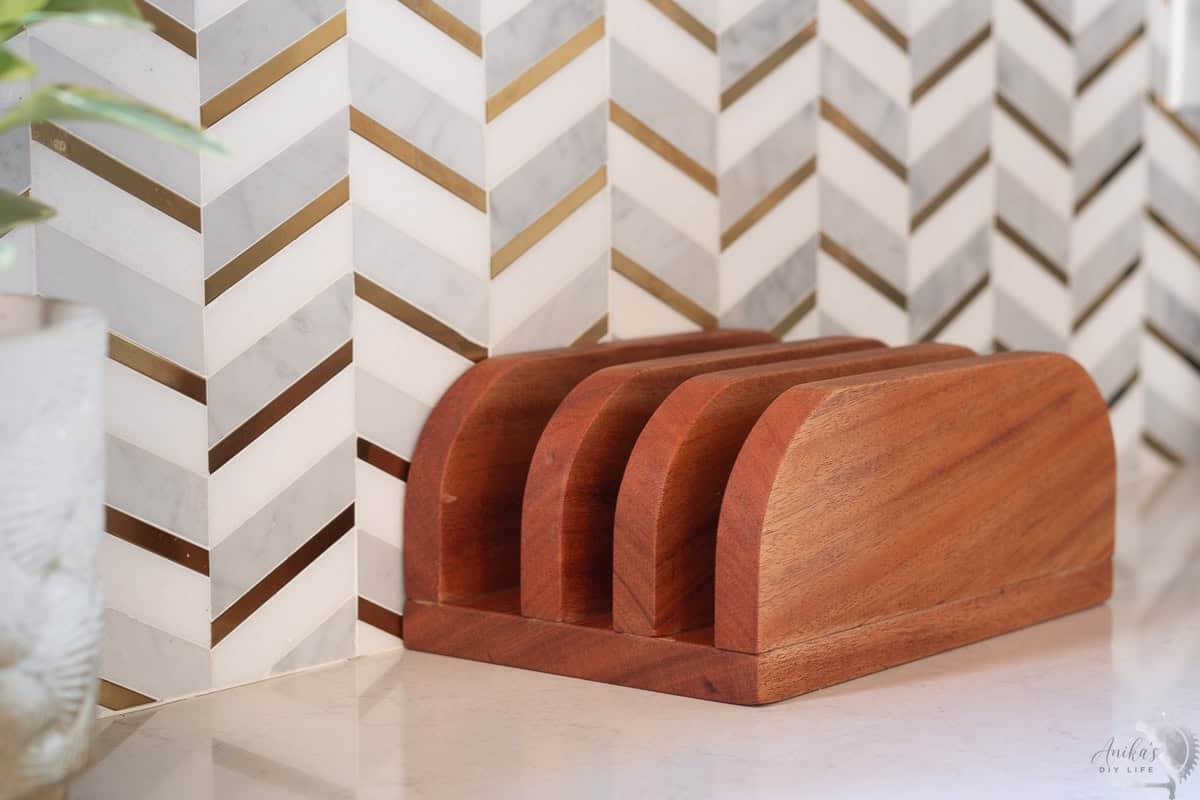
A simple, stylish cutting board stand that keeps your kitchen looking organized and lets your boards shine!

This project is not only functional but also adds a bit of custom charm to your countertop. I can also see the front being engraved or customized to make it a truly custom gift.
Need more DIY Gift Ideas?
I am teaming up with my friends Shara from Woodshop Diaries and Kati from Houseful of Handmade to bring you new DIY gift ideas every day this week!
Just click on the project below to go check it out. Stay tuned for all the fun and easy DIY gift ideas this week.

Anika's goal is to inspire and empower beginners with woodworking, DIY, home improvement, and home decor ideas.
She wants everyone to unlock their creative potential and experience the feeling that comes with making something. Nothing feels better better than seeing something and saying "I can make that!"