How To Use A Miter Saw
A detailed beginner’s guide for how to use a miter saw. Get all the basics, tips, and tricks – everything you need to know in one place.

If you have seen my list of beginner woodworking tools, you know a miter saw is the very first power tool I got and is one of my favorite saws.
A lot of people consider it an intermediate to advanced saw but I think it is the easiest saw to use – even for beginners.
You will be surprised how easy it is to use.
Here is a complete guide on how to use it!
Using a miter saw for beginners
Sometimes seeing somebody do it is better than only reading about it.
I have a full video that talks you through everything in this article and more! Take a look!
Click here to subscribe to my YouTube Channel for more great videos!
***This post contains affiliate or referral links. It is a way for this site to earn advertising fees by advertising or linking to certain products and/or services. Please read my full disclosure here ***
What is a miter saw
It is a saw that can cut across a board at any angle.
Like a 45° or a right-angled cut and a few others that we will get to in a minute.
Important – The miter saw CANNOT rip through a board!
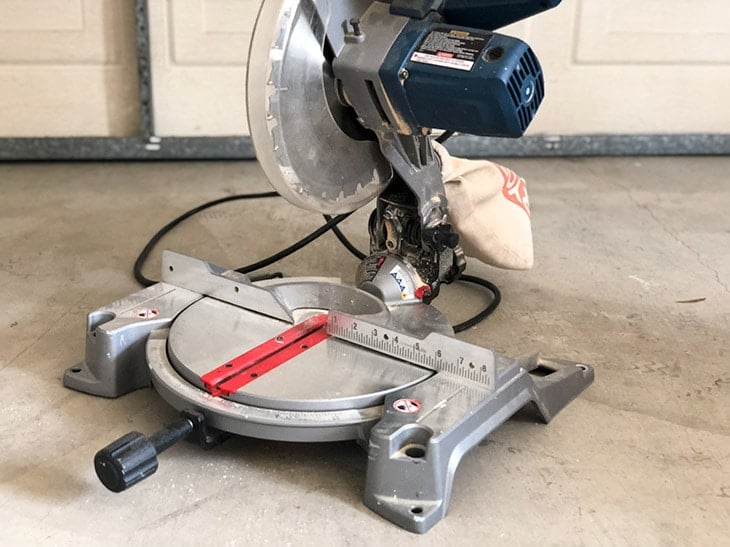
Parts of a Miter Saw
Every miter saw is made up of the following parts –

Blade and gaurd
- The guard, of course, protects the blade. As you lower the saw to make a cut, the guard moves out of the way.
Fence
- The fence helps you align the wood to make sure the cuts are straight and square.
Miter Gauge
- It is the angle gauge on the table. It helps make angled cuts across the board. There is either a lever or knob to loosen and turn the table to set the angle you want. Almost all saws come with built-in angle stops for the most common angles to help you.
Bevel Gauge
- This is the gauge under or behind the blade and measures the tilt of the blade.
Handle and Tigger
- When you operate the saw, you hold the handle and press the trigger to operate the saw.
Types of Miter Saws
Miter saws come in various blade sizes and capabilities and the pricing depends directly on all of these factors.
There are various types of miter saws –
Basic Miter Saw
- The table rotates to make angled cuts.
Single Bevel Compound Miter Saw
- The blade tilts in one direction in addition to the table rotating. Like this one.
Double bevel Compound Miter SAw
- Double bevel compound – the blade tilts in both directions as well as the table rotates. Like this one.
Sliding Compound Miter Saw
- The blade can slide out to make cuts increasing the capability of the saw to cut wider boards. Like this one.
You can basically get various combinations of the above too!
Miter saw size
The miter saw blade size determines how wide a board you can cut. It starts out at 7″ and can go as high as 12″ or more.
I started with a basic 10″ compound miter saw then upgraded to a 10″ sliding compound miter saw.
Now I have the 12″ dual bevel sliding compound miter saw.
Types of Miter Saw Cuts

There are 4 basic types of cuts you can make using a miter saw.
Cross cut
- This is a simple 90 deg cut across the board. It is probably the most used cut.
A Miter Cut
- This is an angled cut across the width of the board. This is made by moving the table to the required angle. For example, 45° is a very common angle.
Beveled Cut
- It is an angled cut across the thickness of the board. This is made by setting the angle on the beveled gauge and tilting the saw blade to the required angle.
Compound Cut
- This is basically a combination of a miter and a bevel cut. Both the miter and bevel gauges are set at required angles.
Miter Saw safety
Before using a miter saw or any power tool, be sure to read the manual and follow ALL safety guidelines.
The key items are – eye protection, ear protection, and dust protection. Also, make sure to keep all hair, clothing and jewelry away.
And most importantly keep your hands away from the cut area and the blade – at least by 6″ – at all times.
Making accurate cuts with a miter saw
The kerf!
One key thing to understand and remember before you start cutting with a miter saw is the Kerf.
The Kerf is actually the width of the blade or rather the part of your board that turns into sawdust when you go through it with a blade.
See the part of the board that has disappeared above? That is kerf.
You have to account for it when you make cuts.
This means that if you have a 10″ board and you want to cut it into two perfectly equal 5″ pieces, you cannot do that. Because one piece will be missing the kerf width.
My saw has a kerf of about 1/8″ so to get those exact 5″ pieces, I will have to start with a board of 10 1/8″.
Therefore, before you start off the cut, rest the blade on the piece and align it so the edge of the blade is touching the line you want to cut and the width is on the other side of the piece you want to keep.
Read more about saw kerf here.
How to use a Miter Saw
Let’s get into the details of exactly how to use a miter saw to make perfect and accurate cuts.

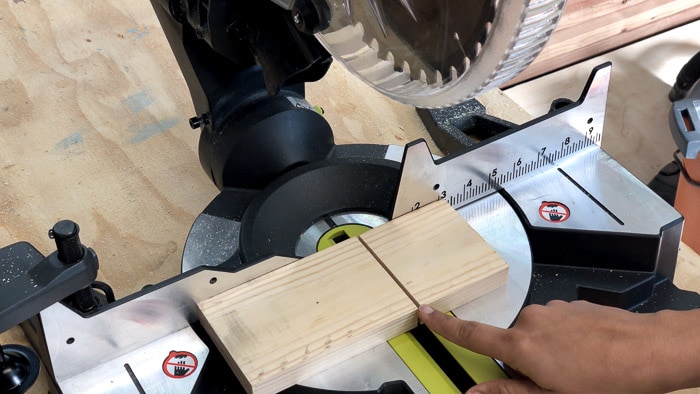
Step 1- Measure and mark
- Measure and mark your board and draw the straight line where you want to cut. I like using a speed square for this.
Step 2 – Set on saw
- Push the workpiece against the fence and hold it with one hand away from the blade.
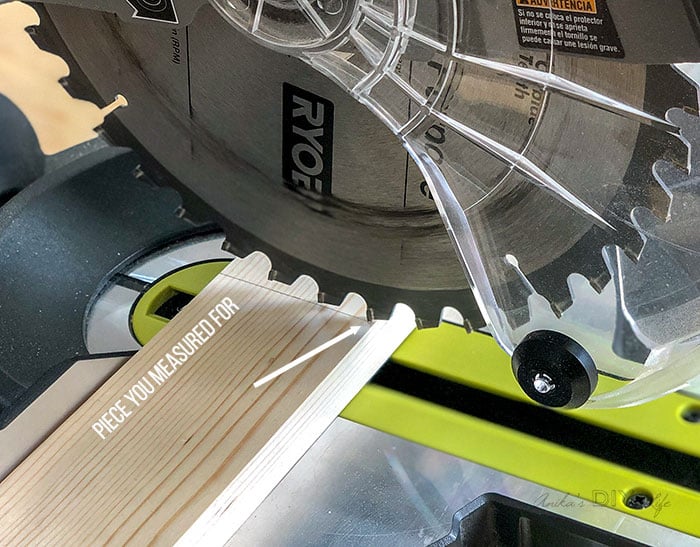
Step 3 – Check for an accurate cut
- WITHOUT pushing the trigger, bring down the blade to make sure the kerf is on the other side of the piece you want to keep.
Step 4 – Make the cut
- Once you are satisfied with it, lift it back up and press the trigger and wait for the saw to reach full speed.
- Slowly lower the blade through the board to make your cut.
- At the end of the cut, let go of the trigger and let the blade STOP COMPLETELY before lifting the blade back up.
If you are using a sliding motion, always bring the saw out and cut towards the fence, stopping when the blade is completely through.
Important Miter Saw tip

Always cut off the ends of boards that you get from the lumber yard. They are never square.
Simply cutting off half an inch to an inch makes sure you start with boards that are perfect on the ends.
That’s it! I hope you have fun using your miter saw!
MY MITER SAW AND RELATED EQUIPMENT
- My first miter saw – 10″ compound miter saw
- Next miter saw 10″ sliding compound miter saw
- Current miter saw – 12″ dual bevel sliding compound miter saw
- Miter saw fold-away stand – great for small workshops
- Hearing protection
- Eye protection
- Dust protection
- Speed square
- Favorite carpenter pencils and sharpener
More Tutorials you might like
Anika's goal is to inspire and empower beginners with woodworking, DIY, home improvement, and home decor ideas.
She wants everyone to unlock their creative potential and experience the feeling that comes with making something. Nothing feels better better than seeing something and saying "I can make that!"


Anika
I looked at your video, it’s a very nice review. We have a Chicago Electric miter saw which has been used extensively for about three years. While I would agree with your enthusiasm for the miter saw, a major challenge is controlling dust. Because of the saw’s versatility in cutting bevels and angles, collecting the dust efficiently is a huge challenge. I have built a variety of collectors, but there always seems to be a “Catch 22”. I have gone into Google for ideas, the consensus seems to be that making a miter saw dust free is a huge problem. Our shop is considering replacing the above mentioned miter saw as some components have failed and replacement parts are not available. Might you have some recommended brands that you feel are better than the general market?
Hi George, Miter saw dust collection is a really great challenge. I use mine out in the driveway so it is just a little bit of clean up with a shopvac and blower. I will work on putting together some ideas.
Great Article It’s Very Helpful For Everyone. Thanks