How to Stain Wood: A Step-By-Step Guide for Beginners
Applying wood stain is a great way to highlight wood grain. Here is everything you need to know about how to stain wood and seal it.

Staining is one of the most popular ways to finish any wood project. Staining wood enhances the wood grain and showcases the beauty of the wood.
However, getting the perfect stained finish can be frustrating if you are new to staining wood. Staining wood enhances scratches and imperfections, making getting a gorgeous factory finish harder.
To get the best results when staining, it is essential to understand what wood stain is and how it works.
Table of Contents
What Is Wood Stain?
Wood stain is a pigment that penetrates wood fibers and gives them color. The pigment is usually dispersed in oil-based solvents or water-based carriers. Wood stain is available in various colors ranging from browns to enhance the natural warmth of wood to colorful wood stains.
Types of Stains
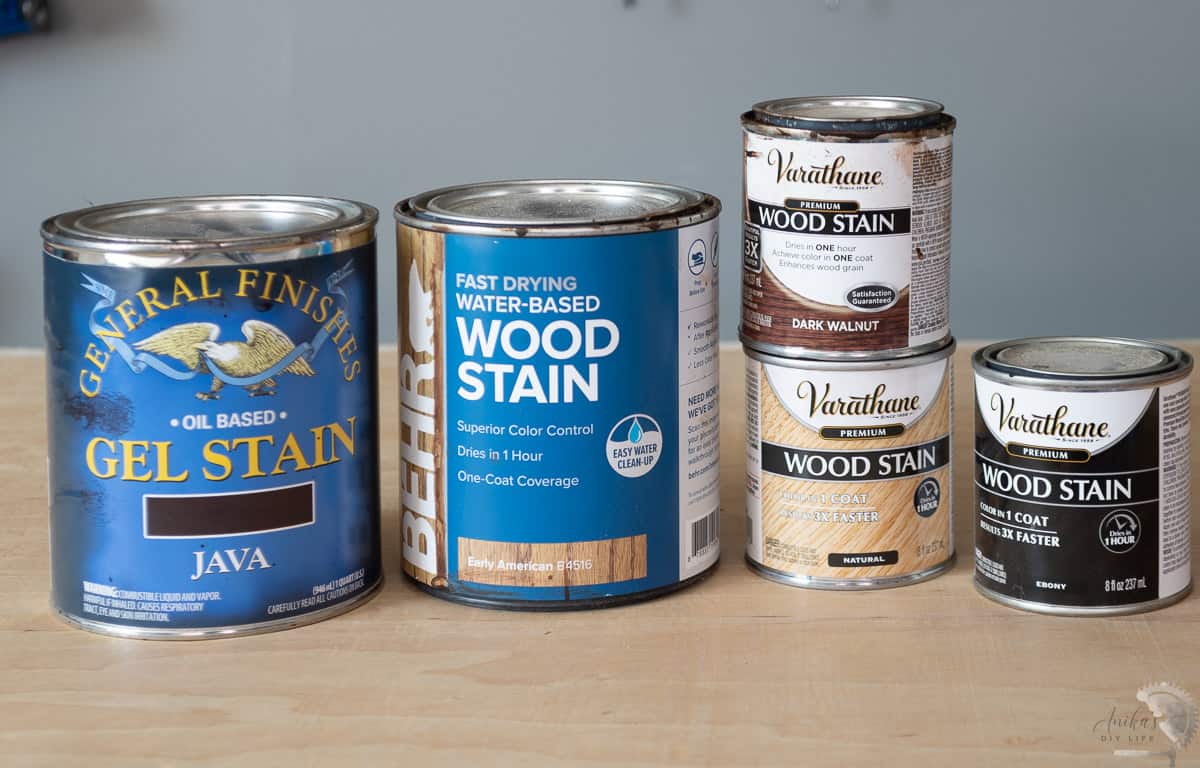
There are multiple types of wood stains available:
- oil-based wood stain
- water based wood stain
- gel stains
They each have their advantages and disadvantages.
Oil-based wood stains are the most popular and my stain of choice. They penetrate deep, have great coverage, and are very durable. They do have a longer drying time than water-based wood stains, making it easy to work with them, but you need patience to ensure the stain dries before use. They are flammable, and the rags should be kept with caution in water.
Water-based wood stains are not very popular and are hence more expensive. They do not penetrate the wood grain deeply; hence, the colors aren’t as rich as oil-based stains. However, they dry quickly, are environmentally friendly, and have low to zero fumes. You can wash your brushes and rags with water and soap.
As the name suggests, gel-based stains are like a gel and sit on the wood, leading to an even stain absorption. They are pretty expensive and don’t penetrate as deeply as oil-based stains. They take a long time to dry. The biggest advantage is that applying gel stain over a previously stained surface is easy. See more about how to use gel stain here.
I recommend a water-based wood stain if you’re in a hurry to finish the project. However, an oil-based stain is your best bet if you’re after an even finish on the wood.
I prefer to use oil-based stains for my projects.
Supplies Needed to Stain Wood
- Sander and Sandpaper. I recommend a random orbital sander and sandpaper from 80 -220 grit.
- Sanding block.
- Pre-stain conditioner. Oil-based or water-based, depending on your project.
- Stain in the color of your choice. I like using oil-based stains.
- Tack cloth
- Disposable chip brush
- Lint-free cloth
- Foam brush applicator
- Top Coat of your choice. More on that below.
- Gloves
Picking the Stain Color
Picking a stain color can be a very nerve-wracking experience. All the stains look very similar or very different on cans and look different on different types of wood. You can never be sure of what the final color will look like. You don’t wait to stain an entire project only to hate the color.
Here are two simple tips to help you:
- Make a stain stick – use a wood board you most often work with and tape- off sections, and apply various stain colors. This will work as a reference when picking the stain for your projects.
- Try the stain on an inconspicuous area or a scrap piece of wood to see exactly what the final stain color will look like. You should do this even if you have a paint stick.
Safety While Staining
Before we get into the sanding details, let’s talk about the most important part – SAFETY.
- Wear a dust mask when sanding.
- Stain in a well-ventilated area – especially with oil-based stains which have a high level of VOCs.
- Don’t throw oil-based stain rags in the trash. They are flammable. Instead, put them in a bucket of water or lay them flat to dry. Once dry, you can throw them away.
How to Stain Wood
Staining wood is a simple step-by-step process. However, every step has certain nuances to consider to get the best results.
Step 1: Sanding
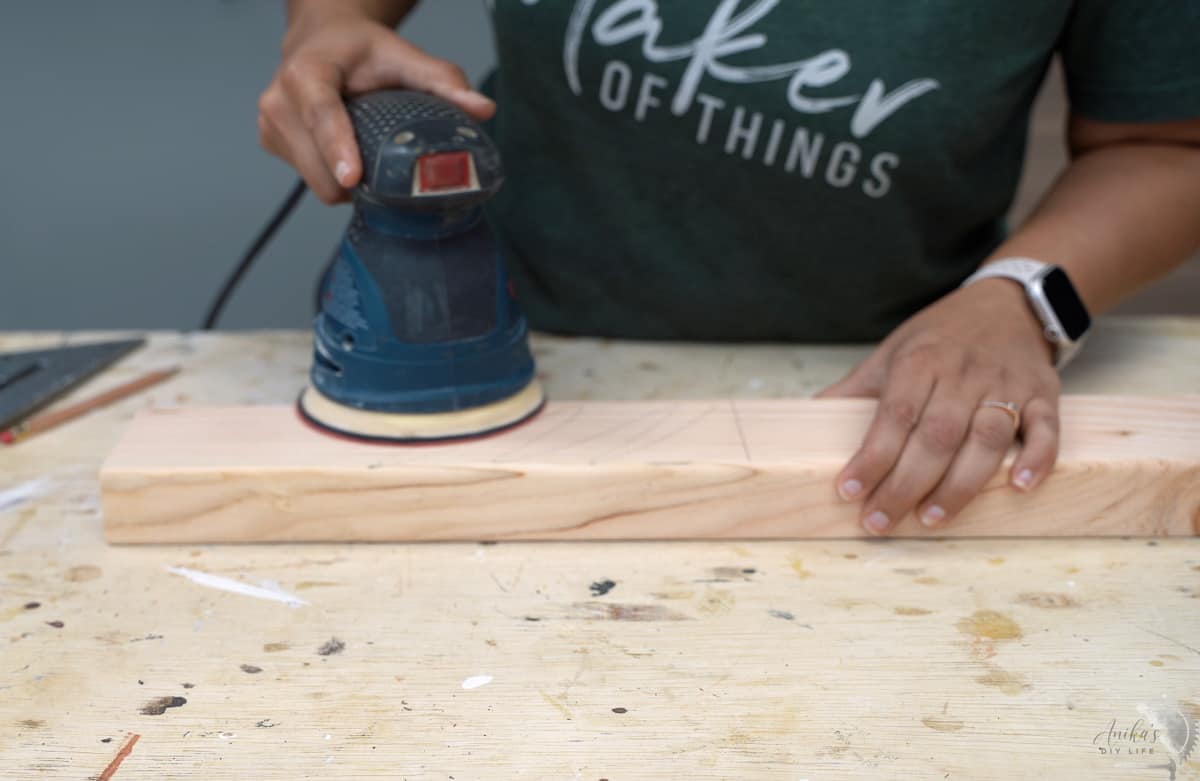
This is the most critical step in preparing the wood for staining. You want to sand down the boards starting with low or medium-grit sandpaper, like 80 or 120-grit sandpaper, all the way to 220-grit sandpaper, with each step up in grit being not more than 60-grit. See more about how to sand for the best results and why you shouldn’t skip grits.
Make sure that the top of the wood is perfectly smooth to the touch.
Sanding is the process of removing wood fibers. This helps with two things –
- It helps open up the pores of wood to absorb stains.
- most importantly, it makes the surface of wood even and removes scratches.
Proper sanding will remove scratches and swirl marks, which the wood stain will enhance – something you do not want.
Swirl marks are caused by improper use of sander. Be sure you don’t get those.
Step 2: Apply Pre-stain Conditioner
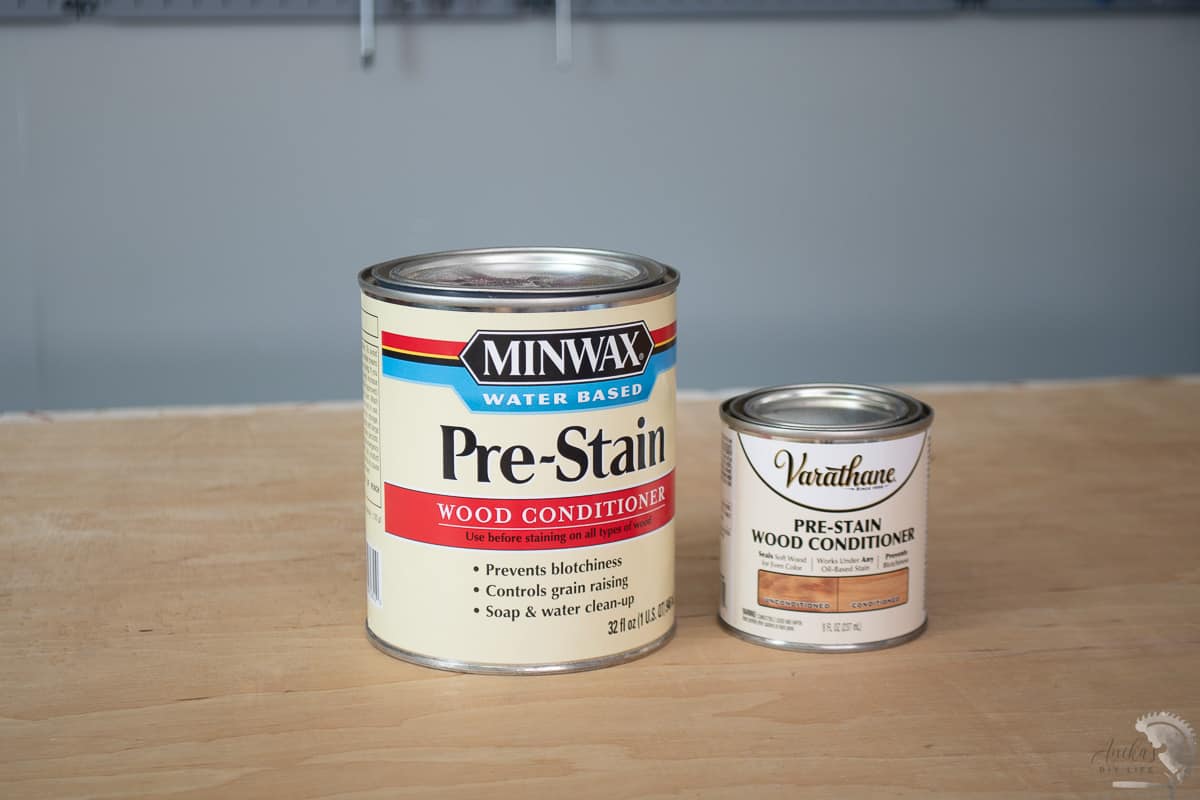
Just like you need to apply primer before applying paint, you need to apply pre-stain conditioner before applying stain.
One of the major frustrations with staining projects is the blotching – especially with softwoods like pine, fir, spruce, maple, alder, etc. Hardwoods have a tight grain and result in less blotchiness.
The main reason for blotchiness is the uneven absorption of stain into the wood grain. The grains absorb the pre-stain conditioner, and it temporarily seals the pores. This helps even out the rate of absorption for the stain.
Pre-stain conditioners are available as water and oil-based for their respective stains. Be sure to use the appropriate one.

Here is how to apply the pre-stain wood conditioner –
- Apply the pre-stain conditioner onto the wood with a rag or foam brush. Be sure to get an even coating and cover the entire surface.
- Wait for around 5 minutes (or as directed by the can) and wipe any excess pre-stain away.
- If the grain rises, which it probably will if using water-based conditioner, sand it down with a 220 grit or fine sanding block.
- Wipe off all the dust using a tack cloth.
It is important to note that there is a window (between 15 minutes- 2 hours) between wiping the pre-stain away and applying the stain to get the best results. If you wait too long, the benefits of the pre-stain conditioner are lost.
Step 3: Stain
Whether you use oil-based or water-based stain, the process remains the same:
- Stir it well before using. Please do not shake it, as it introduces a lot of air bubbles.
- Using a clean, lint-free rag, disposable chip brush, or foam brush, apply the stain in a circular motion on the wood board. The circular motion is perfect to make sure that the stain penetrates the wood from all angles.
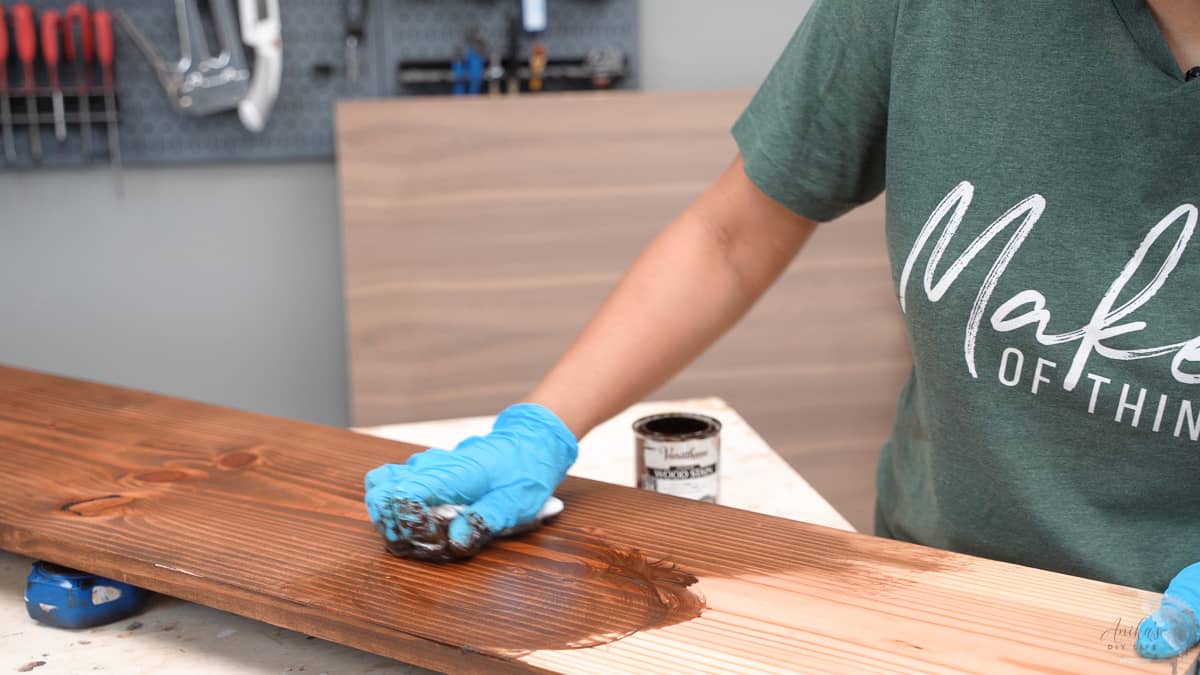
- Allow to sit for a couple of minutes, and then, using a clean rag, wipe off the excess stain in the direction of the wood grain. Wiping the stain off in the direction of the grain is essential to get the best possible finish.

When staining, less is more. A little stain goes a long way. If you get a little bit of excess in a spot, either wipe it away and blend it in or move it over to the unstained areas.
If you are working on a large wood surface like a tabletop, be sure to work in sections so the stain in the previous section doesn’t sit for longer than recommended. Be sure to read the instructions on the stain can to see the longest the stain can sit.
If the stain sits too long, it will become tacky and hard to wipe off. If you want a darker stain color, you may want to try a second coat after the recommended drying time or use a darker stain.
Be sure to watch out for drips on the edges. These can easily go unnoticed and become tacky and hard to blend in if left for too long.
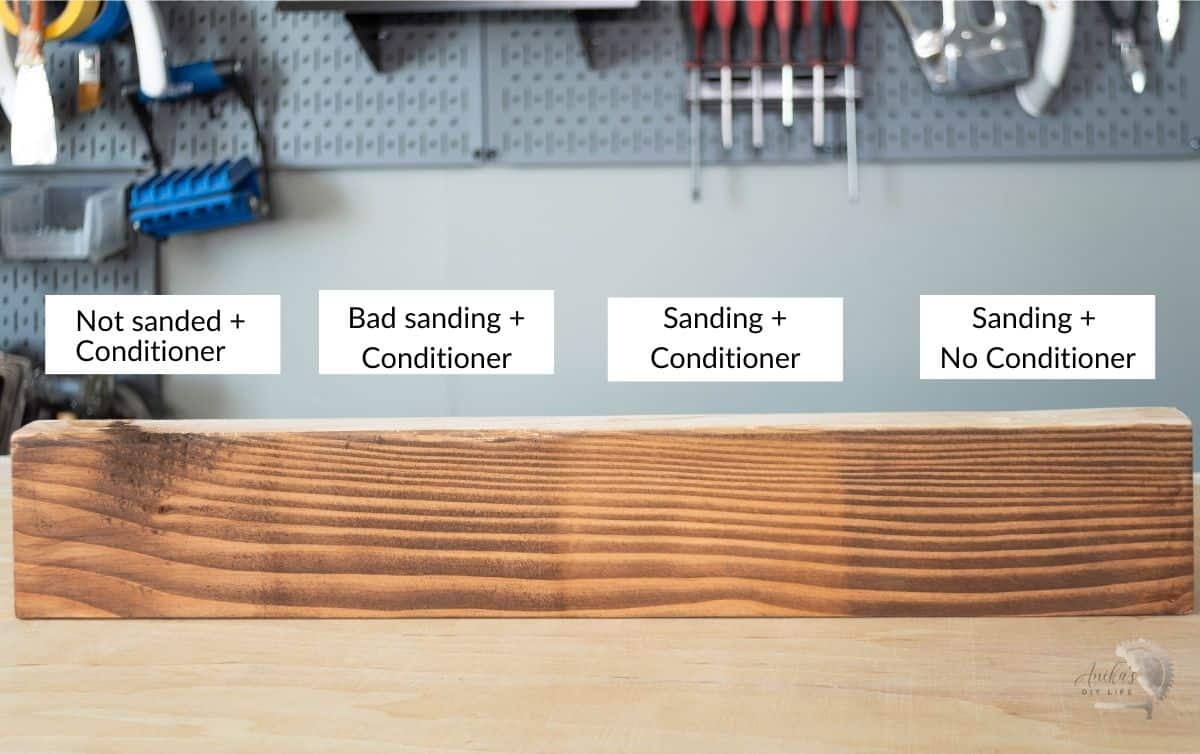
Here is a comparison of the effect of sanding and pre-stain conditioner on a piece of 2×4. The answer is clear – you must sand well AND use a pre-stain conditioner to get the best finish.
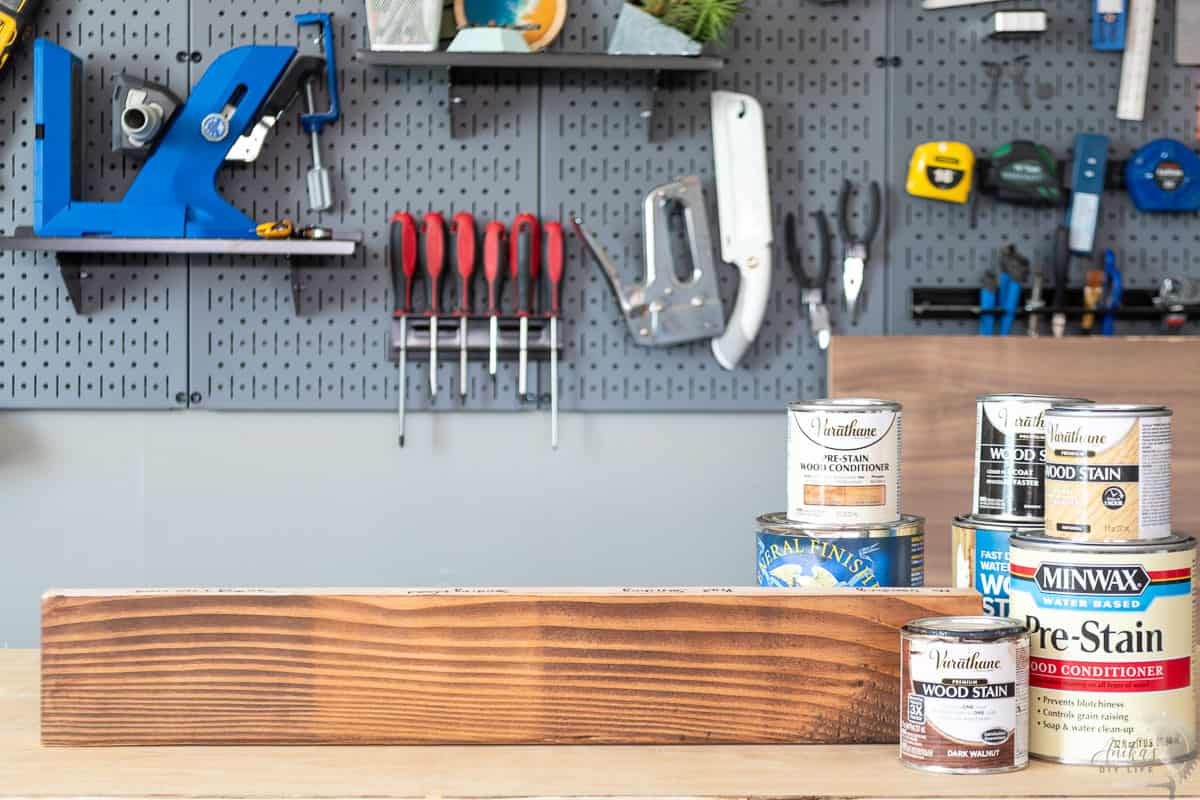
And here is a comparison between oil-based and water-based stain in Dark Walnut. You can see that even though the water-based stain has its color, the oil-based stain produces a richer color.

Step 5: Allow to Dry
This is the step that requires the most patience. Most oil-based stains recommend 24-48 hours to dry between coats or before use.
It is best to allow stained furniture to dry or cure in a well-ventilated area. I leave the projects in the garage/workshop for at least 2-3 days before bringing them inside. This allows them to completely de-gas.
Be sure to read the instructions on the stain can to check how long you need to allow it to dry.
Step 4: Seal the Wood
The wood’s pores are currently exposed, and it can easily take on stains from everyday use, like water rings, etc. It will also have a flat matte finish, which will be hard to wipe down – hello dust.
Sealing the wood will give you a nice smooth finish that can be easily wiped down and will protect the gorgeous wood grain for years.
I highly recommend sealing the wood once it is stained.

There are oil-based and water-based top coats available. My two favorites are the water-based polycrylic and the High-performance top coat. Lately, Halcyon from Total Boat is also one of my favorites. Oil-based spar urethane is best for sealing outdoor wood, but remember that oil-based spar urethane should be used in a well-ventilated area.
Here is how to apply the sealer:
- Stir to mix it.
- Use a good quality synthetic bristle brush and apply thin, even coats across the surface. It will look milky, but that’s okay. It will dry clear.
- Once the recommended drying time has passed, use a fine-grit sandpaper to lightly sand the surface.
- Wipe down all the dust well with the tack cloth.
- Apply another thin layer of top coat.
- Repeat the above three steps until you get a smooth surface.

I usually apply three coats of polyurethane and use a 320-grit sandpaper before the final coat. This gives a really smooth finish.
What about stain + sealant combinations? I have seen these at the stores and tried it once long ago, and I wasn’t happy about the results. I am not a fan of making one product do multiple things. The product should work well for what it is designed to do. The wood stain- stains and the sealer – seals.
And that is the complete guide to staining wood to get the best results. It seems like a long process, but the key steps are – sand well, use a pre-stain conditioner, apply stain in a circular motion, and wipe off in the direction of the grain. Once it is dry, apply the sealer.
These stained projects will look great and last for a long time.
You might also like these tutorials:
- How to Seal Wood: A Beginner-Friendly Guide
- How to paint unfinished pine
- How to paint plywood
- How to sand wood
- 7 Tips for Professional-Looking DIY Wood Projects
Anika's goal is to inspire and empower beginners with woodworking, DIY, home improvement, and home decor ideas.
She wants everyone to unlock their creative potential and experience the feeling that comes with making something. Nothing feels better better than seeing something and saying "I can make that!"


