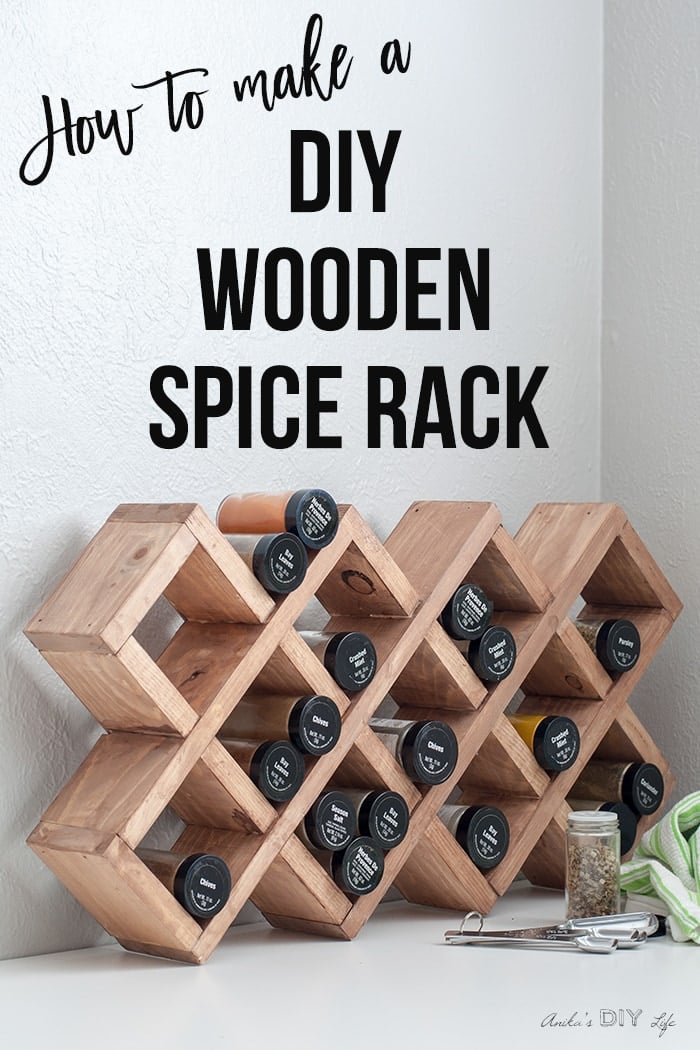
DIY Spice Rack – Wooden Criss-Cross Rack
Build a DIY spice rack with the step by step plans and tutorial. This criss-cross wooden spice rack is perfect for the countertop or mounting on the wall.
Sometimes, you need a quick project.
I promise this is one of those!
PLUS it looks like you spent a LOT of time on it.
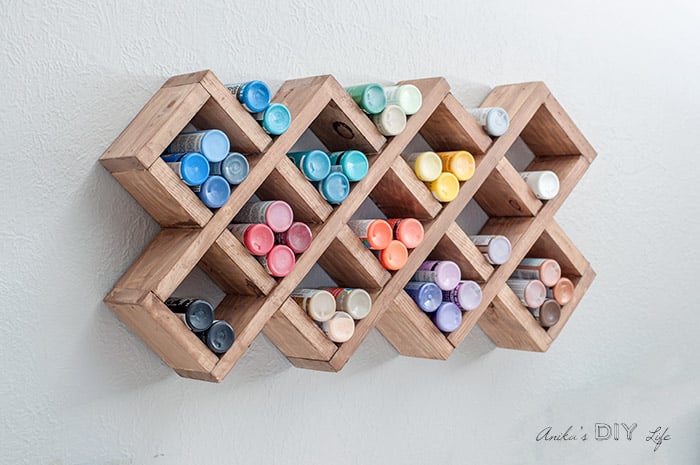
I came across something similar in one of the stores and I immediately thought that I could increase it in scale and make it more efficient to store multiple bottles.
Truth is I actually made it for my craft paint instead of spices.
But spices are more popular… I guess people need spices more. 🙂
This spice rack is VERY versatile in it’s uses:
- You can store small cylindrical things in it like:
- craft paint
- spice bottles
- spools of thread, etc.
- It can be kept on a countertop
- It can be mounted on the wall
- It can be use in a horizontal configuration
- It can be used in a vertical configuration.
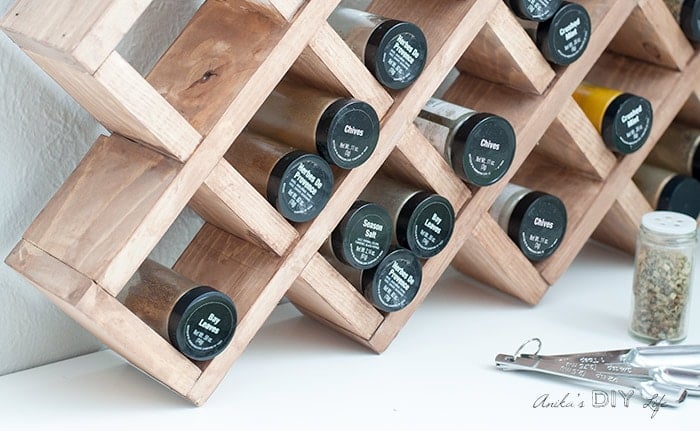
- It can hold a million bottles of spices! Well, yes, of course not a million, but almost 40!
It is a simple project, built with a few simple boards.
In fact, I found all my boards in my scrap wood pile!
Which basically means it is FREE – and who doesn’t like that?
RELATED: Simple Scrap Wood Projects for Beginners
In fact, I am joining 17 other amazing bloggers in a Scrap Wood Challenge hosted by Jen Woodhouse to bring you a whole bunch of awesome scrap wood projects. Take a look at the links to all of those projects at the bottom of the post.
Let’s get back to building the wooden spice rack
***This post contains referral or affiliate links. It is a way for this site to earn advertising fees by advertising or linking to certain products and/or services. Please read my full disclosure here ***
Material Needed
- 1×4 boards per the plans
- Jig Saw or table saw. I used the Blade Runner X2.
- Wood glue
- 1¼” finish nails and brad nailer or hammer
- Stain or paint of your choice.
How to Build
This is a super simple project but can be a bit confusing to put together. There is no better way to exactly explain it than to actually show you.
Here is a full video on how to make this wooden spice rack.
I have the written tutorial and schematics below the video for you.

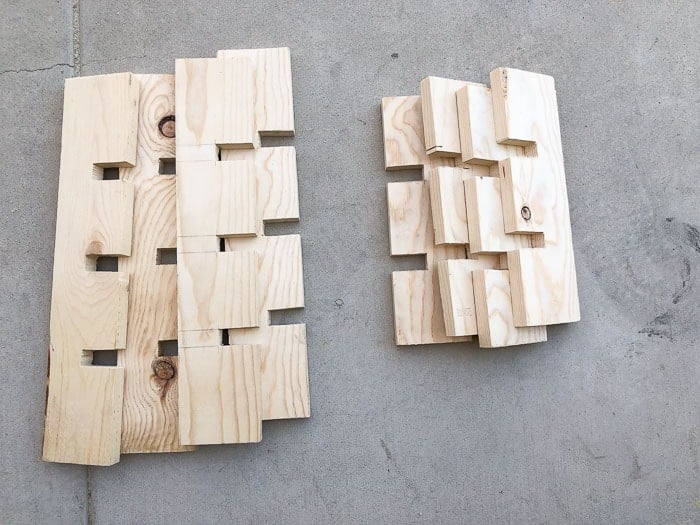
Step 1 – Make the cuts
- Make all the cuts per the plans.
There are two types of cuts –
- cutting the boards to length
- cutting the slots for the half-lap joints.
The cross-cuts to cut the boards to length can be done using a miter saw or circular saw.
For the half-lap cuts, I used my BladeRunner X2. I like that it is easy to keep the boards straight and feels a lot safer that a table saw to make these smaller cuts.
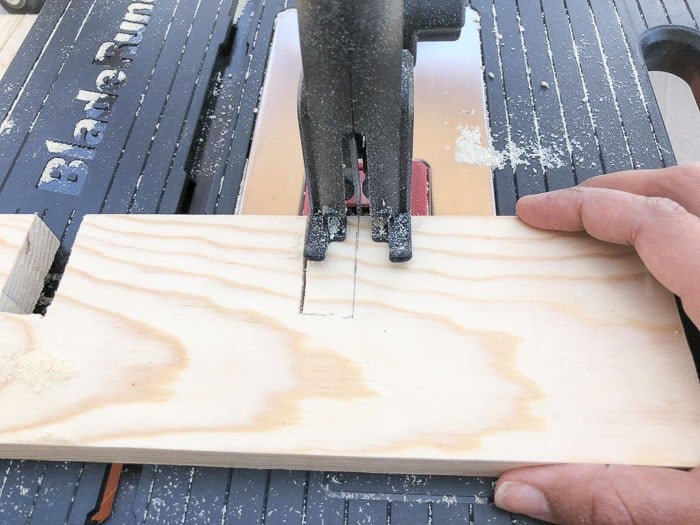
You can use a table saw or a jig saw to make the cuts as well – anything that works well for you.
If using a jigsaw, be sure to pick the right blade. Read more about it here.
Making the half-lap cuts is the most critical step. All the slots need to be perfectly aligned and square for this to work.
Step 2 – Put it together
Honestly, you have to see the video for exactly how to lay them out and put together.
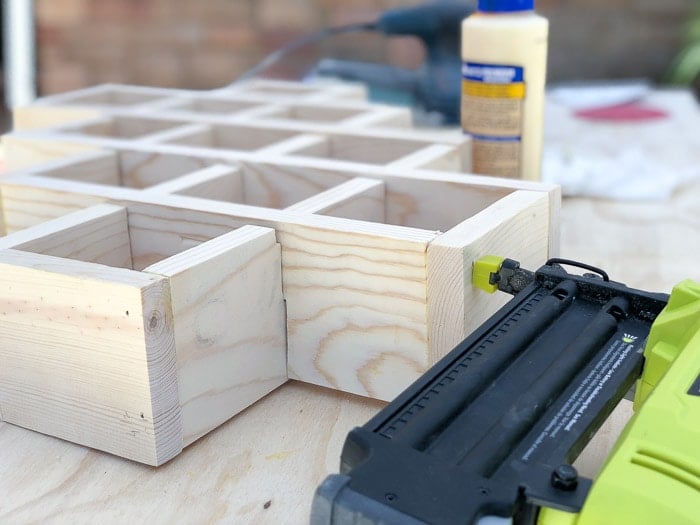
Step 3 – Attach
Once you have them all configured and ready, use wood glue and put it together. The end pieces are attached with wood glue and finish nails.
That is it!
Super easy and quick project that looks really awesome!
Plus it is free if you have my big stash of scrap wood!

All my craft paint looks nice and pretty and colorful in my office/craft room now – just the way I like it!
Printable Plans for Wooden Spice Rack
What will you store in it? Let me know in the comments!
More fun scrap wood projects –
- The House of Wood – DIY Bunk Buddy
- 3×3 Custom – Scrap Wood Trivets
- Ugly Duckling House – Mini Garden Deck
- The Created Home – Animal Coin Banks
- Her Toolbelt – 3D Pixel Art
- The Kim Six Fix – Outdoor Drink Stakes
- DIY Huntress – Scrap Wood Coasters
- Mr. Build It & Mrs. Style It – Bent Plywood Headphone Stand
- At Charlotte’s House – Buffalo Check Tray
- Sawdust 2 Stitches – Scrap Wood Wall Decor
- Bower Power – Pallet Baseball Hat Rack
- Pneumatic Addict – Table with Epoxy Resin
- 100 Things 2 Do – DIY Can Crusher
- Hazel + Gold Designs – Patio Table Drink Holder
- Reality Daydream – Scrap Wood Shoe Cabinet
- House Becoming Home – Modern DIY Clock
- Chatfield Court – Wooden Garden Obelisk
Anika's goal is to inspire and empower beginners with woodworking, DIY, home improvement, and home decor ideas.
She wants everyone to unlock their creative potential and experience the feeling that comes with making something. Nothing feels better better than seeing something and saying "I can make that!"


love it, and especially for the paints! thanks for sharing on craft schooling Sunday!
Awesome project! Thanks for sharing at the To Grandma’s House We Go DIY, Crafts, Recipes and More Wednesday Link Party! I pinned this! Hope to see you again next week.
Very clever and useful! Thanks for sharing with SYC.
hugs,
Jann