DIY Walnut Cutting Board With Brass Inlay
Turn a piece of walnut into a gorgeous walnut DIY cutting board with sunburst brass inlay with this easy tutorial using simple tools.

If you are a woodworker, chances are you have either made or considered making a cutting board.
Handmade cutting boards are not just special, they also make a wonderful gift any time of the year. But, as soon as we talk about cutting boards, you might think of advanced machinery – table saws, jointers, planers etc…
In this tutorial, I will show you how to make a gorgeous one-of-a-kind cutting board with very simple tools!
***This post is sponsored by The Home Depot as part of the #THDProSpective program. Thank you for supporting the brands that help me bring you new projects.***
Brass Inlay
Inlay is the art of embedding one material into another – in this case, brass into walnut.
Brass and walnut make for the most gorgeous combination ever!
I have been intrigued by brass inlay for a long time now and wanted to try it out on a project.
Typically, woodworkers use CNC machines or at least a router to route out the intricate design to inlay.
However, I wanted to show you how you can achieve a custom brass inlay look with the simplest tools that you probably already have!

Walnut
I picked up a piece of 8″ wide walnut milled to 3/4″ from The Home Depot. The walnut had imperfections on one of the edges, which was easily cleaned up on the table saw.
I used a 16″ piece but the total size is your choice. You could even glue up multiple boards to create wider boards.
I wanted to keep this project as simple and straightforward as possible so I simply used the board as is.
DIY Walnut Cutting Board
This was a pretty quick project as well.
It took me a couple of hours to prep the board and add the inlay.
I had to wait for the epoxy to dry overnight, followed by about another hour of clean-up and sanding – a total of about 3 hours of active work.
***This post contains referral or affiliate links. It is a way for this site to earn advertising fees by advertising or linking to certain products and/or services. Please read my full disclosure here ***
Material Needed
- Walnut board. I used a 8″ wide piece that was milled to 3/4″
- Brass rods
- Diablo carbide oscillating blade set
- Diablo Top and bottom cut jigsaw blades
- Diablo Sandnet discs in various grit ranging from 80 to 320.
- Drill bits in various sizes to match the brass rods.
- Food-safe epoxy
- Cutting board oil
Tools Needed
- Miter saw and table saw (optional – to cut /clean up the edges)
- Jigsaw or bandsaw (optional- to add shape to the cutting board)
- Power drill
- Random orbital sander
- Oscilating tool
Instructions
Step 1: Prep the Board
- Clean up the edges of the board as needed.
I trimmed 1/8″ on the sides to remove imperfections.

- Give your board a shape (optional)
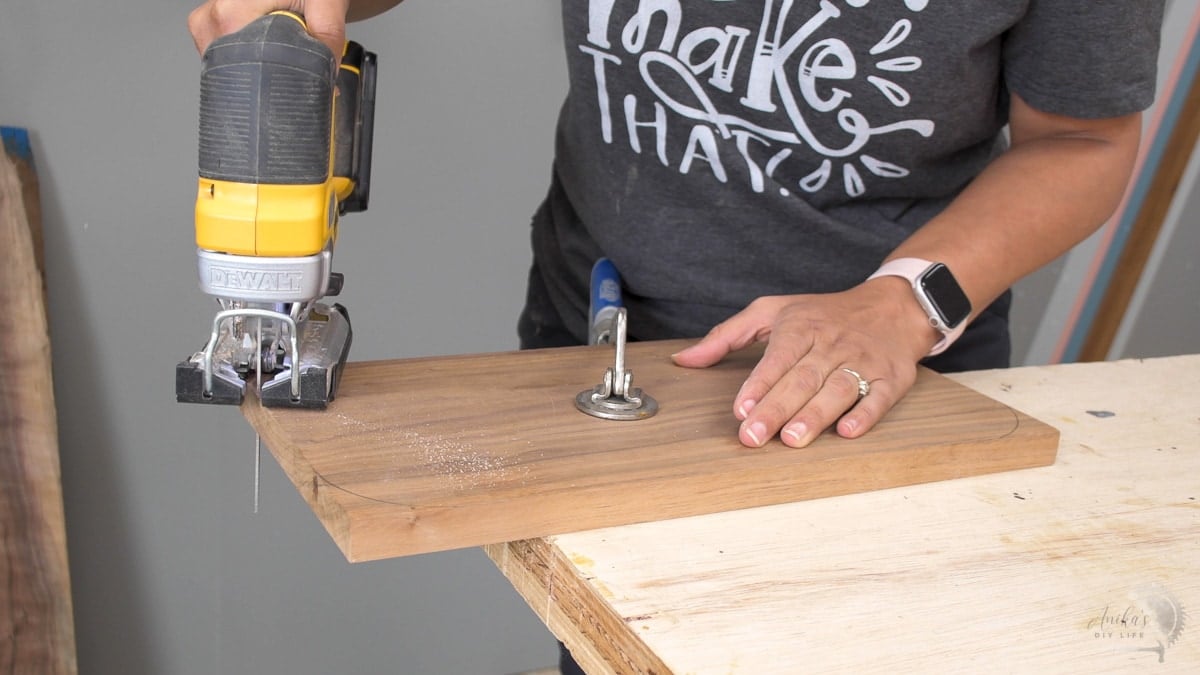
I decided to slightly round the corners of the board to give it a softer look. To do this, I used a round item (a roll of masking tape), drew the curves, and cut it out with a jigsaw.

The options here are endless, you can draw a random shape and cut it out with a jigsaw or bandsaw if you like.
- Sand the boards.
This is a quick step to remove any major imperfections and blend in the cut shapes. I used 150 grit Diablo Sandnet discs for this.
I also added a slight round over to the edges manually. You can also use a router with a round-over bit if you like but I was going for something really subtle.
Step 2: Make the Holes.
Before you start this step –
- Practice on a piece of scrap wood. Very Important!
- Find drill bit sizes to match the brass rods and group them together so you know exactly which bit is used for which rod size.
The rods should fit pretty snuggly into the holes. - Roughly mark and map out where you want to have the rods of various sizes with a pencil.
Once you have the plan and the sizes defined, you are ready to make holes in the walnut.
- Make the holes using various sizes of bits in a random pattern – really there is no rhyme or reason for the pattern I chose, I just kept adding them until I was happy with it.
- The depth of the holes is about half the thickness of the board.
I eye-balled it but if you are uncomfortable with that, you can add a masking tape to bit to judge the depth.

Step 3: Inlay the Rods
Fair warning – This is the messiest step of the whole process!
- Mix up a small batch of food-safe epoxy. We will use this to glue the rods into the holes.
- Add a small amount of epoxy to the hole.
- Push the brass rod into the hole. You may need to use a mallet to push it in.

- Using an oscillating tool fitted with the Diablo carbide metal cutting blade, cut off the brass rod.

The Diablo carbide metal cutting blade has tooth geometry that makes for fast cuts and has a longer life. It also has a Black Ice coating that helps keep a cool cutting edge.

The curved contact edge on the general-purpose cutting blade is great for precise, clean plunge cuts.
As you are cutting the brass rod, be careful to keep the blade parallel to the surface of the board. You don’t want to damage the walnut.
Repeat for all the brass rods.
The epoxy squeezes out from the holes when. you add the brass rod, wipe off the excess before cutting off the brass rods to protect the blade.

As I mentioned, it gets pretty messy because the brass shavings from cutting the rods mix with the extra epoxy.
But that’s ok. we will take care of that in the next step.
Step 4: Clean Up
Once the epoxy has cured, it is time to clean up the board.
- Sand using a random orbital sander and Diablo Sandnet discs – starting at 80 grit, 120 grit, 220 grit and down to 320 grit.

As you sand, the messy epoxy will be removed and the brass will start to shine.
The final step is water popping the grain.
- Spray water on all sides of the board.
- The wood grain will swell up and the board will feel fuzzy.
- sand this back down using 320 grit.
That’s it! The board is ready for the final finish.
Step 5: Final Finish
Give the entire cutting board a nice coat of cutting board oil.

I am absolutely in love with the look of the brass rods in the wood!

I can’t even begin to tell you how happy I am with how this turned out.
When I came up with the idea, I wasn’t quite sure how this would look. Honestly, it turned out like everything I had imagined.

This is a great way to start making cutting boards AND work with brass inlay.
You may also like:
Anika's goal is to inspire and empower beginners with woodworking, DIY, home improvement, and home decor ideas.
She wants everyone to unlock their creative potential and experience the feeling that comes with making something. Nothing feels better better than seeing something and saying "I can make that!"


Your board is beautiful. I want to try one. But can’t find the solid road.
Where did you purchase your rods. I’ve looked at Lowe’s and Home Depot and the rods show as hollow not solid.
Than you for your help. Love your site. Very informative.
Hi Bev, I got the rods from Amazon.
Gorgeous!!