DIY Sunburst Rainbow Accent Wall
Learn how to paint a DIY Sunburst rainbow accent wall with this step-by-step tutorial. We added a little surprise by painting it in a corner!

I love giving each room in our home its own personality – specifically to match the occupants or the room’s purpose.
My daughter is a fun color-loving girl. She got to have a room of her own a couple of years ago but we never made any changes to the room.
It was painted a light gray-blue. She sort of liked the color so I put painting her room on the backburner.

Finally, I decided that even though I didn’t have to paint the entire room, she needed a rainbow accent wall – something colorful and cheerful.
But instead of painting one long wall, I decided to add a little bit of character and painted a corner.
It took me almost one whole day – morning to evening to paint the entire thing but it was so worth it!

Let’s get into the details.
***This post contains referral or affiliate links. It is a way for this site to earn advertising fees by advertising or linking to certain products and/or services. Please read my full disclosure here ***
Material Needed:
- 2 types of Painter’s Tape
- Sharp knife
- Plastic to cover the baseboards. I really like these pre-taped plastic sheets.
- Drop cloth to cover the floor.
- Colors of your choice. I list the colors I used below.
- Paint brush
- Mini rollers and trays
- Yard stick and ruler
- Protractor/ paper or laser level
Instructions:
I decided to keep the base color the same as it was. But if you like, you can start with a fresh coat of neutral paint. White walls are a great starting point for any color.
Below is the video of how I painted the wall. As always, the full written step by step tutorial follows.
Step 1: Draw the Pattern
This is definitely the most important part of the process. Once the pattern is on the wall, you simply need to follow it and paint.
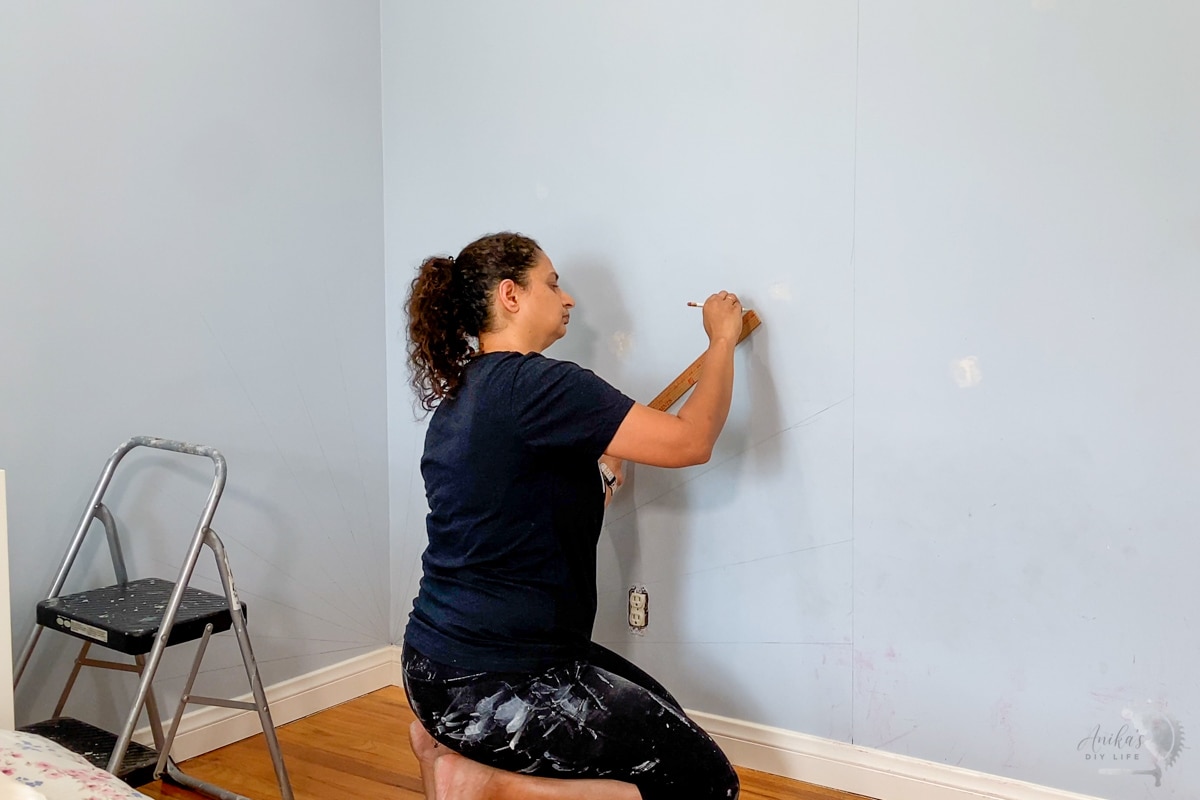
- Use a laser level that can be held at angles to draw lines on the wall.
I didn’t have that available, so here is what I did:
- I folded a paper in half for the center line. I am using this as the corner of the wall but it doesn’t have to be. It can be the center of your accent wall.
- Align a protractor with the center line at 90-degrees and the bottom of the paper at 0-degrees
- Mark angles at 10-degree increments. Of course, you can make the lines wider by using larger angles if you like.
- Draw the lines to make the pattern on paper.

Once the pattern is ready on paper, it is time to transfer it to the wall.
- Align and tape the paper to the wall with painter’s tape.
- mark the ends of the lines on the wall.

- Use a yard stick or long straight edge to extend the lines out.
You can extend the lines all the way across the wall. I decided to terminate it just a little wider than her bed and made the width equal on both sides of the corner.

Step 2 – Prep for Painting
- Fill in any old nail holes.
- Tape off the baseboards. I used this to tape off the baseboards but you can also buy pre-taped plastic which is genius and makes it super easy and quick to cover up the baseboards.
- Put drop cloths to cover your floors.
You can remove any switch plates if you like. But I bought a paintable switch cover and I am so glad I did. Wait till you see what it looks like once painted.
Step 3 – Tape off Pattern
Taping off lines the right way with painter’s tape is key to getting crisp smooth lines. Remember a few key things –
- Pick a tape meant for the type of walls you have. If you have a textured wall, make sure the Painter’s tape works with it.
- Guide the tape into place without pulling at it.
- Push the tape down in place.
- Use a sharp edge like an old credit card or putty knife to seal the tape edges.

To tape off the pattern for the first set of paint colors, here is the process I followed.
- Tape off the edges of the pattern if you are truncating the pattern like me.
- Tape the edges of every alternate stripe.
- Towards the corner where the stripes get narrower, use a sharp knife to cut off the tape along the lines you drew.

The first set of lines is ready for paint.

Step 4 – Paint
Picking the paint colors was probably the hardest part of this project. I used my daughter’s bedspread as the inspiration and picked out colors from it.
I picked up a whole bunch of paint chips – multiples of every color and brought them home.

I used the same piece of paper we used to draw the patterns to decide on the order of the colors. I was going for a random distribution of colors – no real pattern except that light and dark colors are adjacent.
Once I decided and picked the colors, I bought paint samples in each of the colors.
You can see the exact list of colors I used at the bottom.
Time to paint:
- I used a brush to paint the narrow parts of the stripes
- I used a small foam roller to paint the rest of the stripe.

After about 30 minutes, I slowly peeled off the Painter’s tape at a 45-degree angle.

Step 5 – Tape Again
After a couple of hours, the paint had dried to the touch, I went in and taped off the remaining stripes in the same manner as before.
You want to make sure to use tape meant for freshly painted surfaces here.

Important – As you are taping these lines, you want to make sure there is an ever-so-slight overlap with the previous color because you don’t want to see white spaces between the lines.
Step 6 – Paint Again
I painted the rest of the stripes with a brush and a foam roller.

After about 30 minutes, I slowly took off the painter’s tape again.
And it is done!
Once the paint is completely dried – in a couple of days, you can use an eraser to erase any pencil lines that may be visible.
Colors Used in This Sunburst Accent Wall
All the paint used here is by Behr paint. I used the sample size pots and they were more than enough. I still have more than half the pots leftover.
- Celebration
- Nurturing
- Pine Brook
- Toucan
- Dragonfly
- Dash of Curry
- Minstrel Rose
Of course, these aren’t “rainbow” colors. I used my daughter’s bedspread to match these colors. But you can use literally any color scheme you like – even rainbow paint colors!

That is it!
The rainbow corner accent wall adds an unexpected and beautiful colorful punch to the room.

I can actually see this in more neutral colors in a living area. It would look amazing!
You may also like:
- How to Build a DIY Twin Bed Frame and Headboard
- How to Build a Trundle Bed (Detailed Plans and Video)
Related Posts
Anika's goal is to inspire and empower beginners with woodworking, DIY, home improvement, and home decor ideas.
She wants everyone to unlock their creative potential and experience the feeling that comes with making something. Nothing feels better better than seeing something and saying "I can make that!"


This is awesome. I love the colours!