Painting a DIY Board and Batten Wall | Master Bedroom Makeover
I gave my master bedroom a quick but powerful makeover with a simple DIY board and batten wall. I am sharing the before and after, plus all the tips you need to know to easily and quickly paint your room including the accent wall!

This makeover has been a long time in the making…
When we moved into the house, 2.5 years ago, we barely gave any attention to the master bedroom.
We did the basic essential things- ripped out the old carpet, refinished the floors, changed the baseboards and painted the walls. That is it!
Even the paint color, I was going for a calm gray but it ended up being kinda purple-blue-gray which wasn’t a bad color but not the color I was going for in the room.

But not wanting to spend more money or time on painting + tired of sleeping in the guest room, we just called it DONE.
When Wagner reached out to me about a room makeover, I knew it was finally time!
Last year, I had a mock-up made of what my dream bedroom would look like.
It was time to put that into motion. But if you know me, everything had to be DIY!
**This post is sponsored by Wagner. Thank you for supporting my favorite brands that make it possible to bring you all the projects.**
Why board and batten wall?
Honestly, I didn’t start out with a board and batten wall in mind.
I wanted to make a fun wood accent wall to be a focal point of the room.
You know they are all the rage right now!! Plus I have wanted to do one for a long long time.
But I ultimately decided to go with a simple good old board and batten.
Reason # 1 – The more I thought about the pattern I wanted to make (I came up with some really fun patterns) – the more I got worried it was too busy for the small room.
Reason #2 – I hoped that the full wall board and batten wall will help make the room look taller.
Reason #3 – Although this was not really a deciding factor – it is super simple and quick to make. There are no angles involved and you need basic tools.

Room makeover with a board and batten accent wall
This is a great weekend makeover project!
How long did it take to make and paint the wall?
Once I decided the wall behind the bed was going to be a board and batten wall and made all the calculations, putting the entire thing up took about 3-4 hours.
Painting it all took another couple of hours for 2 coats. So, in under 2 days, I was done!
Materials needed –
- 1×4 or 1×3 boards. I used pre-primed 1×4 boards because they are easy to paint.
- Stud finder
- Box Beam Level (at least 24″)
- Miter Saw or hand saw and miter box
- Brad nailer or nail gun
- 2″ brad nails
- Construction adhesive (if needed)
- Painter’s Tape
- Pre-taped painter’s plastic (I am team green but this is life-changing!)
- Wagner FLEXiO 3000 paint sprayer
- Wagner SMART Roller
- Caulk, Caulk gun and wood filler
- Fine sanding sponge
- Drop cloths
- Paint colors of your choice – I used Brooklyn by Behr and Repose Gray by Sherwin Williams
Installing a board and batten wall
You will not believe how easy it is!
Step 1 – Calculate everything
Using a stud finder, find and mark the studs and calculate the spacing and lengths of your boards.
I calculated it so that all my boards fall on the studs and I don’t have to worry about using construction adhesive.
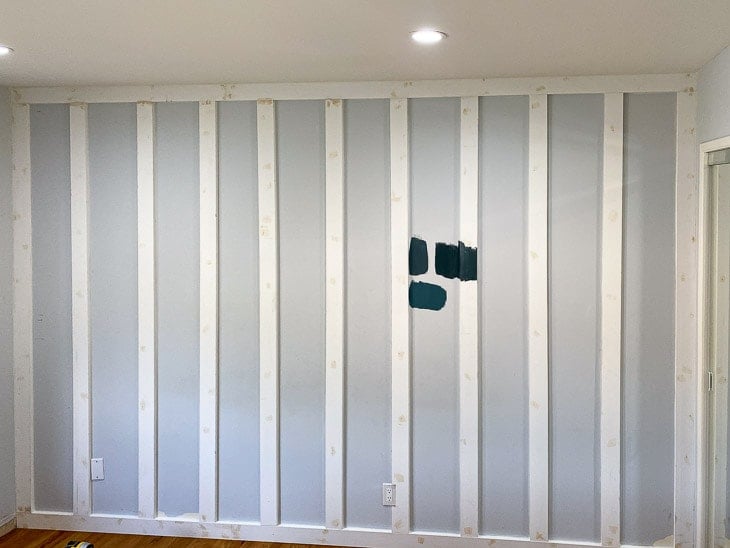
Step 2 – Install the boards.
Using a level, make sure all the boards are straight and install them. If the boards fall on studs as mine did, just attach using 2″ brad nails. If they don’t fall on studs, use construction adhesive to attach to the wall.

Step 3 – Caulk and patch
Fill all the nail holes with wood filler and apply caulk to the seams where the wall meets the boards to give it a finished look.
Once the wood filler has dried, sand using a fine sanding sponge. Make sure to sand the entire board as this gives a great smooth finish to the boards – which means a silky smooth accent wall in the end.
How to paint a board and batten wall
To paint the board and batten accent wall, I decided to break out my Wagner FLEXiO paint sprayer.
I had used it to paint my shed in the summer and I was very impressed with low overspray and quality of finish.
Why use a paint sprayer?
You could totally use a brush and roller to paint the board and batten accent wall but 2 reasons why I decided to use the paint sprayer instead –
- It is super fast! It took me about 20 minutes to prep + 20 minutes for each coat. Therefore – in about an hour’s worth of active work – I was done with 2 coats.
- It gives a silky smooth finish which is you just can’t achieve with a brush or roller!

Step 1 – Prep the room
This is the most important part.
- Cover all the furniture with a drop cloth. Even though you don’t get an overspray or wet paint on it, there is a fine “dust” of paint that falls everywhere.
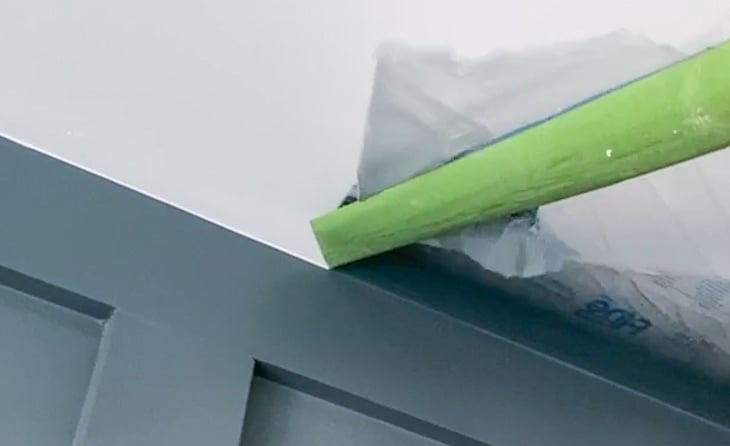
- Tape all around the accent wall using painter’s tape. This is the most critical part. Be sure to align the tape precisely with the edges of the accent wall.

- Apply the pre-taped painter’s plastic over the painter’s tape.
- I don’t recommend using this directly in place of painter’s tape because from experience, it can get really hard to manage. If the plastic sticks to the tape by accident, it rips and then you have a mess. By taping it over the painter’s tape – you don’t have to worry about precision in getting it straight and clean – as long as it overlaps the painter’s tape.

- Extend the painter’s plastic out and tape it to the wall with painter’s tape.

Step 2 – Paint!
- Load up the FLEXiO paint sprayer with paint. The best part of this paint sprayer is that there is no thinning required.
- Make sure that the nozzle is set to make a horizontal paint pattern.
- Start painting in long even strokes – up and down – be sure to move your entire body and arm up and down and not just the wrist.
- Make sure to spray at an angle to get all the sides of the boards.
- After the first coat, the paint was very uniform and I debated on a second coat but I discovered there were areas around the edges – especially where I first started that had non-uniform spray. The second coat of paint fixed that and I think also made the color richer.

Important – to avoid drips, keep moving and never stay in one spot for more than a fraction of a second.
Like I said – I was very impressed with low overspray from the paint sprayer.

Step 3 – Clean up
Once the 2 coats are done, while the paint is wet, pull off all the painter’s plastic and tape carefully.
I only had one spot on the ceiling that had a little bit of paint from the plastic getting ripped – nothing a small touch up couldn’t fix. But other than that it was nice and clean!
Painting the rest of the room
To paint the rest of the room, I used the Wagner Smart Roller.

It is almost like a water gun but for paint. It holds paint in the handle and saturates the roller as you push the trigger – reducing the number of times you have to go back and forth to the paint tray.
In fact, I didn’t even use a paint tray – You can simply pull the paint into the roller from the can!
For a tiny room like mine – it only took one refill to completely paint one coat.
And here it is you guys!
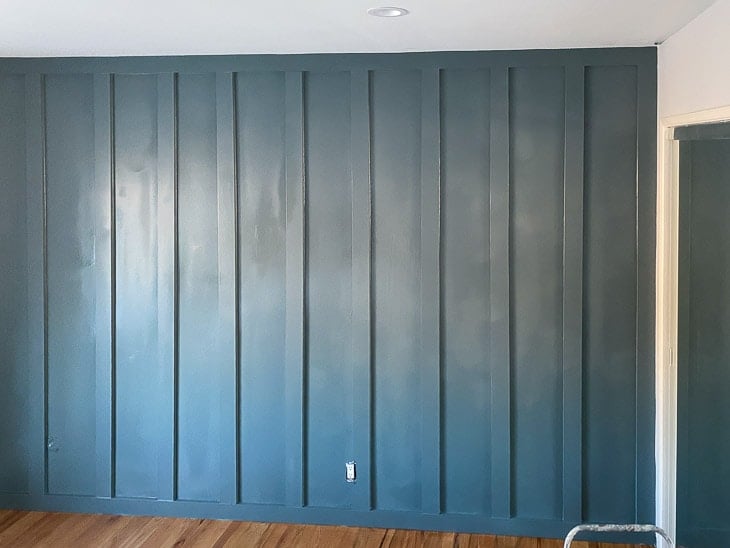
All painted and ready to be put back together! The uneven shine you see is from the wet paint.
I added a few new updates to the room like the headboard, some lighting and a couple of nightstands.
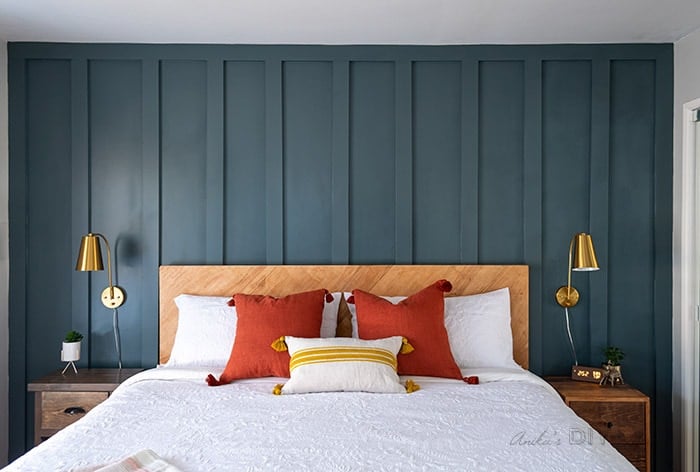
I am not done with the room yet but for now – need to add art a few more touches but we have come a long way!
Be sure to follow me on Instagram to keep up with all the projects I am working on and to see this room develop in realtime!
And because who doesn’t love a good before and after comparison, here it is –

Sources –
- DIY plywood headboard – Tutorial coming soon
- DIY nightstand with hidden storage
- DIY simple 2-drawer nightstand
- Plug-in wall sconce
- Wooden digital clock.
- Brass planter on nightstand
- Comforter set
- Terracotta Tassel Pillow Cover
- Yellow Stripe Tassel Pillow Cover
- Pillow inserts
Anika's goal is to inspire and empower beginners with woodworking, DIY, home improvement, and home decor ideas.
She wants everyone to unlock their creative potential and experience the feeling that comes with making something. Nothing feels better better than seeing something and saying "I can make that!"


I love board and batten! Extended all the way to the ceiling like that makes quite a statement. And the dark color is amazing!! It looks great and I can’t wait to see that headboard!!
Such a great idea. I think I’m going to actually do this in my living room behind my sofa. Thanks for all the info and details. By the way, I love the color. What is it?
Hi Cindy, the color is Brooklyn by Behr Paints. I think it will look amazing in a living room. I am working on a much more detailed tutorial on the actual making of the wall coming next week. So stay tuned for that!
Looks awesome Anika! 😍👌🏻👍🏻👊🏻
Good afternoon, great article! I really liked your advice, this is what I was looking for. I really wanted to update my room, for a very long time I did not make repairs and in my life I want something new and fresh, but I constantly do not have enough time to make repairs completely, your post inspired me. The color of the paint is just awesome, I tried to find a similar one, you did a wonderful job. Have a nice day!
Anika this is so beautiful! I’ve been wanting to do something like this in my Yoga room. Question, did you remove the baseboards? I can’t tell from the pics if the baseboard matches all the way around the room.
Thanks, Janice! I did remove the baseboards. Actually I just published a post this morning on details of the installation and it explains all the details about the baseboards – https://www.anikasdiylife.com/diy-board-and-batten-wall/