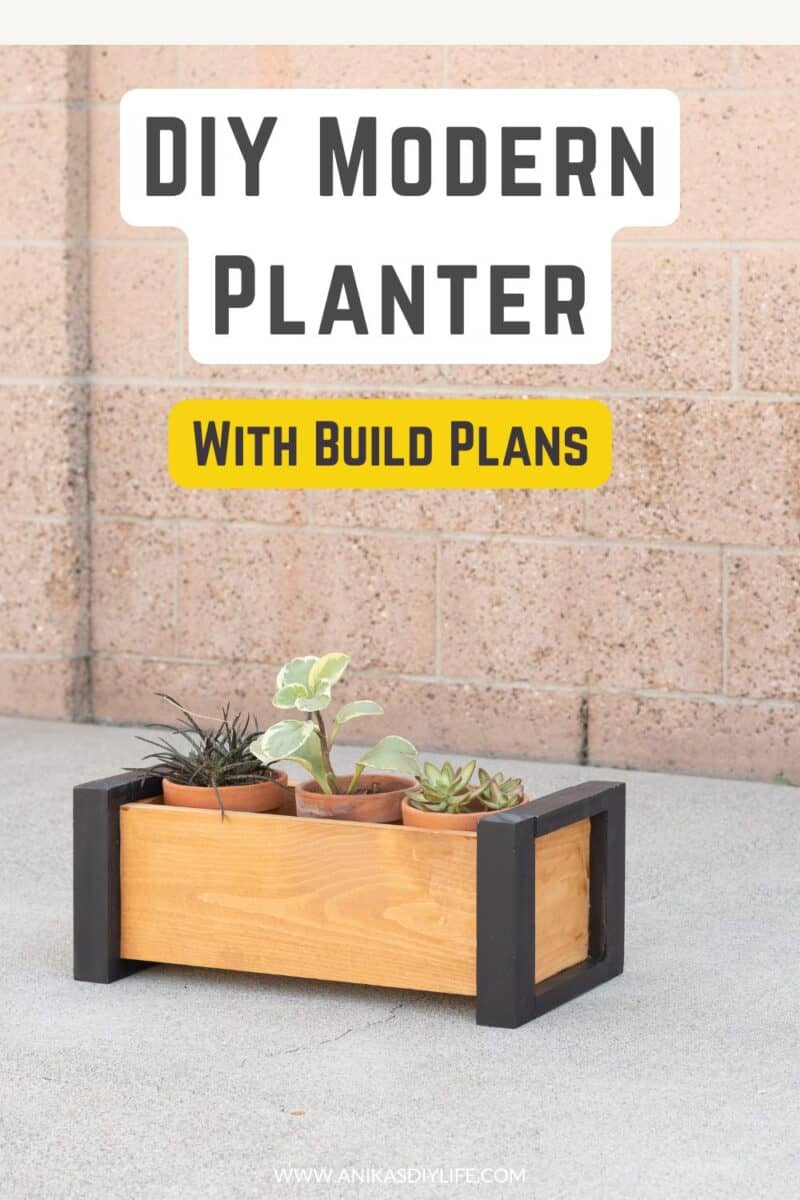
How to Build a DIY Modern Tabletop Planter
Learn how to build a simple DIY modern tabletop planter using basic tools. This beginner-friendly project is perfect as a centerpiece or an indoor planter!
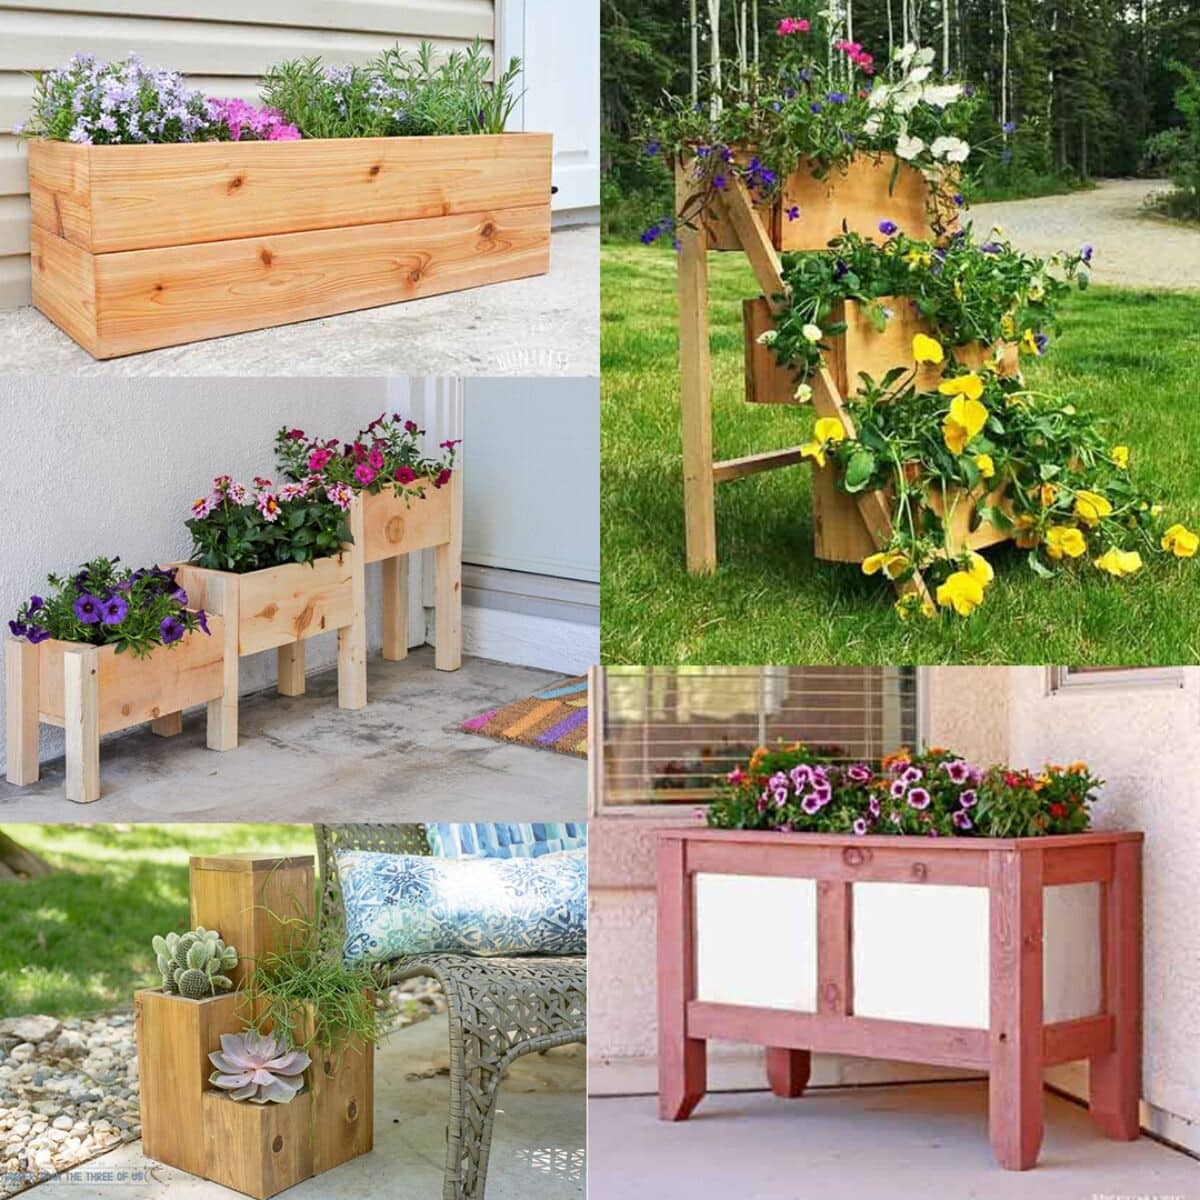
Last year, I designed and built three different modern planter boxes. (If you missed them, I’ve linked them at the bottom of this post.) But guess what? I also designed a fourth one!
That one was exclusive to the Build With Me event—an interactive experience where you sign up to receive all the project details and then join me live on a virtual call to build it together. I’ve hosted a few of these sessions now, and they’ve been so much fun. If you want to be part of the next one, make sure to sign up here to get notified.
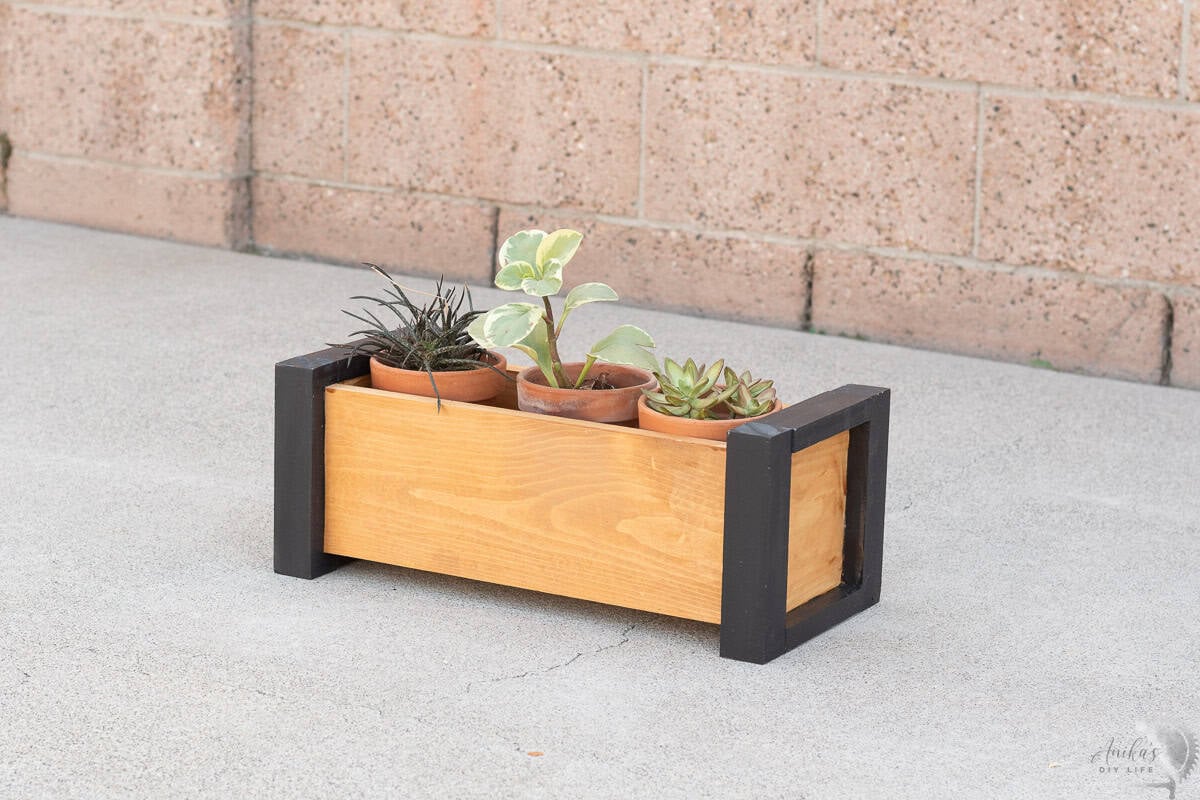
This modern planter was a huge hit!
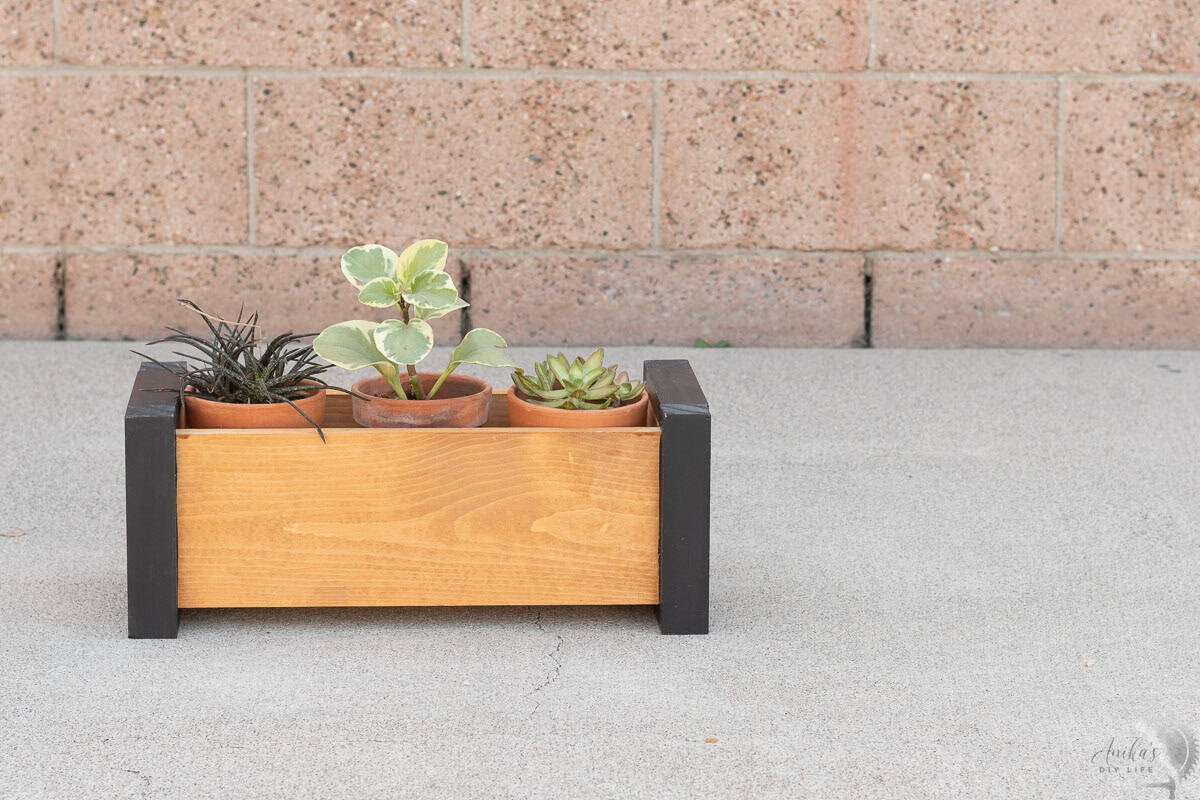
It’s simple, sleek, and comes together with just a few basic tools, making it perfect for beginners or anyone looking for a quick day project.
And now, I’m finally sharing the full tutorial so you can make your own! Whether you fill it with succulents, herbs, or seasonal decor, this DIY planter is a great addition to any space.
Detailed Video Tutorial
I’ve put together a detailed video showing you exactly how to build this planter. As always, the full written tutorial and printable plans are below.
***This post contains referral or affiliate links. It is a way for this site to earn advertising fees by advertising or linking to certain products and/or services. Please read my full disclosure here ***
Material Needed
- Lumber per the plans
- Wood glue If you intend to use this planter outdoors, be sure to use outdoor wood glue.
- 1¼” pocket hole screws . If using this outdoors, be sure to use the outdoor versions.
- 1¼” finish nails (optional – see step 4 below)
- Clamps – I like F-style clamps. 18″ or 24″ are great options to have.
- Stain or paint in the color of your choice. I used this one for the boxes and black paint for the frame.
Tools Needed
- Pocket Hole Jig (I used the Kreg 720. See which one is right for you).
- Miter Saw
- Power Drill/Driver
- 18-gauge brad nailer (optional – see step 4 below)
How to Build the Planter
The planter uses 1×6 boards for the box and 2×2 + 1×2 boards for the leg frame.
Pro tip: You can buy 2×2 boards off the shelf or rip down 2x4s to save on cost.
Step 1: Prepare Boards
- Cut all the boards according to the cut list.
- Sand everything down, ideally step-by-step through the grits. I used select pine, so I only needed 220-grit. See how to sand wood using the right sandpaper sequence here.
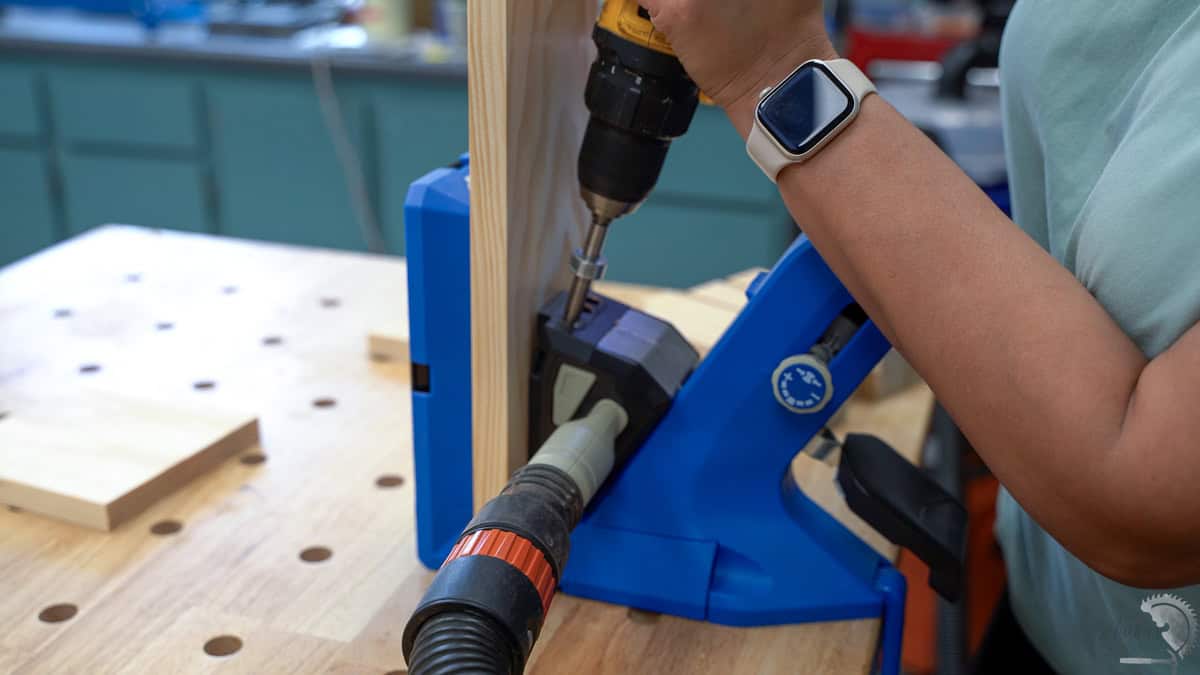
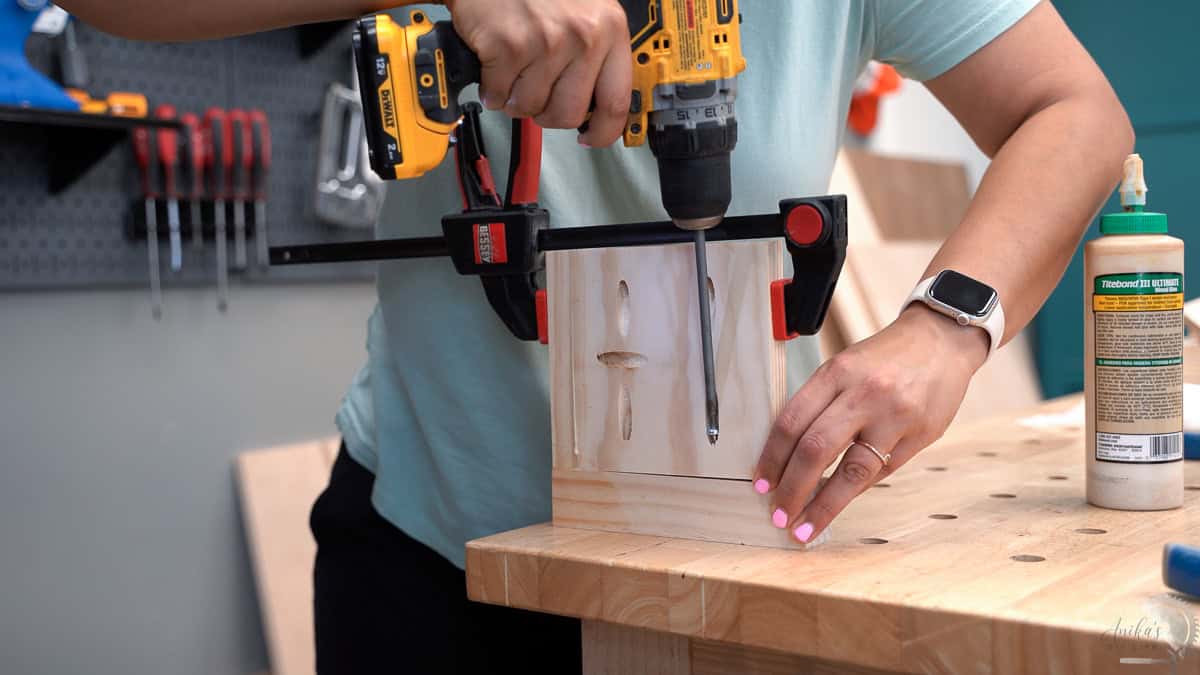
- Make the pocket holes. There are quite a few pocket holes – on all the sides of the planter box as well as on a set of the 1×2 pieces.
The pocket holes are made with the jig and depth collar set to 3/4″. New to pocket holes? Start here.
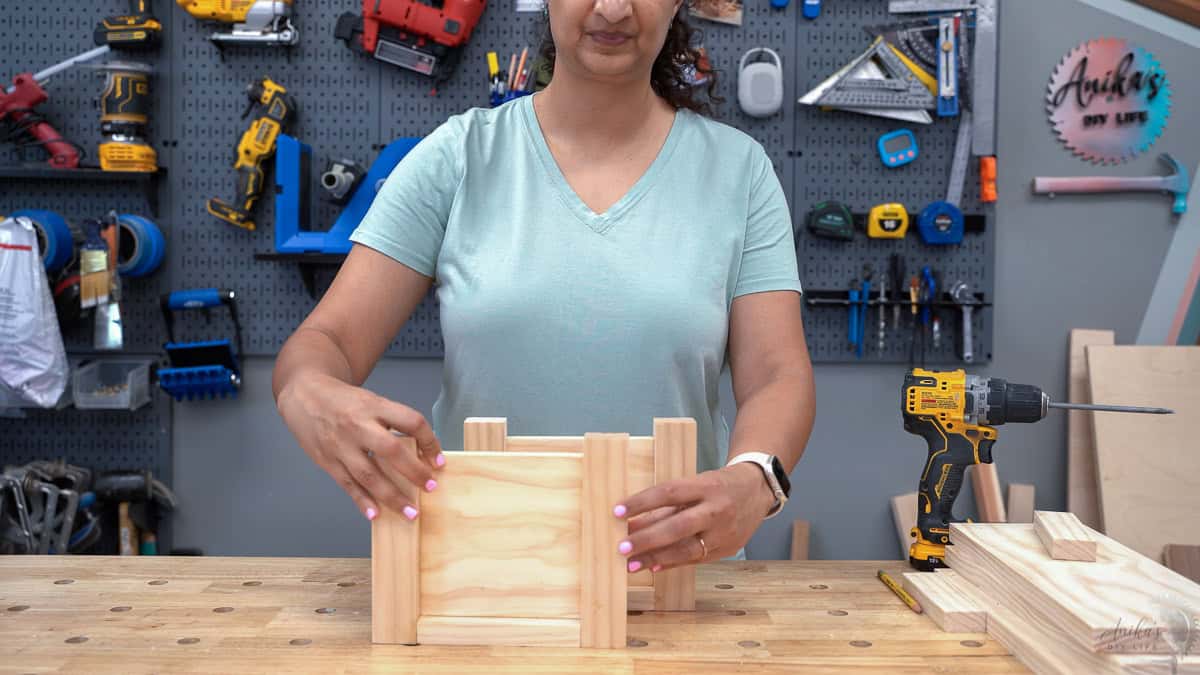
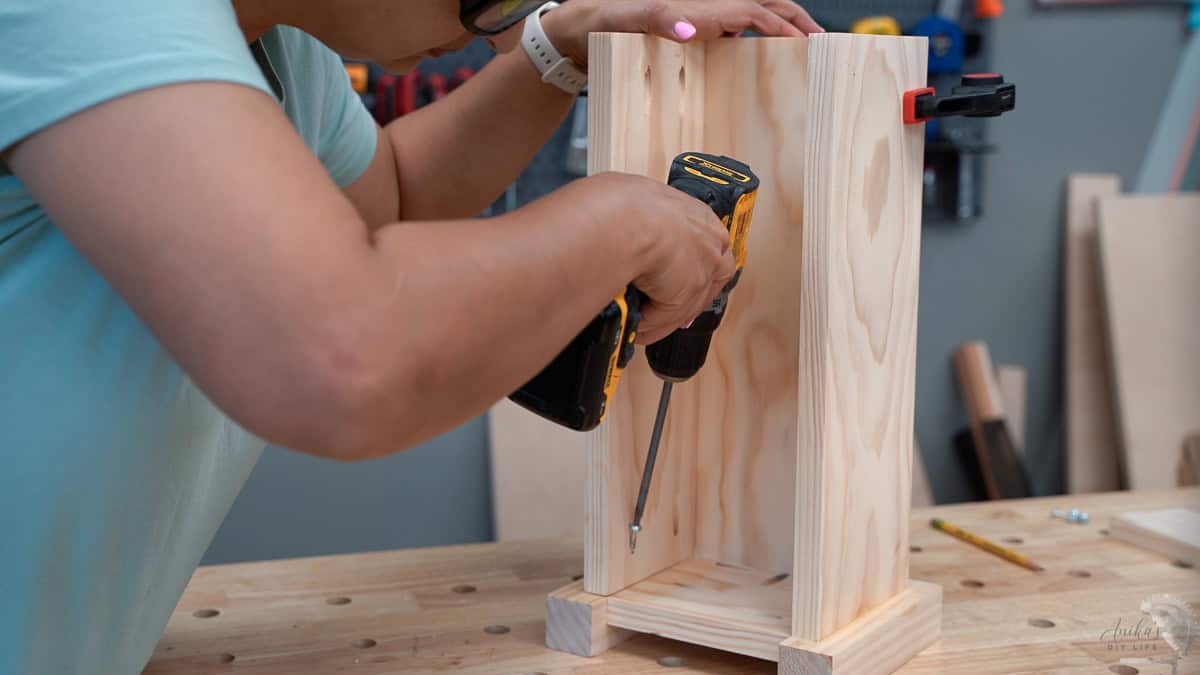
Step 2: Build the end panels
Designing this part was tricky! It took me a few iterations to figure out how to wrap the legs cleanly around the box. I finally landed on the simplest way to attach everything.
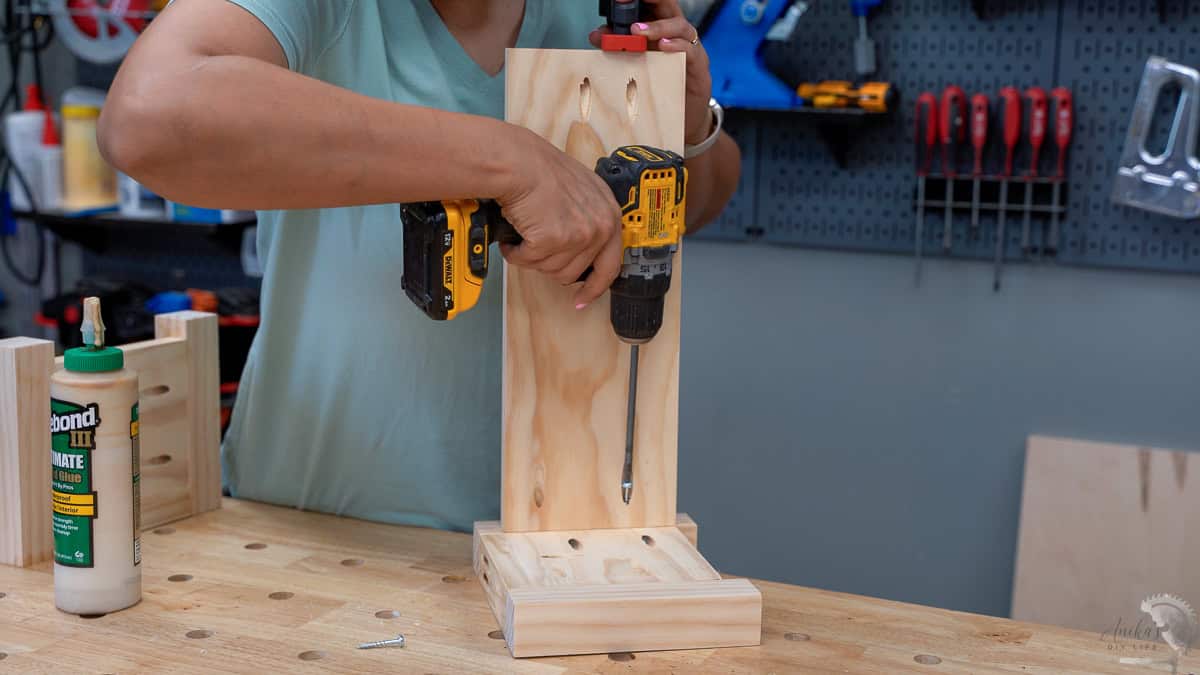
- Attach the 1×2 and 2×2 boards together using wood glue and 1¼” pocket hole screws.
- Add the 1×6 end board to the leg frame.
- Attach the second 2×2 to complete one end panel.
- Repeat to build the second end.
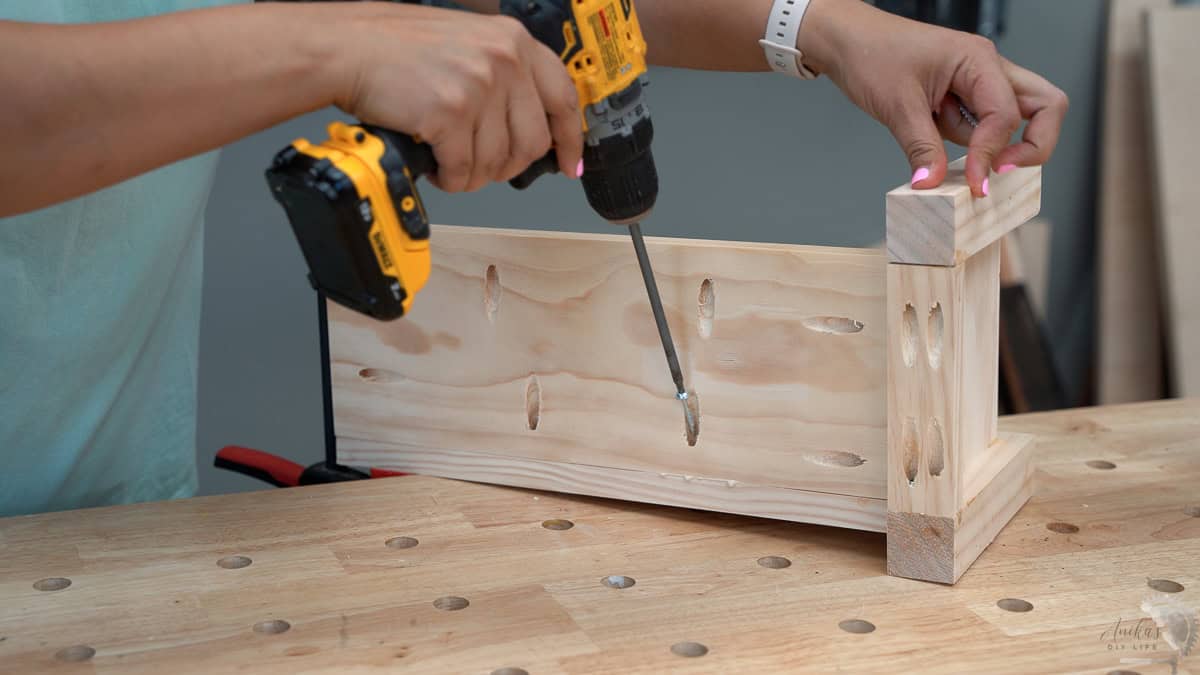
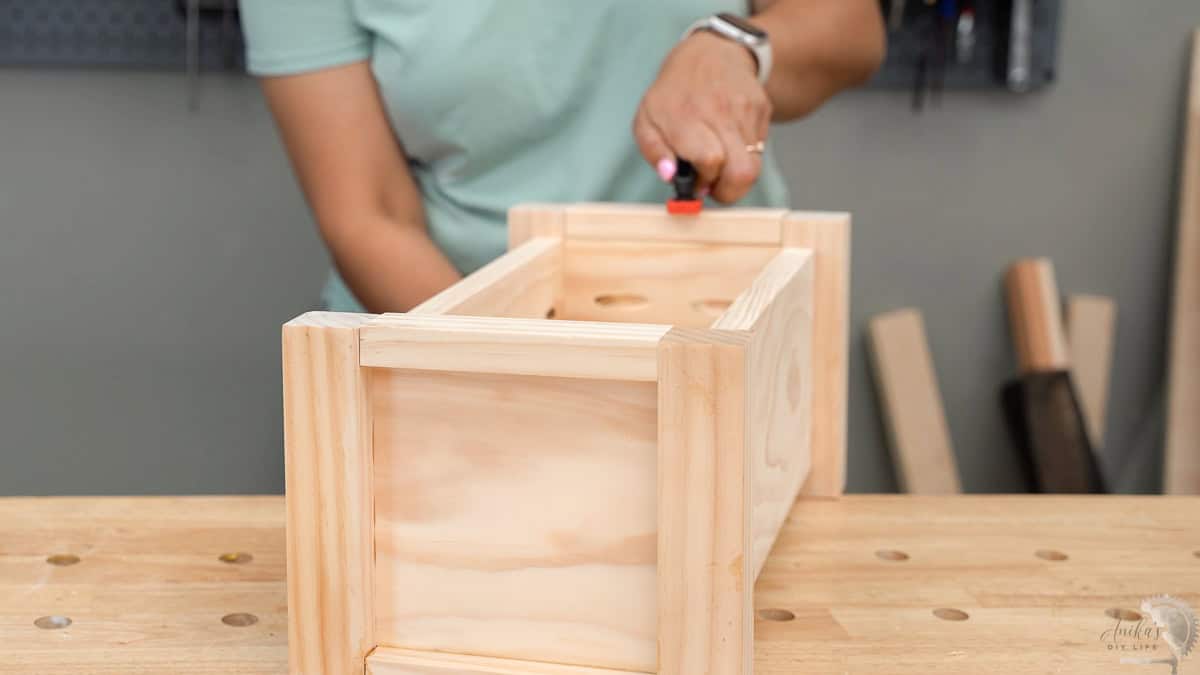
Step 3: Assemble the box
With the ends attached, all we need to do is add in the long sides and bottom to complete the box.
- Start by attaching one of the sides to the end using pocket hole screws and wood glue. The pocket holes are facing inside, and an F-style clamp is the best way to keep everything in place as you attach.
Important – Pay attention to the alignment of the board with respect to the bottom 1×2 and the 2×2.
- Attach the bottom with the pocket holes facing outside. The pocket holes go into the side as well as the end. All of these pocket holes will be hidden underneath the planter.
- Attach the third side to the bottom and the end using pocket hole screws and wood glue.
- Attach the other end piece by adding pocket holes through the bottom and into the ends.
Note: I was able to use my drill and get inside the box to add the screws but if you find it tight, you can use a right angle drill adapter.
Step 4: Add the top trim
The planter box is basically complete, and the last thing left is the top trim. There are two ways you can attach this –
- Add wood glue and use a nail gun to attach. This would have the nail heads visible on the top, but will finish up the planter instantly.
- Add wood glue, clamp, and allow to dry overnight. While this is a longer process, it makes for a clean look on top. This is the option I chose.
Step 5: Apply the finish
Clean up any glue residues and apply the finish of your choice.
Here is how I finished the project:
- I applied pre-stain conditioner and light brown stain to the main body. I didn’t worry too much about the stain getting on the legs because they would be covered in black paint later.
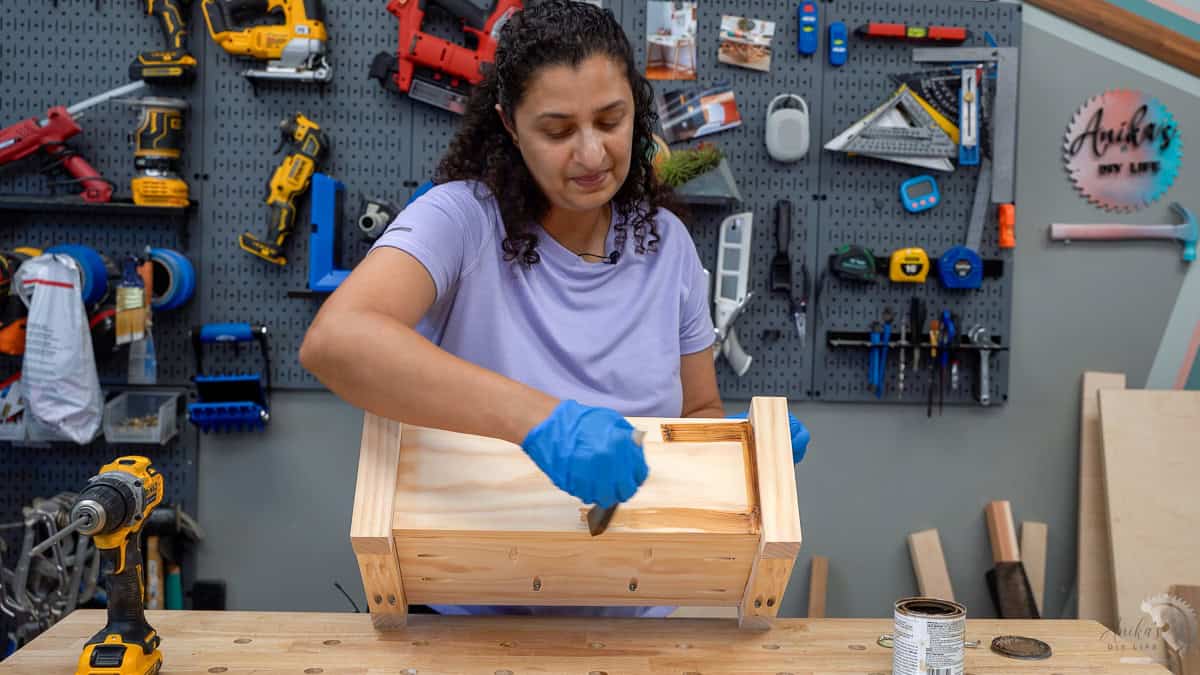
- Once the stain was dry, I taped off the planter box and painted the legs and trim black with latex trim paint.
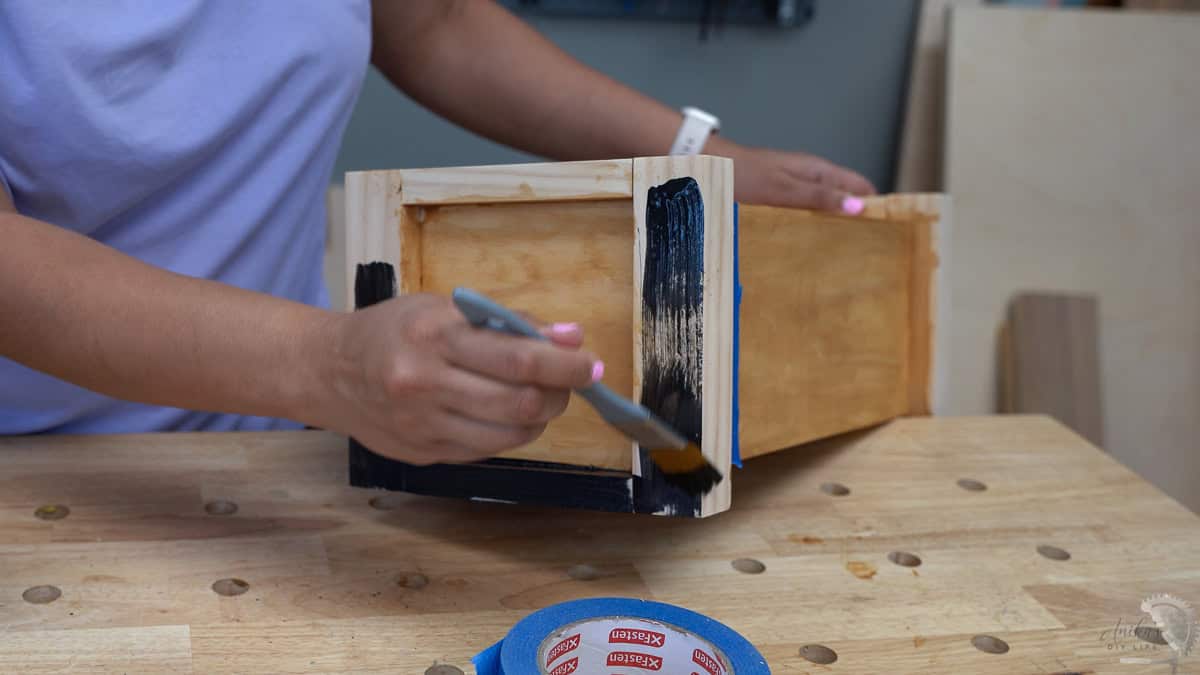
Since I used deck stain and trim paint (both with protective qualities) and this planter is staying indoors, I didn’t apply a top coat. But if you’re placing it outdoors, finish with a few coats of Spar Urethane. See my guide on top coats here.
I plan to place a few pots in it, but if you want to plant directly in the planter, you can make drainage holes and staple landscape fabric inside.
And that is it!

This project took me about three hours total—including filming and photography (which always slows things down!).
During the Build With Me session, we completed it in about 90 minutes.
Without the extra setup, this is a project you could easily finish in an hour.
With just a few boards, some basic tools, and a little bit of time, we have a beautiful piece that looks right at home on a dining table, windowsill, or patio.
More Modern Planter Projects


You might also like:


Anika's goal is to inspire and empower beginners with woodworking, DIY, home improvement, and home decor ideas.
She wants everyone to unlock their creative potential and experience the feeling that comes with making something. Nothing feels better better than seeing something and saying "I can make that!"