How to Build a Sofa Table With Charging and Storage
Learn how to build a functional and stylish DIY sofa table with charging and storage (lots of storage!). This behind-the-sofa table DIY project includes full plans, tips, and a step-by-step guide.

If you’ve ever switched from traditional couches to a sectional, you probably know the struggle: no more space in the middle for a nightstand or end tables, and suddenly… nowhere to charge your phone, store remotes, or set down your coffee. That was exactly our dilemma.
We used to have a 3-seater and a 2-seater with the charging nightstand in between. It had all of our chargers, a drawer for the remotes, and served as a spot to put down your drink. But once we upgraded to a sectional, all of that functionality disappeared.

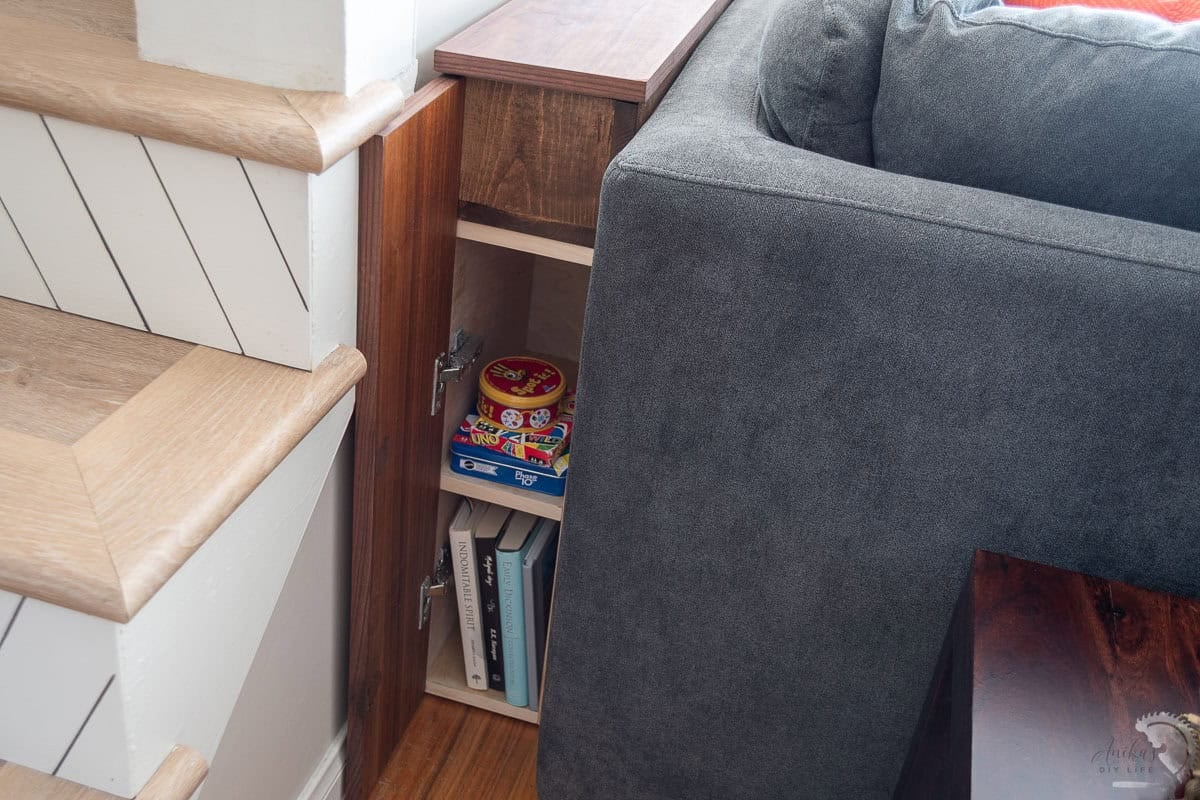
That’s why I built this custom behind-the-sofa table with charging ports, storage for remotes, a sleek walnut top, and even a custom side cabinet (because I will take all the storage we can get). It’s clean, modern, and packed with functionality.
***This post contains referral or affiliate links. It is a way for this site to earn advertising fees by advertising or linking to certain products and/or services. Please read my full disclosure here ***
Materials Needed
- Lumber per the plans
- 1×6 boards – long enough to match the length of your sofa
- Plywood
- 2×4 boards
- Wood glue
- 1 1/4″ brad nails
- 2″ wood screws
- 2 1/2″ wood screws
- Clamps (especially right-angle)
- right-angle attachment
- Full overlay frameless hinges
- Reusable plastic shims
- Stain or paint in the color of your choice (I used Dark Walnut with Pre-stain wood conditioner)
- Boiled linseed oil (for walnut)
- Clear top coat or polyurethane.
- Edge banding depending on type of plywood. I used walnut and birch.
- Recessed power strips
Tools Needed
How to Build the Behind-The-Sofa Table
As always, I have a detailed video showing how to build it. The step-by-step written tutorial follows below.
Step 1 : Measure and Cut the Boards
- Measure the length and height of your sofa. The height should be such that the top doors on the table are just above the back.
- Cut (3) 1×6 boards to the same length as your sofa. Mine was about 103″. The details are in the plans.
- Cut smaller pieces for vertical dividers inside the table.

Tip: Use a stop block on your miter saw for consistent cuts on the dividers.
Step 2: Mark and Cut Outlet Openings
- Decide where the power strips will go. I distributed them based on the distance from the power outlet on my wall.
- Measure and mark the cutouts for each outlet.
- Cut using a jigsaw, allowing an extra ⅛” around each outlet for easy fit.

- Cut a wire pass-through hole in the sides using a router or jigsaw. I forgot to do this and had to make the openings after staining and finishing using a router with a straight cut bit.
Step 3: Sand and Prep the Boards
- Sand all visible boards (base and sides) down to 220 grit. See all about how to sand wood for the best finish.
Step 4: Assemble the Main Table Box
- Mark divider positions on the base board.
- Use wood glue, clamps, and brad nails to attach dividers at right angles.

- Attach the side boards to form a box.

Tip: Right-angle clamps make this process easier and more precise. I used these clamps that I recently discovered and they definitely made it easy to hold the boards in place to attach.
Step 5: Stain and Seal the Table Box
This is a great time to stain or paint and seal the table box. I decided to go with dark walnut stain because I was going to be using walnut plywood for the top. Be sure to apply pre-stain conditioner.

See more about how to stain wood.
- Once the stain is dry, apply a couple of coats of top coat. I used this top coat. See more about the best top coat to use.
Step 6: Build and Prep the Cabinet & Doors
- Cut plywood for the side cabinet and all doors.
I used walnut plywood for visible doors and birch for the cabinet box. I was able to use up “scrap” cut-offs left over from other projects for both the walnut and birch plywood. Win-win!

- Apply edge banding to the front-facing edges of the cabinet and all the sides of the doors. See how to cover plywood edges.
- Assemble the side cabinet with wood glue and brad nails.

Step 7: Install the Doors
- Make the holes for the hinges using a hinge jig.
- Apply boiled linseed oil to the walnut doors before installing the hinges
- Use spacers to align doors and attach hinges. See the video for details on how to get the best alignment.

- Install and attach the power strips in the cutouts.

Tip: A right-angle drill adapter helps get into the tight spaces.
Step 8: Build the Support Frame
- Cut 2×4 boards and build support bases with wood glue and 2-1/2″screws. Be sure to predrill before adding the screws.

These will hold up the entire table behind the sofa. I made three stands so I could have them spaced evenly across the table length. You may need more or less, depending on the length of your table.
Step 9: Final Assembly
- Position the support bases evenly along the length of the sofa and place the table and cabinet on top.
- Screw the table to the supports from underneath using 2″ screws.

- Attach the side cabinet door.

- Plug everything in and push the sofa into place!
And that is it!

Grab the Plans
Want to build your own version? I’ve created detailed step-by-step plans and a complete supply list to help you make this project. Click on the button to get the plans.
It’s a pretty straightforward build and uses just a few tools. Now we have the perfect behind-the-sofa setup:
- Power outlets within reach
- Space for remotes and tech
- A beautiful walnut top to put down our drinks
- Extra hidden storage
All of this in a slim, modern table that adds function and style to our living room.
And the best part? You don’t need a fancy workshop or a massive tool collection to make it happen. Just a few basic tools, some thoughtful planning, and a little bit of patience, and you’ll have a custom piece you’ll use every single day.

You might also like:


Anika's goal is to inspire and empower beginners with woodworking, DIY, home improvement, and home decor ideas.
She wants everyone to unlock their creative potential and experience the feeling that comes with making something. Nothing feels better better than seeing something and saying "I can make that!"


