How to Cut Angles Greater Than 45 Degrees on a Miter Saw
Learn how to cut angles greater than 45 degrees on a miter saw with this simple technique. It can be easily set up on any miter saw.

A typical miter saw will let you adjust the miter and the bevel angle up to 45-degrees or 55-degrees.
What if you need a larger angle?
There can be situations where you may need to cut angles that are larger than 45 degrees, or larger than what your miter saw allows. For example:
- Trim installation along stairwells
- Transitions from baseboards to stairwells
- Crown molding in awkwardly shaped rooms.
- Furniture builds with really acute angles. Like this dining table leg or this Christmas Tree shelf.
Understanding Angle Cuts on a Miter Saw
When you set a miter saw angle, you are actually setting the angle at which you will be removing the material.
The remaining wood is the angle you are left with.
For example – if you make a cut at 20 degrees, you have 70 degrees left on your board.
If you have a situation where you need 30-degree angle to be left on the board, that would mean setting up your miter saw at a 60-degree angle.
This is something most miter saws are not capable of.

You can be tempted to think that you can simply flip the board and make a 30-degree cut – in which case you will still be left with 60 degrees on the board.
You would really need to set your saw at 60-degree to be able to get the cut you want. This is where the below method comes into play.
Video
Here is a video I shared on TikTok about how to make the cuts.
How to Set up a Quick Acute Angle Jig for a Miter Saw
If you are in the middle of a project, you can quickly get your cuts set up with the below technique.
***This post contains referral or affiliate links. It is a way for this site to earn advertising fees by advertising or linking to certain products and/or services. Please read my full disclosure here ***
What You Need
- A miter saw. A compound miter saw is even better because it makes it more versatile.
- Scrap wood at least 3.5″ wide – at least 18″ recommended – can be 1×4 or 2×4. Can be wider as well.
- Hot glue gun (trust me on this one.)
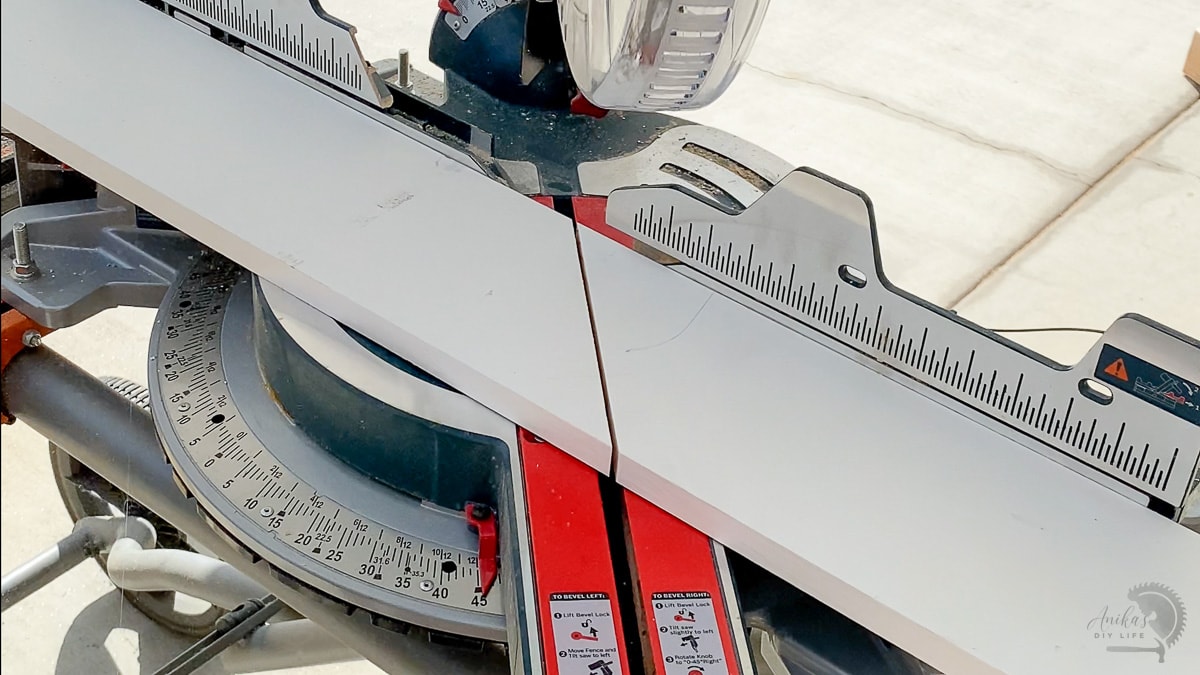
Step 1: Align saw
As always when starting to use the saw, make sure that the saw is aligned. See here for more details on how to do that.
Step 2: Attach scrap board
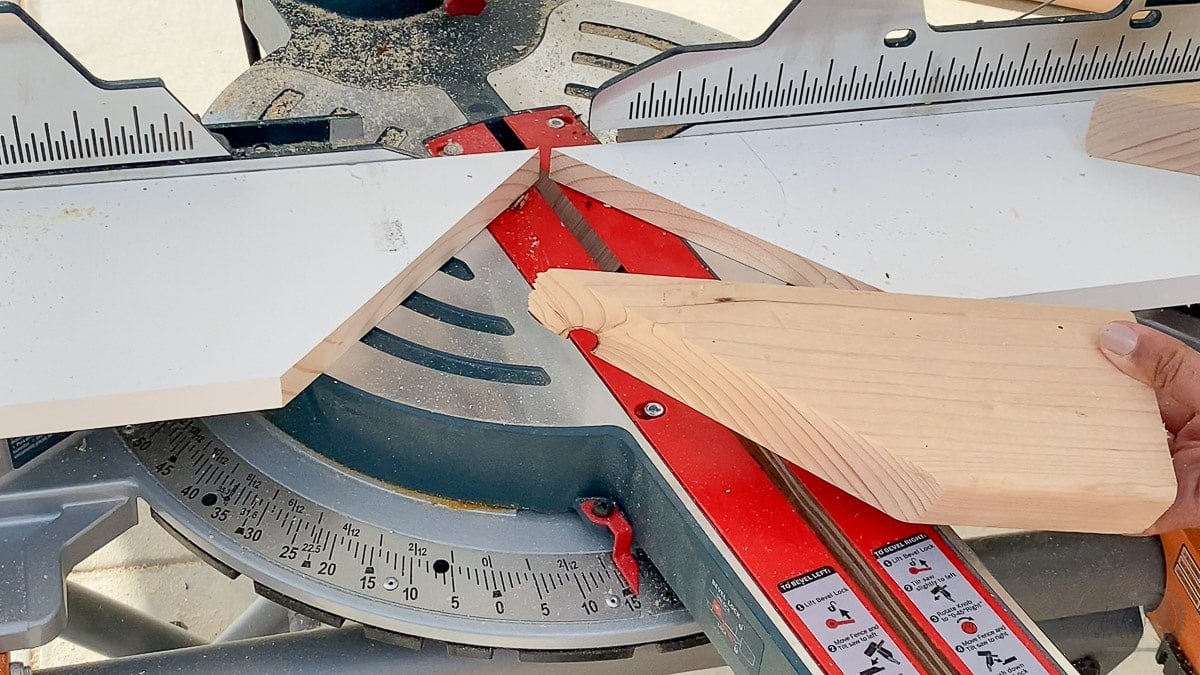
- Use hot glue and attach the scrap board to the miter saw aligned with the fence. The hot glue will come right off.

Some saws have spots that you can screw the board into which will work as well. But I have used hot glue with no problems. The glue peels right off of the metal on the saw.
Step 3: Make the cuts.
- Set the miter saw blade at 45-degree miter and make a miter cut.
- Set the saw blade at 45-degree in the opposite direction and make the 45-degree cut.
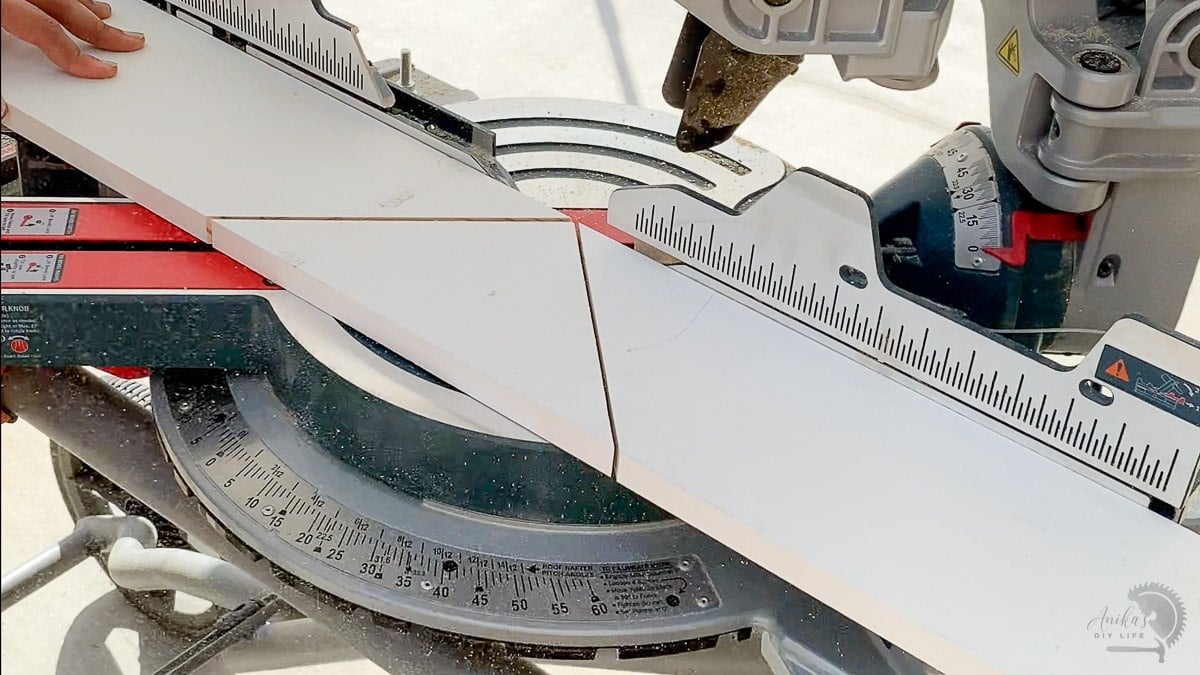
- Remove the cut out.
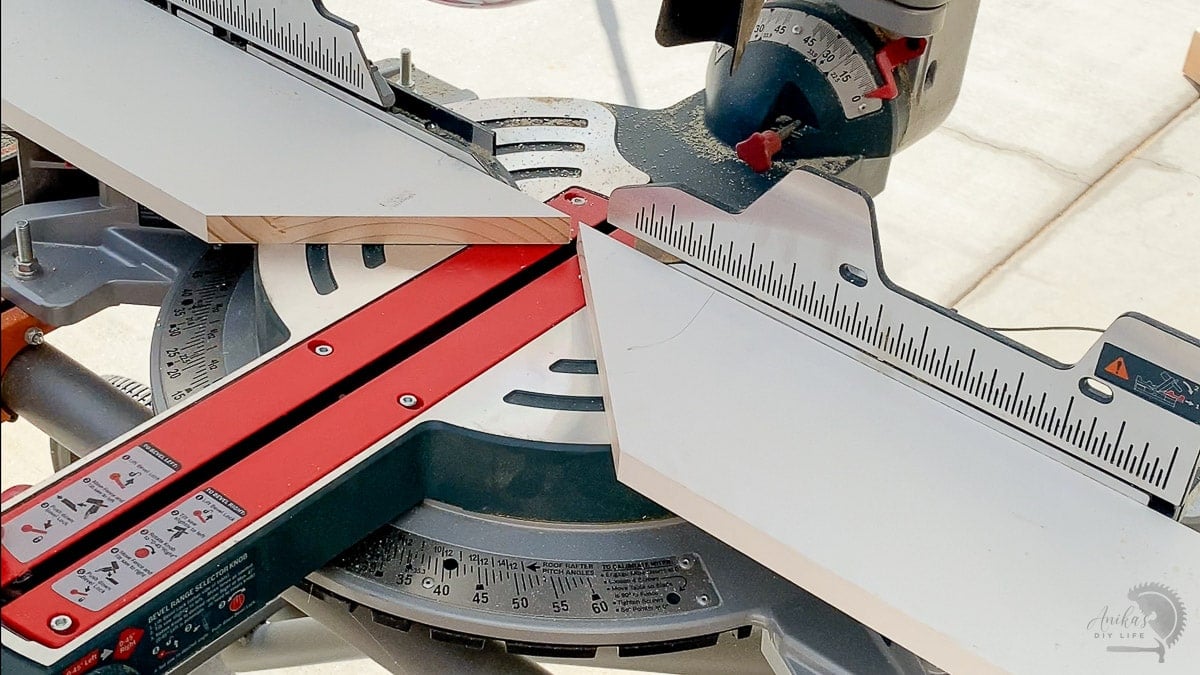
The jig is now ready to go.
The Trick to Cutting Large Angles on the Miter Saw
With the jig completed, the right angle cut or the 0-degree line is now a 45-degree angle.

Any angle you set your miter gauge will be 45 degrees plus that setting.
How to Make a 60-Degree Cut on a Miter Saw
To make a 60-degree cut, you need to set the saw at the 60-45 = 15-degree miter setting.
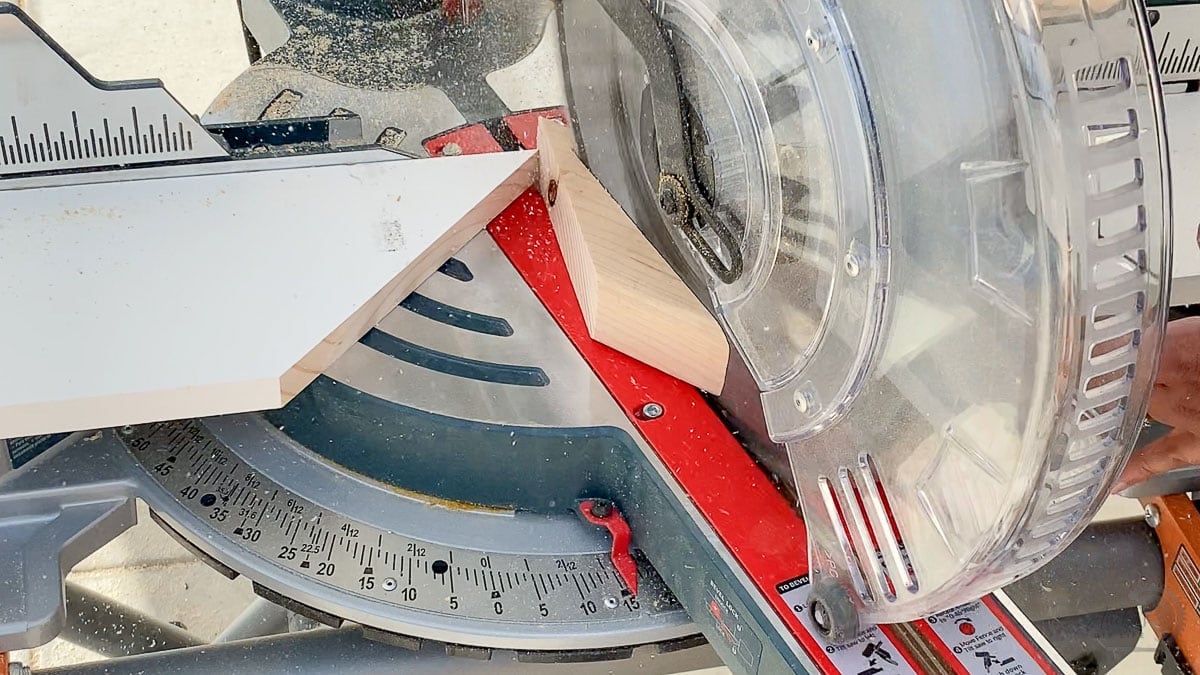
How to Make a 70-Degree Cut on a Miter Saw
To make a 70-degree cut, you need to set the saw at the 70-45 = 25-degree miter setting.
How to Make Large Angle Bevel Cuts
There may be cases where you might need a bevel cut at a large angle. This jig works perfectly for that as well.
Simply stand up the board during the cut. Ensure that the board is well supported and clamped while making the cut.

I used a large bevel angle on this Christmas tree shelf.
Summary
Once you make the jig like above, you can pretty much cut any angle between 45 degrees to 90 degrees by simply subtracting 45-degree from your required angle and setting the saw to the resulting angle. Although you will never need a jig to cut a 90-degree angle 😆.
This is a quick way to set up a single-use jig. However, if you are planning to make lots of cuts and projects, it might be beneficial to make a jig that you can use multiple times. Here is a great example and idea of a reusable acute angle jig.
Safety
Remember it is very important remember basic shop safety while making the cuts.
- Always use a pair of safety glasses, ear protection and airway protection. See the best hearing protection here.
- Ensure that the miter saw blade is aligned. See more about how to make accurate cuts with the miter saw.
- Make sure that for any cut you make – your hands stay at least 6″ away from the blade and the edge of the wood.
- Do not remove the blade guard.
- Support and clamp your workpiece.
How to Cut Acute Angles Without a Miter Saw
In case you do not have a miter saw, or aren’t comfortable using it, an alternate method is to cut using a speed square and a circular saw.
- Mark the angle you need to cut using a speed square. See more about how to measure angles with a speed square.
- Align a straight edge to guide the circular saw against a known straight edge board or a ruler work for this.
- Push the circular saw along with the guide and make the cut.
You might also like:
Anika's goal is to inspire and empower beginners with woodworking, DIY, home improvement, and home decor ideas.
She wants everyone to unlock their creative potential and experience the feeling that comes with making something. Nothing feels better better than seeing something and saying "I can make that!"


Fantastica spiegazione, ma qui in Italia ti devi arrangiare e imparare da solo. Trovo i tuoi insegnamenti stupendi e ti dico grazie.
This is a great idea! I will most likely laminate the “Reader’s Digest” version of this and hang it by my miter saw. I can see this coming in quite handy! Thanks for the great information!