DIY Ring Toss Game
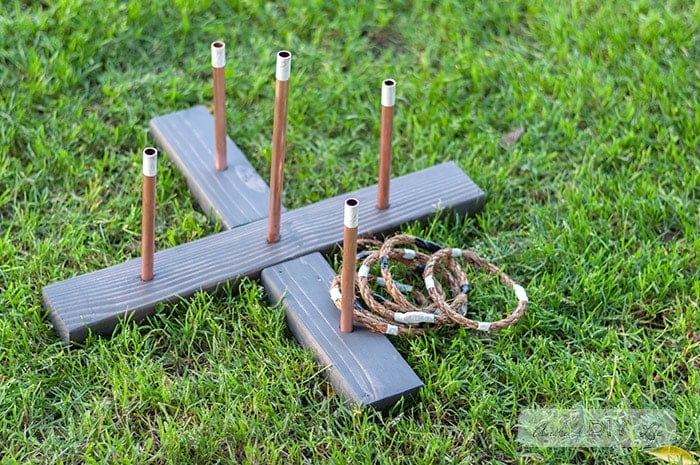
Learn how to make a simple DIY ring toss game with step by step tutorial, printable instructions, and video. This classy take on the traditional carnival game is also easy to dismantle and store away when not in use.
You will also like 24 amazing 2×4 project ideas and simple scrap wood projects
With summer coming up, we need to find fun ways to keep busy…
Especially for those long summer evenings!
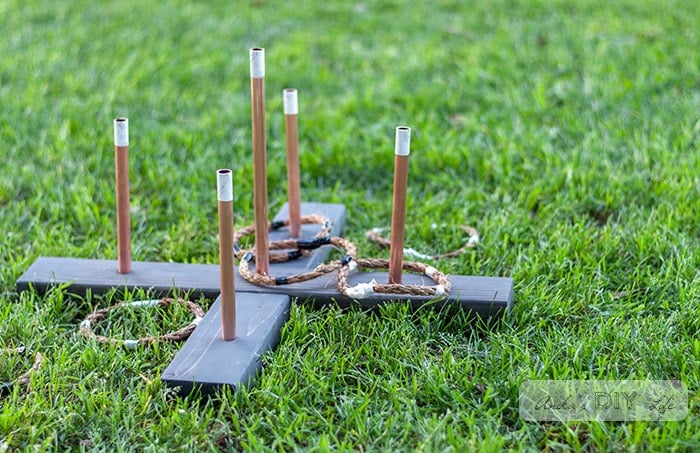
This DIY ring toss game is perfect for that!
Or for any outdoor party really.
Isn’t that the best part of long summer evenings – hanging out in the backyard and playing games.
I whipped up this traditional carnival game in a couple of hours and it is already a great hit with the kids!
The best part?
When you are done with it, you can simply dismantle it and put in a box!
It takes up barely any space when it is not in use!
Speaking of games, I am partnering with 12 other bloggers to bring you DIY game ideas to keep everyone busy indoors or outdoors. Be sure to take a look at them all at the end of the post. There are some amazing ideas!
DIY Ring Toss Game
***This post contains affiliate or referral links. It is a way for this site to earn advertising fees by advertising or linking to certain products and/or services. Please read my full disclosure here ***
Materials to Make a Ring Toss Game
- 2×4 boards (total 2 @ 2′ long)
- Table saw or circular saw
- ½” copper pipe ( total 4′)
- 5/8″ drill bit
- Tube cutter
- Marble contact paper (optional)
- Manilla rope
- Electrical tape in multiple colors of your choice.
- Stain or paint of your choice (I used Carbon Gray)
Before we get started, make sure to follow me on Instagram, Facebook, YouTube, and Pinterest to keep up with all my latest builds and projects!
Shop My T-Shirt Designs –
Ring Toss Game Printable Instructions
I have the full printable instructions available for you so you can get the instructions in your email, print it out and take it to your workshop to build it. Click on the button below to grab them!
Video Tutorial for the DIY Ring Toss
Below is a full video tutorial showing how I made this easy DIY game. Step by step instructions and details follow.
Step by Step Tutorial for the Ring Toss Game
I used half lap joints on 2×4 boards to create the base. However, if you want to keep it simple, you could also use 1×4 boards and join shorter pieces using glue and nails to create the “half lap” look.
Step 1: Create Half Lap Joints
Make half lap joints using a table saw in the center of each 2×4 board.
I show you all the details on how to measure, mark and make the cuts in the video.
If you don’t have a table saw, you can do the same using a circular saw. Be sure to clamp well and test the blade depth on scrap pieces.
Note – The most critical part of the half lap is getting precise cuts for the perfect fit. If not, the joints might be too loose or uneven.
Step 2: Cut Copper Tubes
- Use a tube cutter to cut the copper pipes
- If your copper tubes are tarnished, wash them in warm soapy water. If that doesn’t work, use Bar Keeper’s Friend. It makes all the copper nice and shiny!
- Sand any sharp edges using a metal file.
Step 3: Make Holes
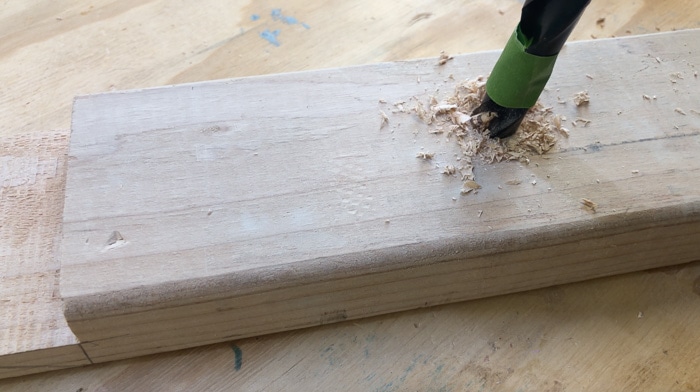
Drill holes in the boards for the copper tubes to fit using a 5/8″ drill bit. The holes are 1″ deep.
The hole in the center goes through the top board and into the bottom board. This helps keep the two boards joined during use.
Tip- Use a piece of masking tape to mark the depth of the drill.
Step 4: Add finishing touches
Stain or paint the boards in color of your choice. I decided to use Carbon Gray because I think copper and gray are an amazing combination.
I also love the combination of copper and marble – to add a little more character to the copper tubes, I add strips of marble contact paper to the tops.
Step 5: How to Make Rings for a Ring Toss Game
- Cut the manila rope into desired lengths. I used 15″ long pieces.
- Use electrical tape to wrap around the two ends and connect them to form a ring.
- You can use multiple colors of electrical tape top create colorful rings if you like.
I also added a few extra rings to the rope rings for the sake of patterns and uniformity.
That’s it!
When you are ready to play, just lay down the boards, add the tubes and start playing.
Other Variations of the Ring Toss Game –
I built a basic version of the game. However, there are various ways you can switch it up –
- You can easily make the 2×4 boards longer to add more copper tubes.
- You can use wooden dowels instead of copper tubes. Be sure to measure and drill hole sizes accordingly.
- You can make it as colorful as you like. Also, you can paint or write the point value for each tube!
Remember, you can download the printable plans below –
Be sure to check out these 25 Fun DIY Yard Games for This Summer for even more backyard fun!
More DIY Game Ideas –
Now as promised, here are 12 other amazing DIY game ideas from some of my favorite bloggers –
- Backyard Chip Shot Golf Game – Addicted 2 DIY
- Chinese Checkers Game – RemodelaCasa
- Dress -up Wardrobe – The Created Home
- Ring Toss Game – The Inspired Workshop
- Outdoor Tic-Tac-Toe Game – The Awesome Orange
- 3D Tic-Tac-Toe – Her Toolbelt
- DIY Outdoor Scorecard – Not Just A Housewife
- DIY Molky Game – My Repurposed Life
- DIY Wooden Puzzle – Ugly Duckling House
- Sliding Puzzle – 100 Things To Do
- DIY Chalkboard – Joyful Derivatives
More projects using copper tubes –
[mv_create key=”13″ type=”diy” title=”DIY Ring Toss Game ” thumbnail=”https://www.anikasdiylife.com/wp-content/uploads/2019/04/DIY-ring-toss-game-how-to-Anikas-DIY-Life-10sq500.jpg”]
Anika's goal is to inspire and empower beginners with woodworking, DIY, home improvement, and home decor ideas.
She wants everyone to unlock their creative potential and experience the feeling that comes with making something. Nothing feels better better than seeing something and saying "I can make that!"


I love this project, Anika! So simple but so much fun to play!
I love your projects. They are easy to follow and fun to do. Thank you!!
I LOVE YOUR WEBSITE ( ANIKA ).
Thank you 🙂