How to Build a DIY Closet Organizer (With Drawers)
Learn how to make your own custom built-in closet organizer from scratch using 2 basic power tools with this step-by-step tutorial, plans, and video.

Are you wondering if it is even possible for you to build a DIY closet system yourself from scratch?
I am talking about starting with plywood.
The answer is yes you can!
But then you might think – well that’s ok but that means I need lots of advanced tools to get this done.
Think again because I am going to show you exactly how you can do it with the most basic power tools – a circular saw, a power drill, and an optional miter saw.
The Before
I decided it was high time I gave my son’s reach-in closet a little bit of organization. It started out as a basic builder-grade small closet. It doesn’t have any closet doors.
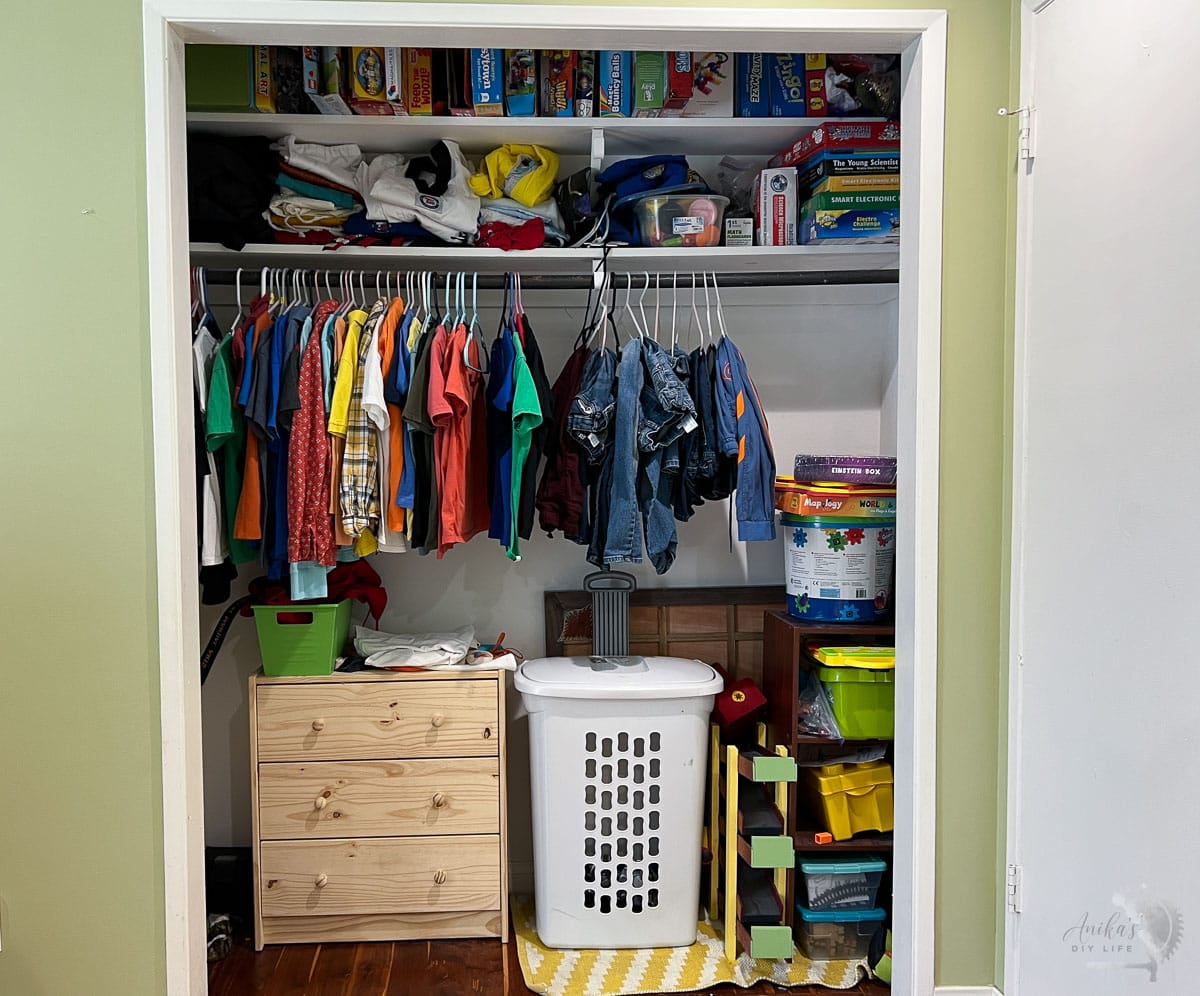
His closet has one challenge – the access for the crawl space is in the closet so the organizer had to be designed to make sure that it did not interfere.
It just meant that one side had to be easy to empty out.
***This project is sponsored by Kreg. All opinions are my own.Thank you for supporting the brands that make it possible to bring you new projects and tutorials***
The Demo
Demolition was pretty straightforward.
- I removed the trim carefully so I could reuse it.
- I removed the shelves. I intend to reuse these as well because they are perfectly good 1×12 boards. Why send them to the landfill?
- I removed the shelf supports.
Once everything was out, I cleaned up and patched up any damage to the drywall with spackle.
How to Build the Closet Organizer
I am sharing the plans for how I built the closet organizer on kregtool.com.
How to make the plans work for your closet:
- Measure the width of your closet
- Take the difference between the width of step 1 and the width of my closet
- Divide the difference in half
- Subtract or add the difference based on your needs to the length of all the horizontal boards.
***This post contains referral or affiliate links. It is a way for this site to earn advertising fees by advertising or linking to certain products and/or services. Please read my full disclosure here ***
Supplies Needed
- Plywood and dimensional boards per your needs.
- Kreg Rip-Cut
- Kreg Pocket hole jig. I used the Kreg 720. See which Kreg Jig is right for you.
- 1 1/4″ pocket hole screws
- Edge-banding to match the plywood
- Wood Glue
- 10″ drawer slides
- Kreg Drawer Slide Jig
- Kreg multi-mark tool
- Kreg shelf pin jig
- Kreg face clamp
- Kreg right angle clamp
- Kreg hardware jig
- Cabinet hardware of choice
- Primer and paint in the color of your choice.
- Hearing protection – ISOTunes Pro 2.0 – Get $10 off with code ANIKA10.
- Wall Control Metal pegboards
Tools Needed
- Circular saw
- Power drill/driver
- Miter saw (optional but recommended). You can make these cuts using a circular saw but I like using a miter saw for quick accurate cuts.
- Household iron.
What Kind of Plywood Do You Use for Closet Shelves
The best plywood to use for a built-in closet is 3/4″ birch plywood. It is a great plywood to paint because the faces are relatively smooth. It is also inexpensive compared to other hardwood options.
If you are going for a natural finish, you can even purchase pre-finished birch plywood which has a lacquer on one side.
Plans
You can find detailed step-by-step plans with schematic drawings and measurements for the closet organizer at Kregtool.com.
Video
As always, I have a very detailed video showing you how to build this closet. Watch it below.
Step-By-Step Instructions
Step 1: Prepare the boards
- Make all the cuts in the plywood as needed.
I used the Kreg Rip-cut set to 11 1/4″ (the width of the closet organizer) and made all the cuts with a circular saw.
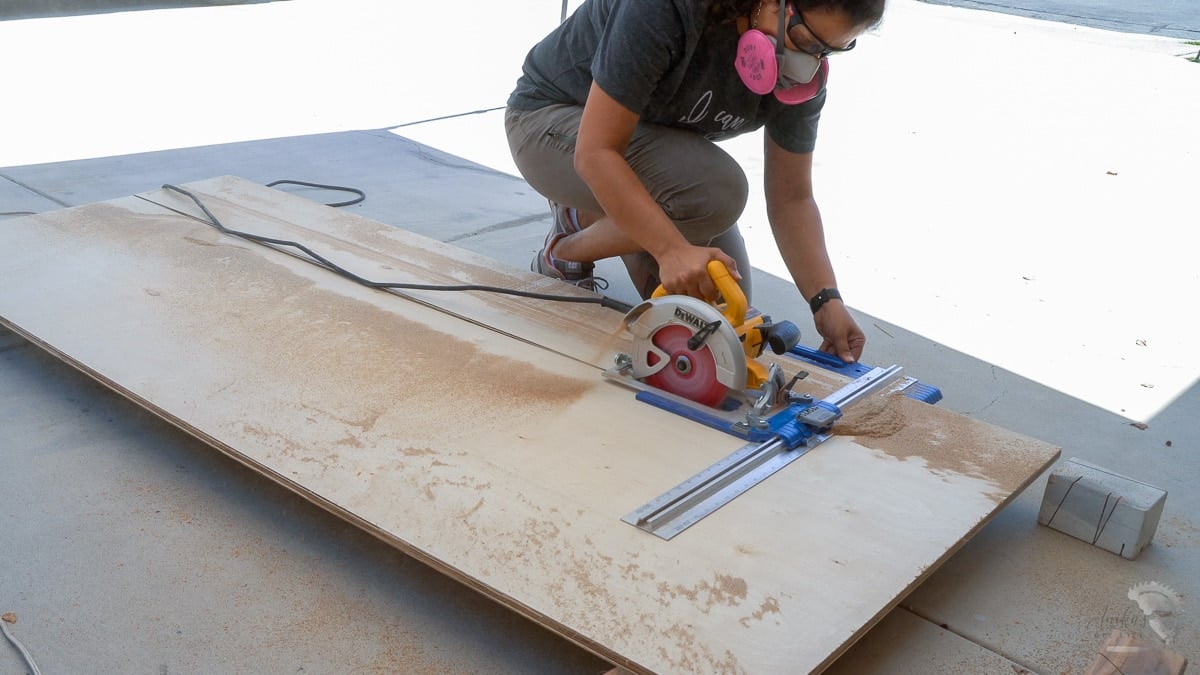
I like the Rip-cut because once you set it up for a cut width, you can repeatedly make those cuts for reproducible results very quickly.
- Apply edge banding to the edges of the closet that will be visible. See how to apply edge banding here.

Step 2: Make pocket holes
- Make pocket holes on the ends of the stationary shelves. These will hold the closet organizer together.
- Also, make pocket holes on both ends of the cleats as well.

I used the Kreg 720 to make the pocket holes. You can also use the Kreg 520 or Kreg 320.
See how to use the Kreg 720 here.
The pocket holes are made with the drill bit collar and the Kreg jig set up for the 3/4″ setting.
Step 3: Build the first side
It is best to start building the side with the drawers from the bottom up.
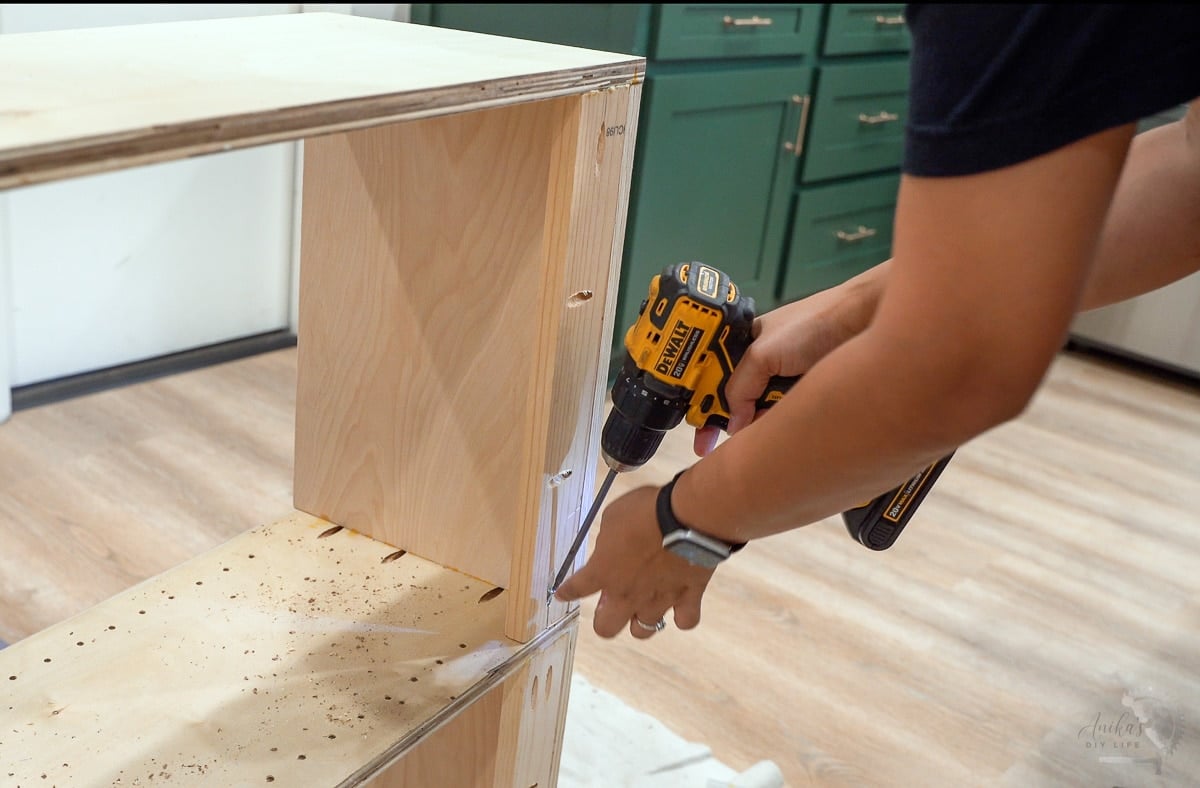
- Attach the shelves using wood glue and 1 1/4″ pocket hole screws.

Be sure to measure accurately for the placement of each shelf and make sure they are square and aligned as you attach them.
- Once the shelves are attached to one side, turn them over on to the other side and attach.

- Attach the cleat under the top shelf using wood glue and pocket holes. This is screwed into the shelf and into the sides. Make sure that the pocket holes face outwards so they will be hidden once it is installed in the closet.
Step 4: Add Shelf pin holes
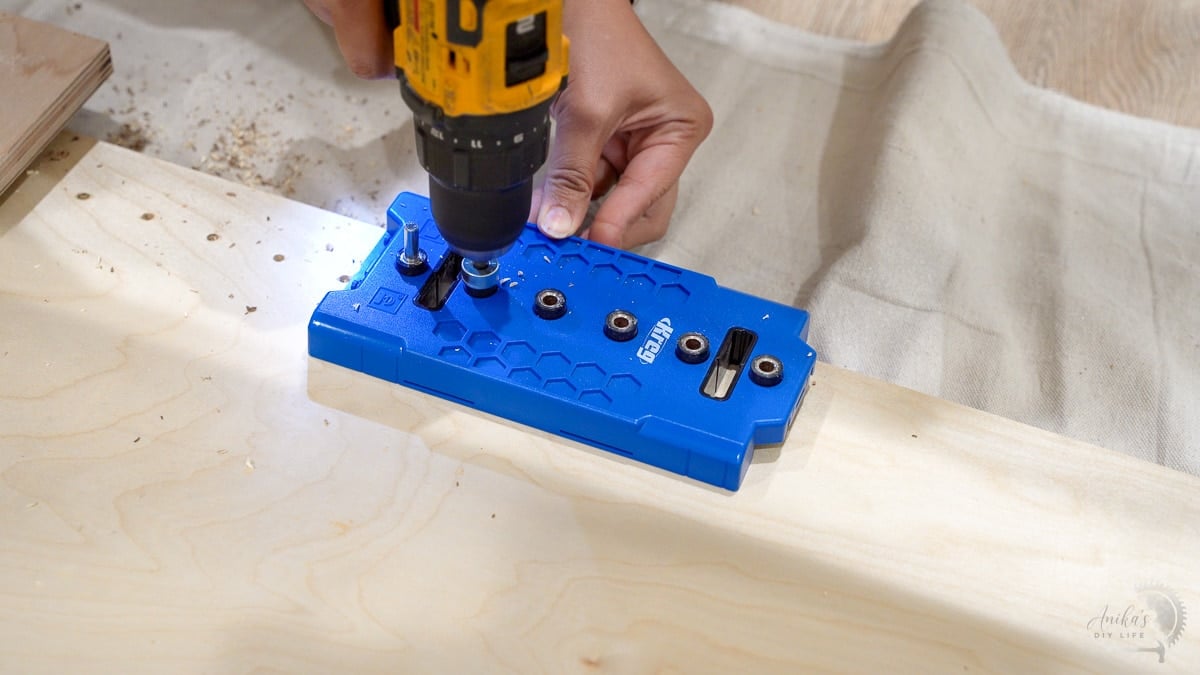
- Add shelf pin holes for the adjustable shelves using the shelf pin jig. They are a little tedious and take time but worth it for the flexibility.
Step 5: Build the drawers
Once the organizer for one part of the closet is ready, it is time to build the drawers.
I like to have the drawer frame ready so I can make sure that my drawers fit and work well.
There are many ways to build a drawer.
The simplest way to build a drawer is to attach the front and back using pocket holes to the side and then glue and nail on a base.

You can see more about how to build drawers with or without a recessed base here.
I made 5 drawers – 3 deep drawers and 2 shallow drawers. I also added a divider in the shallow drawers for more organization.

Once they were built, I installed the drawer slides on the organizer using the drawer slide jig.

- Once the drawer boxes are installed, you can easily attach the drawer faces using screws through the hardware holes. Watch the full video to see this process.

Step 6: Build the 2nd side of the closet
- Attach the top shelf to the end of the side using wood glue and 1 1/4″ pocket hole screws.
- Attach the cleat to the back of the shelf.

In this case, I made the pocket holes that were attached to the shelf on one side and the pocket holes attached to the side on the other side.
This is so that majority of the pocket holes will be hidden in the back but the pocket holes needed to attach to the other side will be available.
Step 7: Attach organizers to the closet
Once all the pieces are ready, it is time to attach the organizer to the wall and make it permanent.
- Make sure the organizer is against the wall and corners as much as possible. This can be really hard because walls are not straight or square.
- Find and mark the studs in the wall.
- Drive in 3″ screws through the cleats into the studs. Or you can use heavy-duty anchors like toggle bolts.

Step 8: Add shelves
I decided to add an additional permanent shelf on the second side to add a little more stability to the structure.
- Attach the shelf using wood glue and pocket holes screws. I used a scrap 2×4 clamped to the side to help support the shelf while I attached it.

- Add shelf pins and add the shelves.

Step 9: Finishing touches
- Install the baseboard
- Use caulk to fill in any gaps and cracks.
- Paint the closet as needed.
I was going for an accent wall look inside the closet so I had painted the walls and the organizer before installing it. I also added concrete contact paper on the back wall.
If you want to paint the entire closet the same color, you can simply paint after everything is installed.
- Install drawer pulls on the drawers and install the drawers back in the organizer
- Attach the closet rod brackets and the closet rod. I added two rods – one at the top and one at the bottom.

How to Cover Up Large Gaps Between Built-in and Wall
Walls are not even and square and can result in large and varying gaps between the built-in and the wall. Caulking does not work in this case because it can fall into the gaps. A backer rod or Caulk-saver is a great solution for this.
It is a flexible foam rod that can be stuffed into the gap. They are available in various thicknesses ranging from 1/4″ to 3/4″ so you can pick the best option for your situation.
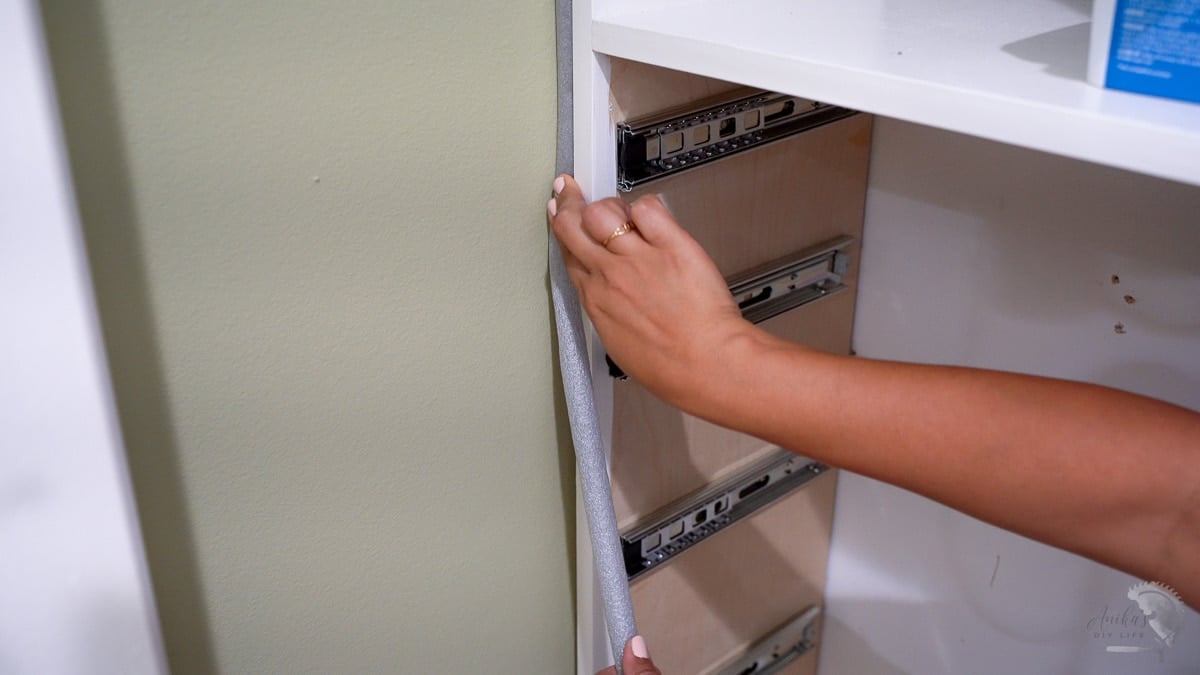
In my case, I ended up having to use a combination of 3/4″ and 5/8″ backer rod.
Once the backer rod is installed, you can cover it with caulk. Once the caulk is dry and painted, it gives you a seamless look.
Custom Closet After
The closet is done.

It is now nicely organized. There is lots of storage space and shelving and none of the closet space is wasted.
I also added a few baskets and bins to keep toys organized. You can never have enough in a kid’s closet.

The closet makeover was straightforward and easy. Not bad for a few days work to take the closet from builder-grade to a fully custom closet with the perfect amount of organization.
Looking for more small closet organization ideas? Check out Small Closet Organization Ideas for a Clean and Clutter-Free Home.

Who am I kidding though? It’s probably never going to stay this way… but at least my son can’t tell me he doesn’t know where to put something.
RELATED:
You might also like:
Anika's goal is to inspire and empower beginners with woodworking, DIY, home improvement, and home decor ideas.
She wants everyone to unlock their creative potential and experience the feeling that comes with making something. Nothing feels better better than seeing something and saying "I can make that!"




I am going to attempt this one of these days, once my 16 month old let’s me. Quick question: could you use melamine sheet stock instead? Since you’re going to paint it anyway should it matter if it’s wood or particle board? Thanks for all you do!!
Hi Lori, yes you could use melamine sheet rock. However, wood is definitely a lot stronger and can take more wear and tear (loads)