DIY Nightstand With Cane Webbing
Learn how to make a simple nightstand with cane webbing drawers. This project is easy to make for beginners and adds a chic touch to your room.

Do you know that it is relatively easy to make furniture and incorporate cane into it?
I made the cane chair last year and ever since, I have wanted to work with cane webbing again.
I decided to make a nightstand with cane webbing drawer fronts.
But I had a feeling that there will be a few challenges to making it all work. What’s a project without a few roadblocks?
Let’s get building.
***This project is sponsored by Arrow Fastener. Thank you for supporting the brands that make it possible to bring you new projects.***
***This post contains referral or affiliate links. It is a way for this site to earn advertising fees by advertising or linking to certain products and/or services. Please read my full disclosure here ***
Material Required
- Lumber per the plans
- Cane webbing
- 5/16″ Arrow staples
- wood glue
- Edge banding
- Rabetting router bits
- 14″ drawer slides
- Drawer pulls
- Furniture legs
- Clamps to keep boards aligned.
Tools Needed
Video Tutorial
Watch the full video showing how I built the project along with lots of tips. The full written tutorial follows below.
Step-By-Step Tutorial
I kept this nightstand super simple.
- It is a box for the frame
- Boxes for the drawers.
- I used premade metal legs but you can also build legs if you like.
Step 1 – Prepare the Boards
- Make all the cuts per the cut list in the plans.
- Apply edge banding to the edges of the plywood that will be visible.
- Make pocket holes on the insides of the side pieces. The pocket holes are made with the drill bit collar and the jig at a 3/4″ setting.

Step 2 – Build the Box for the Nightstand
- Attach the sides to the bottom of the nightstand box using wood glue and 1 1/4″ pocket hole screws.

- Attach the top to the sides using wood glue and 1 1/4″ pocket hole screws.

Note that the backs are aligned but the fronts are staggered to allow for the overlay drawer faces.
This completes the box.
Step 3 – Build and Install the Drawers
- Build and install 2 drawers inside the box.
There are multiple ways to build a drawer – using a groove to insert the base or simply attaching the bottom using wood glue and finish nails.
I built the drawers with an inset base. You can see more about how to build it here.

Installation of the drawers is pretty straightforward as well. The drawers are overlay drawers. This means the drawer slides are attached aligned to the frame.
- Attach the drawer slides to the frame followed by attaching the slide to the drawer box.

Step 4 – Prepare the Drawer Faces
- Cut the drawer faces to sizes and dry fit.
- Draw the cutout on the two drawer fronts.
For the cutout, I decided to go with a circle across the two fronts.
There are 2 reasons for this-
- It will add interest to the nightstand and break the lines.
- It will give enough space on the drawer front to add screws from the inside to attach to the drawer box.
How to Cut the Circle Design
- Align and lay the drawer fronts on a work surface.
- Find the center and attach the nail to the work surface. If you do not have a work surface you can do this on, I recommend using a sheet of plywood underneath.
- Tie one end of the string to the nail and the other end to the pencil.

- The length of the string is adjusted such that there is at least 1 1/2″ at the top and bottom of the drawer front.
- Draw the circle.
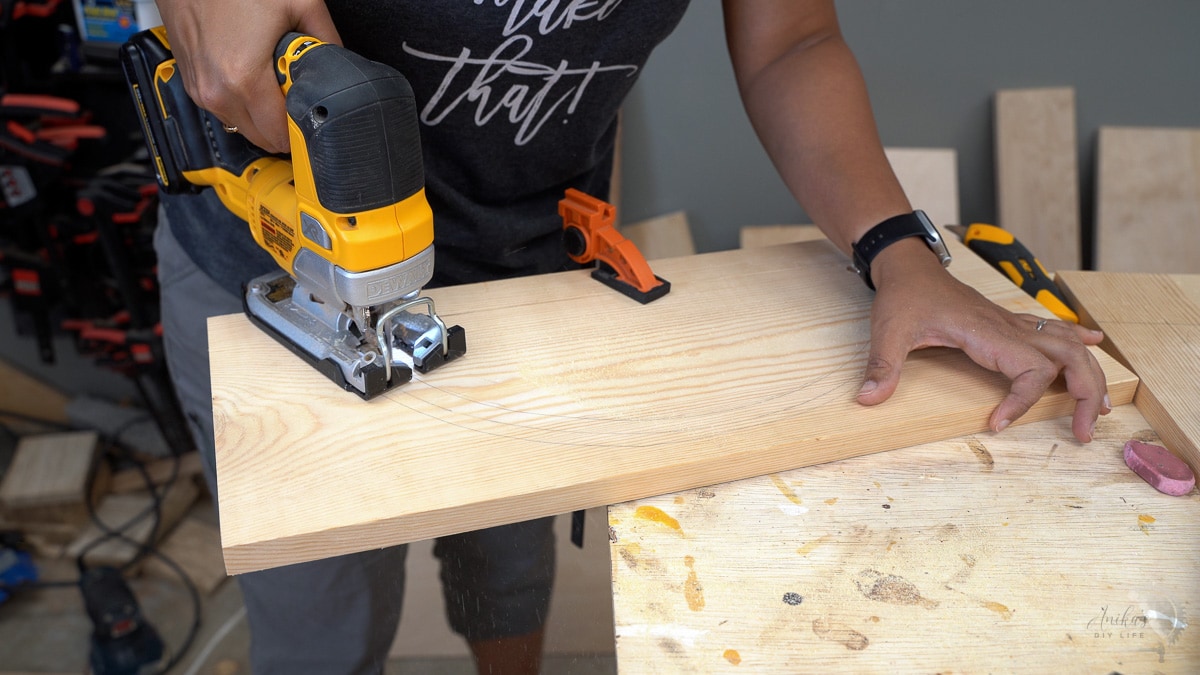
- Cut it out using a jigsaw. See more about how to use a jigsaw here.

- Using a router and a rabbeting bit, create a rabbet for the cane webbing to sit in. I used this 1/2″ rabbeting bit with the smallest bearing to get the deepest rabbet.

Step 4 – Paint/ Stain
This is a good time to paint or stain the nightstand in the color of your choice.
I decided to paint it black to contrast with the cane webbing. See how to paint unfinished furniture here.
Step 5 – Prepare Cane Webbing
Cane webbing comes in a roll. It can be very stiff and hard to work with.
Here is how to work with cane webbing –
- Cut cane webbing to the size needed.
- Soak the cane webbing in warm water for 30-45 minutes. This makes it flexible and easy to stretch while attaching.

Step 6 – Attach the Cane Webbing
Once the cane webbing is soaked, it is a lot more pliable and easy to work with.
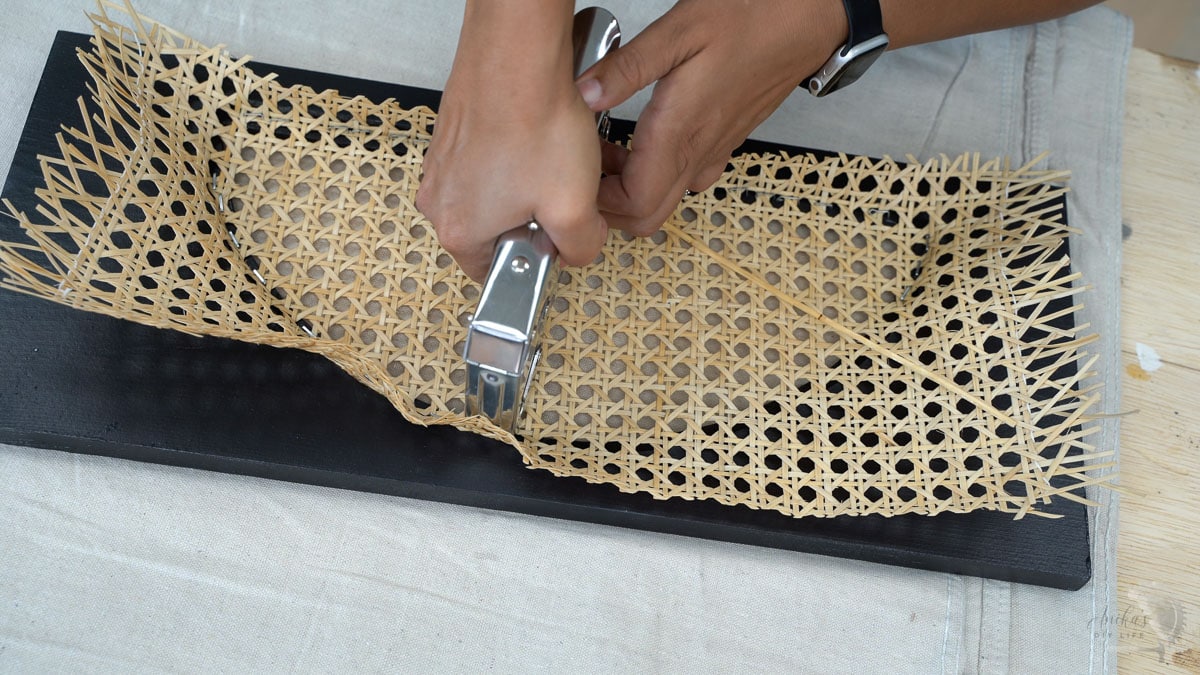
- Lay it on the drawer faces and attach using the heavy-duty T50 Staple gun from Arrow Fastener.

There are a couple of things to pay attention to:
- You want to make sure that the head of the staple gun is sitting on the step created by the rabbet so the staples go into the wood.
- You want to staple as many of the strands as possible so they do not unravel in the future.

- Once the webbing is stapled all around, cut off the excess webbing around the rabbet using a sharp utility knife.

Step 7- Attach the Drawer Front
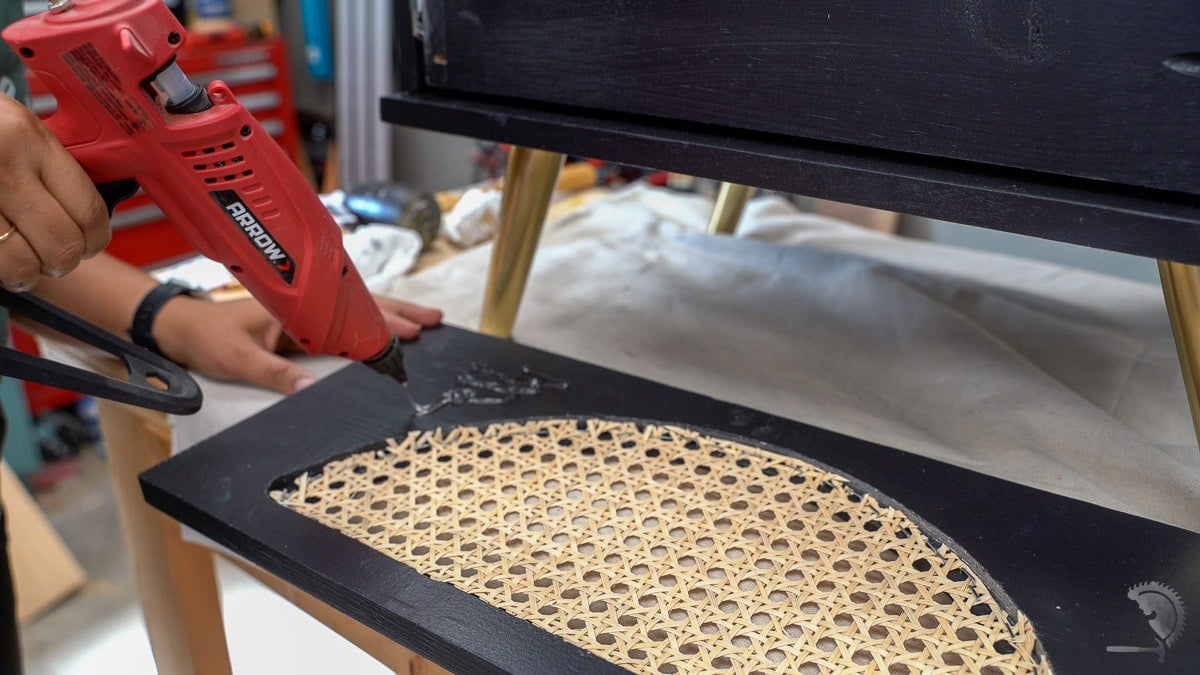
- Place the drawer front on the nightstand with 1/8″ gap all around and temporarily hold it in place using hot glue. I used the GT300 High-temp hot glue gun for this.

- Once the hot glue has cured, open up the drawer and add countersunk 1 1/4″ wood screws from the inside.

NOTE: Be sure to only add screws in locations that do not have the cane webbing in front.
Step 8: Add Hardware
- Install the pre-made legs. I used these. You can even build a separate leg frame for the nightstand if you wish.

- Install the drawer hardware. I used these.

That is it!
The cane dries up and shrinks making it nice and tight across the drawer front.

I love the combination of black and gold with the cane drawer fronts.

It is super easy to make as well. I have you covered with detailed plans.

If you have been thinking of a cane project, this is a great fun project to try! You can also see more cane project ideas here.
Arrow Fastener offers a full line of manual, electric, and cordless versions of staple guns, rivet tools, glue guns, nail guns, grommets, hammer tackers, and its flagship product, the heavy-duty T50® staple gun. To learn more about Arrow Fastener and where you can find Arrow Fastener products, visit www.arrowfastener.com.
Printable Plans for the DIY Nightstand
Click the link below to get the woodworking plans for this project. The plans have all the dimensions plus step-by-step instructions with illustrations to help you build the nightstand.
If you build it, I would love to see it! Feel free to email photos to me at [email protected] or tag me on Instagram @anikasdiylife for a chance to be featured on social media! I can’t wait to see what you build!
You will also like:
Anika's goal is to inspire and empower beginners with woodworking, DIY, home improvement, and home decor ideas.
She wants everyone to unlock their creative potential and experience the feeling that comes with making something. Nothing feels better better than seeing something and saying "I can make that!"


