A Complete Guide to DIY Custom Closets
Got a builder-grade reach-in closet that needs organizing? DIY Custom Closets are surprisingly easy to build. Here is everything you need to know to design and build your own.

If you are here, chances are you have a builder-grade closet that you have tried organizing with all the organizing supplies you can find, but it is still a mess.
Yeah… me too.
Builder-grade closets are usually just a shelf or two and a rod that spans the length of the closet. There is a lot of wasted vertical space in the closet.
I have built four closet organizers in the last few years – for my craft room, for my daughter’s room, my son’s room, and most recently, for our room.
Custom closets are one of those DIY projects that seem like a huge undertaking but are surprisingly easy. The impact they have on your closet organization is extremely worth it!
My latest custom closet build is our primary bedroom closet; you can see the details of the build in the video below.
If you would like the plans for the closet organizer, I have them available as well
In this article, let’s dive into practical tips and tricks for designing and building a custom closet so you can build your own closet easily!
***This post contains referral or affiliate links. It is a way for this site to earn advertising fees by advertising or linking to certain products and/or services. Please read my full disclosure here ***
Designing Your Closet System
The first step in building your custom closet is the design. Several key details need to be considered as you design the closet.
- Your needs: Begin by evaluating your storage requirements. Inventory your belongings, from clothing and accessories to shoes and bags. This will help you determine the types of storage solutions you’ll need.
- Available space: accurate measurements are crucial. Record the dimensions of your closet, including height, width, and depth, in three locations and take an average. Measuring in multiple locations helps account for the variations. I highly recommend using this digital measurement tool.
- Layout Planning: Draw a preliminary layout based on your inventory and measurements. Decide on the placement of hanging rods, shelves, drawers, and other components. Consider utilizing vertical space with storage towers and built-ins.
- Prioritize Accessibility: Remember to keep frequently used items at eye level for easy access. Reserve lower spaces for shoes and folded clothes and keep lesser-used items in upper spaces.
- Utilize Online Design Tools: You can always sketch the closet design on paper, but online closet design tools or software help create a digital representation of the design. This allows you to visualize the layout and make adjustments before implementation.
Sketchup is free to use. This is where I make all my furniture drawings.
Another great, free, and easy-to-use resource is Shelf Help Now. It lets you simulate the number of shelves and modules in your closet. It cannot simulate drawers, but you can understand how the organization will work. - Maximize Space: Make the most of every inch by incorporating pull-out accessories, shoe racks, hooks, and specialized compartments. You need to pick them now so you can design around them.
You can get the plans here if you want to use my reach-in closet design. Be sure to modify them to fit your closet.
Design Guidelines for Custom Reach-in Closet
The average reach-in closet is 24″ deep. When designing the closet, follow the guidelines below to get the best results.
Width of Closet Organizer
The width of the closet organizers should be 11.25″, the standard size of a 1×12. This gives you enough space to reach higher closet shelves and close the closet with hangers on the closet rod.
You can make some of the storage towers deeper, but you must ensure you can reach the items on the top shelf. If you make it deeper, you may need to cut a small angle at the top to access the top shelf.
Closet Rod Placement
For a closet with a single rod, you should install the rod 66″ above the floor.
For a closet with double rods (like in my case), you want to install the top rod around 81″ and the bottom rod around 40″.
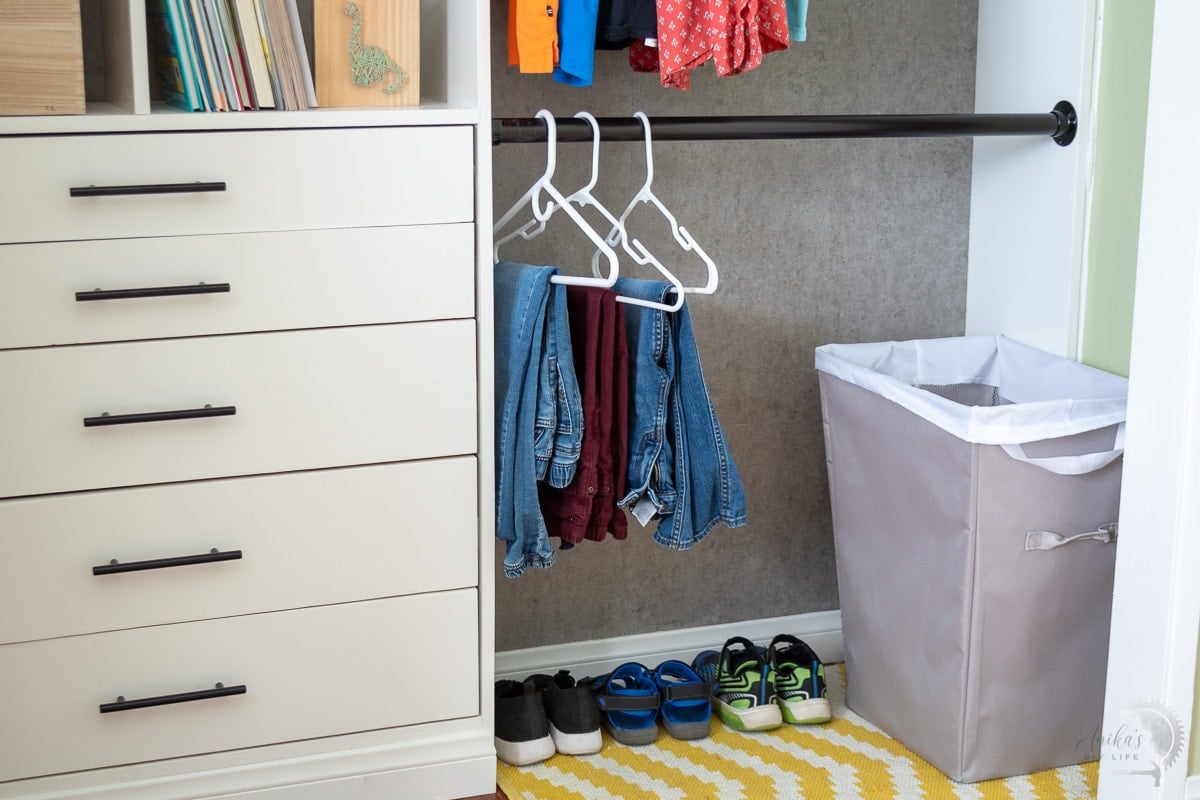
The closet rod should be installed at least 11″ from the back wall to allow space for hangers. This means the rod holder will be at the edge of the closet organizer boards.
Closet Shelves
Every closet organizer tower should have at least two stationary permanent shelves. Three is better. All other shelves can be adjustable and easily made using a shelf pin jig.
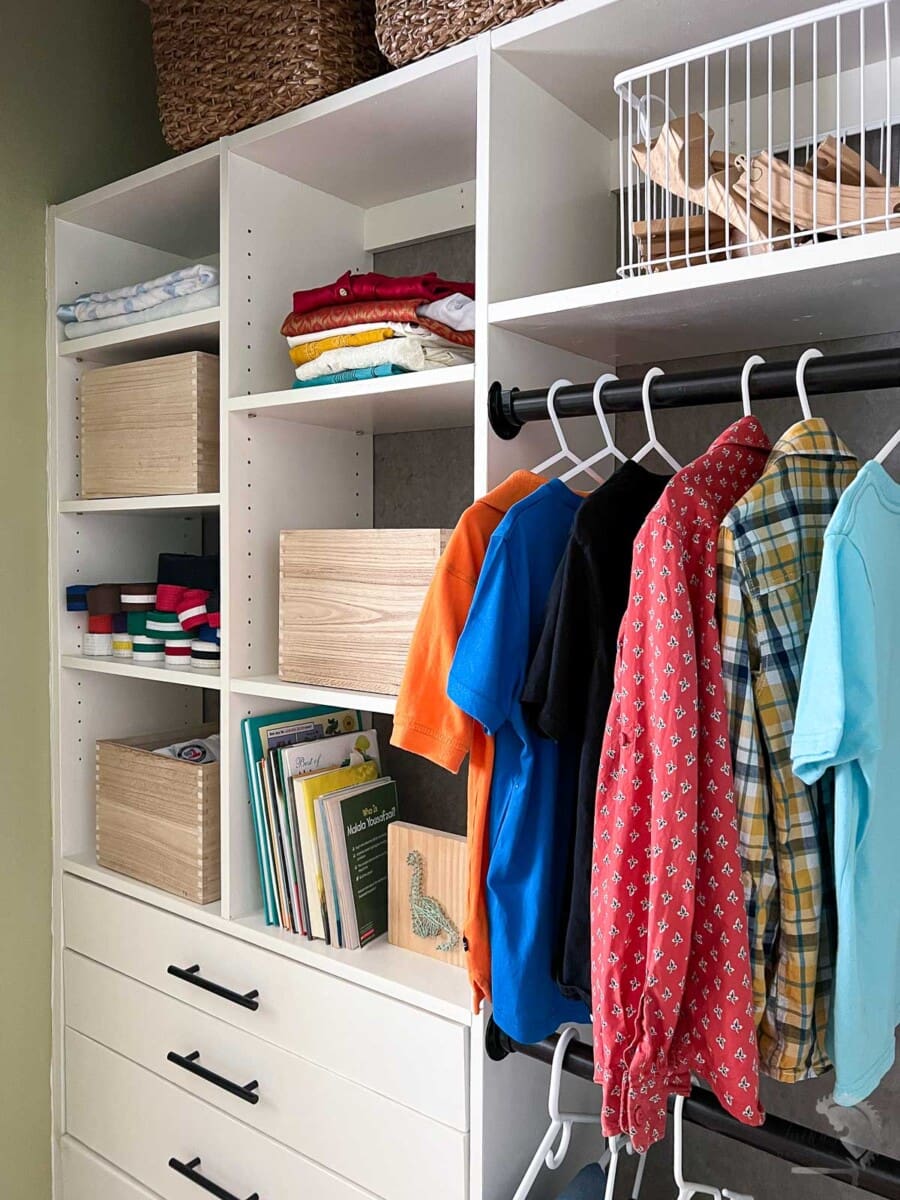
The maximum span of shelves should is about 36″. If the shelves are longer than that, you should add extra braces.
Drawers in the Closet
Drawers can be up to 30″ wide. The depth of the drawers depends on the closet organizer width.
With an 11.25″ width organizer, you are restricted to around 10″. However, you can make the storage area for the drawer deeper to accommodate deeper drawers.
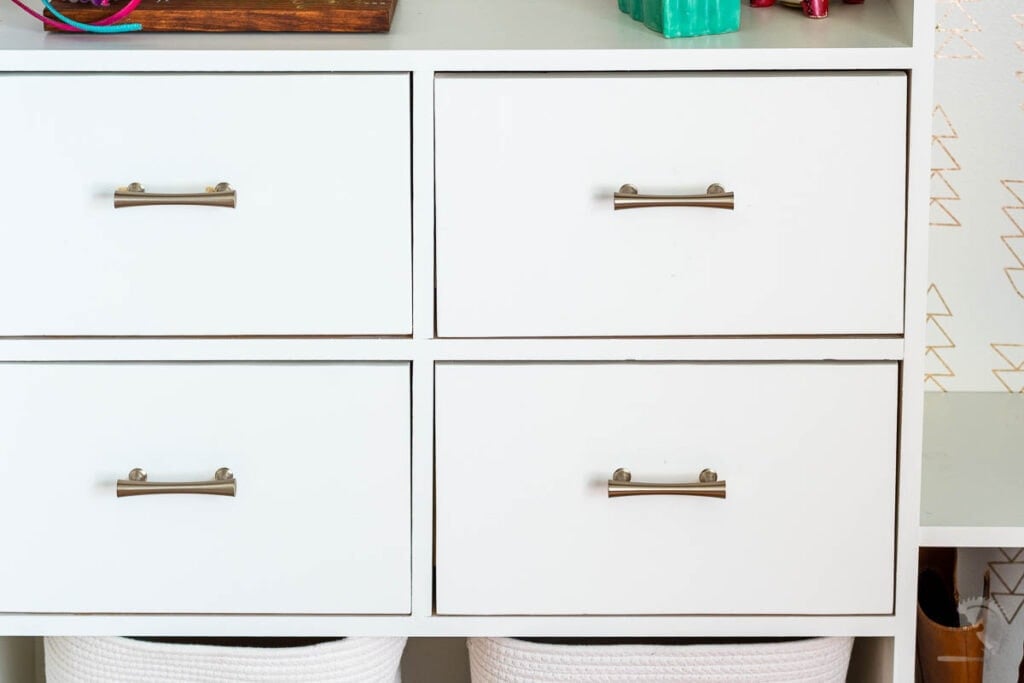
In a recent project, I made the tower with a drawer 16″ deep to accommodate 14″ drawers and shelves. However, to ensure the upper shelf was reachable, I cut an angle at the top to go back down to 11.25″.
Picking the Material
The two main choices of material for a closet system are wood and MDF – both of which have pros and cons.
Wood is durable and strong. Plywood is especially strong and can withstand heavy loads. It is a little more pricey than MDF but it can be stained or painted depending on the finish you are looking for.
MDF is a budget-friendly option but lacks durability. Depending on the quality of MDF and the weight you place, you may end up with warped shelves over time. It is available as pre-finished boards that you can use right off the shelf or paint.
My material of choice for DIY custom closets is plywood. It is cheaper than hardwood and very strong and stable.
How Much Does It Cost to Build a Custom Closet?
The cost of the DIY custom closet depends on the size and the material you pick. I highly recommend using plywood (birch plywood is the best for painting). Plywood is stable and sturdy and will last a long time.
I used two sheets of plywood for the most recent reach-in closet. Each sheet costs about $70, meaning about $140. The hardware, including the closet rod holders, drawer slides, and pulls, was about $100. Plus, you may need primer, paint, spackle, and baseboard – around $100. Overall, I built the closet for under $350 in raw materials.
Tools Needed for a DIY Custom Closet
You can easily build a custom closet with two power tools and a simple pocket hole jig (Kreg Jig). I have built three closets with just these tools. A nailer is optional and needed only if you add baseboards or trim. You can get all the tools for under $250 in total. Plus, these tools will be helpful for many projects to come!
Some people use dado joints etc which will require a table saw or router but these are not at all necessary. You can make building a closet as complicated or easy as possible.
If you do not own a saw, no problem. Shelf Help Now offers a service that sends you precut, ready-to-assemble boards. This is what I used when I built my daughter’s closet organizer.
My Recommended Tools:
- Circular saw
- Power Drill
- Pocket Hole Jig. I love using the Kreg 720. See which one is right for you.
- Multi-mark tool – extremely useful for every project.
- Kreg Rip Cut (optional but highly recommended – helps make quick reproducible cuts using a circular saw)
- Shelf Pin Jig (optional) – to help with making the shelf pin holes
- Drawer mounting jig (optional) – helps make drawer installation easier. I don’t always use it though
- Hardware jig (optional) – helps to install pulls on drawers easily.

Picking the Closet Finish
The closet’s finish is your chance to infuse your personality into the design. You can easily incorporate color schemes and decorative elements that resonate with your style.
Staining the closet or painting it is your choice. Staining brings out the natural wood grain and adds warmth to the closet.
Painting opens up a whole range of options for color. I love using cabinet paint for the closets. It dries super hard and is resistant to wear and tear.
Not just the closet organizer, you can also bring in accents and color to the walls with color, stencils, decals, or wallpaper.
I used contact paper to give an industrial concrete look to the back of this closet.
We used gold decals to add a touch of glamor to my tween daughter’s closet.
I even stenciled these gorgeous features in the coat closet!
How to Build DIY Custom Closets
Each DIY custom closet will have its own design and assembly, but the basic steps stay the same.
Custom Closet Plans
If you would like a guide to use as inspiration and follow along, I am sharing the plans I used to build my primary custom closet.
Step 1: Prep
Make the cuts for the sides and shelves per the design you came up with.
Step 2: Assemble
Assemble the organizers and storage towers using wood glue and pocket hole screws. Be sure to take into account the height of baseboards as needed.
The most important part of the closet assembly is the addition of the brace at the back of the closet that will help attach the closet to the wall.
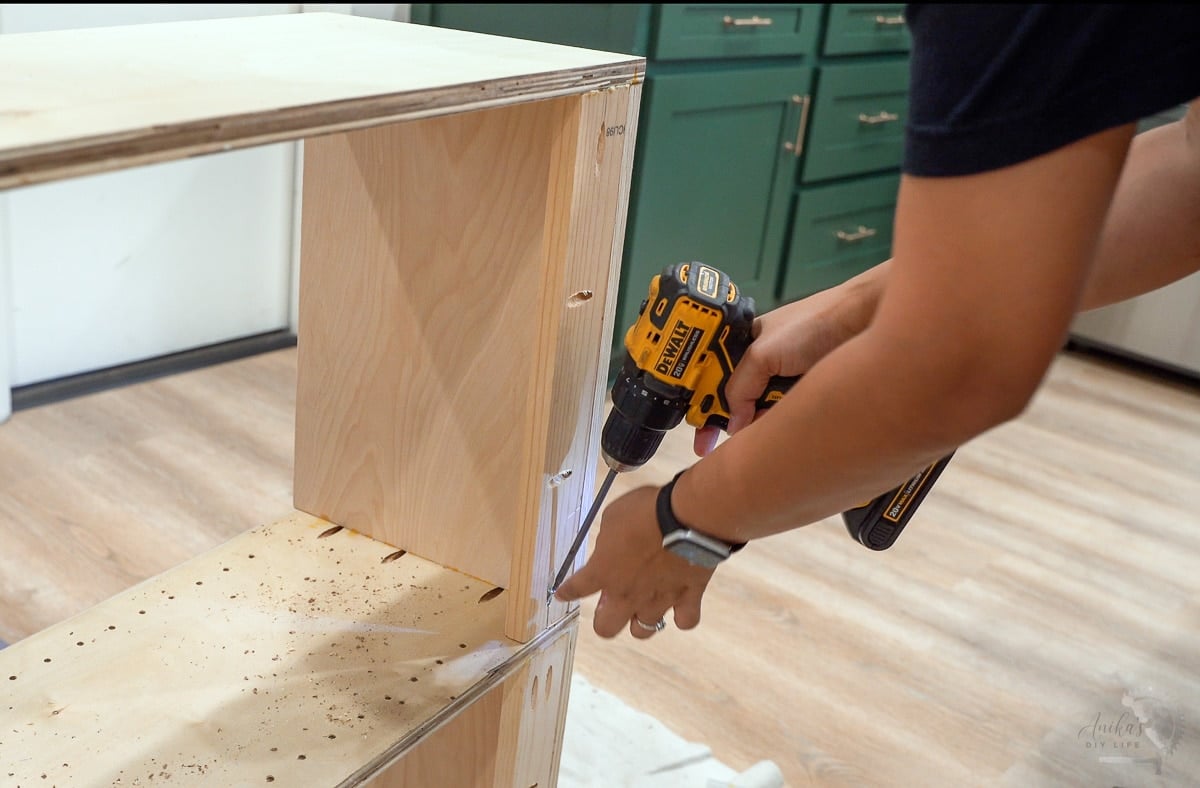
This is also a good time to paint or stain your closet organizer. You can also paint it once it’s installed inside the closet.
If you are using plywood, you may want to cover up the edges. There are many ways to cover the plywood edges. Edge banding is great if you are going to stain it. If you are going to paint, you can use a more budget-friendly option like wood filler. Trimming out the edges with boards and finish nails is another option.
Step 3: Attach to the Wall.
This is the most important part. You want to ensure the organizer stays in place and does not topple on you.
Add 3″ long screws through the back braces into studs – add at least two screws on each stud. This will ensure that the organizer will not go anywhere.

If you aren’t hitting a stud, you can use toggle bolts to attach securely.
Important: DO NOT add any screws on the sides of the organizers. The walls are usually not square, and adding the screws will warp the sides leading to issues with shelving and drawers. Only add screws to the back.
Step 4: Install the Remaining Items
Once the frame of the closet organizer is in, you can install the drawers, closet rod holders, and shelves.
Final Closet Finishing Touches
Once the closet organizer is installed, it’s time to add all the finishing touches to complete the closet.
Add baseboards to cover the bottom and add a sophisticated, finished look.
Fill in any visible holes with wood putty and touch up the paint.
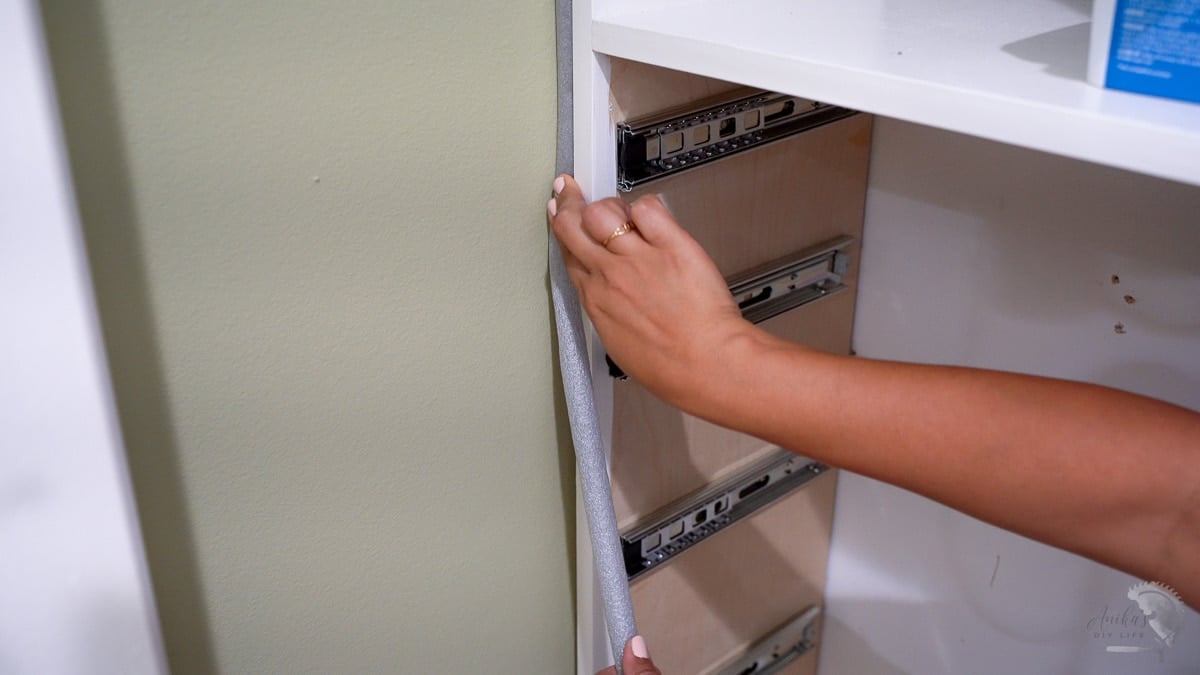
Apply caulk to all the seams – between the wood and between the wood and wall. Use backer rods if you have a large or uneven space between the wall and the organizer. These foam rods fill the large gap that can be covered with caulk for a seamless finish.
Apply any touch-up paint as needed.
This should complete your custom closet organizer.
How Long Does It Take To Build a DIY Custom Closet?
I built this closet from start to finish, including a demo, in 4 days. I had a deadline with guests visiting, so I did work overtime – patching and painting after the kids were in bed. But if you wanted to, you could complete this in a week or over a few weekends.
RELATED:
Anika's goal is to inspire and empower beginners with woodworking, DIY, home improvement, and home decor ideas.
She wants everyone to unlock their creative potential and experience the feeling that comes with making something. Nothing feels better better than seeing something and saying "I can make that!"


