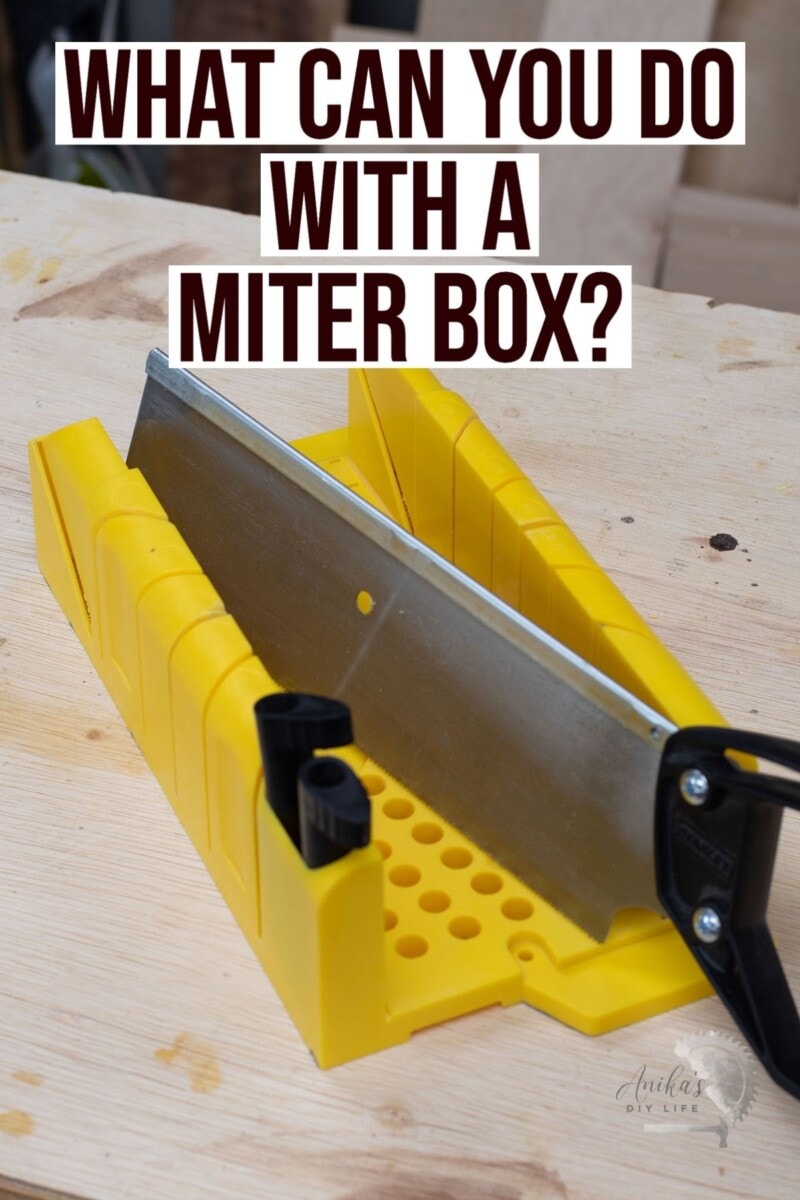
How to Use a Miter Box (Cut Wood Without a Power Saw)
Learn how to cut wood WITHOUT a power saw using a miter box for beginner woodworking projects, baseboards, and molding. This is your detailed tutorial on how to use a miter box. Great for apartments!
You want to build beautiful wood projects but,
- You are just starting out
- Don’t have the budget to buy power tools
- are intimidated by power saws
- you live in an apartment and can’t use or store power tools.
No matter the case, you do not need a power saw to do many basic projects.
All you need is a miter box, and I will show you exactly how to use it and how powerful it is.
Now, if you are already confident with power saws and are wondering if you even need to continue reading this, the miter box is an essential part of my toolbox. I use it for many things, and I will go into the details below.
Cutting Wood Without a Power Saw
If you want to cut wood and don’t have a power saw, there are a few options –
- use a sharp knife
- use an axe
- use a machete
But I am sure you aren’t into any of those options because you want to make simple beginner woodworking projects in the first place.
Another option is to get your boards cut at the lumber store. That is what I did for the first couple of my projects.
The problem with that is the cuts are NOT at all accurate. The stores do not and are not expected to guarantee accuracy.
What’s the solution?
The best way to cut boards for simple woodworking projects without a power saw is a miter box with a handsaw.
***This post contains referral or affiliate links. It is a way for this site to earn advertising fees by advertising or linking to certain products and/or services. Please read my full disclosure here ***
Video
I have a full written article below, but if you would like to watch and learn, I also have a detailed video for you below.
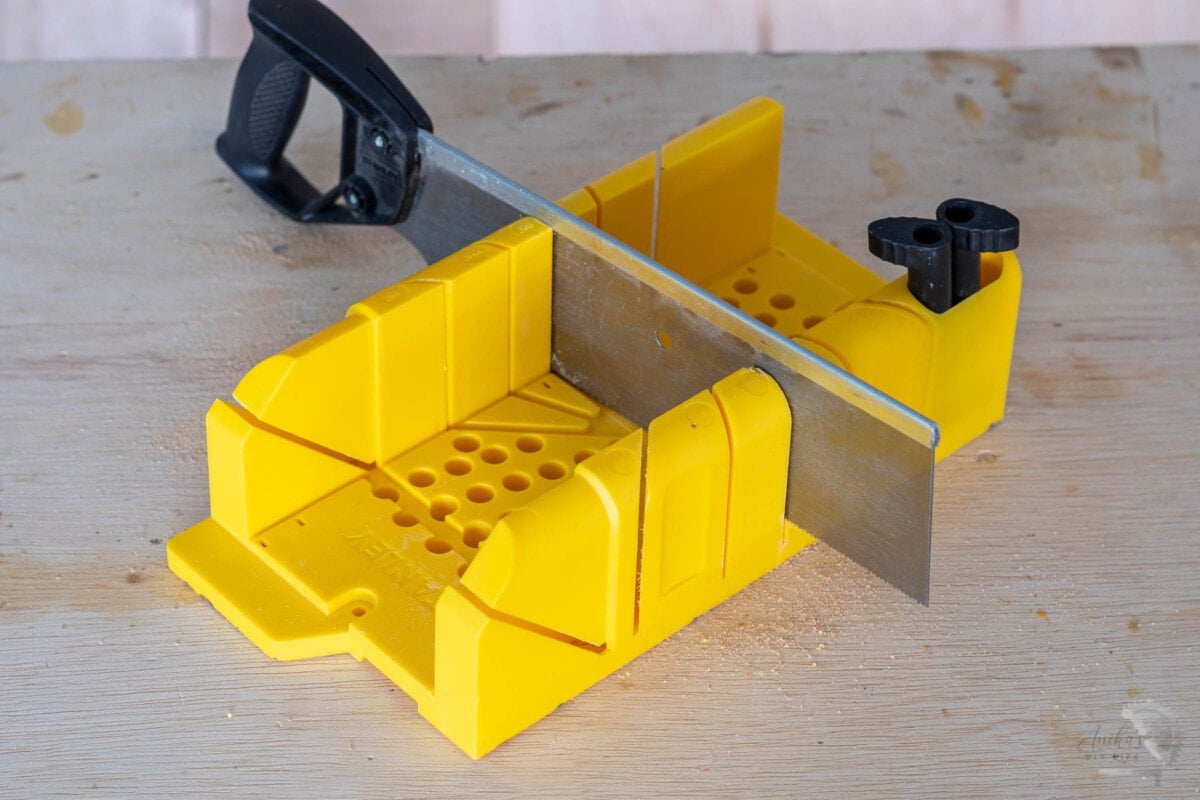
What Is a Miter Box?
A miter box is a guide for a hand saw and allows you to make cuts in boards manually with pretty good accuracy.
They are very inexpensive to purchase and make a great starting point to try simple woodworking projects like building frames, and small furniture builds and is the best option for installing baseboards and molding.
It is essentially like a manual miter saw where you are able to make pretty precise cuts.
They are:
- Small
- Easy to store
- Don’t make noise
- Sawdust is confined to a small area and doesn’t fly everywhere.
These features make a miter box an excellent solution if you live in an apartment.
Parts of a Miter Box
A miter box usually consists of:
- A hand saw – specially designed with a rim to prevent it from digging into the miter box.
- A miter box – with precut slots at various angles to help guide the hand saw.
- Cam pins – to help lock the boards being cut in place. These are only available with a few models.
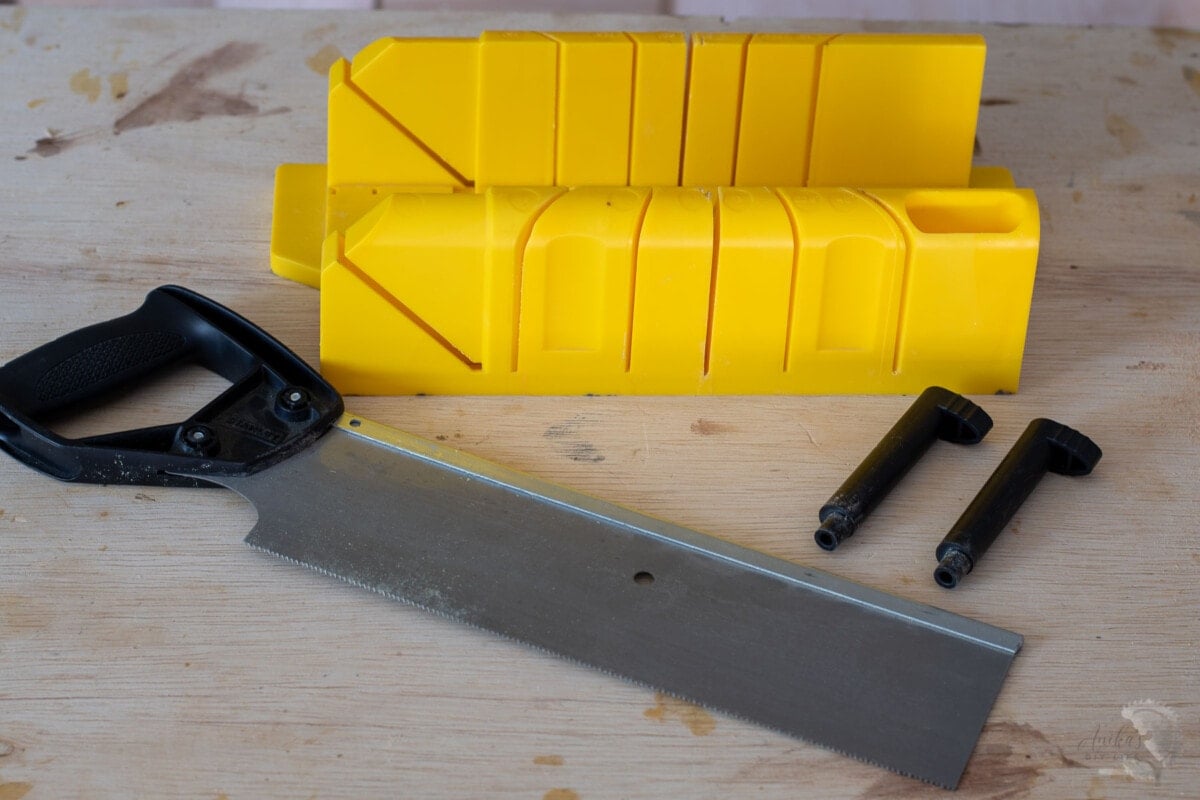
The box itself has the following features:
- Material – can be made from wood, plastic, or aluminum.
- U-shaped with openings on the top and on both ends to fit long pieces of wood.
- Slots are cut into the miter box at precise angles needed to make cuts. More on that below.
- A way to hold and secure the miter box when in use
- Small holes to help screw the miter box to a work surface if needed
- Clamping wings to use a clamp to hold the miter box when in use.
- A lip or tabs to help hold the box against a workbench.
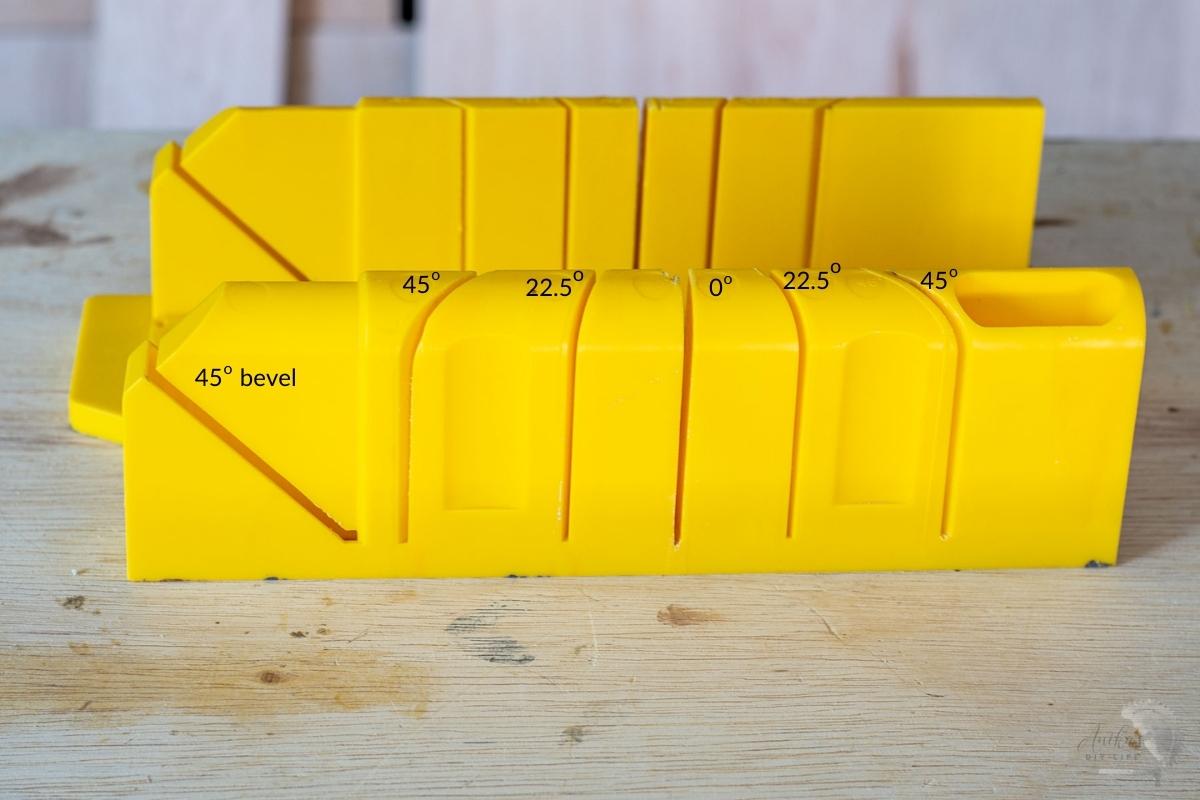
A basic miter box has three angle slots – 0, 22.5-degrees, and 45-degrees plus a 45-degree bevel slot.
An adjustable miter box gives more flexibility and can be set at different angles. These are usually made of metal and are a little more expensive.
Uses
A miter box, or mitre box, makes straight and angled cuts in various materials.

A miter box can be used not just for cutting wood boards like 1×2, 1×3, etc, but also for many other boards and materials.
Despite having power tools and saws, I still use my miter box – especially when I need to cut small pieces (less than 2-3″) or dowels which can be dangerous to cut on a power miter saw.
Some other applications where you can use miter box are:
- Miter cuts for picture frames
- Dowels
- Crown molding
- Baseboards
- Cut or trim PVC pipe
- Acrylic rods
- Aluminum tubes
I’ve used a miter box to build a picture frame, a mail organizer, cut acrylic rods, rain gutter bookshelves, and even aluminum tubing for my shower organizer.
Miter Box Options
Miter boxes are very inexpensive, and the box itself usually comes with an included handsaw and a few stops. Here are some options:
- Stanley Miter Box with hand saw – most budget friendly!
- Standley Miter Box with hand saw (and clamping stops) – Great value (highly recommended)
- Adjustable angle clamping miter box – definitely recommend if budget allows.
- A few other options for miter boxes.
How to Use a Miter Box to Make Cuts
Miter boxes are really straightforward to use.
Of course, as with any hand tool, it takes a little bit of effort and patience.
STEP 1: MARK THE WORKPIECE
You know how they say – measure twice, cut once? I say measure at least three times.
- Measure and mark your workpiece for the size you need to cut using a tape measure.
- Using a speed square, draw a straight line and mark your piece of wood with the angle you wish to cut.
You can draw your line on either the face or the edge of your workpiece. See how to use a speed square to mark angles. - Mark the side you need with an X or a little arrow, so you remember exactly which side is the one you need.

STEP 2: SECURE THE MITER BOX
- Use a clamp to secure the miter box to a workbench or table.
Depending on the model, your miter box may have a lip that sits flush against the table’s edge or little collapsible tabs on the bottom to keep it in place as you cut.
The miter box may have a spot of clamps to hold it. Or it will have holes for you to be able to screw it into your workbench- if that is something you want to do.

Alternatively, you can also screw it into a larger board that might be easier to clamp.
Either way, holding the miter box in place is essential for safety and accuracy.
It is possible to cut with the miter box without clamping it down, and I have done it many times, but whenever possible, clamping it down adds stability and makes it a lot easier to use it.
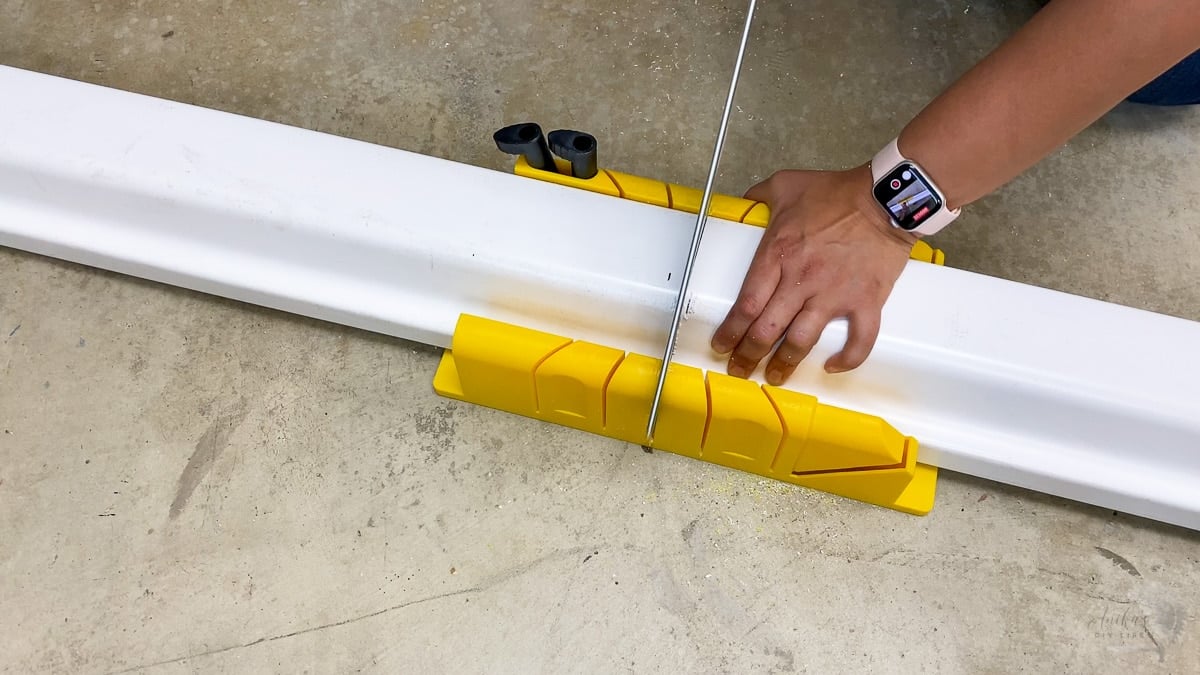
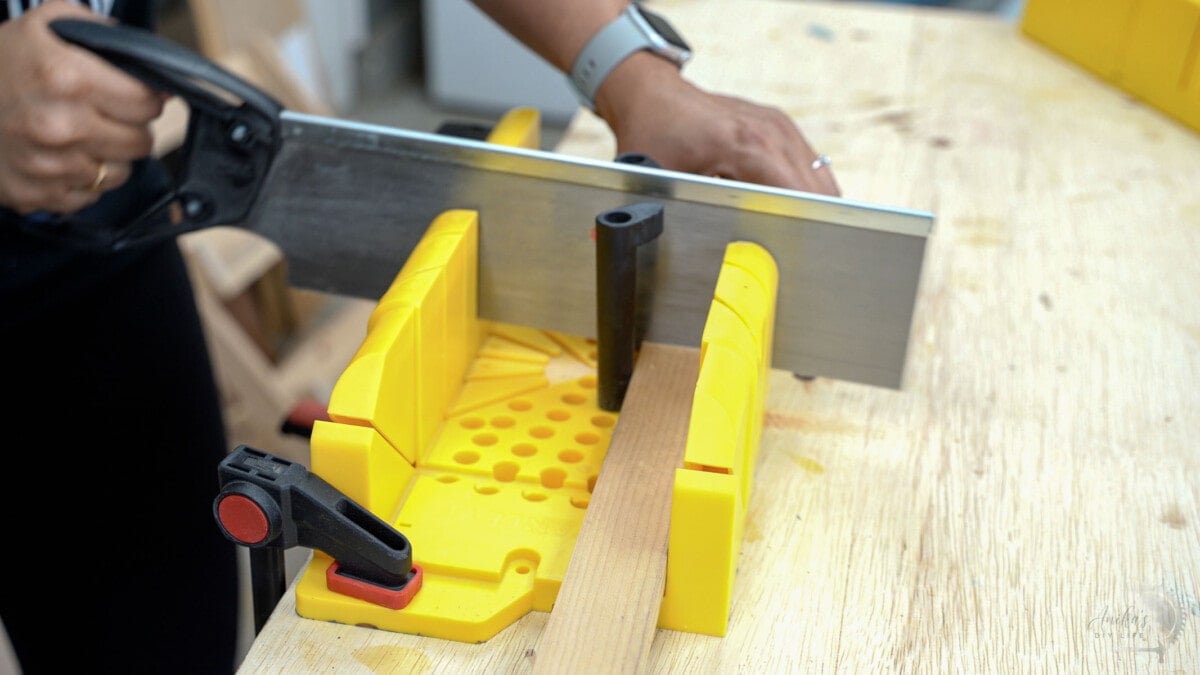
STEP 3: SECURE THE BOARD
- Line your mark up with the corresponding miter box slot on the miter box edge.
- Insert the saw in the slot and check the placement of the board.
At this point, you want to pay attention to the kerf – which is the thickness of the saw blade. Read more about Kerf here. You want to ensure that the entire blade of the saw lies on the waste side of the board.
- Once the saw is aligned in the right place, secure the board with clamps on the ends or use the cam pins. You may also carefully use your hand to hold the board as you make the cut. Just be sure to keep your thumb out of the way!

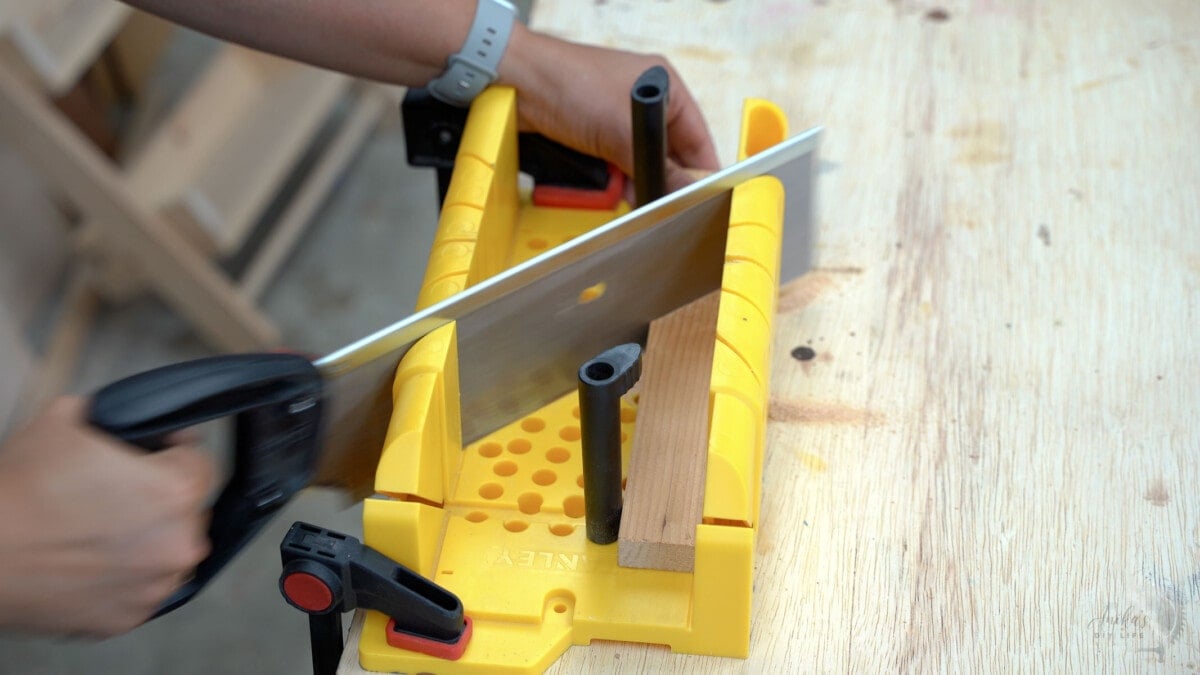
STEP 4: MAKE THE CUT
- Slowly score the cut line with the saw by pulling the blade back slowly towards you a few times.
This will make a groove and help get the cut started and keep the saw from deviating from the cut line when you make the cut.

- Go ahead and make the cut with downward pressure on the saw.
It can sometimes be hard to keep long pieces of wood stable and control them to get a precise cut. The best way to manage is to use as many clamps as needed.
Cutting Angles
Miter boxes typically have 22.5-degrees and 45-degree angle slots and a 45-degree bevel.
Cutting angles is pretty much like when cutting a straight-line – measure, mark, align and secure the board and make the miter cut.
The slots in the miter box make sure your saw stays aligned to the desired angle you make the cut.
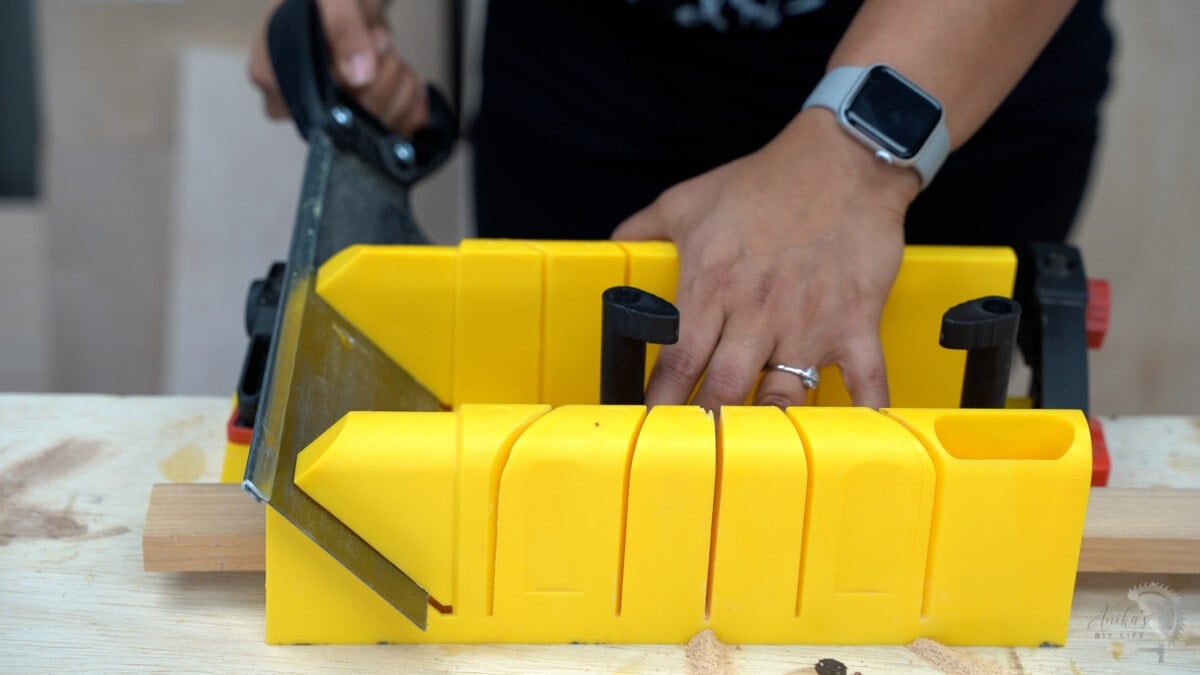
To make a miter cut, lay the board flat inside the miter box. Below, I am making 45-degree cuts.
To make a bevel cut at 45-degrees, use the bevel cut slot to help guide the saw.
If your miter box does not have the bevel slot or if you want to make a bevel at 22.5-degrees, hold the board standing up in the miter box and cut through the 22.5-degree slot.

Of course, the height of the wood that can be used is limited by the height of the sides of the miter box.
Cutting crown molding and baseboards
Cutting crown molding and baseboards is one of the most common applications of miter boxes.
Even with the power saws available, I usually keep a miter box handy to quickly make the cut in the room as needed and don’t have to carry the huge boards across the house.
Plus, baseboards and molding are usually soft materials that are pretty easy to cut.
The inside and outside corners of molding and baseboards can be pretty confusing. Here is a little guide –
To cut a left internal corner –
- Place the piece of molding upside down laying at an angle on the left of the miter box.
- The top of the trim should rest against the miter box while the bottom wall angle toward the middle.
- Clamp it in place to hold it secure.
- Line up the saw in the 45-degree slot.
- Cut from the bottom right to top left.
Cutting a right inner corner –
- Place the piece of molding upside down on the right side of the miter box, with the top resting against the side of the miter box and the bottom angled out towards the middle.
- Clamp it in place
- Line up the saw with the 45-degree angle slot.
- Cut from bottom left to top right.
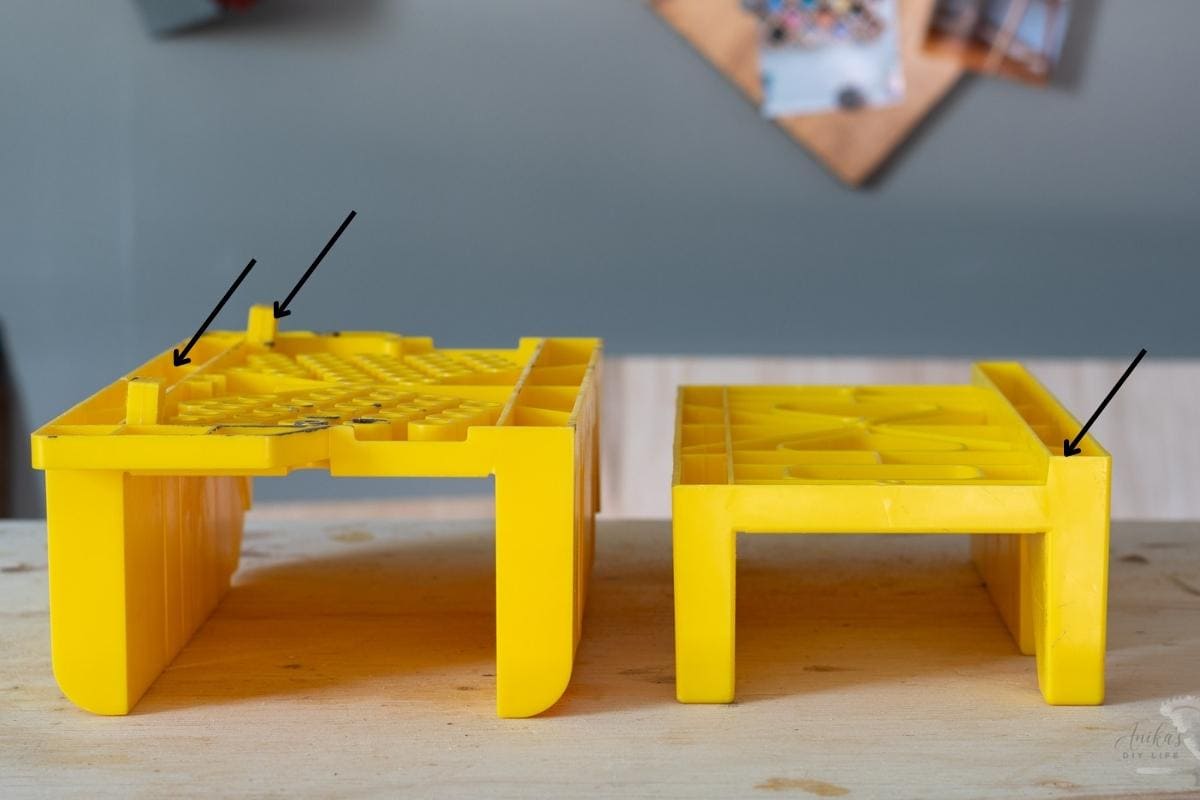
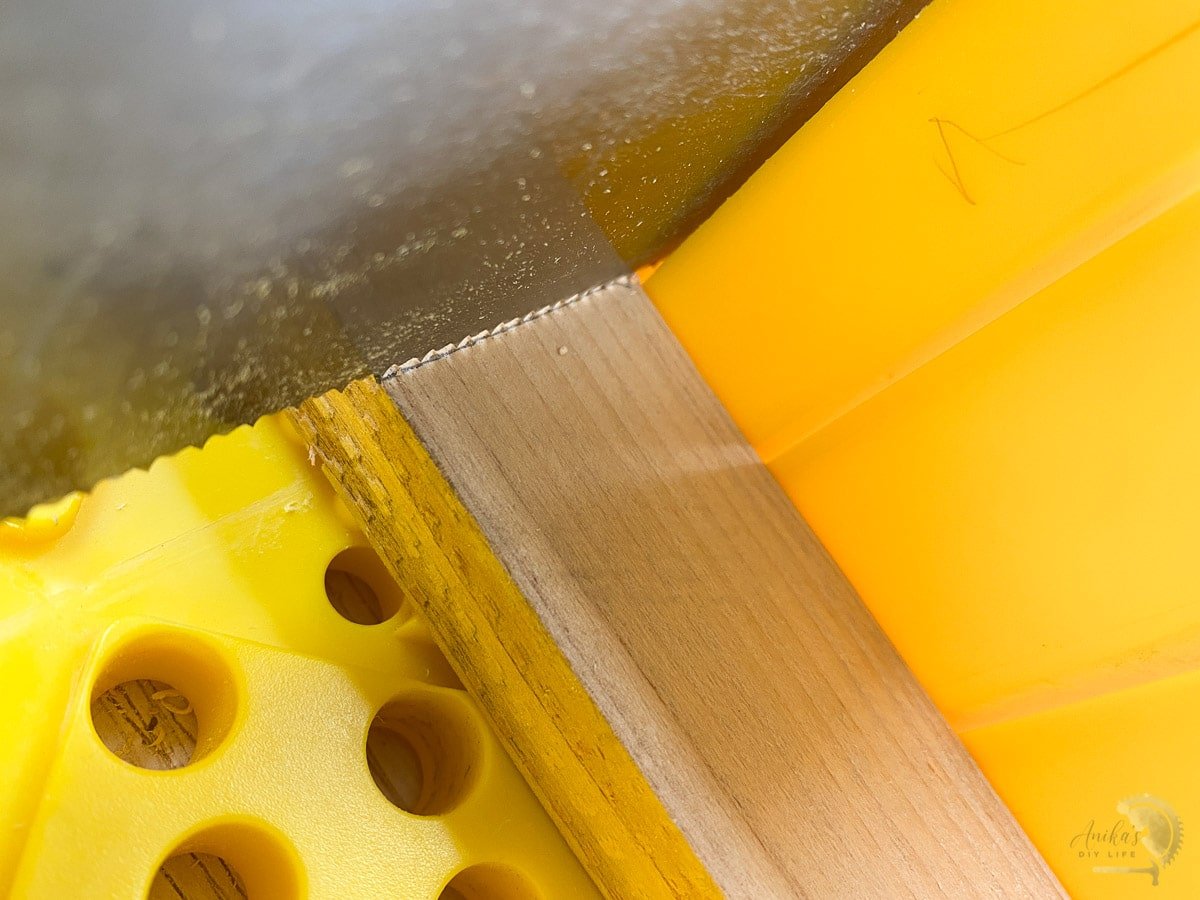
Why Does the Saw Not Cut Into the Box?
The design of the miter box and accompanying handsaw makes sure you do not cut into the box itself.
The handsaw has a lip on top that is wider than the slot and the box itself has grooves at the bottom.
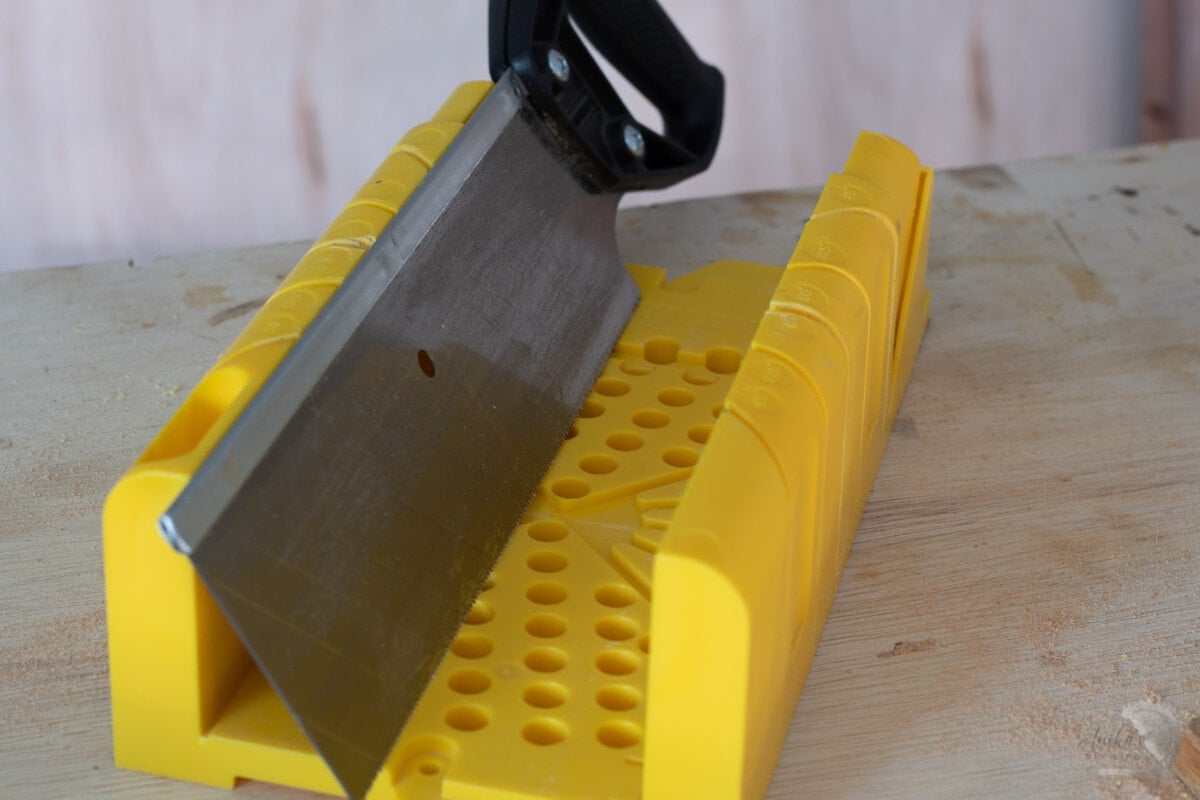
The lip on the saw hits the top of the miter box when the saw reaches the bottom of the cut.
But what if you have lost the handsaw that came with your miter box?
In that case, you can use a scrap piece of wood underneath your workpiece so that the miter box does not get damaged.
In Summary
I think a miter box is definitely an important tool to have in the workshop – whether you are just starting out or have lots of power tools.
I still use my miter box pretty often for various projects.
Projects Using a Miter Box
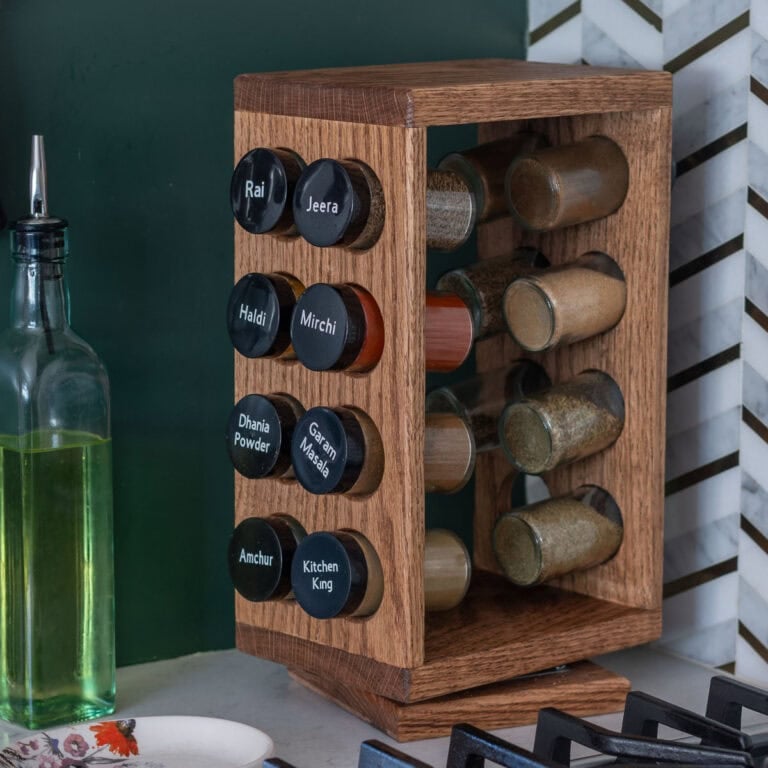
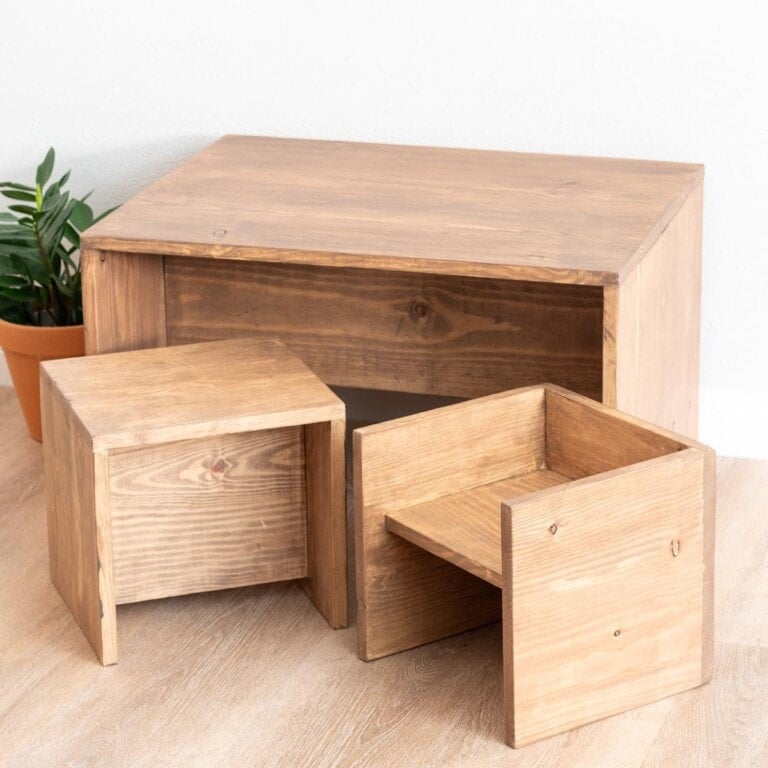
Now that you know how to use a miter box, here are a few projects that you can use them for:
If you would like to learn more about other beginner-friendly power tools, take a look at these:
Anika's goal is to inspire and empower beginners with woodworking, DIY, home improvement, and home decor ideas.
She wants everyone to unlock their creative potential and experience the feeling that comes with making something. Nothing feels better better than seeing something and saying "I can make that!"