DIY Kids Art Station
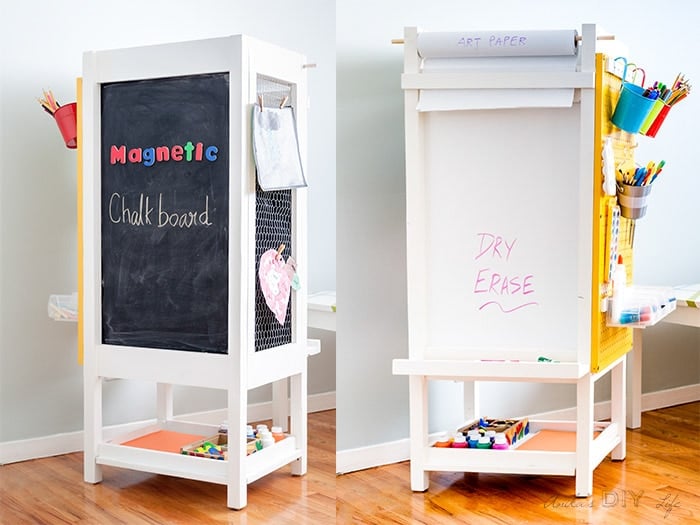
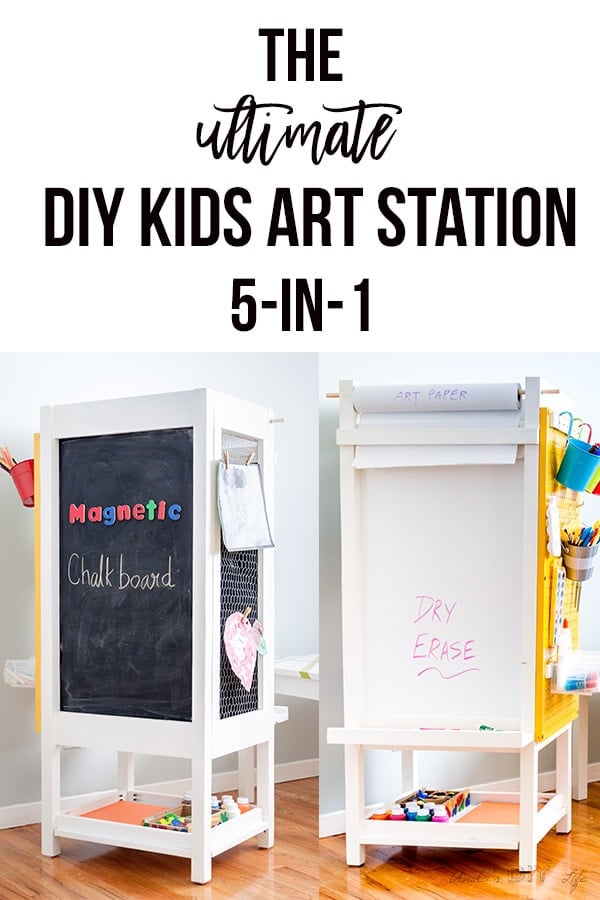
A DIY Kids Art Station that includes 5 options for getting creative – a dry erase board, magnetic chalkboard, art paper roll holder, kids art display, and an art supply organizer. Set up a creative station for the kids with this easy project!
I have a feeling this DIY kids art station is going to be used a LOT this summer!
How can it not be… it has everything they (and mom) could dream of in an art station for kids.
***I partnered with Build Something to bring you the free plans for this DIY kids art center ***
What’s Special About This DIY Kids Art Station
It is 5-in-1! They are never going to get bored of using it! Plus it is the perfect solution if you don’t have a lot of wall space to create a dedicated corner for a childrens art center!
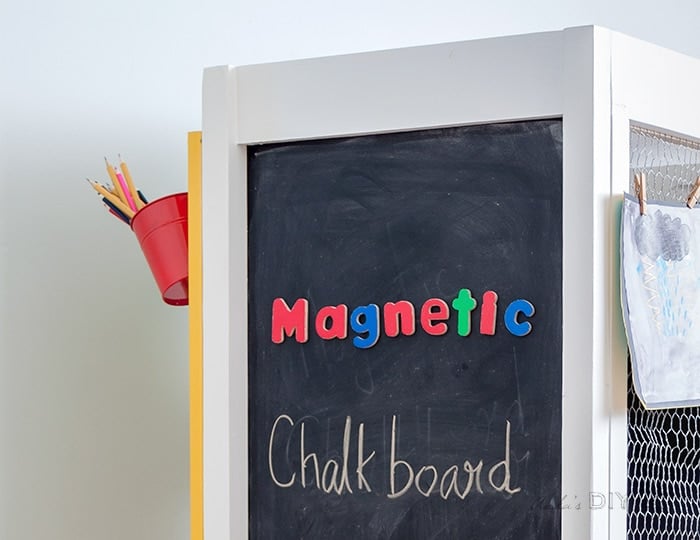
It has a magnetic chalkboard on one side…
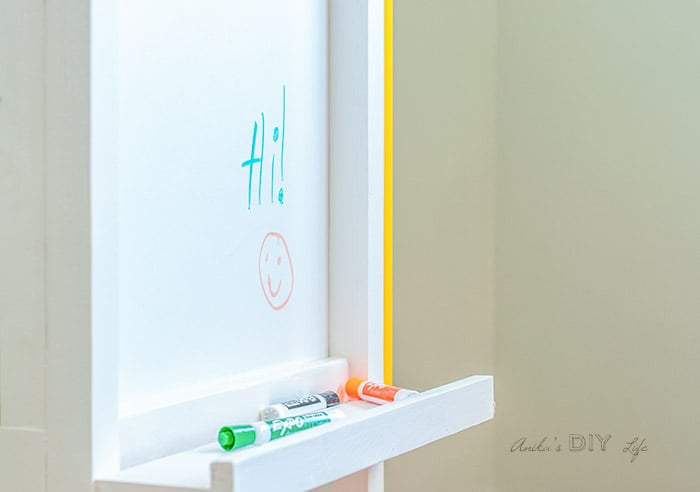
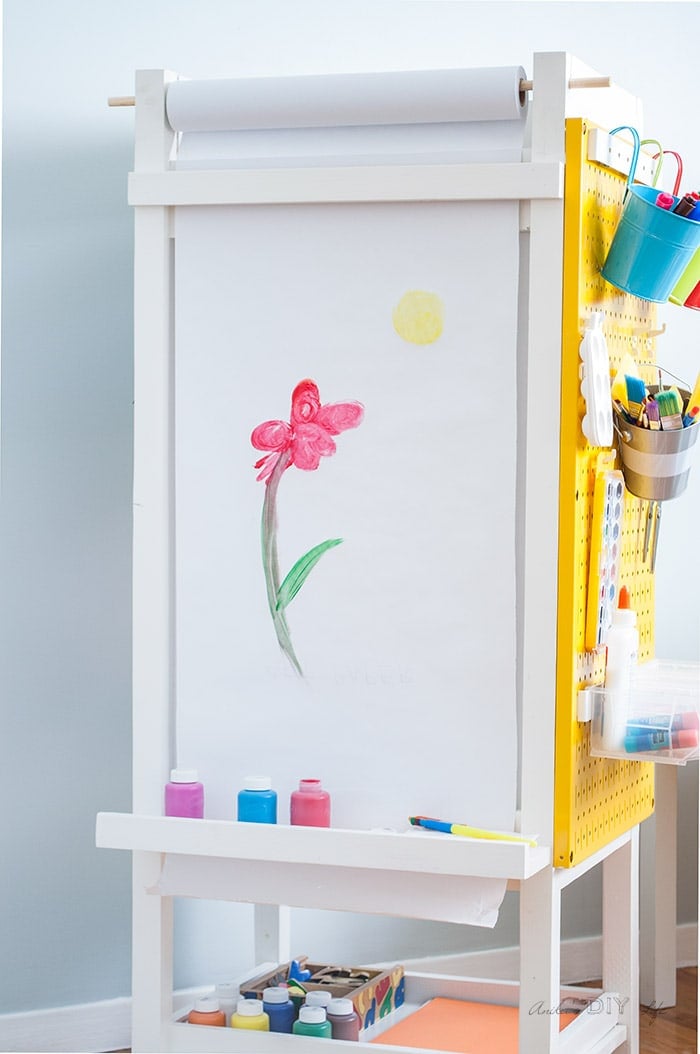
and a dry erase board on the other…

which can easily be converted to a painting “easel” by pulling down the art paper…
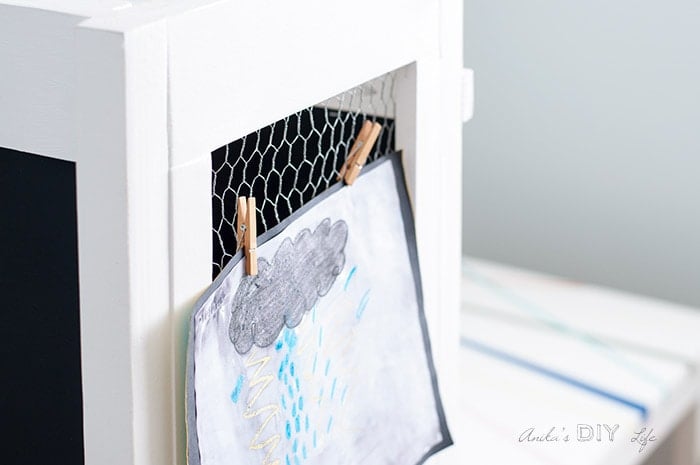
One side has a spot to display kids artwork or just to allow it to dry…
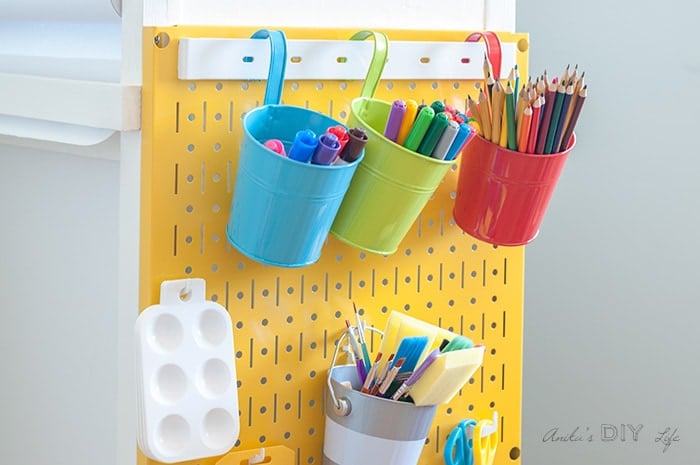
and the fourth side – my favorite – a pegboard organizer.

A simple shelf to store a few supplies on the bottom too.
It is freestanding and can be moved around quite easily. My original plan was to put it up on casters but I realized that wheels and kids make for a very mobile combination so I added felt pads on the bottom. It is easy enough to turn it around (without scratching the floor) but also not “that” easy.
Read on for all the material sources and a few tips and tricks to make this. You can grab the detailed plans for this art center on BuildSomething.com.
***This post contains affiliate or referral links. It is a way for this site to earn advertising fees by advertising or linking to certain products and/or services. Please read my full disclosure here ***
Materials Needed to Make the DIY Kids Art Station –
- Lumber per the plans
- Miter saw
- Ryobi brad nailer
- 1¼” finish nails
- Kreg Jig
- 1 1/4″ pocket hole screws
- Staple gun
- 3/8″ staples
- Chicken wire
- Galvanized sheet metal or you can get a magnetic chalkboard sheet to skip painting.
- Dry erase board – you can find these in your local hardware store with project panels.
- Chalkboard Paint
- Pegboard (I used the Wall Control metal pegboard system. More on that later)
- Power drill/driver
How to Build a Children’s Art Center –
All the cuts and dimensions are detailed in the step by step plans.
Get the free plans at buildsomething.com and make your own!
Here are a few tips and tricks for making this art station without any hiccups. Be sure to read through it before starting assembly so you don’t run into any issues.
- Clamp the two 2×2 boards to drill the hole for the dowel so they are perfectly aligned.
- Make a note of the positioning of the boards and the pocket holes. The pocket holes for the dry erase board and the chalkboard are on the inside and aligned to the inside edge of the legs whereas the pocket holes for the pegboard and the chicken wire frame are on the outside and aligned to the outside edge of the frame. Also note, that the 1×2 to create the chicken wire frame is joined by pocket holes that face the inside of the frame.

- Once you build the frame, paint or stain it in the color of your choice before attaching the chalkboard, dry erase board etc. I painted the frame with my favorite paint sprayer inside the spray shelter.
- For the magnetic chalkboard, I used a galvanized metal sheet and painted it with chalkboard spray paint.
- When attaching the faces, it is best to do it in this order – magnetic chalkboard, dry erase board, chicken wire and then finally, the pegboard.
- The edges of the chicken wire are sharp. Also, the raw edge of the magnetic chalkboard is visible. I hid them under extra 1×4 boards to create a finished look.

With these pointers and the complete plans on BuildSomething.com, you should be able to build your own in time for the summer break!
Organizing Kids Art Center Using a Pegboard
For the organization, Wall Control sent me their metal pegboard system. I just love the fact that it comes in so many wonderful colors. I picked the yellow and used a couple of Hanger Holders, standard slotted hooks, 90-degree hooks, and plastic hanging pegboard bins.
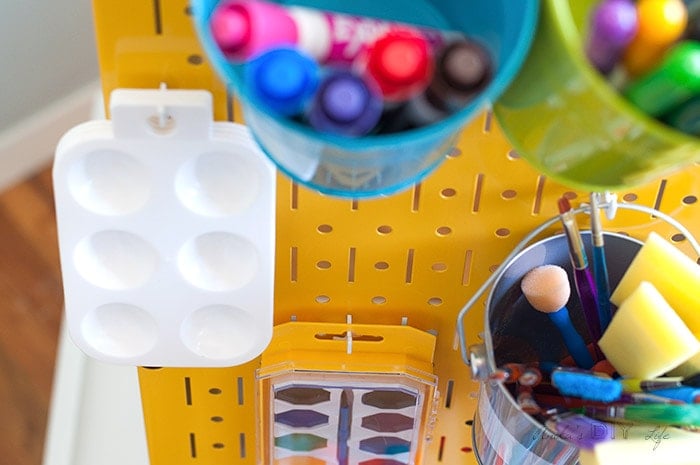
I used these hanging metal planters to organize all the markers and pencils.
It is super easy to build this! And if you have a small house, you don’t need to have a dedicated corner in your home for an art station!
Grab the plans at Build Something and build your own version!!

Anika's goal is to inspire and empower beginners with woodworking, DIY, home improvement, and home decor ideas.
She wants everyone to unlock their creative potential and experience the feeling that comes with making something. Nothing feels better better than seeing something and saying "I can make that!"


OMG this is super cute. I will have to be sure to remember this when I have grandkids. I should have had one when I was a kid. Very creative!
This is such a cute idea. I know my very creative nephew would love this.
This is every kid’s (rather, everyone who loves to make paintings and drawings) dream come true. It has everything one ever needs to do artworks. Parents don’t have to bother about their kids drawing on walls as is the case in many houses. Such a great idea. I can only wish to have a art station.