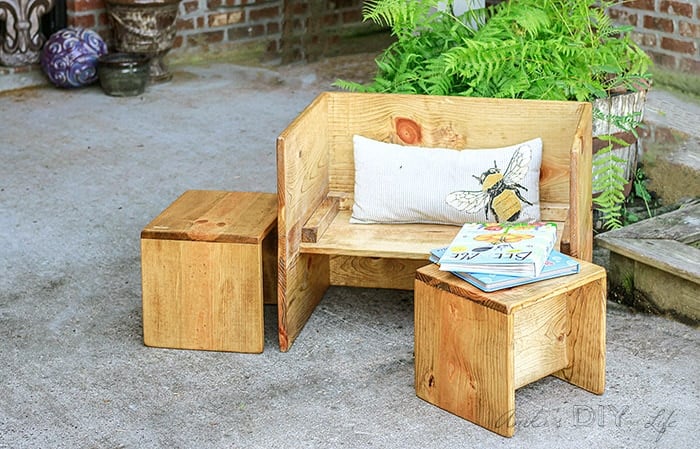
Convertible DIY Toddler Table and Chair Set
Learn how to build a convertible DIY Toddler Table and chair set, which is the perfect Montessori weaning table and can be used in so many configurations.

As babies grow, it is essential to help them be independent to gain self-confidence.
This is why little toddler tables and chairs are essential to have. They are also called weaning tables in the Montessori world.
This adorable little set is not just any simple table and chair set.
It can be converted into many configurations – 27 possible combinations, to be exact!
This set was originally built by Katie, who is a member of the Facebook group for women woodworkers and DIYers

It can be a simple desk with stools.

Or as a smaller table with little Montessori-style cube chairs.
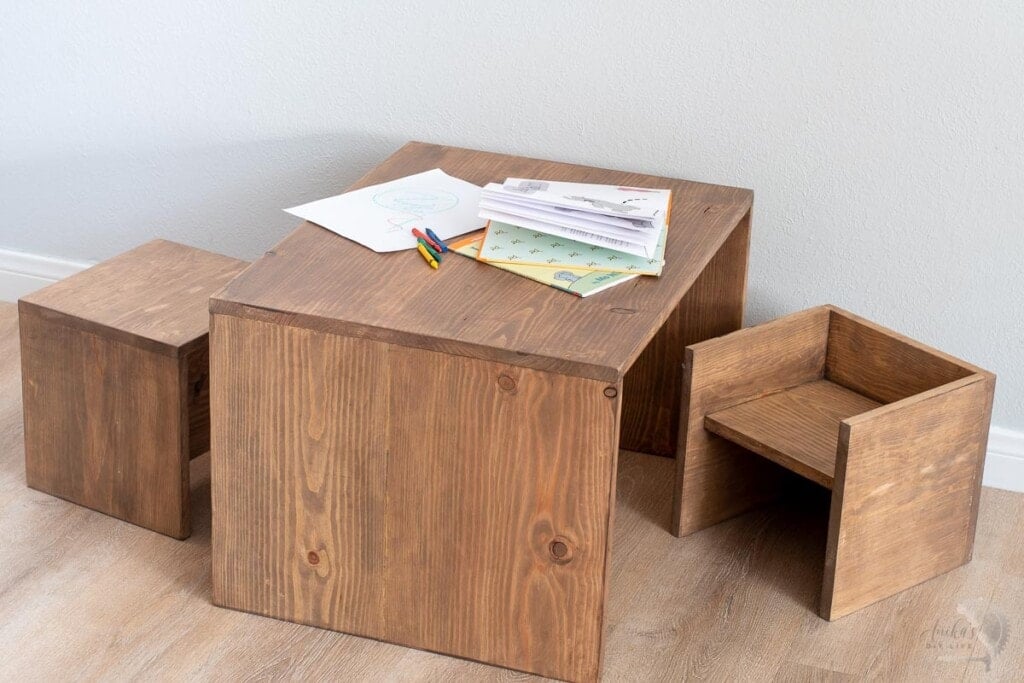
Or you can flip it entirely and use the table as a bench!

And what do kids like more than being able to flip furniture and still use it 🙂
Katie Says –
My two younger kiddos have already spent several hours playing on it, drumming on it, and making art on it. I’ve also frequented the chairs myself in the “side table” position, and even tested the table in all three positions to see if it could hold my weight, and it can. It’s easy enough to move that it’s been in several rooms in our house already. It’s definitely a piece that will be able to evolve with my children as they grow.
I have the full details of how you can build your very own convertible set below.
***This post contains referral or affiliate links. It is a way for this site to earn advertising fees by advertising or linking to certain products and/or services. Please read my full disclosure here ***
Material Needed
- Lumber per the plans.
- Miter Saw
- Dowel Jig. This is a newer version of the one I used.
- 3/8″ dowel pins
- 2″ wood screws
- Orbital sander
- Sand paper in various grits
- 48″ Clamps – pipe clamps or bar clamps are perfect
- Wood Glue
- 1-1/4″ finish nails and Brad nailer
- Stain and paint of your choice. Katie used this one.
How to Build
To build this set, Katie used only wood glue and finish nails. I decided to use dowel joinery to reinforce all the joints.
You can use pocket holes if you like, but the pocket holes will be visible since this set can be used in all sorts of configurations. If you intend to paint it, the pocket holes can be easily filled in and hidden.
Alternatively, you can also use countersunk wood screws for all the joints, fill the screw holes, and paint or stain.
Here is a full video of the project –
Flip Toddler Table/ Bench
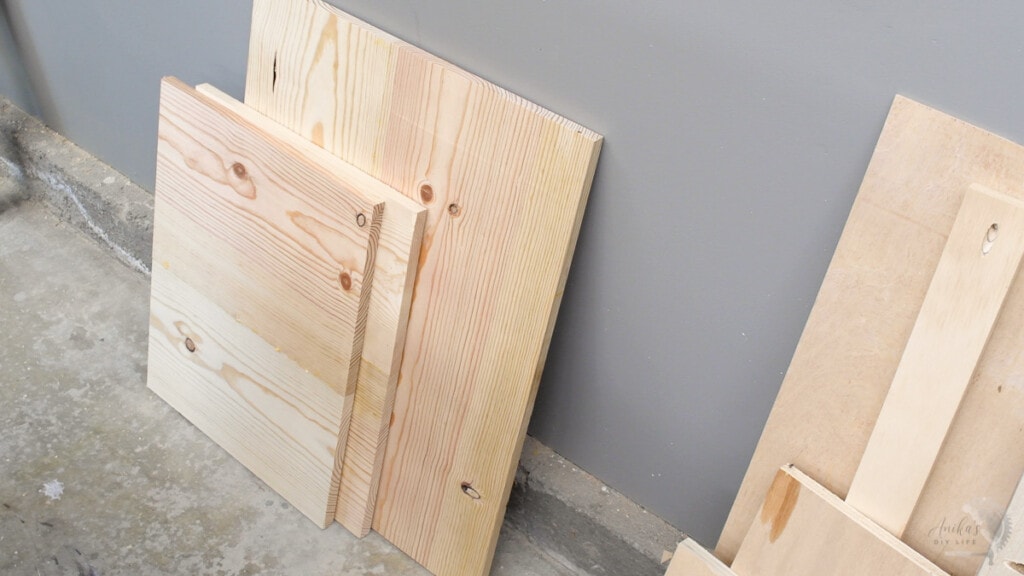
Step 1: Prep the boards
- Make all the cuts per the cut list in the plans.
- Sand the boards.
Step 2: Edge glue boards
- Edge glue and clamp top boards to build the top. 48″ F-style clamps are perfect for these.
- Edge glue and clamp the sideboards to build 2 sides.
- Let the glue-ups dry overnight.

Honestly, 3-4 clamps are enough but the more, the better so you can clamp and complete all the glue-ups at the same time and don’t have to go one-by-one.
This gives two side panels and 1 top panel.
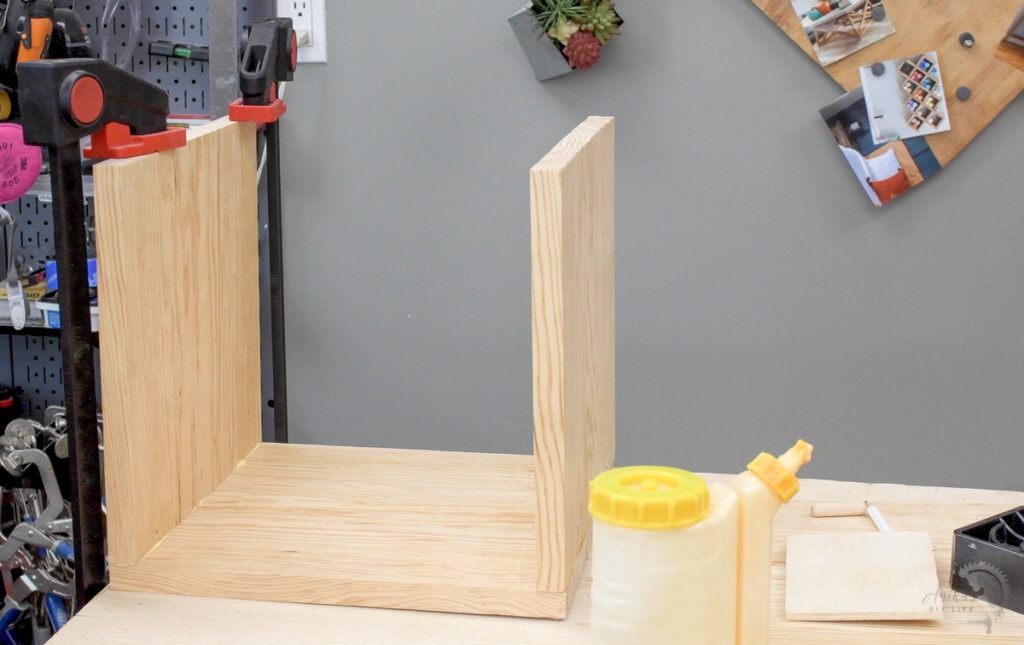
Step 3: Attach Sides
- Attach the side pieces to the top using wood glue and dowel pins.
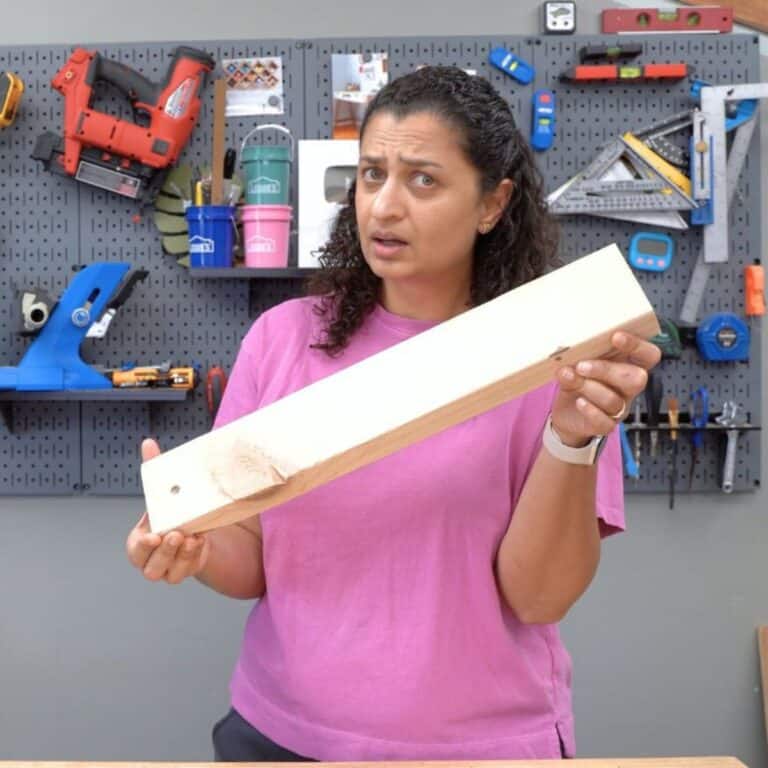
Using a dowel jig is super easy.
- Mark the locations of the dowels on both the sides of the joint.
- On the horizontal board, I used a piece of plywood to help keep the jig in place as I made the holes.

- On the vertical board, I clamped the jig directly to the board and made the holes.

- Add wood glue to the dowel holes, and the joint and put the boards together. You may need a mallet to help push the boards together.
- Clamp tightly and allow to dry.

Important – As you join the sides to the top, Stagger the two different dimensions of lumber for added strength: so the 1×10 side pieces attach to the 1×12 top piece, and the 1×12 side pieces attached to the 1×10 top piece.
Step 4: Attach the 2×2 braces
- To help brace and hold everything together, glue and attach the 2×2 braces through using 2″ wood screws to the back and side edges of the desk piece (2x2s are visible when table is in bench position).

Step 5: Attach the desk
- Attach desk inset piece to the braces and the sides using wood glue and finish nails.

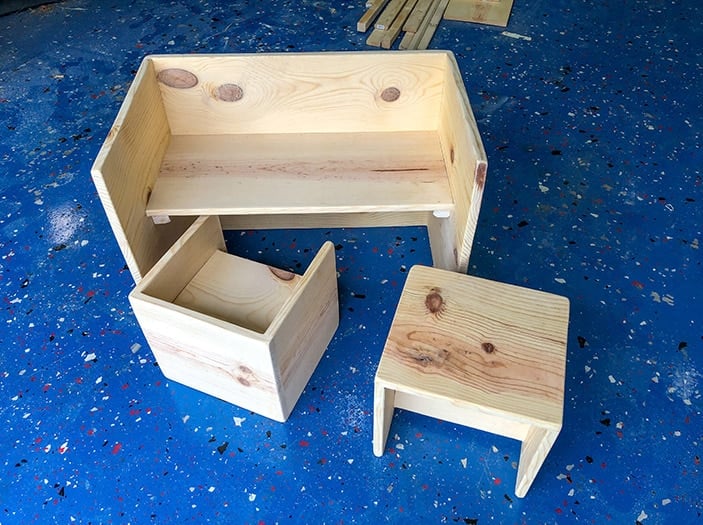
Montessori Style Cube Chair
Step 1: Prep the boards
- Make all the cuts per the cut list in the plans.
- Sand the boards.
It is always best to sand down all the boards before putting them together to get the best finish.
Step 2: Attach sides
- Attach the sides to the back using wood glue and dowel joinery.
Step 3: Attach the seat
- Attach the seat using glue and finish nails from the outside.
The seat is attached at a height such that it allows it to be flipped for two different seat heights.

Finishing
- Use an orbital sander with 80 grit to round all of the edges and also to smooth any super rough spots. Then follow up with 150 grit and 220 grit.
- Finish with stain or paint of your choice. Katie used Puritan Pine stain that she already had laying around.
- If you decide to paint it, see how to paint unfinished wood to get the best long lasting finish
- Once the stain is dry, use a high performance top coat to stand the test of time and toddler activity.
As you know by now, I absolutely love this adorable set which can be used in so many different ways!
Each piece can be used in 3 configurations giving us a total of 27 different possible configurations!
Printable Plans
You can get the printable plans for this cute little set by clicking below.
If you build it, I would love to see it! Feel free to email photos to me at [email protected] or tag me on Instagram @anikasdiylife for a chance to be featured on social media! I can’t wait to see what you build!
More DIY Kids Room Ideas
Anika's goal is to inspire and empower beginners with woodworking, DIY, home improvement, and home decor ideas.
She wants everyone to unlock their creative potential and experience the feeling that comes with making something. Nothing feels better better than seeing something and saying "I can make that!"


Great work Katie and Anika that was nice of you to post Katie’s project on your own platform. Should b proud of yourselves #inspirationalwomen 🙌❤️