How to Make Shaker Cabinet Doors – A Simple Tutorial
Building Shaker-style doors is easier than you think. Learn how to build shaker-style cabinet doors using only a table saw with this detailed step-by-step tutorial.

Shaker cabinets are very popular right now.
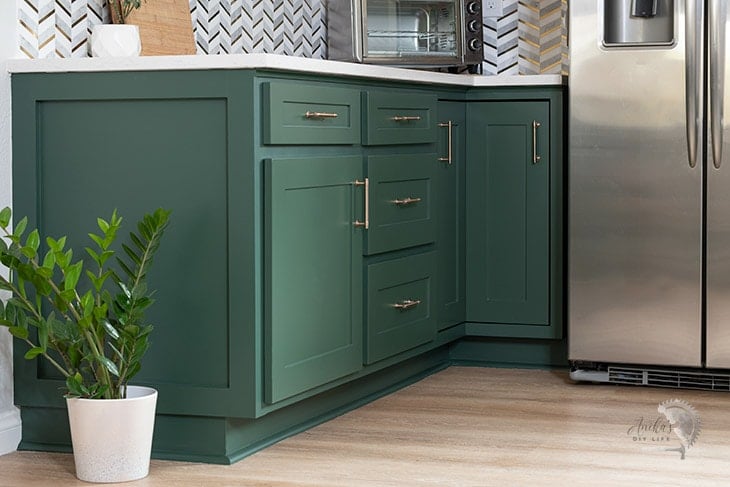
These classic doors, with their clean lines and minimalist design, add a touch of sophistication to any room.
Whether you’re renovating your kitchen, upgrading your cabinetry, or revamping your wardrobe, shaker doors can elevate the overall aesthetic and create a sense of harmony in your living space
However, they can be pretty expensive to buy. I did upgrade my kitchen cabinets with new doors from a company and it was perfect because building 30+ doors wasn’t something I was looking forward to.

However, if you need a few doors, the shipping charges add up and could be more beneficial to build.
For my laundry room, I needed only 3 doors so I decided to go ahead and make my own.
Plus, making your own cabinet doors will definitely save you a ton of $$$.
There are multiple ways to build a Shaker Style door:
- using pocket holes or Kreg Jig (tutorial coming soon)
- using a table saw
- using a router and router table (tutorial coming soon)
They each have their advantages and disadvantages and I will be posting tutorials for each of them.
In this tutorial, I will show you how to build shaker doors using a table saw. Using this technique, you get clean doors using only a table saw (which you might already have).
My goal is that by the end of the tutorial, you will know exactly how to design and build your own shaker-style cabinet doors.
DIY Shaker Cabinet Doors Video
Shaker Door Design
Shaker-style cabinets have clean lines and a minimalist aesthetic. They have a flat, recessed panel surrounded by a sturdy frame. The frame consists of rails (horizontal pieces) and stiles (vertical pieces) that join together at 90-degree angles to make the frame.
The center panel within the frame is flat, with no intricate carvings or decorations leading to simplicity and utility.
What Type of Wood to Use for Shaker Cabinet Doors
When it comes to choosing the type of wood for shaker-style doors, there are several options to consider. Here are a few commonly used woods that work well:
- Hardwoods like Oak, maple or Cherry: If you are looking to stain the doors, these are a great choice. The final choice will depend on the look and aesthetic you are looking for.
- Pine: Pine is a more affordable option that can provide a rustic look when stained or it can be painted as well. It is a soft wood and can be easily dented or scratched. If you are painting, you can also get pre-primed pine from home improvement stores.
- MDF: If you are planning on painting, you can use mdf which when primed and sealed well gives a super smooth finish with paint.
Ultimately, the choice of wood for shaker-style doors depends on your personal preferences, budget, and the overall design aesthetic you want to achieve. Consider factors such as durability, appearance, and compatibility with your desired finish to make an informed decision.
Calculating the Door Dimensions
Like all things woodworking, measuring accurately and calculating the dimensions and cut list is the most crucial step. Below is the step-by-step guide.
Step 1: Measure the Cabinet Opening
Measure the opening of the cabinet where the door will be installed. You want to measure the inside edges. Do not measure to the edge of the cabinet.
For accurate results, you want to measure in 3 locations – top, middle, and bottom. This makes sure to get the most accurate measurement. Ideally, if your cabinet is square all three measurements should be equal. But in the case that they are not equal you want to go with the smallest measurement.
Step 2: Determine the Overlay
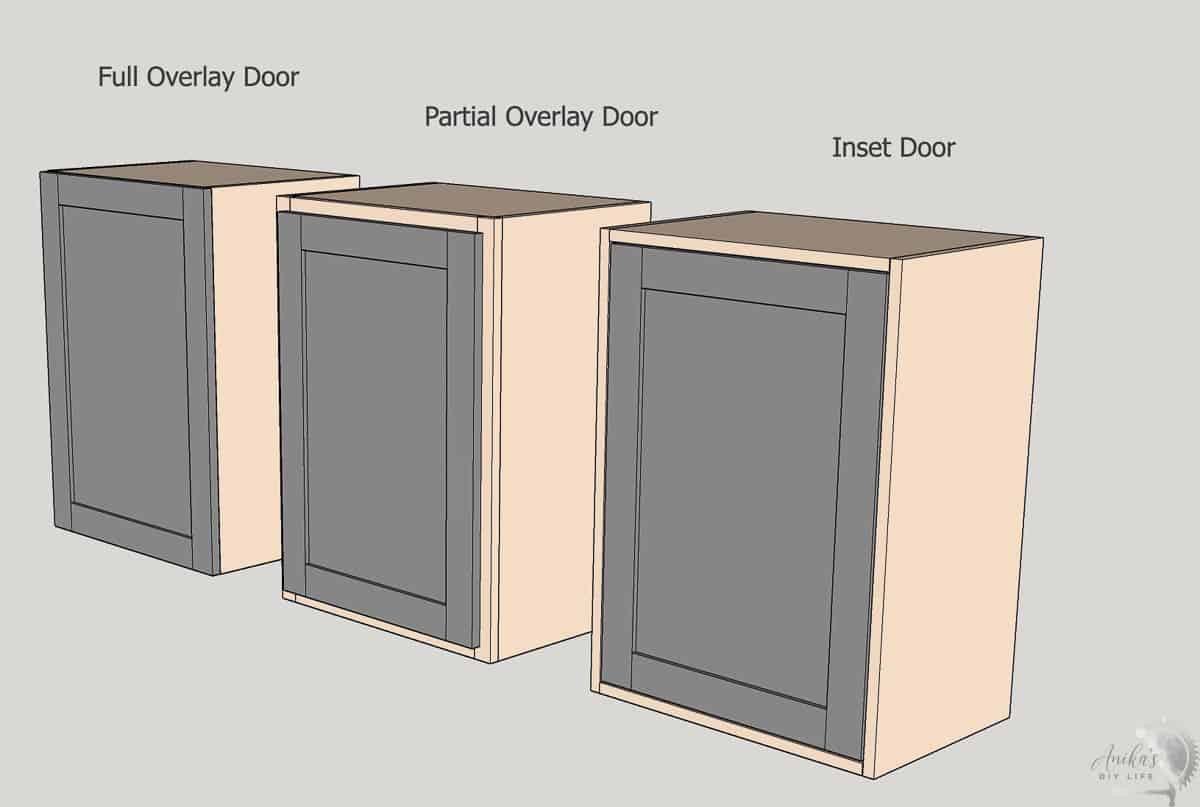
Overlay determines how much of the cabinet frame the door will cover. These apply to drawer fronts as well. Common overlay options include – full overlay, partial overlay, and inset doors.
Full and partial overlay doors are bigger than the cabinet opening and are generally used with face frame cabinets. Partial overlay doors only have a small overlay and can be 1/2″ or more. Full overlay doors completely overlap the edges of the cabinet and only have a 1/16″ reveal on all sides to allow for smooth hinge operation.
Inset doors or inlay doors are inset within the cabinet door opening and have about 1/8″ gap on all sides to allow for door operation.

At this point, once you have the measurements, you can pop in the measurements in the Cabinet Door Size calculator I created, and it will give you all the measurements you need.
Step 3: Calculate the Door Size
Once you know what type of door you want, you can add the overlay to the width and height of the cabinet door opening. Be sure to double up the overlay because it will be on all sides.
For example: if the door opening is 8″ wide and you want a 1″ overlay, the door width will be 18″+1″(overlay on the left side)+1″ (overlay on the right side) = 10″.
If you are building inset doors, you will subtract 1/8″ on all sides. Therefore, in the above example it would be 8″ – 1/8″ (gap on the left side) – 1/8″ (gap on the right side) = 7 3/4″.
Once you have the final door dimensions, it is time to get ready to calculate the size of the parts of the door and build it!
Cabinet Door Size and Cut List Calculator
You can add the cabinet measurements to the FREE Cabinet Door Size calculator I created, and it will give you all the measurements you need. Be sure to grab that!
Parts of the Shaker Cabinet Door
The Shaker doors are made of three parts:
- The Rails
- The Stiles
- The Panel.
The rails are the horizontal pieces and the stiles are the vertical pieces that join together at 90-degree angles to make the frame. This can be built with any size lumber based on your preference but the most commonly used size is a 1×3 or a 2.5″ wide and 3/4″ thick board.
In this tutorial, we will be using 1×3 boards to show all the calculations and tool setup.
If you are using a different size of the board, you can adjust it accordingly. The key is to understand how everything works.
The panels within the frame are flat and are usually made of either 1/4″ hardwood plywood or 1/4″ mdf.
Calculating the Rails and Stiles Dimensions

Dimensions of the stiles:
This one is super easy – it is the length of the door itself.
Dimension of the rails:
Length of the rails = width of the door – (2 x 2 1/2″) + 3/4″
The 2 1/2″ is the width of the boards being used. In this case we are using 1×3 boards hence it is 2 1/2″ wide.
The 3/4″ comes from 2 x 3/8″. 3/8″ is going to be the width of the tenons that we will be creating.
Dimensions of the panel:
Length of the panel = length of the door – (2 x 2 1/2″) + 3/4″
Width of the panel = width of door – (2 x 2 1/2″) + 3/4″
Essentially, the panel will be 3/8″ larger than the door frame opening on all sides. I highly recommend not cutting the panel just yet. Once the door frame is assembled, you can double-check the dimensions and make the final cuts.
The Cabinet Door Size calculator also calculates the sizes of the rails and stiles for you! So be sure to grab that with the above link.
Now that you have all the dimensions figured out, it is time to collect the tools and get to the building!
***This post contains referral or affiliate links. It is a way for this site to earn advertising fees by advertising or linking to certain products and/or services. Please read my full disclosure here ***
Tools Needed
- Table Saw
- Miter saw
- Kreg Multimark Tool
- Measuring tape
- Wood glue
- Clamps (large enough to clamp the entire door). These ones are my favorites but you can also get pipe clamps that might be cheaper to make.
Safety Equipment
Safety is extremely important when using the table saw – especially to build these doors where you will be making small and precise cuts.
- GRR-Ripper safety block (very highly recommended!)
- Table saw cross-cut sled. Your table saw would have come with one. If not, this is a great one.
- Dust mask
- Eye protection
- Hearing protection. I love using my IsoTunes Free 2.0. You can get $10 with code ANIKA10
How to Build DIY Shaker Cabinet Doors
Once you have the door size and board sizes figured out, you can easily build these doors. Here is a step-by-step tutorial:
Step 1: Make the Cuts
Cut the rails and stiles per the dimensions you calculated according to the guide above (or from the Door Size Calculator). The miter saw is the best tool to make these cuts quickly and precisely.
Remember, do not cut the center panels to size just yet.
Also, additionally, you want to save at least two 8″ long pieces of scrap board from your cuts to use for the trial cuts.
Step 2: Cut the Grooves
The first goal is to create grooves in all the rails and stiles to accommodate the 1/4″ thick panel. Now, you can usually use a Dado blade for this. But like me, if you don’t have one, don’t worry! I have you covered. It takes a few more passes but it works just fine. Here is how to do it.
Note: Always run the test piece through first.
- Set up the blade height to 3/8″ high. I like using my multi-mark for this. Make sure you are measuring from the edge of the blade tooth.

- Set up the table saw fence at 3/8″.
- Run the boards through to make the groove

- On all of the boards, make sure to mark the fence side.
Note: be sure to use the GRR-Ripper to keep the boards aligned and pushed up against the fence while also keeping your fingers at a safe distance.
Now, you have a groove but it isn’t wide enough to accommodate the 1/4″ panel. With a dado blade, this would have created a wide enough groove. But we a regular blade, you will need a couple more steps.
- Move the fence by 1/16″. It can be moved in any direction.
- Run the scrap board through and double-check to make sure the groove is well-defined.
- Run all the other boards through.

Remember: Keep the fence side (that you marked earlier) towards the fence.
At this time, you can check if the groove fits the 1/4″ panel. If it does, great! But it probably will not. We need to make one more pass.
- Move the fence by 1/8″ in the other direction.
- Run the scrap piece of wood through and double-check to make sure the groove is well-defined and the 1/4″ board fits nicely. If it is too tight or too loose, adjust the fence for it.
- Run all the other boards through.
Important: You want to run all the boards through the blade at every step to ensure you get the exact same width and placement of the groove on all the stiles and rails.
Step 3: Cut the Tenons
Once the grooves are cut in all the boards, it is time to cut the tenons (or tongue) at the end of the rails.
DO NOT make these cuts without a crosscut sled (also called a miter gauge). This usually comes with the table saw but you can also buy one.
First, we have to set up the table saw. We will be using a test piece for this.
- Set up the fence at 3/8″
- Set the height of the saw blade to the height of the groove.

- Hold the board against the cross-cut sled with the end up to the fence.
- Slide the board through the table saw and then make multiple cuts, slightly sliding the wood away from the fence each time.

- Flip the board over and repeat to complete making the tenon.

Test this piece with the grooves you make in the previous step to ensure it fits snugly. If it doesn’t make adjustments to the table saw accordingly and try another scrap piece until it works.
Note: Make small adjustments at a time.
Once you get it dialed in, you can go ahead and make the tenons on both ends of all the rail pieces.
We are ready to assemble the door!
Step 4: Cut the Central Panels
Once the rails and stiles are cut, it is time to get an accurate measurement of the panel needed to complete the door.
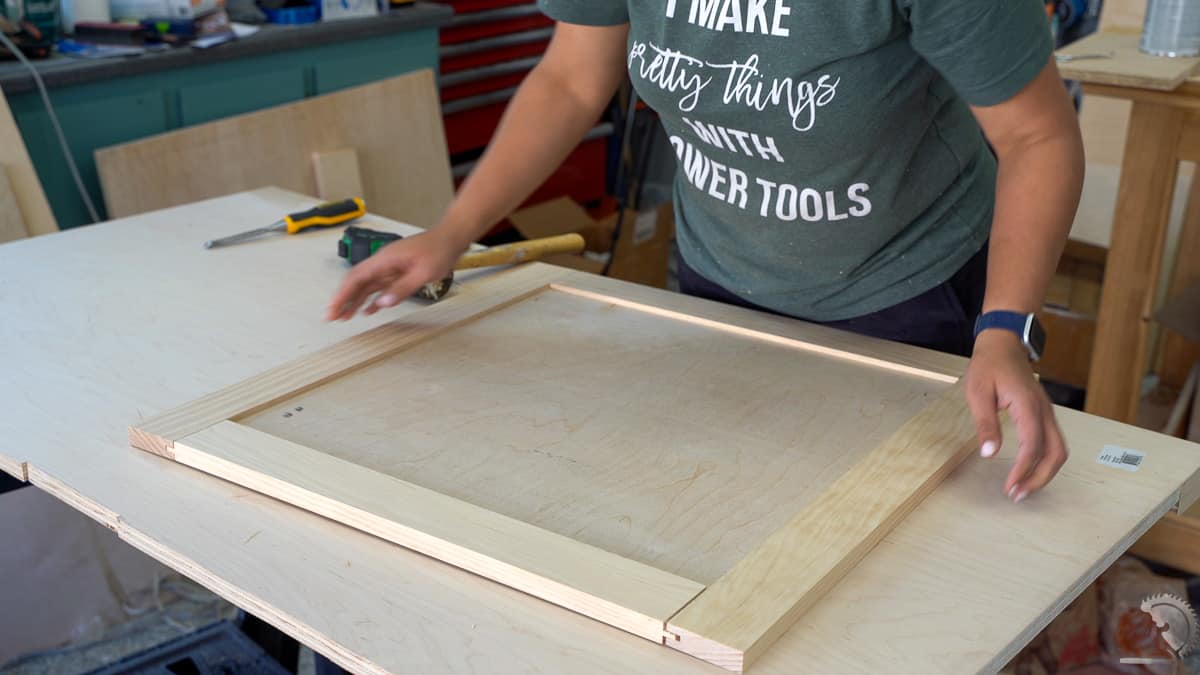
- Do a dry fit of the rails and stiles to make a frame.
- Measure the inside opening of the frame – both the height and the width.

- Add 3/4″ to the width and height. This is because it will go in about 3/8″ on all sides into the groove.
- Cut the panel using a table saw. A circular saw will work as well.
Now that the panels are cut up, you can quickly do a dry fit to make sure everything is working well.

I found that there were wood splinters stuck inside the grooves that wouldn’t allow the plywood to go in all the way. A little bit of cleanup with a chisel worked wonders and made it easy to put it all together.
REMEMBER: I have the Cabinet Door Size calculator to make all the calculations super easy!
Step 5: Glue-up
We are now ready to put it all together.
Set up a clean flat surface to assemble the door.
- Apply wood glue to the tenons and also add some to the grooves.
- Start by assembling a stile with rails on two sides to make a C.
- Slide the central panel into it. If it is too snug to slide in, you can also attach each side to the panel and then into the tenons.
- Add the last side (the stile). You may need a rubber mallet if the joints are a little snug. This is totally fine… better to have a snug joint than a loose one!

- Once it is all assembled, add clamps. You want to ensure you squeeze all the sides together until flush.

- This is a good time to make sure that the doors are square. Learn more about how to do this here.
- Wipe away any excess glue and allow to dry overnight.
Step 6: Finish
Once the glue has dried, you can unclamp the boards.
- Fill any gaps using wood filler or caulk. Caulk is great for getting clean seams but only when you are painting.
- Give the entire door a sanding with 220 grit sandpaper (150 if using stain).
- Use primer and paint or stain in the color of your choice.
To mount the doors, you can use a concealed hinge jig to make the hinges easy to install. Also, this cabinet door installation jig is a great help in attaching the doors to the cabinet frame.
There you have it! You can easily build shaker-style doors for your next cabinet project. Apart from the table saw, you can also router bits to make the grooves and mortise and tenon joints for the door frame.

If you want something simpler, you can use pocket holes and pocket hole screws to assemble the frame while still making the grooves.
If you don’t own a table saw and want to make doors, you can easily make those as well. Just that the inside of the doors will not be the prettiest! That is how I made the large door in my laundry area to hide the water softener. A simple tutorial coming up for it soon.
RELATED: How To Build Pull-Out Drying Rack Drawers
Anika's goal is to inspire and empower beginners with woodworking, DIY, home improvement, and home decor ideas.
She wants everyone to unlock their creative potential and experience the feeling that comes with making something. Nothing feels better better than seeing something and saying "I can make that!"


