DIY W-Trestle Dining Table – How to Build
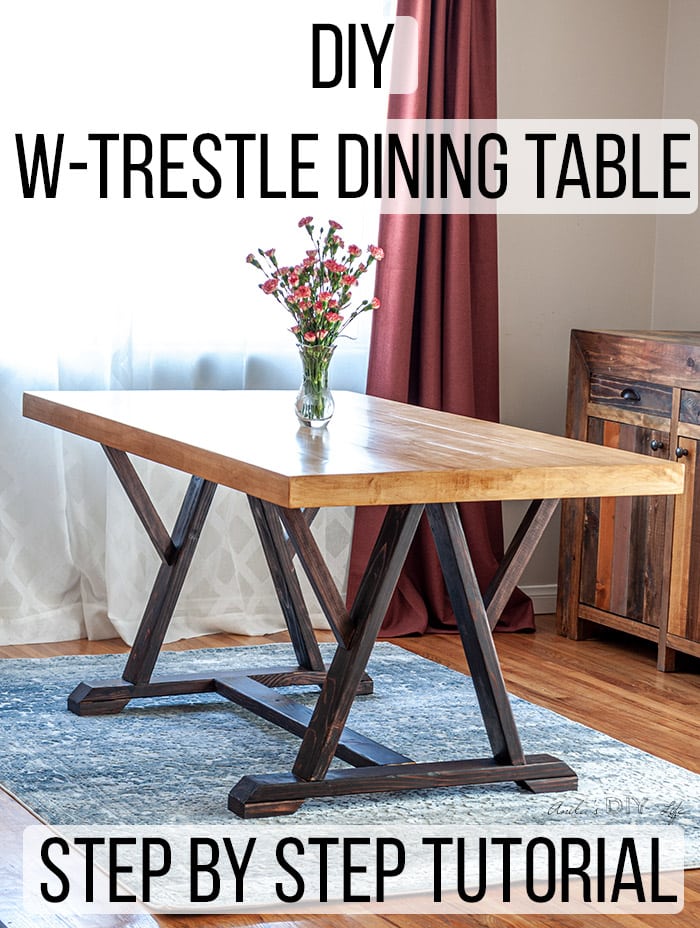
Learn how to build a DIY W-trestle dining table with full step by step tutorial and project video. Plus get the plans to build your own!
You might also like this $20 DIY Outdoor Table and 24 Amazing 2×4 project ideas

Building a dining table has been on my list for almost 3 years!
It took me almost 2 years to find the idea and inspiration for the design I wanted.
It just waited for me to get around to figuring out how to do it.
But then, Jen Woodhouse agreed to make the plans for it!
Her plans are always so simple, smart and easy to follow. And now I have this gorgeous dining table!
Table of Contents
- About the Trestle Dining Table
- Materials needed
- Printable plans
- Video tutorial
- How to Build Trestle Table Base
- How to Build Trestle Table Top
- Putting the table together
- Pin this project to Pinterest
- More Related DIY projects
About the DIY Trestle Dining Table –
I am in love with how it turned out, especially because this table has a lot of firsts in it –
- Not just the fact that it is the first dining table I have built.
- It is the first time I have used Maple or any hardwood for that matter. Which led me to visit a real lumber yard for the first time.
- I edge joined boards for the first time which meant I had to make an edge jointer jig.
- This is probably the first project I put my table saw through a thorough use!
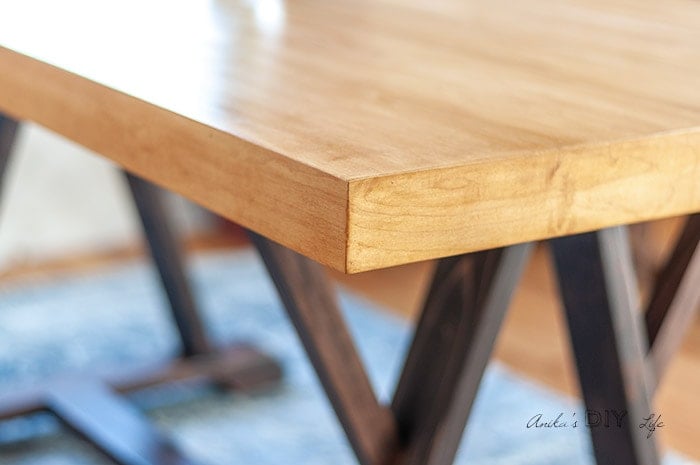
Look closely at the table top.
It is built using mitered 1×3 boards.
I had never done this before but when Jen suggested, I agreed to try it out… because trying new things just makes everything so much more fun!
Let’s get on to all the details of how to build this W-trestle dining table.
***This post contains affiliate or referral links. It is a way for this site to earn advertising fees by advertising or linking to certain products and/or services. Please read my full disclosure here ***
Materials Needed for the DIY Trestle Table
- Lumber per the plans
- Circular saw
- Table saw
- Miter saw
- Power Drill/Driver
- Kreg Jig
- Brad Nailer and 1¼” finish nails
- Countersink bit
- 2 ½” wood screws
- 2 ½” pocket hole screws
- 2″ wood screws
- Wood glue
- Large bar clamps or pipe clamps
- Random Orbital Sander
- Sand Paper in various grits
- Fine grit sanding block
- Tack Cloth
- A stain of your choice. I used –
- Java gel stain for the legs
- Wood Dye mixed in dewaxed shellac for top
- Arm-R-Seal for Top Coat
DIY W-Trestle Table Plans
Jen Woodhouse has the plans available on her website. Click below to get the plans!
Shop My T-Shirt Designs –
How to Build a Trestle Table
Here is a video showing you exactly how I built this W-trestle table. Step by step instructions and all the written details follow below.
DIY W-Trestle Dining Table
The build is basically split into two parts – the leg frame and the top.
How to Build the W-Trestle Table Base
Step 1 – make the cuts
- Start by making the cuts per the plans. As you make the cuts, be sure to rough fit them as you go to ensure the best fit.
- After all the cuts are made, sand all the pieces smooth before attaching.
Step 2 – build legs
- Layout and rough fit all the boards for the legs.
- Build the A-frame using 2½” countersunk screws. A countersink drill bit makes this really easy.
- To attach the 2×2 braces, use spacers to make them centered along the 2×4. I found that a couple of scrap boards were the perfect thickness for this.
- This builds the basic legs. You can fill in any visible holes – just 2 on each leg where the braces join.
Step 3 – attach the runners
- Attach runners using pocket holes and 2 ½” pocket hole screws. It is best to attach all three to one leg then lay it on the side and attach the other leg. (I did this after I stained and sealed the legs and runners)
Step 4 – finish the leg frame
- I used Java gel stain and Arm-R-Seal to finish off the legs.
- If you are making the entire table a single color, you could wait to do this at the end too.
How to Build the Dining Table Top
The table top is built using 1×8 boards edge glued together and trimmed with mitered 1×3 boards.
I chose to go with Maple boards because I wanted a hard durable top. I loved the grain and look of maple!
Step 1 – prepare the boards
- Leave the boards about 4″ – 5″ larger than needed
- Run both sides of 3 of boards through a router or a table saw using an edge jointer jig. This isn’t necessary but by doing so, you get the best tight fit of the boards.
- I made my own edge jointer jig following this Woodworking for Mere Mortals tutorial. It is super easy and uses a few boards and clamps.
- I made my own edge jointer jig following this Woodworking for Mere Mortals tutorial. It is super easy and uses a few boards and clamps.
- For two of the edge boards – run 1 side through with the jointer jig and the other side at a 45° angle.
Step 2 – glue up
- Lay down bar clamps or pipe clamps and glue up 3 1×8 panels and let dry overnight.
- Once they are dry, add the edge boards with the mitered edges outwards and glue them up.
Step 3 – miter the end of the table top
- Use a track saw or circular saw to cut the ends of the table top at the 45°.
Step 4- add the edge trim
- Run the 1×3 boards through the table saw at 45° to create the miter edge.
- Cut the bevel edges using a miter saw. Make sure you measure accurately to get the best tight fit.
- Attach to the table top using wood glue and finish nails.
Step 4 – finish table top
- Sand the top to remove any glue that squeezed out during the glue up
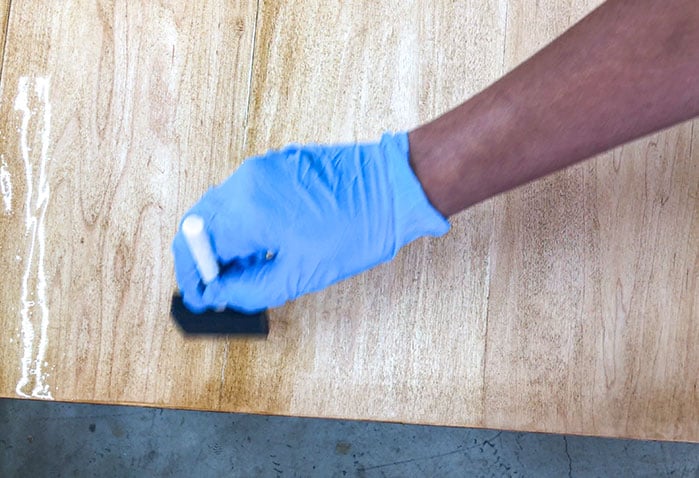
- Stain in the color of your choice. Since I used maple, I had the challenge of figuring out how to stain maple. After a bunch of trials, I finally settled on a formula by The Wood Whisperer and used golden brown wood dye and dewaxed shellac to add color to the table top.
- Add a protective top coat. I used a few coats of ARM-R-SEAL while sanding in between.
Put the DIY Dining Table Together
- Lay down the table top upside down on a drop cloth.
- Make sure the legs are centered.
- Drill pilot holes and attach using 2″ wood screws.
And DONE!
Pssstt: Do you see the DIY Emerson Buffet on the side? See more about it here!
This table is really not hard to build at all.
Although the truth is it took me almost 3 months to get it done. A large part of it had to do with the fact that I was trying so many new skills.
Also, I had dropped a lot of $$$ on the maple boards and was scared to mess up anything. That meant a whole bunch of trial cuts and glue ups before I worked with the real thing.
But I cannot be happier with how this turned out!
Now I have to go figure out the chairs and all the pretty things to bring this space together!
Remember you can get plans for this table on Jen’s blog here.
If you decide to build it, I’d love to see it! Feel free to email photos to me at [email protected] or tag me on Instagram @anikasdiylife and Jen @jenwoodhouse for a chance to be featured on social media!
You Might Also Like –
[mv_create title=”How To Build a W-Trestle Dining Table” key=”31″ type=”diy”]
Anika's goal is to inspire and empower beginners with woodworking, DIY, home improvement, and home decor ideas.
She wants everyone to unlock their creative potential and experience the feeling that comes with making something. Nothing feels better better than seeing something and saying "I can make that!"


Oh, goodness, Anika! Thank you for allowing me to have a small part in your beautiful dining table project. I LOVE that you tried so many new techniques with this build! Your dining table looks stunning!
You guys did a great job! It is gorgeous!
Anika that turned out awesome!!! Kudos to you on a fantastic project.Alisa