DIY Wood Chair With Cane Webbing
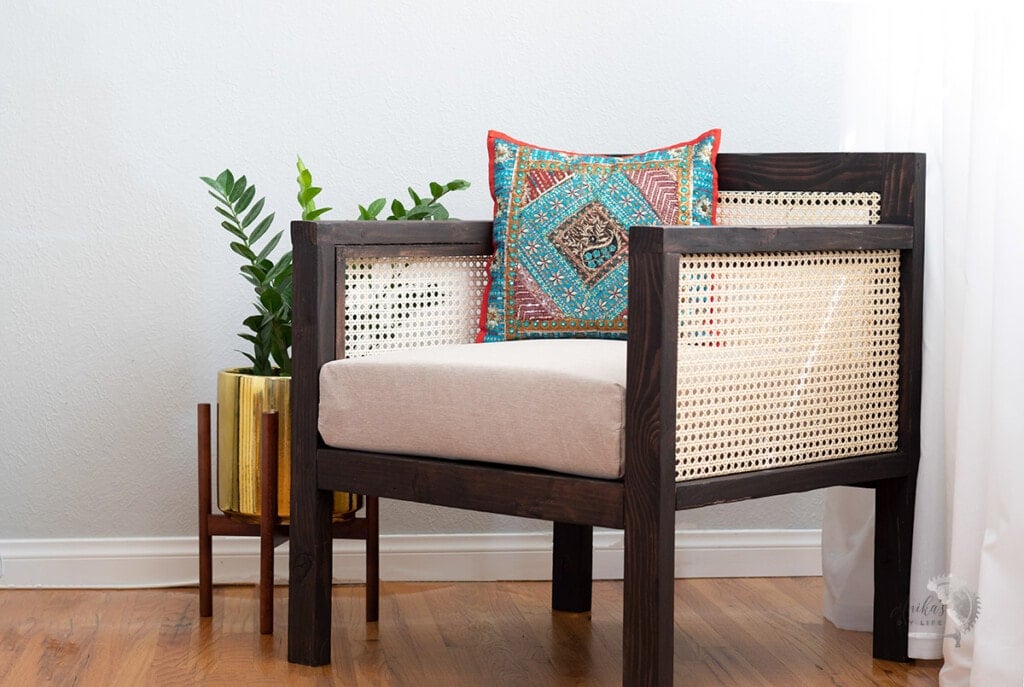
Learn how to make a DIY wooden chair with cane webbing back and arms with the step-by-step tutorial and plans. This DIY armchair makes the perfect addition to any living room.

The use of cane webbing in furniture is a prevalent design trend right now. Growing up in India, I was surrounded by it. Cane and jute, and natural fibers and are very popular in India as a cheaper alternative to wood furniture. I wanted to use it in a furniture project for a while, and I thought this wooden chair was the perfect project to start with.
I love how the cane webbing gave this simple chair a beautiful twist.
I have you covered with the step by step tutorial and the full plans for this chair below.
How Hard Is It to Build This Chair?
This is a very beginner friendly project requiring very basic tools.
The cuts are simple and straightforward, and I built the entire frame of the chair in a day (and I was troubleshooting, recording video, and taking pictures the whole time).
I have all the kinks ironed out for you in the detailed step-by-step plans, and I think this would make a great weekend project.
Do You Need a Lot of Tools to Build It?
Nope! Just a few basic tools. You need a miter saw (or circular saw) to accurately cut the boards, a power drill, and pocket hole jig to put the boards together, and then a staple gun and nail gun to attach the cane webbing.
RELATED: How to make accurate cuts with a miter saw.
What Kind of Wood Do You Need?
This wooden chair is made using 2×3 boards and 1×2 which are very easily available in any home improvement store. When you purchase them, be careful to make sure that they are straight and have the least possible amount of knots.
RELATED – 25 DIY Cane Webbing Project Ideas
RELATED – DIY Cane Nightstand
Let’s get to building now!
***This project is sponsored by Arrow Fastener. All opinions are my own. Thank you for supporting the brands that make it possible to bring you new projects***
***This post contains referral or affiliate links. It is a way for this site to earn advertising fees by advertising or linking to certain products and/or services. Please read my full disclosure here ***
Material Needed
- Lumber per the plans
- Cane webbing (7ft)
- 2 ½” pocket hole screws
- 2½” wood screws
- 5/16″ Arrow staples
- 1 ¼” finish nails
- wood glue
Tools Needed
Step-By-Step Tutorial
Step 1 – Prepare the Boards
- Make all the cuts per the plans and sand them smooth.
- Make pocket holes as shown in the plans using a Kreg Jig at the 1½” setting.
Step 2 – Build the Arm Frames
- Build both the sides by attaching the arms and support to the front and back legs using wood glue and 2 ½” pocket hole screws.
- The front of the arms are attached using regular wood screws which I countersunk and then filled with a wood dowel for a clean look.

Step 3 – Build the Seat
- Build the seat by attaching the slats to the back rail using wood glue and 2 ½” pocket hole screws. I had enough 2×4 scrap wood to build these, so I used those, but you could use 2×3 per the plans.

Step 4 – Put It Together
- Attach the cross rails between the two arm frames. I only attach the front rail at this point, so the pocket holes are accessible.
- Attach the back rail and the slats to complete the chair.

This is a great time to apply stain or paint to the chair and the frames in the color of your choice. Also, apply a top coat to the chair. I used this gel stain and top coat.
Step 5 – Build the Inserts for the Cane Webbing
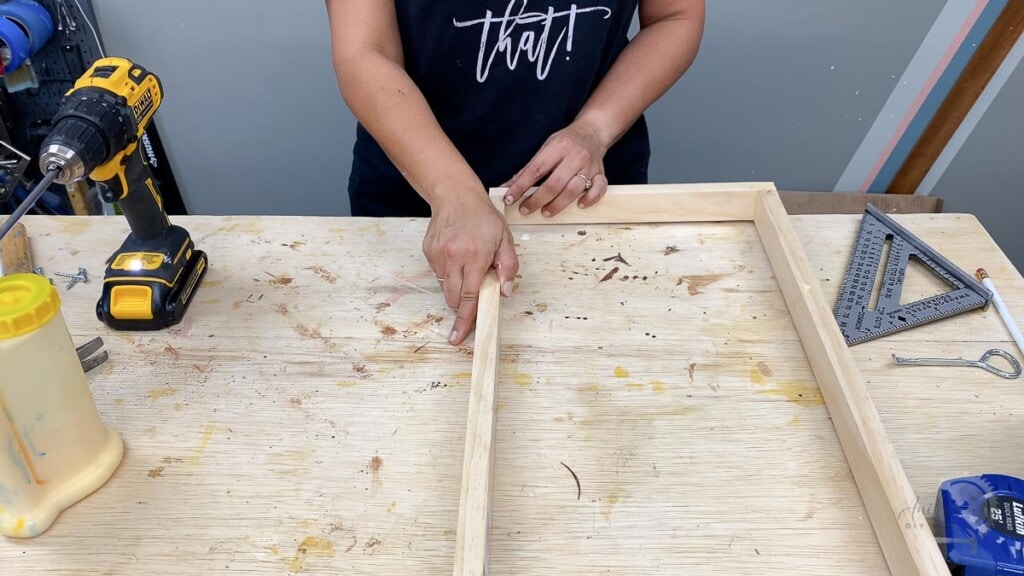
The cane webbing will be attached to an insert that sits in the arms and back. This insert is made from 1×2 boards and is slightly smaller than the opening to account for the webbing thickness.
- Cut the boards and make pocket holes with the Kreg Jig at ¾” setting on the ends of the longer boards.
- Attach using wood glue and 1 1/4″ pocket hole screws to build rectangular frames.
- Stain or paint these to match the chair.

Step 6 – Prepare Cane Webbing
Cane webbing comes from the store in a roll. It is very stiff and hard to work with. To make it more flexible and easy to stretch while attaching, it needs to be soaked in warm water for at least 30 minutes.
Plus, once it dries, it shrinks making it nice and tight.
- Cut cane webbing to lengths needed.
- Lay it flat and soak it in warm water.

I soaked it in the bath tub and used a few bottles to hold it down and keep it flat.
Step 7 – Attach Cane Webbing
Once the cane webbing is soaked, it is a lot more pliable.
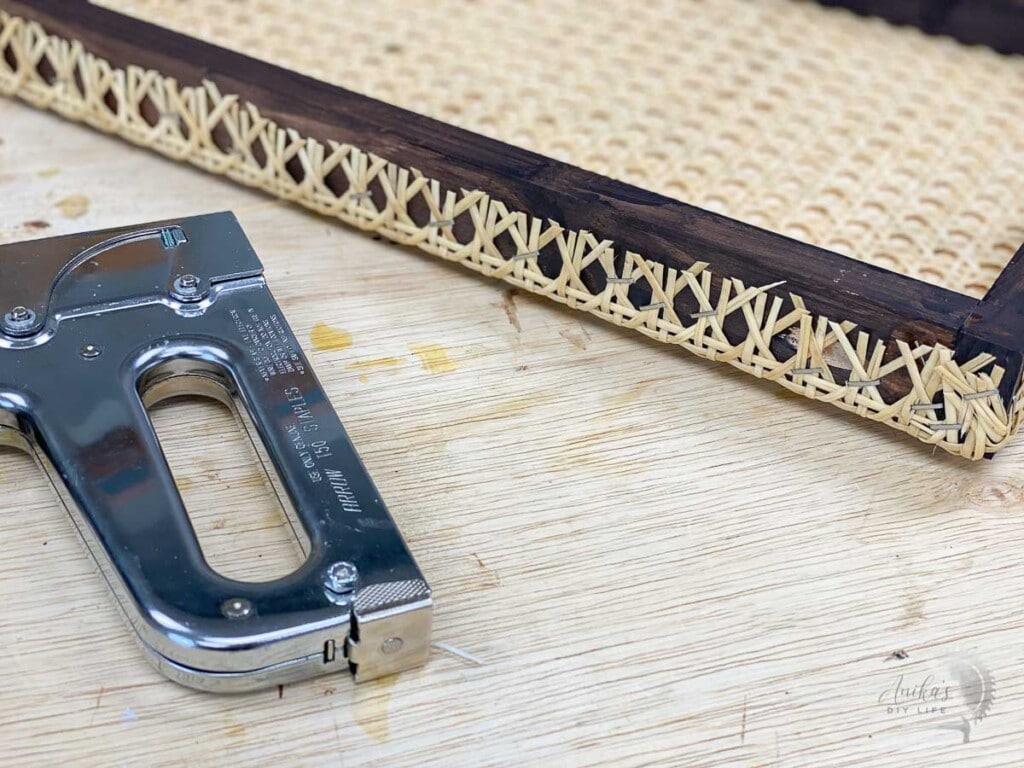
Lay it on a flat clean surface and attach it to the frames. I am using the heavy-duty T50 Staple gun from Arrow Fastener.

This process is like any upholstery project – attach one side and then pull the opposite side tight and attach.

With the cane, you have to use enough staples to ensure that the fibers don’t start unraveling and the webbing remains taught with no wrinkles.

For the corners, I just folded the strings onto the adjoining side and stapled them.
And that’s the frame ready to be attached to the chair.

Step 8 – Attach Frames to Chair
- Insert the frames to the arms and the back of the chair.
I added the arms from the inside and the back from the outside. The frames are pretty snug to the chair and may need a mallet to tap it in.

- Once they are in, use a nail gun to fix it to the chair.

That’s it! The chair is done.
The cane webbing shrinks as it dries and gets tighter.
It was hot enough that I could already feel the cane webbing becoming tighter in a couple of hours. In fact, there were a few wrinkles in the back that I was a bit concerned about. The next morning, they were nowhere to be seen. Everything was nice and tight!

If you have been thinking of a cane project, try it! It was a lot of fun to work with, and the result is beautiful. Sure, my palms are a little sore from all the stapling, but it was so worth it!

Arrow Fastener offers a full line of manual, electric, and cordless versions of staple guns, rivet tools, glue guns, nail guns, grommets, hammer tackers, and its flagship product, the heavy-duty T50® staple gun. To learn more about Arrow Fastener and where you can find Arrow Fastener products, visit www.arrowfastener.com.
Printable Plans for the DIY Chair
Click the link below to get the woodworking plans for this project. The plans have all the dimensions plus step-by-step instructions with illustrations to help you build the chair.
More DIY Furniture Projects –
Anika's goal is to inspire and empower beginners with woodworking, DIY, home improvement, and home decor ideas.
She wants everyone to unlock their creative potential and experience the feeling that comes with making something. Nothing feels better better than seeing something and saying "I can make that!"


Can you elaborate on the cushion for the chair?
Hi Lydia, It’s a 24″x24″ cushion for outdoor patio furniture wich you can find in any store – Target, Home Depot, Ikea, etc. I got mine from Home Depot. Anika
It’s beautiful, Anika.
Thank you!
The caning sure looks classy! And I have had so many issues with stapling, even though I have Arrow staplers (some are vintage) but after reading this article, I am tempted to try them again. Maybe my problems were with my technique! Good job, Anika!