DIY Scrap Wood Candle Holder
Share this post:
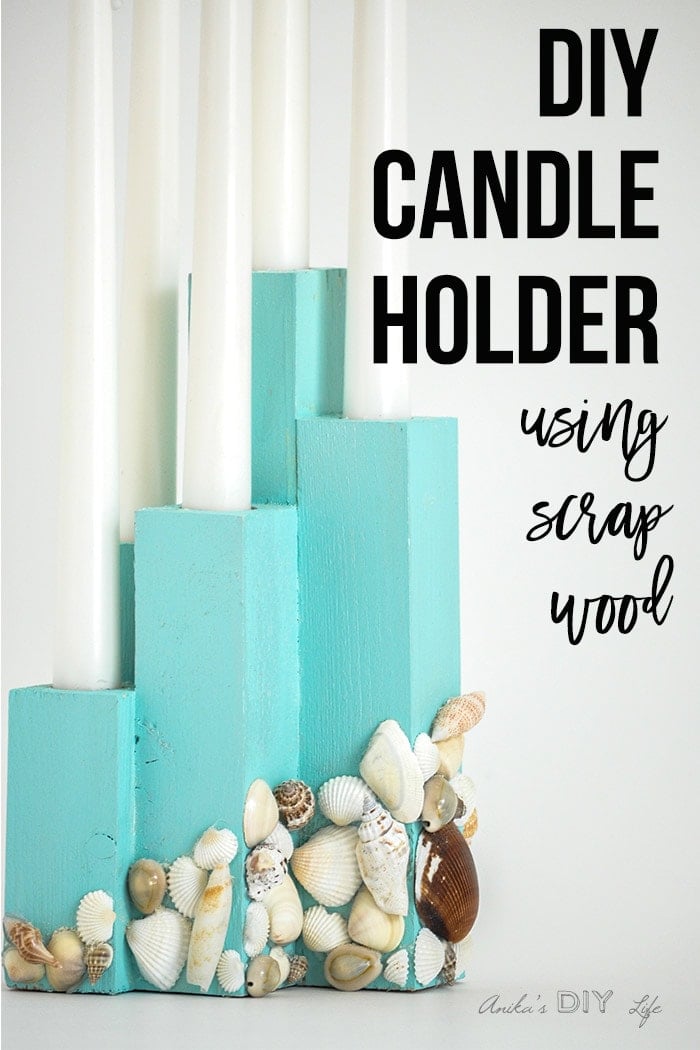
Make an easy DIY scrap wood candle holder from 2×2 boards to make a centerpiece and decorate to match any style.
I am forever trying ways to use up all the pieces of scrap wood I collect after every project.
Typically, I don’t save any pieces smaller than 6″ because they aren’t safe to cut a miter saw, but I had a few pieces of 2x2s left.
Playing around with them, I figured why not put them together and make a candle holder.
It can be decorated in so many different ways – colors, decor – think – red or green with glitter for Christmas, simple wood tones for Farmhouse style or coastal like I did using my daughter’s seashell collection.
***This post contains affiliate or referral links. It is a way for this site to earn advertising fees by advertising or linking to certain products and/or services. Please read my full disclosure here ***
Material Needed
- scrap 2″ x 2″ pieces cut at different lengths.
- Sea shells – I used the ones my daughter had collected but you can use these sea shells too!
- Wood glue
- Hot glue gun
- Aqua paint
- 7/8″ spade drill bit
- Drill
- Clamps – my favorite is this one!
How to Make the Candle Holder
Step 1 – Make Cuts/ Gather Material
- Gather the scrap 2″x 2″ lumber pieces and figure out the configuration..
Tip – Once you have the final configuration, take a picture so you remember exactly how you wanted it.

Step 2 – Assemble
Glue wood scraps together using wood glue. I glued them one by one – clamping them and letting them dry overnight. Takes patience but I only had a few small clamps.

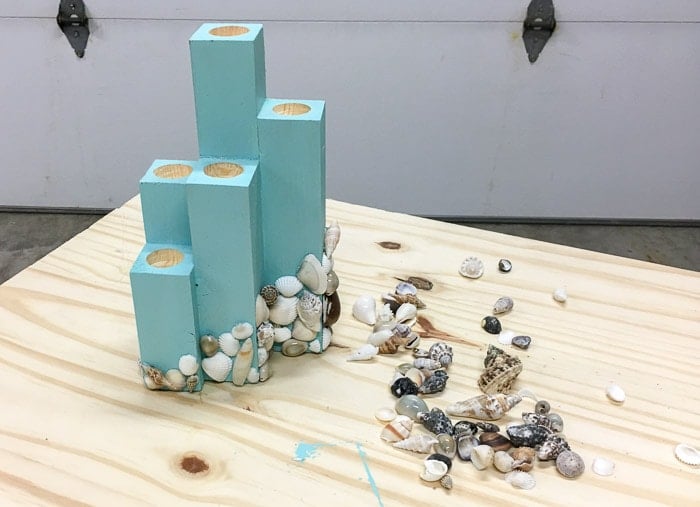
Step 3 – Drill holes on the top of each 2″x2″ pillar using a 7/8″ drill bit. I obviously did this after it was painted but I would definitely do this earlier if I ever did this again! Be sure to make the holes at least an inch deep.

Step 4 – Paint with your favorite color. I picked the aqua because I was going for a coastal feel. color is very aptly named Seaside Manor by Clark +Kensington. I used this for the stripes on my outdoor coffee table too.

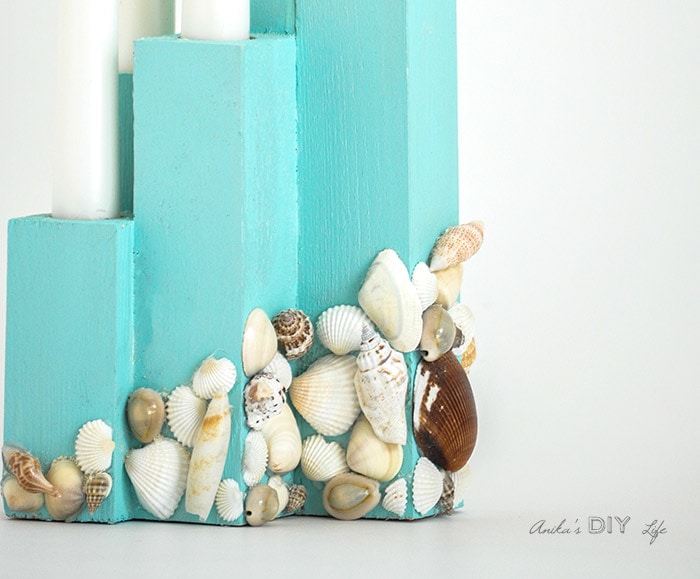
Step 5 – Glue sea shells using hot glue onto the candle holder. I glued them on in a diagonal pattern but you could do this however you wish!
Step 6 – Add Candles and enjoy!

I love how it looks!
This can be used indoors too with any coastal decor or also make the perfect centerpiece at any coastal or beach themed event or wedding.
Oh, and let’s not forget that this basically turned out free!

Also, it can be customized in so many ways to suit whatever style you are looking for.
Anika's goal is to inspire and empower beginners with woodworking, DIY, home improvement, and home decor ideas.
She wants everyone to unlock their creative potential and experience the feeling that comes with making something. Nothing feels better better than seeing something and saying "I can make that!"
- Anika Gandhi
- Anika Gandhi
- Anika Gandhi
- Anika Gandhi
- Anika Gandhi
- Anika Gandhi
- Anika Gandhi
- Anika Gandhi
- Anika Gandhi
- Anika Gandhi
- Anika Gandhi
- Anika Gandhi
- Anika Gandhi
- Anika Gandhi
- Anika Gandhi
- Anika Gandhi
- Anika Gandhi
- Anika Gandhi
- Anika Gandhi
- Anika Gandhi
- Anika Gandhi
- Anika Gandhi
- Anika Gandhi
- Anika Gandhi
- Anika Gandhi
- Anika Gandhi
- Anika Gandhi
- Anika Gandhi
- Anika Gandhi
- Anika Gandhi
- Anika Gandhi
- Anika Gandhi
- Anika Gandhi
- Anika Gandhi
- Anika Gandhi
- Anika Gandhi
- Anika Gandhi
- Anika Gandhi
- Anika Gandhi
- Anika Gandhi
- Anika Gandhi
- Anika Gandhi
- Anika Gandhi
- Anika Gandhi
- Anika Gandhi
- Anika Gandhi
- Anika Gandhi
- Anika Gandhi
- Anika Gandhi
- Anika Gandhi
- Anika Gandhi
- Anika Gandhi
- Anika Gandhi
- Anika Gandhi
- Anika Gandhi
- Anika Gandhi
- Anika Gandhi
- Anika Gandhi
- Anika Gandhi
- Anika Gandhi
- Anika Gandhi
- Anika Gandhi
- Anika Gandhi
- Anika Gandhi
- Anika Gandhi
- Anika Gandhi
- Anika Gandhi
- Anika Gandhi
- Anika Gandhi
- Anika Gandhi
- Anika Gandhi
- Anika Gandhi
- Anika Gandhi
- Anika Gandhi
- Anika Gandhi
- Anika Gandhi
- Anika Gandhi
- Anika Gandhi
- Anika Gandhi
- Anika Gandhi
- Anika Gandhi
- Anika Gandhi
- Anika Gandhi
- Anika Gandhi
- Anika Gandhi
- Anika Gandhi
- Anika Gandhi
- Anika Gandhi
- Anika Gandhi
- Anika Gandhi
- Anika Gandhi
- Anika Gandhi
- Anika Gandhi
- Anika Gandhi
- Anika Gandhi
- Anika Gandhi
- Anika Gandhi
- Anika Gandhi
- Anika Gandhi
- Anika Gandhi
- Anika Gandhi
- Anika Gandhi
- Anika Gandhi
- Anika Gandhi
- Anika Gandhi
- Anika Gandhi
- Anika Gandhi
- Anika Gandhi
- Anika Gandhi
- Anika Gandhi
- Anika Gandhi
- Anika Gandhi
- Anika Gandhi
- Anika Gandhi
- Anika Gandhi
- Anika Gandhi
- Anika Gandhi
- Anika Gandhi
- Anika Gandhi
- Anika Gandhi
- Anika Gandhi
- Anika Gandhi
- Anika Gandhi
- Anika Gandhi
- Anika Gandhi
- Anika Gandhi
- Anika Gandhi
- Anika Gandhi
- Anika Gandhi
- Anika Gandhi
- Anika Gandhi
- Anika Gandhi
- Anika Gandhi
- Anika Gandhi
- Anika Gandhi
- Anika Gandhi
- Anika Gandhi
- Anika Gandhi
- Anika Gandhi
- Anika Gandhi
- Anika Gandhi
- Anika Gandhi
- Anika Gandhi
- Anika Gandhi
- Anika Gandhi
- Anika Gandhi
- Anika Gandhi
- Anika Gandhi
- Anika Gandhi
- Anika Gandhi
- Anika Gandhi
- Anika Gandhi
- Anika Gandhi
- Anika Gandhi
- Anika Gandhi
- Anika Gandhi
- Anika Gandhi
- Anika Gandhi
- Anika Gandhi
- Anika Gandhi
- Anika Gandhi
- Anika Gandhi
- Anika Gandhi
- Anika Gandhi
- Anika Gandhi
- Anika Gandhi
- Anika Gandhi
- Anika Gandhi
- Anika Gandhi
- Anika Gandhi
- Anika Gandhi
- Anika Gandhi
- Anika Gandhi
- Anika Gandhi
- Anika Gandhi
- Anika Gandhi
- Anika Gandhi
- Anika Gandhi
- Anika Gandhi
- Anika Gandhi
- Anika Gandhi
- Anika Gandhi
- Anika Gandhi
- Anika Gandhi
- Anika Gandhi
- Anika Gandhi
- Anika Gandhi
- Anika Gandhi
- Anika Gandhi
- Anika Gandhi
- Anika Gandhi
- Anika Gandhi
- Anika Gandhi
- Anika Gandhi
- Anika Gandhi
- Anika Gandhi
- Anika Gandhi
- Anika Gandhi
- Anika Gandhi
- Anika Gandhi
- Anika Gandhi
- Anika Gandhi
- Anika Gandhi
- Anika Gandhi
- Anika Gandhi
- Anika Gandhi
- Anika Gandhi
- Anika Gandhi
- Anika Gandhi
- Anika Gandhi
- Anika Gandhi
- Anika Gandhi
- Anika Gandhi
- Anika Gandhi
- Anika Gandhi
- Anika Gandhi
- Anika Gandhi
- Anika Gandhi
- Anika Gandhi
- Anika Gandhi
- Anika Gandhi
- Anika Gandhi
- Anika Gandhi
- Anika Gandhi
- Anika Gandhi
- Anika Gandhi
- Anika Gandhi
- Anika Gandhi
- Anika Gandhi
- Anika Gandhi
- Anika Gandhi
- Anika Gandhi
- Anika Gandhi
- Anika Gandhi
- Anika Gandhi
- Anika Gandhi
- Anika Gandhi
- Anika Gandhi
- Anika Gandhi
- Anika Gandhi
- Anika Gandhi
- Anika Gandhi
- Anika Gandhi
- Anika Gandhi
- Anika Gandhi
- Anika Gandhi
- Anika Gandhi
- Anika Gandhi
- Anika Gandhi
- Anika Gandhi
- Anika Gandhi
- Anika Gandhi
- Anika Gandhi
- Anika Gandhi
- Anika Gandhi
- Anika Gandhi
- Anika Gandhi
- Anika Gandhi
- Anika Gandhi
- Anika Gandhi
- Anika Gandhi
- Anika Gandhi
- Anika Gandhi
- Anika Gandhi
- Anika Gandhi
- Anika Gandhi
- Anika Gandhi
- Anika Gandhi
- Anika Gandhi
- Anika Gandhi
- Anika Gandhi
- Anika Gandhi
- Anika Gandhi
- Anika Gandhi
- Anika Gandhi
- Anika Gandhi
- Anika Gandhi
- Anika Gandhi
- Anika Gandhi
- Anika Gandhi
- Anika Gandhi
- Anika Gandhi
- Anika Gandhi
- Anika Gandhi
- Anika Gandhi
- Anika Gandhi
- Anika Gandhi
- Anika Gandhi
- Anika Gandhi
- Anika Gandhi
- Anika Gandhi
- Anika Gandhi
- Anika Gandhi
- Anika Gandhi
- Anika Gandhi
- Anika Gandhi
- Anika Gandhi
- Anika Gandhi
- Anika Gandhi
- Anika Gandhi
- Anika Gandhi
- Anika Gandhi
- Anika Gandhi
- Anika Gandhi
- Anika Gandhi
- Anika Gandhi
- Anika Gandhi
- Anika Gandhi
- Anika Gandhi
- Anika Gandhi
- Anika Gandhi
- Anika Gandhi
- Anika Gandhi
- Anika Gandhi
- Anika Gandhi
- Anika Gandhi
- Anika Gandhi
- Anika Gandhi
- Anika Gandhi
- Anika Gandhi
- Anika Gandhi
- Anika Gandhi
- Anika Gandhi
- Anika Gandhi
- Anika Gandhi
- Anika Gandhi
- Anika Gandhi
- Anika Gandhi
- Anika Gandhi
- Anika Gandhi
- Anika Gandhi
- Anika Gandhi
- Anika Gandhi
- Anika Gandhi
- Anika Gandhi
- Anika Gandhi
- Anika Gandhi
- Anika Gandhi
- Anika Gandhi
- Anika Gandhi
- Anika Gandhi
- Anika Gandhi
- Anika Gandhi
- Anika Gandhi
- Anika Gandhi
- Anika Gandhi
- Anika Gandhi
- Anika Gandhi
- Anika Gandhi


I love this idea. It’s a perfect center piece, and a great way to use shell collections. Thanks for sharing on Sunday’s Best.
So in love with this project. I’m all about tropical and beachy things, so this totally speaks to me. Thanks for sharing this candle holder on Merry Monday. Pinned.
I love how you could customize this for any room! Thanks for sharing at To Grandma’s House We Go DIY, Crafts, Recipes and More Wednesday Link Party! Pinned it to Pinterest! Hope to have you join the party next week!
Such a fun and easy project with a great beachy vibe! Thanks for sharing it with SYC.
hugs,
Jann
This is such a brilliant idea! Instead of throwing these scraps, didn’t know we could still come up with something this beautiful and so creative. Thanks for sharing this idea 🙂 Love lots, xoxo