DIY Phone Stand for Desk – Using Scrap Wood
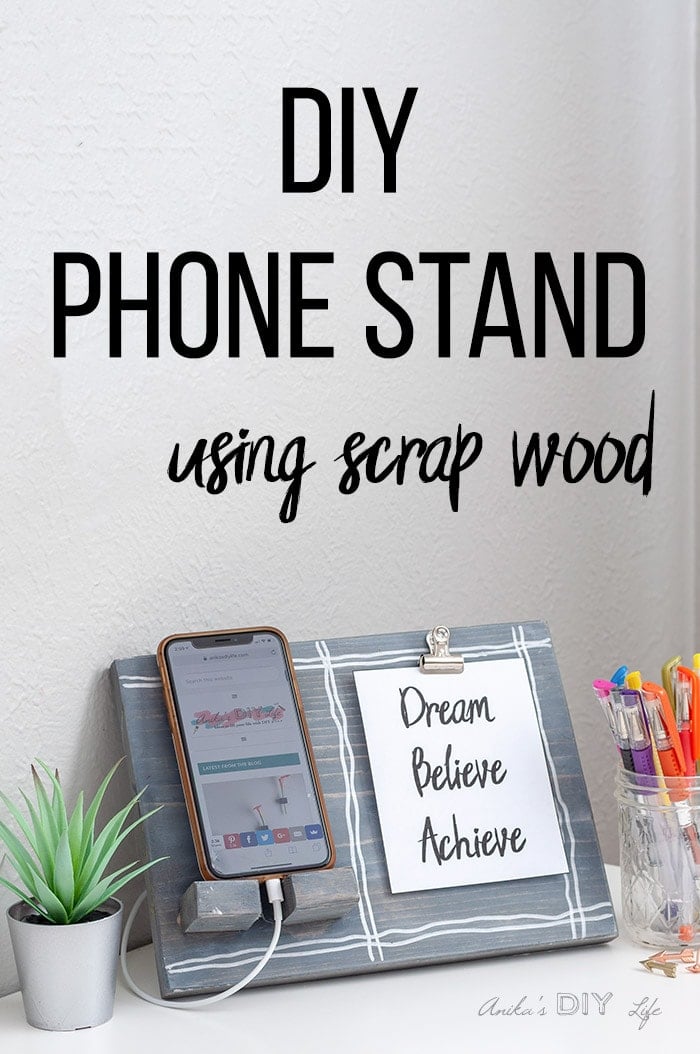
Learn how to make a DIY phone stand with space to add a quote or photograph using scrap wood. It’s a great DIY gift idea and the perfect desk accessory.
You will also like easy DIY scrap wood projects and Last minute DIY gifts for him.
When Father’s Day was just around the corner, I asked my daughter what she wanted to give daddy.
She said, “something to keep his phone on.”
With more brainstorming, we decided we wanted to make something for his desk.
This DIY phone holder is what we came up with.
It holds up your phone even while it’s charging and you can add a quote or picture next to it.
What is cuter than seeing your kids’ faces every time you glance at the phone – which we all know happens a lot 😉
The best part!
You guessed it! It is that it is made from scrap wood and the only thing I had to buy was the clip for holding the picture.
DIY Phone Stand
***This post contains affiliate or referral links. It is a way for this site to earn advertising fees by advertising or linking to certain products and/or services. Please read my full disclosure here ***
Materials Needed for DIY Phone Holder and Photo Display –
- 1″ x 12″ board cut at 10″
- 1″ x 2″ cut at 1.5″ – 2 of these – phone rest
- 1″ x 2″ cut at 5″ – back stand
- Mini hinged clip
- wood glue
- 1 ¼” spax wood screws
- Super Glue
- Kreg jig and 1 ¼” pocket hole screws (optional)
Before we get started, make sure to follow me on Instagram, YouTube, and Pinterest to keep up with all my latest builds and projects!
DIY Phone Stand and Picture Holder Plans
Grab a copy of the updated printable plans to build this DIY phone stand by clicking the button below.
How to Make a DIY Phone Stand –
UPDATE: I made a new version of this DIY phone holder with some improvements. Be sure to download the plans for the updated version by clicking the button above.
Step by Step Tutorial for the DIY Phone Holder
Step 1 – Attach back support
- Start with the 5″ long 1″ x 2″ board for the back support.
- Make pocket holes and attached it 1″ from the bottom of the 1″ x 12″ using wood glue and 1¼”pocket hole screws.
Note – If you do not have a Kreg Jig, you could simply use countersink wood screws from the front and fill the holes. Or you could even use a brad nailer and attach using finish nails.
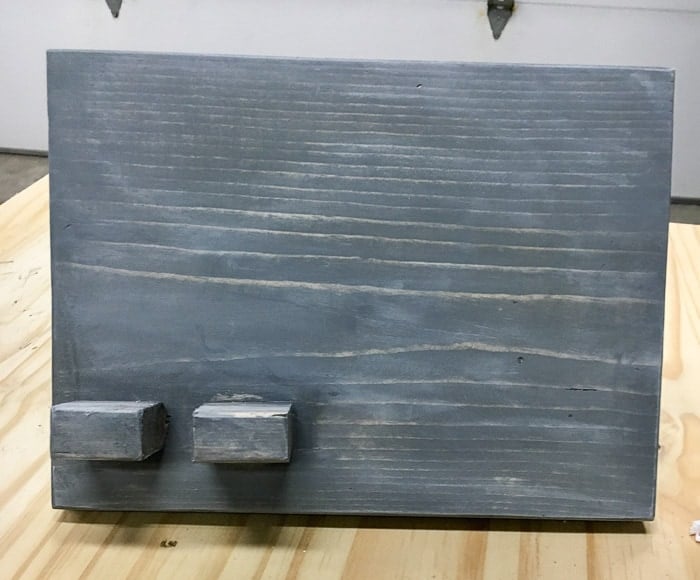
Step 2 – Attach the Phone Rest
- Attach the two 1″ x 2″ for the phone rest on the front using wood glue and 1 ¼” spax screws from the back. HERE
- Keep a spacing of 1″ between them to allow for the charging cord to go through. Since the screws were on the back, I didn’t bother to countersink them.
Step 3 – Finish the Phone Stand
- Lightly sand your piece and finish it using your choice of stain or paint.
I used weathered grey stain followed by a whitewash with thinned white paint.
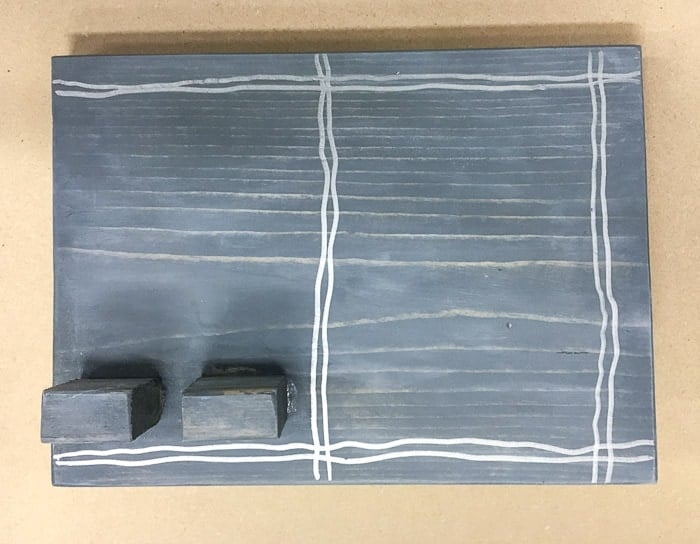
Step 4 – Add interest (optional)
To add some interest to the piece, I drew imperfect lines to create a “framed” look for the photograph using a silver poster paint pen.
You could write a message or paint patterns…
Step 5 – Add a clip.
- Glue the mini hinged clip. I used super glue.
That’s it!
The DIY phone stand and photo display ready!
Add your favorite picture or an inspirational quote to have at your desk!
A few months later, I decided to re-design this project and make an updated version. The back stand is a designed differently and it a little bit more stable.
Get the plans for the updated DIY cell phone holder by clicking on the button below.
More like DIY phone holder –
Anika's goal is to inspire and empower beginners with woodworking, DIY, home improvement, and home decor ideas.
She wants everyone to unlock their creative potential and experience the feeling that comes with making something. Nothing feels better better than seeing something and saying "I can make that!"


Love it! At my work we have a table to sell crafts to co-workers and I really think this would sell for folks homes or desks. I’m really glad I found this!
Good project! I noticed you use SPAX screws, which, after reading up on, I see where there is a lot of engineering going on to make them so easy to use! Love being able to sink a screw without even pre-drilling a hole for them!
Thanks, Anika!
Lovely 🙂
Thank you so much for this idea! I have such a hard time finding a gift for my dad so when I saw this, I decided to make this for him. It turned out great and he loved it! It is such an easy, fun project that anyone can make!
Hi Susan! Thank you for making it! I am so happy to know that he loved it!! Can you share a picture of it if you have one?
This is a wonderful scrap wood project! Also, if you’re in need of a quick gift.
When put my phone stand together I’m going to add a drilled hole right under the phone dock for the charging cord to go through. That way, no unsightly cords and less of a risk that something will get caught on the cord and pull your phone off.
Thanks for all of your awesome posts!!! Love your blog!
Hi Courtney! That is a great idea! I would love to see it when you make it! Please do share a picture!