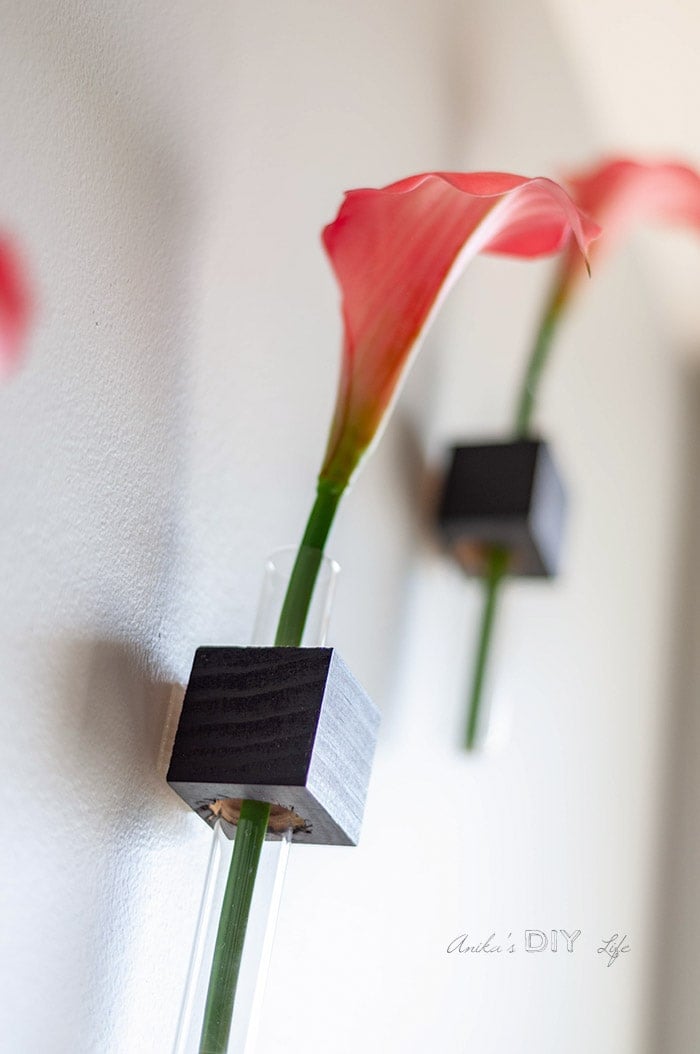
DIY Test Tube Bud Vase – Wall Mounted
Learn to make this easy DIY test tube bud vase using small pieces of scrap wood. Great quick project that makes gorgeous decor mounted on the wall!
You will also like Easy DIY Scrap wood projects and DIY up-cycled glass bottle decor.

I wanted to do add some wall decor but wanted to keep it minimal because it is a really tiny bathroom.
I came up with these simple and quick wall mounted test tube bud vases that are simple but look so pretty!
I put these in the bathroom, but the truth is they will make really pretty decor anywhere in the home!
DIY test tube bud vases
***This post contains affiliate or referral links. It is a way for this site to earn advertising fees by advertising or linking to certain products and/or services. Please read my full disclosure here ***
Materials to Make the Test Tube Vases
- Test tubes
- 2″x 2″ board – A small piece of scrap will do.
- 7/8″ spade bit
- Drill
- Miter Saw or Miter box. See my complete beginner’s guide to using a miter saw.
- Paint or stain of your choice. I used this gel stain to match my bathroom cabinets.
- Polyurethane
- Hot glue gun and hot glue
- 3M Command picture mounting strips
How to Make the DIY Test Tube Flower Vase
Below is a quick video on how to make this. The step by step written tutorial follows.
Shop My T-Shirt Designs –
DIY Test Tube Vase Tutorial
Step 1 – Make hole for test tube
- Measure and mark where you will cut the blocks – 1 ½” from the end on the 2″ x 2″ board.
- Find the center (at ¾″ from each side) and mark the location for the hole.
- Clamp the 2″ x 2″ board to the workbench and use a 7/8″ spade bit to make a hole through the board.
Tip: You may need to make a small pilot hole first with a small drill bit to keep the spade bit from wandering.
Step 2 – Cut cubes
Once the hole is drilled, cut your board at the marked location using a miter saw or hand saw.
Step 3 – Paint or stain the cubes
- Paint of stain the cubes in the color of your choice.
I used a gel stain in Java to match my bathroom vanity.
- If you would like to use fresh flowers and water in these test tubes, add a couple of coats of polyurethane on the wooden cubes to protect from splashes.
Step 4 – Glue test tubes
- Add a line of hot glue about 2″ down from the top rim of the test tube.
- Place the test tube inside the cube to glue it in place.
Step 5 – Mount on Wall
- Trim mounting strips to size if they are longer than the cubes
- Fill with your favorite flowers.
I decided to use 3M Command picture mounting strips to attach the vases to the wall. The vases are light and the strips remove without any damage.
If you are using real flowers, it is easy to take them off to change out the water.
And that’s it!
These are so easy and quick to make and look so pretty!
More like DIY test tube bud vases –
- DIY scrap wood candle holder
- DIY phone and photo holder
- DIY Jewelry holder
- How To Make the Easiest DIY Wood Vase
[mv_create key=”15″ type=”diy” title=”DIY Test Tube Bud Vase ” thumbnail=”https://www.anikasdiylife.com/wp-content/uploads/2019/04/DIY-test-tube-bud-vases-wall-mounted-Anikas-DIY-Life-7sq500.jpg”]
Anika's goal is to inspire and empower beginners with woodworking, DIY, home improvement, and home decor ideas.
She wants everyone to unlock their creative potential and experience the feeling that comes with making something. Nothing feels better better than seeing something and saying "I can make that!"


Oh, good business! I do have a spade drill, and little pieces of wood from other projects! Now all I need are some willing test tube thingies! Good job! I like it! At first I thought, well, I don’t have a drill press, but a spade bit, I can do! Thank you, fond regards,
Yup! You don’t need a drill press! I don’t have one either! 🙂
Can’t wait to see what you make!
Just stumbled upon your website and I LOVE the projects you have on here! Back then, my schools didn’t offer woodworking, but recently, I saw firsthand how beautiful and special it was for a home to have furniture HOMEMADE. Thank you for these inspirational projects; you’ve shown me that woodworking can be for everyone (gals too), as long as you seek to try something new 🙂