DIY Craft Closet Organizer With Drawers
Learn how to build your own custom DIY craft closet organizer with drawers with these full plans, step by step tutorial and video. Turn any closet into the perfect organized craft closet.
You will also love this DIY Underbed Shoe Organizer and DIY Reach-in Closet Organizer
I have to confess that I have been hiding away a huge mess in a closet.
I am embarrassed to even show you the before picture of this craft closet in my home office.
It is an awkwardly shaped closet which I have been using as storage for a whole bunch of my supplies.
I started off by adding the wire cube shelf/organizer and tons of boxes and bins. But it wasn’t enough to keep things at organized. It wasn’t always easy to reach for things in the closet so it ended up in a huge big mess!
Are you ready to see it?
Consider this the last warning because things are really bad!!
See what I meant! I had no idea how to find anything anymore!
It was very dysfunctional. It has a weird shape and I wasn’t able to use any of the pre-built closet organizers. The deep space on one end of the closet led to piles of things accumulating on the floor.
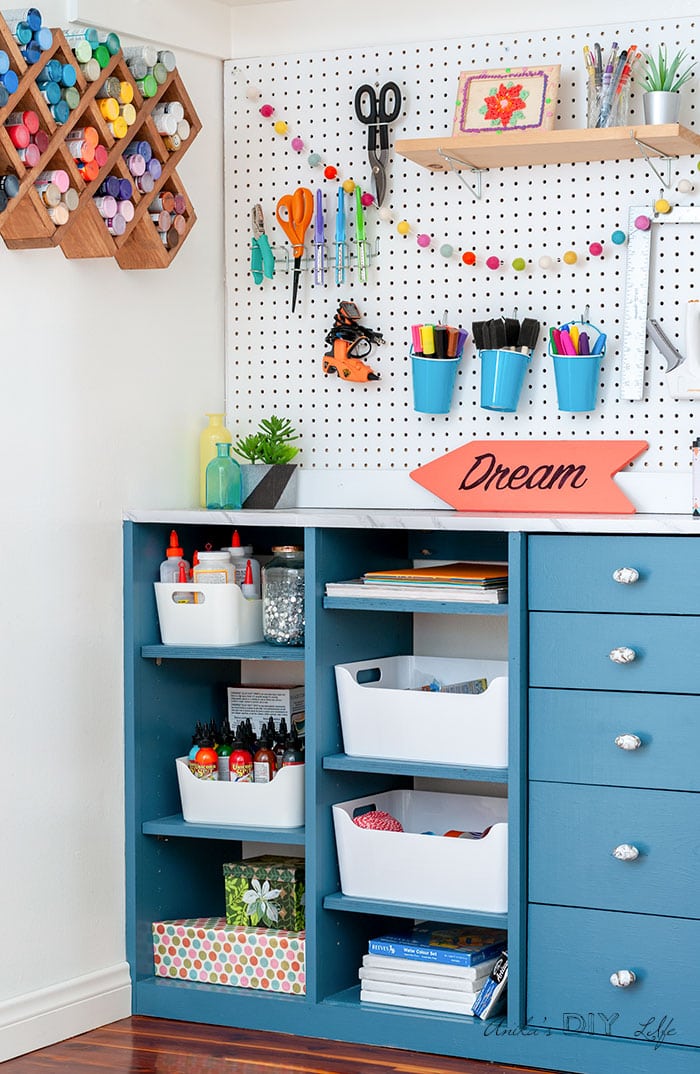
It was high time I got this mess organized! And I am so happy the way it turned out!
I made this working about 3-4 hours a day for a total of 4 days – including buying, cutting, building, and painting.
It wasn’t too bad at all – except that this room is upstairs and I had to go up and down the stairs about 30 times each day to make sure I got the right fit and size on boards! The positive side is I got all my exercise and steps in for those days 🙂
DIY Closet Organizer
*** I am partnering with BuildSomething.com to bring you free plans for this DIY custom closet with drawers. ***
***This post contains affiliate or referral links. It is a way for this site to earn advertising fees by advertising or linking to certain products and/or services. Please read my full disclosure here ***
Materials Needed to Build the DIY Closet Organizer
- Lumber per the plans
- Circular saw
- Kreg Rip Cut
- Table Saw (optional)
- Kreg Jig
- Kreg Multi-mark Tool
- 1¼” Pocket hole screws
- Miter Saw
- Kreg Shelf Pin Jig
- 10″ drawer slides
- Kreg Drawer Slide Jig
- Power drill/driver
- Brad Nailer and 1¼” finish nails
- 3″ screws
- Stud finder
- Wood glue
- Knobs or pulls of your choice.
- Contact paper (optional)
- Primer and Paint in color of your choice. Check out my guide on how to paint unfinished pine furniture.
Shop My T-Shirt Designs –
DIY Closet Organizer Plans
The plans are per measurements of my closet. But they can be very easily modified to fit any closet.
You can access the plans for this DIY modern bookshelf on BuildSomething.com
DIY Custom Craft Closet
I have the video showing you how I built the custom closet. More details and step by step instructions are below.
How to Build a Custom Closet From Scratch
The first step to any organization project is clearing out everything, sorting and deciding what to keep and what to get rid of.
It is astonishing how many craft supplies I have accumulated over the years – and I am not even really a huge crafter. It’s just usually the little projects I make with kids…the workshop is more my thing! I got rid of a whole bunch of little bits and pieces that wouldn’t really be worth keeping.
Step 1: Measure the Closet and Prep
- Measure the closet as accurately as you can. Modify measurements in plans according to your closet dimensions.
- Remove any old installations you don’t want to keep.
- Remove the old baseboards. You can save them for the future if you like or if they are like mine – reeeealllly old, you can add new ones after the closet is built.
Step 2: Cut Lumber
- Start by ripping up the plywood to size using a circular saw or table saw.
- Be sure to cut a little bigger and slowly trim down as needed to ensure the perfect fit.
Step 3: Build Dividers
- Attach base supports to the sides using 1¼” Pocket holes screws.
- Test for fit in the closet space
RELATED: A Full guide to using pocket hole joinery for beginners
Step 4: Build Drawers
Build drawers for the closet organizer.
Be sure to check out my full tutorial on how to build drawers for beginners.
Step 4: Make Shelf Pin Holes and Attach Drawer Slides
- Using the Kreg shelf pin jig, make shelf pin holes.
- Attach Drawer slides using the drawer slide jig.
- I found that it is a lot easier to access both sides to make the shelf pin holes and attach the drawer slides before the organizer is installed in the closet.
Step 5: Attach Organizer to the Closet
- Add the back supports between the sides using pocket hole screws.
- Attach the back supports to the wall using 3″ screws added into the studs.
Step 6: Attach the Top
- Cut top to size to fit
- Attach the top using 1 ¼” brad nails and wood glue.
Step 7: Install Trim, Toe Kick, and Drawer Fronts
- Attach drawer fronts leaving 1/8″ gap on all sides.
- Attach the 1×3 toe kick to the bottom of the organizer using 1 ¼” brad nails and wood glue.
- Attach ¾” square dowels to trim the plywood edges using 1 ¼” brad nails and wood glue.
Step 8: Finish With Paint and Hardware
- Prime and paint the entire organizer in the color of your choice. I added contact paper to the top.
- Add hardware of your choice.
Step 9: Add Pegboard (Optional)
If you would like to add a pegboard –
- Mark the studs and attach a frame of 1×3 boards using 3″ screws attached to the studs.
- Attach pegboard to the frame using 1¼” screws.
Once everything was in place, I added new baseboards to complete the look!
Time to organize and decorate it!
RELATED: Be sure to see how I built that craft paint holder!
I am so excited about this new pretty closet!
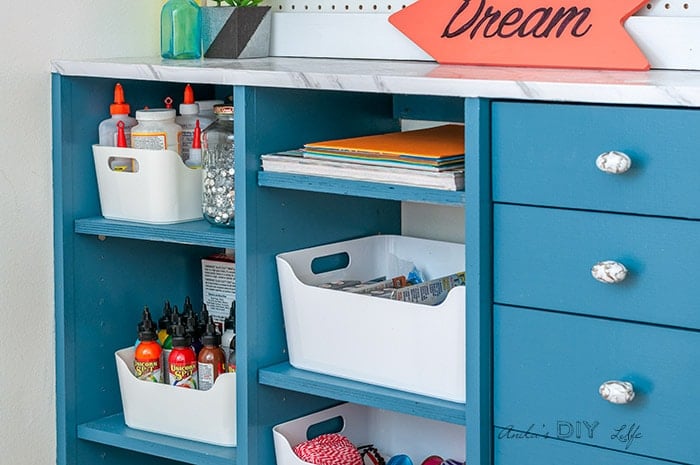
Between the drawers and the shelves, I was able to fit almost all the crap stuff and not only can I easily find everything, but it also looks awesome 🙂
I can decorate all my craft supplies and they are all easy to find too.
I removed the sliding doors for now. I plan to add bifold doors at a later point.
Building the closet organizer was a lot easier and straightforward than I had expected.
I am already eyeing all the other closets in the house.
Do you have a closet that needs some help? Build a custom closet organizer for it. It is so straightforward, you will be surprised!
I can’t wait to see what you build!
GET PLANS TO BUILD THIS ORGANIZER!
More Like This DIY Closet Organizer –
[mv_create key=”17″ type=”diy” title=”DIY Craft Closet Organizer ” thumbnail=”https://www.anikasdiylife.com/wp-content/uploads/2019/06/DIY-Craft-closet-organizer-6sq500.jpg”]
Anika's goal is to inspire and empower beginners with woodworking, DIY, home improvement, and home decor ideas.
She wants everyone to unlock their creative potential and experience the feeling that comes with making something. Nothing feels better better than seeing something and saying "I can make that!"


Wow, what a dramatic before and after! I love that you built it in place so it’s custom to your exact space. I’d love t have something like this in my closet. The Pegboard above it is perfect for often used items. Plus it’s all very colorful which I love love love!!
Thank you so much Toni! It is such an improvement from the old closet 🙂 I am very excited to use the closet.
Great build. Thanks for sharing. It’s very inspiring.
Btw we also have that “wired” cubes. The sides are still there but we managed
to lose all the connective parts. (they are put together with thread now)
I hope I can find one of those connective parts back. Somehow I should manage
to make more according the example.
I have an entire room that looks like your before! It has become the dumping ground but I hope to organize it this summer. I love how colourful everything is! I may need to do some painting after I clean it all up. I actually feel inspired to get started!
Best idea