DIY Jewelry Display – Easy Woodworking Gift for Her
Learn how to make a gorgeous DIY jewelry display that can be easily customized using a Cricut machine to make a perfect gift for yourself or the woman in your life.

I have had this idea for a jewelry display stand in my mind for quite a while. With Mother’s Day coming up, I thought it was a great time to make the project come alive finally.
If you have been around here a while, you know I love jewelry! I think they are beautiful art and should be displayed instead of being tucked away in cabinets and drawers.
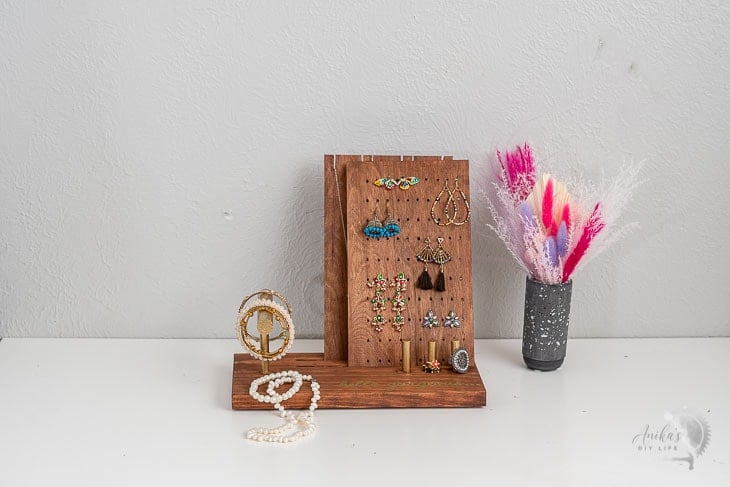
This jewelry display stand has a spot for everything – earrings of any kind, bracelets, necklaces, and rings.
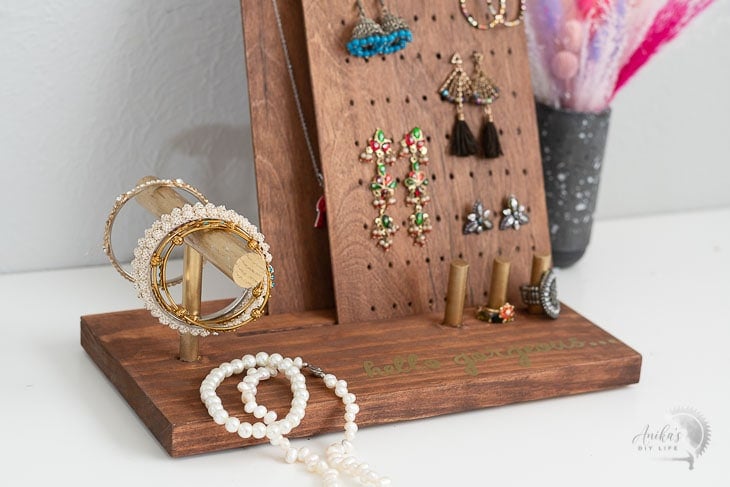
Plus, it is extremely customizable – you can easily add your own personalization like a message or monogram, change the number of display cards, make the entire thing as big or small as you like. The possibilities are endless.
***This post is sponsored by Cricut. Thank you for supporting the brands that help bring you new projects***
Material Needed
Supplies Needed
- Lumber
- 1×6 board
- 3/4″ and 5/16″ dowels
- 1/8″ underlayment boards
- Wood glue
- Premium Vinyl in the color of your choice. I used gold.
- Transfer tape
- Stain in the color of your choice.
- Spray paint (optional). I used gold.
Tools Needed
- Cricut cutting machine. I used a Cricut Maker
- StandardGrip machine mat
- Weeding tools
- FinePoint Blade
- Table Saw
- Miter saw (optional. Can use a Jigsaw too.)
- Jigsaw
How to Make
Click here to subscribe to my YouTube Channel for more great videos!
Step 1 – Make the Base
- I made the base out of a 1×10 cut down to a 6″x 12″ board. This can be any size, depending on how much jewelry you need to display.
- I set the table saw at 15-degrees, lowered the blade to about half of the board thickness, and ran the board through to create two grooves for the display cards. Once again, the number of grooves depends on your requirement.
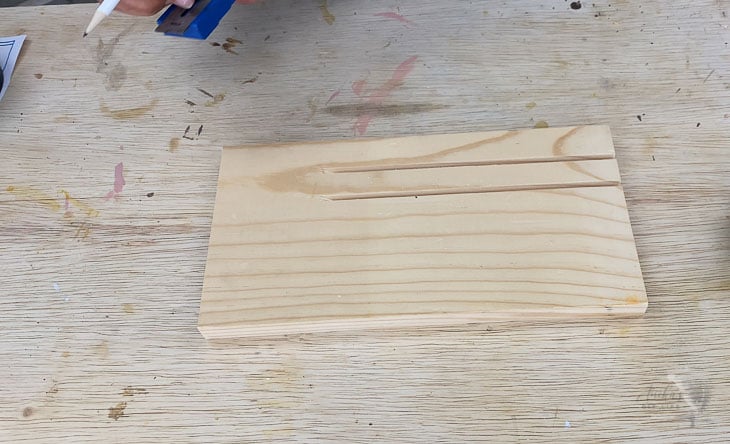
Note – I decided not to make the groove across the base and stopped the table saw in the middle. Be very careful if doing this and allow the table saw to come to a complete stop before picking it up.
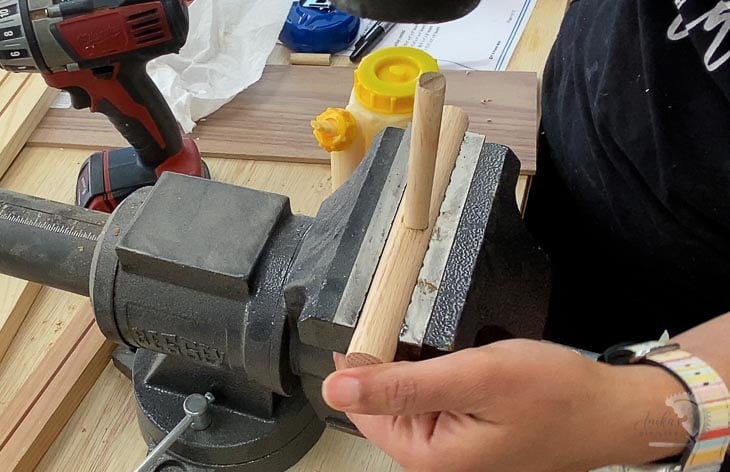
Step 2 – Add the Bracelet and Ring Holder
- Build the bracelet holder by joining the 5/16″ and 3/4″ dowel. I put the 3/4″ dowel in a vice and drilled a hole with a 5/16″ bit to about half of the thickness. Then I used wood glue and inserted the 5/16″ dowel, and allow it to dry.
- Make shallow holes in the base and attach the bracelet holder and ring holders using wood glue.
- Leave it to dry overnight.
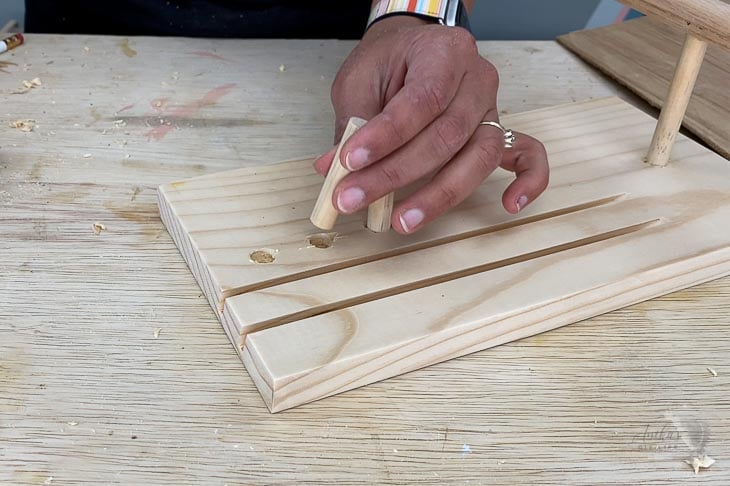
Note – if you want to paint these a different color, be sure to do so before attaching. I didn’t and had the cover the whole base in tape before spray painting them gold.
Step 3 – Make Earring and Necklace Display
- Measure, mark, and drill holes for earrings using a 1/4″ drill bit. The spacing and number are totally up to you.
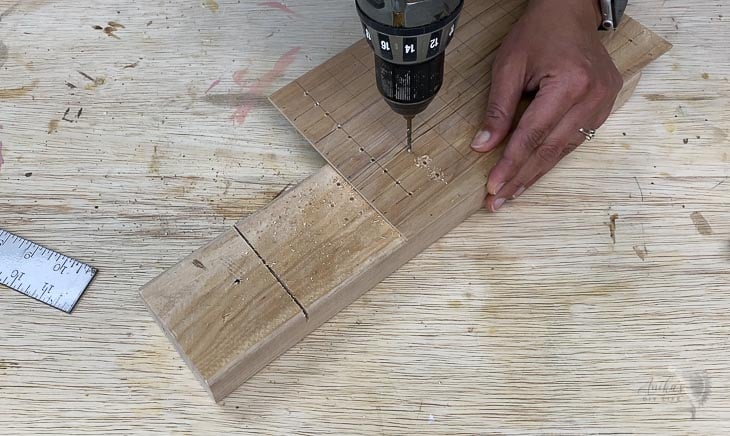
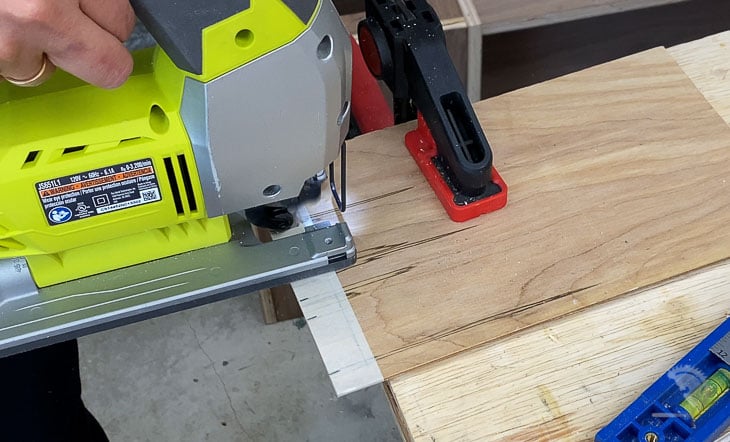
- For the necklace display, mark and cut out the slots using a jigsaw.
This is the perfect time to stain or paint the jewelry holder in the color of your choice. I stained it in American Walnut.
Step 4 – Customize!
This is where the fun comes in. The sky is the limit with a Cricut machine! You can customize with little notes, quotes, initials, patterns, or even monograms!
How to add custom designs
STEP 1 – DESIGN PROJECT IN DESIGN SPACE
- Measure the area you have for the image/quote and make a box in Design Space. Set the box dimensions to the measured area on the jewelry holder. This box is the guide for the amount of space you have.
- Add the desired text or image inside the box.
- Once you are happy with it, you can hide or delete the box.
- Attach all the text/images.
STEP 2 – SET MATERIAL AND LOAD BLADE
- Set material to Premium Vinyl in Design Space.
- Load the fine point blade in the machine.
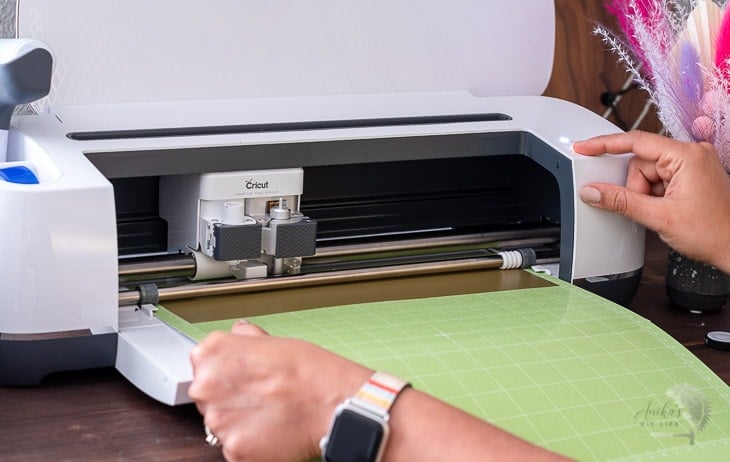
STEP 3 – LOAD AND CUT vinyl
- Apply the Premium vinyl on the StandardGrip machine mat with the white side down and load it into the machine. I used gold vinyl.
- Run the Cricut to cut the stencil.
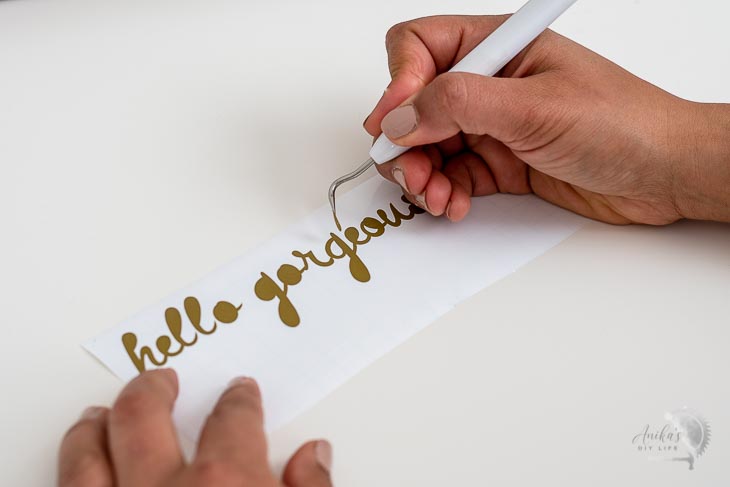
STEP 4 – WEED DESIGN
- Using a weeding tool, remove all the extra vinyl around your pattern.
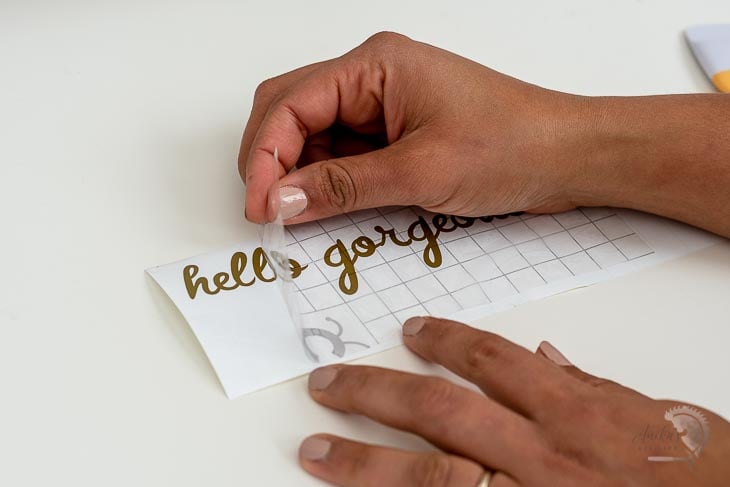
STEP 5 – Transfer to tape
- Use transfer tape to pick up the design off of the backer.
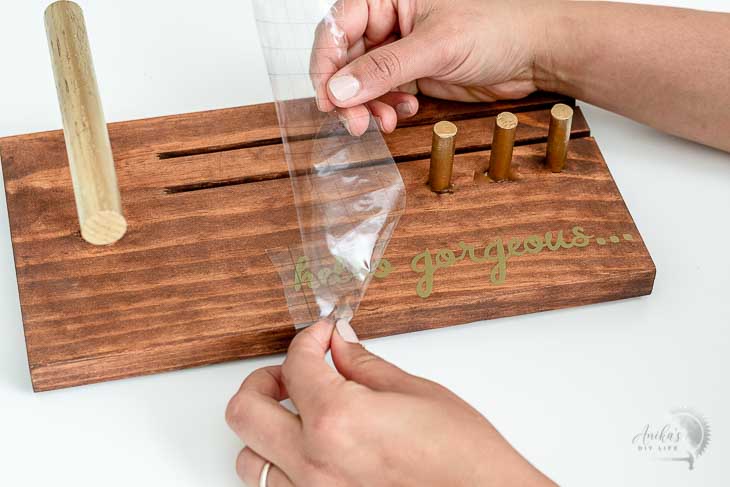
STEP 6 – Apply to jewelry holder
- Transfer the vinyl onto the jewelry holder and peel off the transfer tape.
That’s it!
I added a little quote in the front and an initial on the necklace display card.
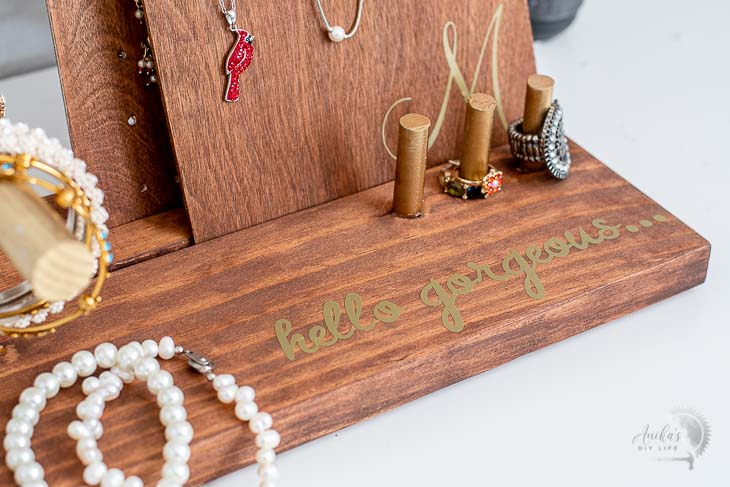
That’s a beautiful custom jewelry display! Depending on what you want to display, you can change how many of each feature you add!
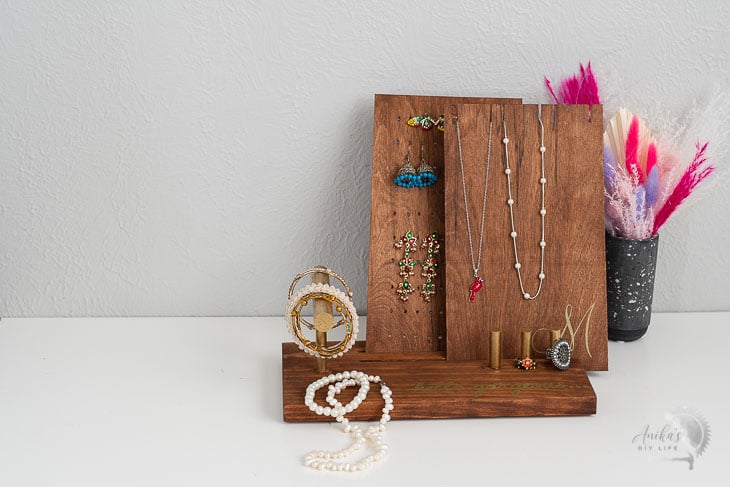
I used mostly scrap wood except the dowels which I needed to purchase. It is an easy, simple and quick project to make for yourself or as a gift!
Who will you make it for?
More Easy DIY Gift Ideas –
Anika's goal is to inspire and empower beginners with woodworking, DIY, home improvement, and home decor ideas.
She wants everyone to unlock their creative potential and experience the feeling that comes with making something. Nothing feels better better than seeing something and saying "I can make that!"


Great idea! Simple, yet elegant. Thanks for sharing.