How to Make a Dinosaur Shelf
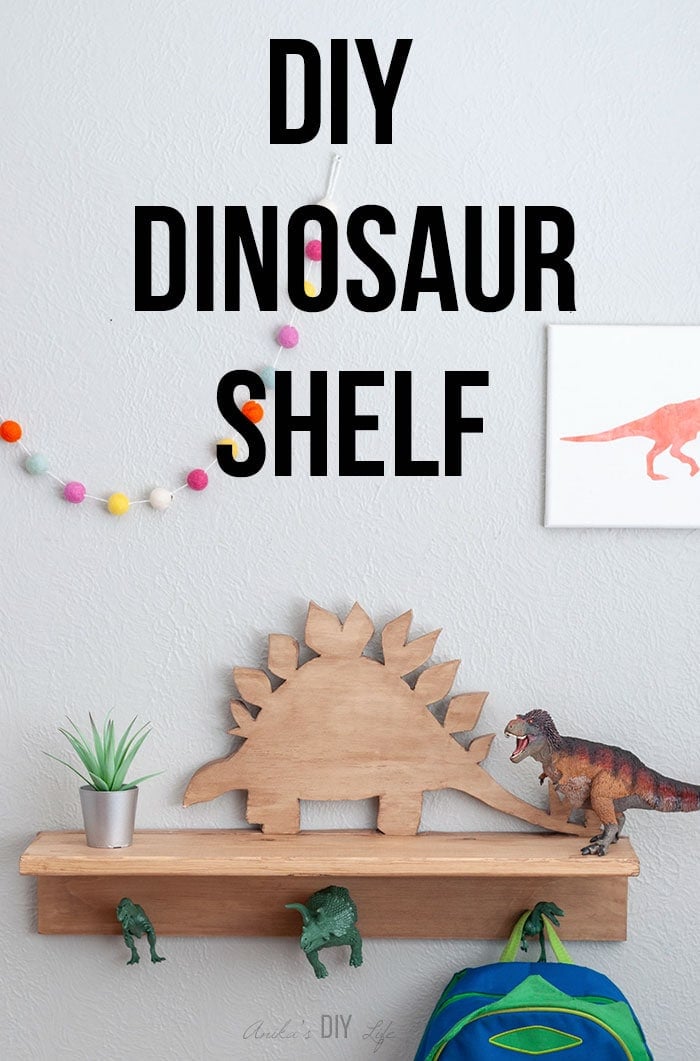
Learn how to make a dinosaur shelf with hooks with this detailed tutorial. It makes a perfect DIY dinosaur theme kids room decor!
Be sure to also check out this dinosaur themed room makeover and this easy dinosaur canvas art
You will also love colorful shared girl-boy room reveal and DIY rain gutter bookshelves for kids
To say my son is obsessed with dinosaurs is an understatement!
He can tell you the names and facts about dinosaurs you would have never heard of unless of course, you are a paleontologist…
Obviously, that means he has an insane amount of dinosaur toys, bags, and books.
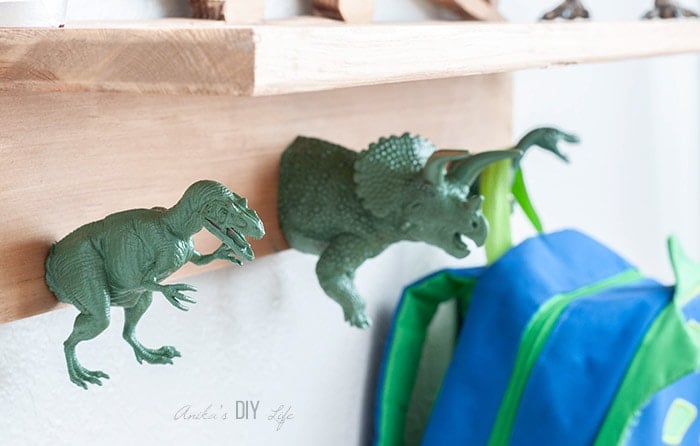
A dinosaur shelf with hooks was the obvious choice for this room!
This dinosaur shelf is a quick project and it adds so much function in his room!
RELATED: Easy dinosaur canvas wall art
***This post is sponsored by Safari Ltd.. All opinions are my own***
Safari Ltd. is a manufacturer of toys that teach. They specialize in animal figurines of many sizes that are meticulously researched and created with accuracy.
***This post contains affiliate or referral links. It is a way for this site to earn advertising fees by advertising or linking to certain products and/or services. Please read my full disclosure here ***
Supplies to Build a Dinosaur Shelf
- Dinosaurs of various kinds (I have a special discount code for you at the bottom!)
- ¾” plywood – dimensions per your needs. I used a 18″ x 30″ piece.
- 1″ x 6″ board – I used a 18″ long board
- Hand saw
- Jig Saw
- Power drill
- Countersink drill bit
- Brad nailer
- 1¼” finish nails
- 1¼” Spax screws
- Wood glue
- Spray paint in color of your choice. I used this one.
- Paint or stain of your choice
- Keyhole hangers

I had planned to make a shelf with 5 hooks initially but when I got the dinosaurs they were so detailed and gorgeous, I decided against cutting up a couple of them.
How to Build a Dinosaur Shelf
Here is a video tutorial of how I made the dinosaur shelf. The full written step by step process follows below.
Click here to subscribe to my YouTube Channel for more great videos!
Step 1 – Cut the Dinosaurs.

A hand saw works great for this. It did take some time to cut them up because these dinosaurs are completely solid inside.
Note – be sure to cut straight down so they are flush against the shelf when attached.
Step 2 – Spray Paint Dinosaurs

Add little screws on the back of the dinosaurs to prop them up and take them outside and spray paint them.
Step 3 – Measure and Mark Plywood.
- Leave 6″ or more for the dinosaur hooks (depending on the size of your dinosaurs) and mark the location where the 1″ x 6″ board will be attached.
- Above the line, draw the shape you want to cut.
For the shape – Just google for dinosaur clip art. I opted for the Stegosaurus and used the clip art as a guide to hand draw it.
Step 4 – Cut Out Dinosaur
- Using a jigsaw fitted with a scroll blade, cut the dinosaur shape.
- Be sure to sand any rough corners using a sanding block or a Dremel attachment for tight spots.
Learn how to use a jigsaw here.
Step 5 – Attach Shelf
- Attach the shelf using wood glue and finish nails.
- Stain or paint the shelf color of your choice.
Step 6 – Attach Dinosaurs
- Mark locations for the dinosaur hooks.
- Make a pilot hole all the way through.
- Make a pocket for the screw to sit in using a countersink bit.
- Add the screw and attach the dinosaur from the front end. You may have to make a pilot hole in the dinosaur too.
Step 7 – Add Hangers
I used keyhole hangers at the back of the shelf.
Note- You may have to make a small dimple on the back with a drill to make space for a screw to sit well inside the keyhole.
That is it!
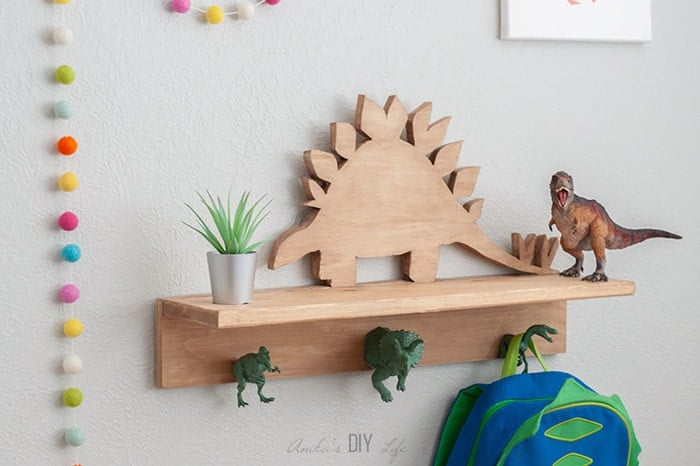
It is ready to hang up!
It was a quick and easy project. I think the most time consuming part was cutting out the wooden dinosaur which probably took about 30 minutes.
I was originally going to go with a simpler dinosaur outline like a brachiosaurus.
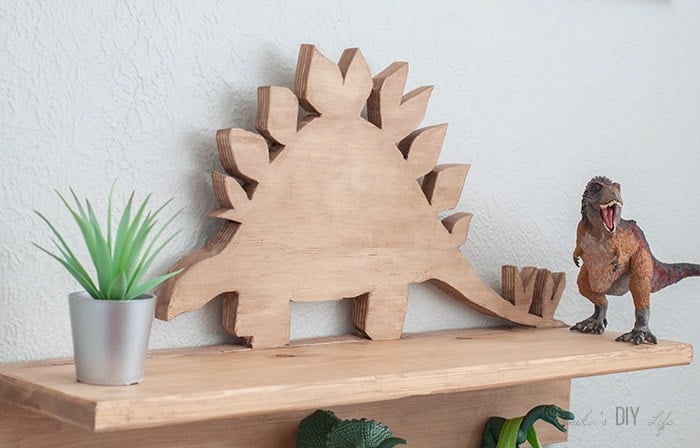
I wasn’t sure how sturdy a complicated design like the Stegosaurus would be – especially the scales on the back.
But it is really strong! I am so glad I decided to try it out! It worked perfectly!
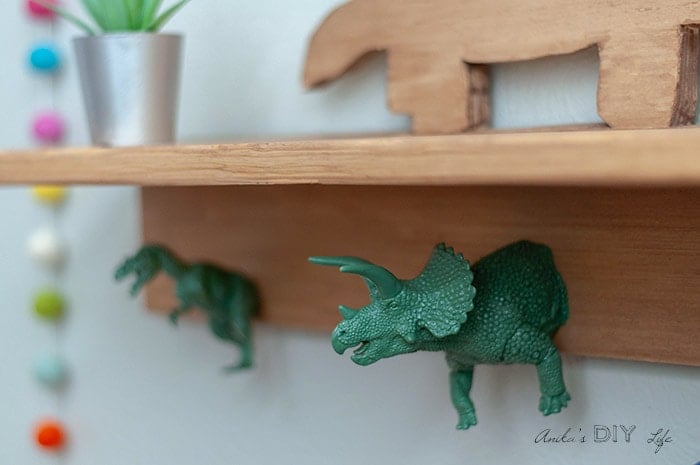
Here is a closer look at the dinosaur hooks. They are nice and sturdy and ready to take on life!
***If you want to make your own, you can get 15% off full-priced items at Safari Ltd. Use code – ANIKADIY***
Also, now I already have orders from my 5-year-old to build 2 more of these for his Dinosaur-obsessed friends…
So you know where I will be for the next few days!
Supplies Used for Dinosaur Shelf
- Dinosaurs of various kinds
- ¾” plywood – I used a 18″ x 30″ piece.
- 1″ x 6″ board – I used a 18″ long board
- Hand saw
- Jig Saw
- Power drill
- Countersink drill bit
- Brad nailer
- 1¼” finish nails
- 1¼” Spax screws
- Wood glue
- Spray paint in color of your choice. I used this one.
- Paint or stain of your choice
- Keyhole hangers
More Like DIY Dinosaur Shelf
[mv_create title=”Dinosaur Shelf” type=”diy” key=”29″]
Anika's goal is to inspire and empower beginners with woodworking, DIY, home improvement, and home decor ideas.
She wants everyone to unlock their creative potential and experience the feeling that comes with making something. Nothing feels better better than seeing something and saying "I can make that!"



Oh my gosh this turned out so great, I love the color you chose to paint the dinosaur hangers. They still have their own character but look great together on the shelf. Your son is lucky to have a crafty momma like you.
Thanks Toni! It was a fun quick project! 🙂
Now this, I like. My son liked dinosaurs too when he was little.
Thank you Linda! Thee is something about little boys and dinosaurs 🙂
This is just too cute!!
Now that is totally cool!