Easy DIY Personalized Doormat
Share this post:
Make your own unique DIY personalized doormat. This custom monogrammed door mat reflects your unique personality and is the perfect way to welcome guests!

Do you sometimes spend a long time looking for that perfect piece of decor that fits your space and personality?
I do that a lot too… it is one of the driving forces of why I love to make things by hand.
If I have an idea of what I need and a quick browse of the store or internet doesn’t yield any interesting results, I normally end up making my own.
That is exactly what happened with this DIY monogrammed doormat! 
I wanted a doormat that screamed “spring” but didn’t have any floral designs for my spring porch makeover. It was so easy to make! It took me about an hour to make and the only investment was the blank coir door mat!
***This post contains affiliate or referral links. It is a way for this site to earn advertising fees by advertising or linking to certain products and/or services. Please read my full disclosure here ***
Materials Needed for DIY Monogrammed Door Mat –
- Coir doormat. I got mine from here
- masking tape
- yard stick
- paints in various colors – I used Latex test pots I already had. Acrylic paints will work too
- Spray polyurethane
- Monogram stencil or card stock and X-acto knife
- Paint brushes
- spray adhesive

How to Make a DIY Personalized Doormat –
Step 1 – You can use a premade letter stencil or create your own monogram stencil like I did. Maria tells you exactly how to make a stencil without a cutting machine. It is fairly quick and easy.
Step 2 – Measure and draw a line to divide the mat in two along the width. My mat was 18″ wide so I drew a line at 9″. 
Step 3- Mark 1½” gaps on the midline and both sides. Then, tape alternate line to make the herringbone pattern. Do only one half first. The tape doesn’t stick very well but that’s ok. we just need to it stay out for a little bit. 
Step 4 – Apply light spray adhesive to the monogram stencil and place in the middle of the mat. Paint the lines. Be careful not to move the tape or the stencil. You will probably have to put down 2 coats. When done, remove the tape and stencil carefully.
Step 5 – Repeat step 4 for the other side of the mat. 
Step 6 – Once both sides are done, stencil the monogram with the paint color of your choice. I used white.
Step 7 – Seal the mat with the spray polyurethane. 
You have got yourself a fun welcoming customized unique doormat! It is one of my favorite features in the front porch and I am so glad I decided to make one instead of buying something. It fits in perfectly with my tiered cedar planter and new front porch decor. Nothing on the market would have been such a perfect reflection of my home!
Have you ever made your own doormat? If yes, I would love to see!


I love spring projects because I get to add lots of color to everything!! Like this pretty spice bottle upcycled decor.
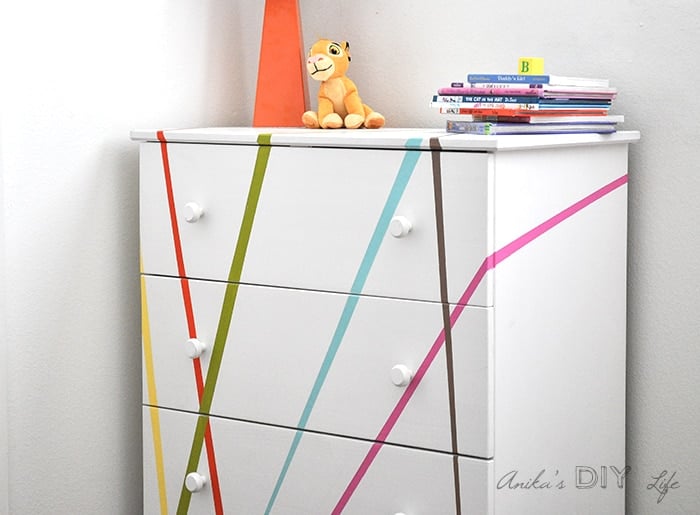
Or this colorful Ikea dresser makeover for the kids room
Looking for more inspiration on fun personalized DIY doormats?
Anika's goal is to inspire and empower beginners with woodworking, DIY, home improvement, and home decor ideas.
She wants everyone to unlock their creative potential and experience the feeling that comes with making something. Nothing feels better better than seeing something and saying "I can make that!"
- Anika Gandhi
- Anika Gandhi
- Anika Gandhi
- Anika Gandhi
- Anika Gandhi
- Anika Gandhi
- Anika Gandhi
- Anika Gandhi
- Anika Gandhi
- Anika Gandhi
- Anika Gandhi
- Anika Gandhi
- Anika Gandhi
- Anika Gandhi
- Anika Gandhi
- Anika Gandhi
- Anika Gandhi
- Anika Gandhi
- Anika Gandhi
- Anika Gandhi
- Anika Gandhi
- Anika Gandhi
- Anika Gandhi
- Anika Gandhi
- Anika Gandhi
- Anika Gandhi
- Anika Gandhi
- Anika Gandhi
- Anika Gandhi
- Anika Gandhi
- Anika Gandhi
- Anika Gandhi
- Anika Gandhi
- Anika Gandhi
- Anika Gandhi
- Anika Gandhi
- Anika Gandhi
- Anika Gandhi
- Anika Gandhi
- Anika Gandhi
- Anika Gandhi
- Anika Gandhi
- Anika Gandhi
- Anika Gandhi
- Anika Gandhi
- Anika Gandhi
- Anika Gandhi
- Anika Gandhi
- Anika Gandhi
- Anika Gandhi
- Anika Gandhi
- Anika Gandhi
- Anika Gandhi
- Anika Gandhi
- Anika Gandhi
- Anika Gandhi
- Anika Gandhi
- Anika Gandhi
- Anika Gandhi
- Anika Gandhi
- Anika Gandhi
- Anika Gandhi
- Anika Gandhi
- Anika Gandhi
- Anika Gandhi
- Anika Gandhi
- Anika Gandhi
- Anika Gandhi
- Anika Gandhi
- Anika Gandhi
- Anika Gandhi
- Anika Gandhi
- Anika Gandhi
- Anika Gandhi
- Anika Gandhi
- Anika Gandhi
- Anika Gandhi
- Anika Gandhi
- Anika Gandhi
- Anika Gandhi
- Anika Gandhi
- Anika Gandhi
- Anika Gandhi
- Anika Gandhi
- Anika Gandhi
- Anika Gandhi
- Anika Gandhi
- Anika Gandhi
- Anika Gandhi
- Anika Gandhi
- Anika Gandhi
- Anika Gandhi
- Anika Gandhi
- Anika Gandhi
- Anika Gandhi
- Anika Gandhi
- Anika Gandhi
- Anika Gandhi
- Anika Gandhi
- Anika Gandhi
- Anika Gandhi
- Anika Gandhi
- Anika Gandhi
- Anika Gandhi
- Anika Gandhi
- Anika Gandhi
- Anika Gandhi
- Anika Gandhi
- Anika Gandhi
- Anika Gandhi
- Anika Gandhi
- Anika Gandhi
- Anika Gandhi
- Anika Gandhi
- Anika Gandhi
- Anika Gandhi
- Anika Gandhi
- Anika Gandhi
- Anika Gandhi
- Anika Gandhi
- Anika Gandhi
- Anika Gandhi
- Anika Gandhi
- Anika Gandhi
- Anika Gandhi
- Anika Gandhi
- Anika Gandhi
- Anika Gandhi
- Anika Gandhi
- Anika Gandhi
- Anika Gandhi
- Anika Gandhi
- Anika Gandhi
- Anika Gandhi
- Anika Gandhi
- Anika Gandhi
- Anika Gandhi
- Anika Gandhi
- Anika Gandhi
- Anika Gandhi
- Anika Gandhi
- Anika Gandhi
- Anika Gandhi
- Anika Gandhi
- Anika Gandhi
- Anika Gandhi
- Anika Gandhi
- Anika Gandhi
- Anika Gandhi
- Anika Gandhi
- Anika Gandhi
- Anika Gandhi
- Anika Gandhi
- Anika Gandhi
- Anika Gandhi
- Anika Gandhi
- Anika Gandhi
- Anika Gandhi
- Anika Gandhi
- Anika Gandhi
- Anika Gandhi
- Anika Gandhi
- Anika Gandhi
- Anika Gandhi
- Anika Gandhi
- Anika Gandhi
- Anika Gandhi
- Anika Gandhi
- Anika Gandhi
- Anika Gandhi
- Anika Gandhi
- Anika Gandhi
- Anika Gandhi
- Anika Gandhi
- Anika Gandhi
- Anika Gandhi
- Anika Gandhi
- Anika Gandhi
- Anika Gandhi
- Anika Gandhi
- Anika Gandhi
- Anika Gandhi
- Anika Gandhi
- Anika Gandhi
- Anika Gandhi
- Anika Gandhi
- Anika Gandhi
- Anika Gandhi
- Anika Gandhi
- Anika Gandhi
- Anika Gandhi
- Anika Gandhi
- Anika Gandhi
- Anika Gandhi
- Anika Gandhi
- Anika Gandhi
- Anika Gandhi
- Anika Gandhi
- Anika Gandhi
- Anika Gandhi
- Anika Gandhi
- Anika Gandhi
- Anika Gandhi
- Anika Gandhi
- Anika Gandhi
- Anika Gandhi
- Anika Gandhi
- Anika Gandhi
- Anika Gandhi
- Anika Gandhi
- Anika Gandhi
- Anika Gandhi
- Anika Gandhi
- Anika Gandhi
- Anika Gandhi
- Anika Gandhi
- Anika Gandhi
- Anika Gandhi
- Anika Gandhi
- Anika Gandhi
- Anika Gandhi
- Anika Gandhi
- Anika Gandhi
- Anika Gandhi
- Anika Gandhi
- Anika Gandhi
- Anika Gandhi
- Anika Gandhi
- Anika Gandhi
- Anika Gandhi
- Anika Gandhi
- Anika Gandhi
- Anika Gandhi
- Anika Gandhi
- Anika Gandhi
- Anika Gandhi
- Anika Gandhi
- Anika Gandhi
- Anika Gandhi
- Anika Gandhi
- Anika Gandhi
- Anika Gandhi
- Anika Gandhi
- Anika Gandhi
- Anika Gandhi
- Anika Gandhi
- Anika Gandhi
- Anika Gandhi
- Anika Gandhi
- Anika Gandhi
- Anika Gandhi
- Anika Gandhi
- Anika Gandhi
- Anika Gandhi
- Anika Gandhi
- Anika Gandhi
- Anika Gandhi
- Anika Gandhi
- Anika Gandhi
- Anika Gandhi
- Anika Gandhi
- Anika Gandhi
- Anika Gandhi
- Anika Gandhi
- Anika Gandhi
- Anika Gandhi
- Anika Gandhi
- Anika Gandhi
- Anika Gandhi
- Anika Gandhi
- Anika Gandhi
- Anika Gandhi
- Anika Gandhi
- Anika Gandhi
- Anika Gandhi
- Anika Gandhi
- Anika Gandhi
- Anika Gandhi
- Anika Gandhi
- Anika Gandhi
- Anika Gandhi
- Anika Gandhi
- Anika Gandhi
- Anika Gandhi
- Anika Gandhi
- Anika Gandhi
- Anika Gandhi
- Anika Gandhi
- Anika Gandhi
- Anika Gandhi
- Anika Gandhi
- Anika Gandhi
- Anika Gandhi
- Anika Gandhi
- Anika Gandhi
- Anika Gandhi
- Anika Gandhi
- Anika Gandhi
- Anika Gandhi
- Anika Gandhi
- Anika Gandhi
- Anika Gandhi
- Anika Gandhi
- Anika Gandhi
- Anika Gandhi
- Anika Gandhi
- Anika Gandhi
- Anika Gandhi
- Anika Gandhi
- Anika Gandhi
- Anika Gandhi
- Anika Gandhi
- Anika Gandhi
- Anika Gandhi
- Anika Gandhi
- Anika Gandhi
- Anika Gandhi
- Anika Gandhi
- Anika Gandhi
- Anika Gandhi
- Anika Gandhi
- Anika Gandhi
- Anika Gandhi
- Anika Gandhi
- Anika Gandhi
- Anika Gandhi
- Anika Gandhi
- Anika Gandhi
- Anika Gandhi
- Anika Gandhi
- Anika Gandhi
- Anika Gandhi
- Anika Gandhi
- Anika Gandhi
- Anika Gandhi
- Anika Gandhi
- Anika Gandhi
- Anika Gandhi
- Anika Gandhi
- Anika Gandhi
- Anika Gandhi
- Anika Gandhi
- Anika Gandhi
- Anika Gandhi
- Anika Gandhi
- Anika Gandhi
- Anika Gandhi
- Anika Gandhi
- Anika Gandhi


This is so cute Anika! I love the colors!
I have been wanting to try this!! So cute!
So cute Anika! This would be fun to do with circles also. Love all of the color!
Thanks Tonya! Yes! Circles would be so fun too!
Happy and bright! Your pretty mat is ready for spring. I love the porch look. Those cute wood planters are wonderful. Happy Crafting, Kippi #kippiathome
So pretty and perfect for spring! Thanks so much for sharing with us at the Encouraging Hearts and Home party. Pinned.