DIY Toy Organizer – The Ultimate Toy Storage Solution (With Plans)
This DIY Toy organizer is the toy storage solution you have been looking for! It is an easy beginner build and has a spot for stuffed animals, books, board games, and even all those big and small toys. Step by step tutorial and building plans are included. This is the ultimate playroom storage idea!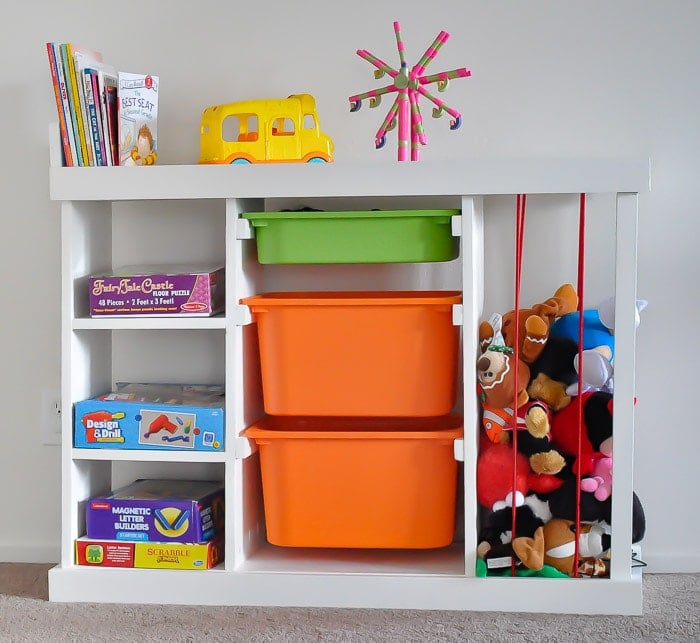
If you have kids in your life, you need this DIY Toy Organizer!
Toys come in literally every shape, size, and material!
And they are EVERYWHERE!
You know what I am talking about if you have ever stepped on that long lost piece of lego…
In my quest for finding an organization solution for the ubiquitous toys, I came across Jamie’s Stuffed animal zoo and Shanty sisters’ Ikea Trofast knockoff.
I decided to combine the two ideas and add a few more touches of my own to create this toy organizer which holds the most types of toys I can think of… at least for now.
It is the perfect toy organizer for small spaces too.
RELATED: 20 DIY TOY ORGANIZER IDEAS TO HELP CONTROL THE CHAOS and DIY Lego Table with Storage for Small Spaces
***This post contains affiliate or referral links. It is a way for this site to earn advertising fees by advertising or linking to certain products and/or services. Please read my full disclosure here ***
Materials Needed to Build the DIY Toy Organizer –
- Lumber per the plans
- Kreg Jig
- Circular Saw
- Miter Saw
- Drill
- 1 1/4” finish nails.
- 1 1/4” pocket hole screws
- 1 1/4” wood screws
- Hammer or brad nailer
- Wood Glue
How to Build the DIY Toy Organizer –
DIY Toy Storage Plans –
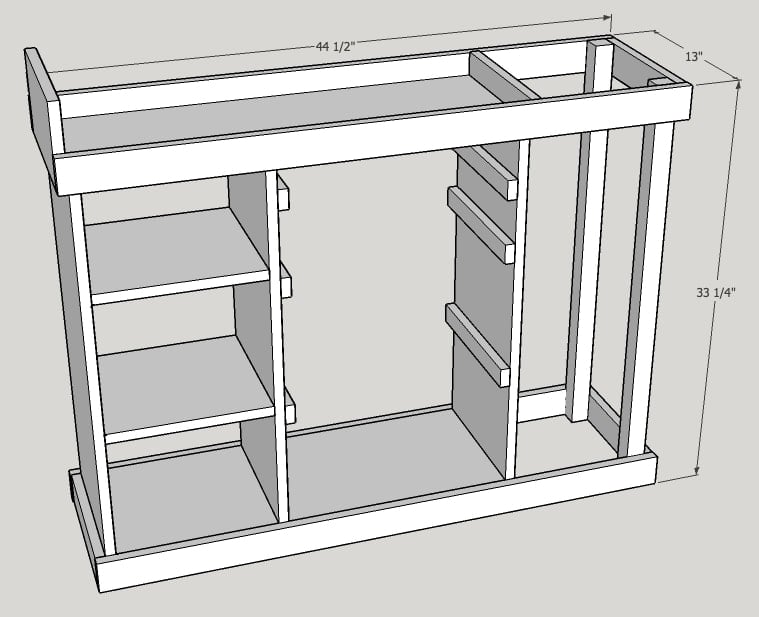
As usual, the free printable plans are available. Get them by clicking below.
Let’s Build the Easy Toy Organizer –
*Use wood glue along with nails or pocket hole screws in each step.
Start by making cuts according to the cut list in the printable plans and pocket hole screws as shown below.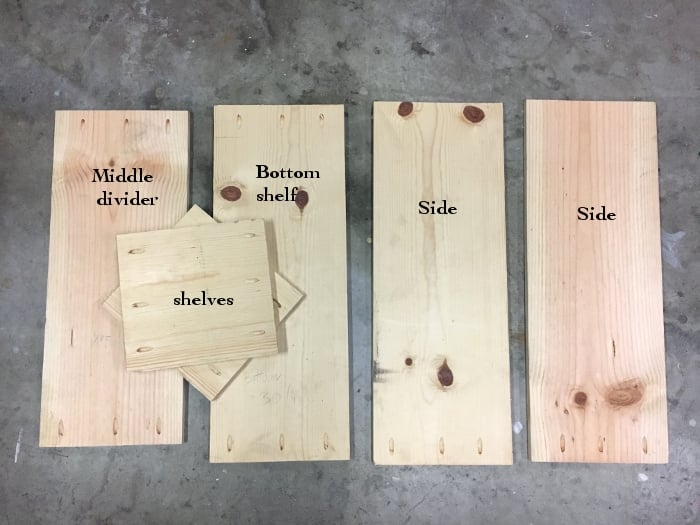
Step 1 – Attach rails.
Start by attaching the rails on the middle divider and one of the sides.
Make sure to measure the distances between the rails accurately as shown in the plans.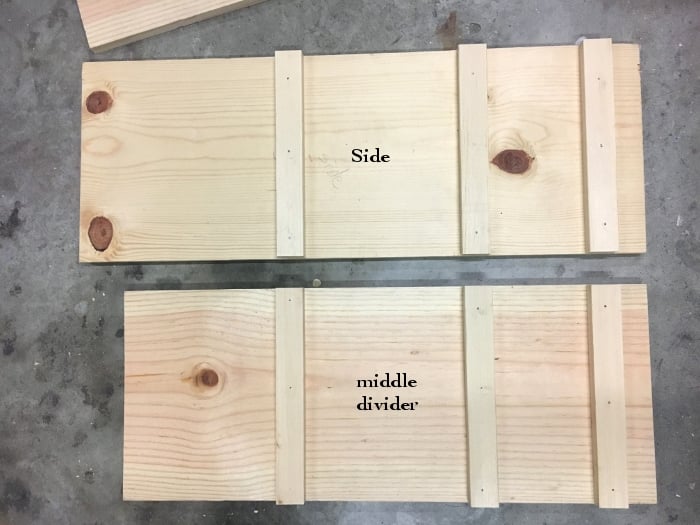
Step 2 – Attach shelves.
On the other side piece, attach the center and bottom shelves. 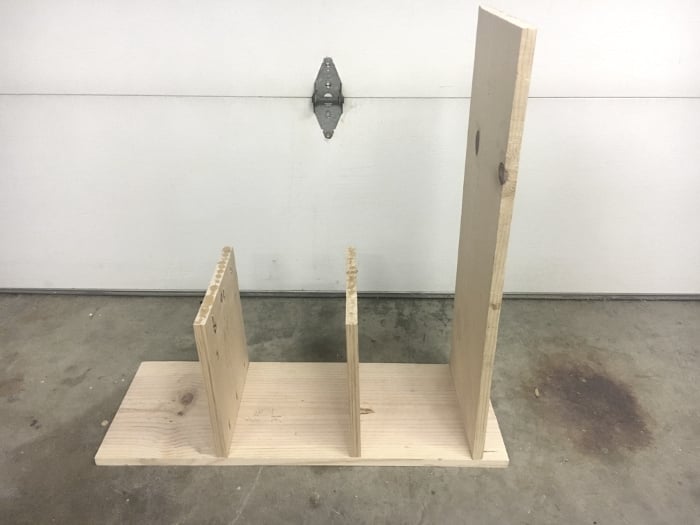
Step 3 – Assemble basic frame.
Attach the middle divider and the other side piece. 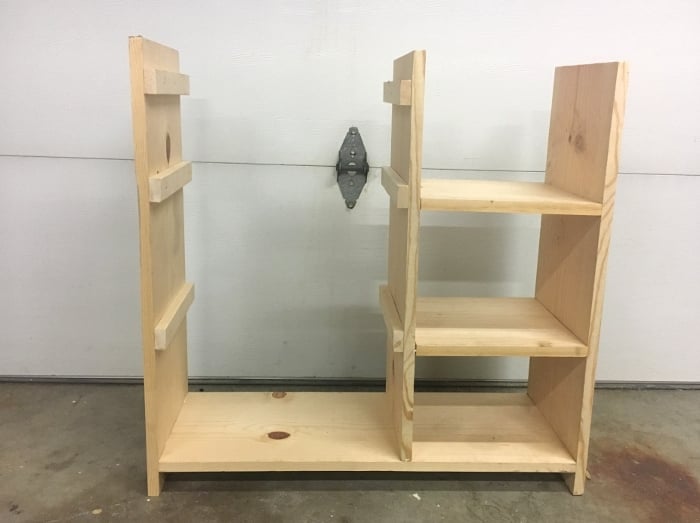
Step 4 – Attach top.
Attach the top using pocket hole screws through the outside of the sides and the middle divider. 
Step 5 – Attach trim.
Use 1 ¼”pocket hole screws on the side trim pieces to attach them to the long trim pieces.
Note – one of the side trim pieces is larger which acts as a book support. Also, use countersunk screws to screw in the long trim pieces to the dividers in the front and back. See plans for more details.
The last step is to attach the 2″ x 2″ supports on one side of the structure using countersunk screws. This makes the stuffed toy area.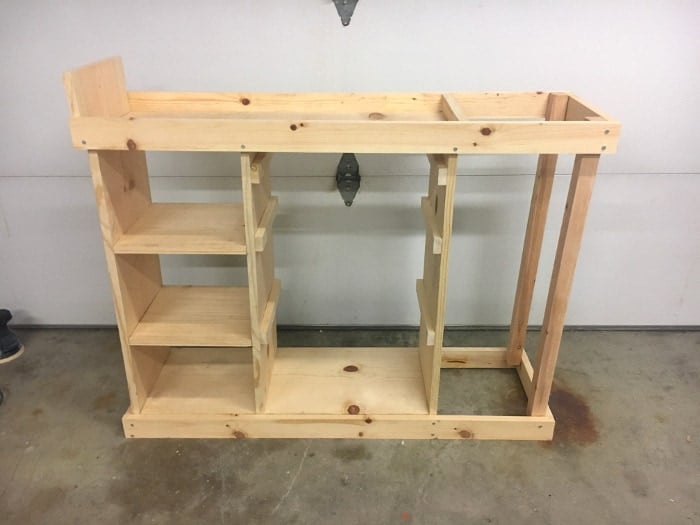
Step 6 – Fill all visible holes, caulk, sand and paint or stain.
I used 2 coats of primer followed by a couple coats of paint in Polar White by Valspar.
I love to use my Homeright paint sprayer and also set up my Large Spray shelter inside the garage since it was raining outside. It took me 45 minutes for primer and 45 minutes for paint!
That paint sprayer is the best!! 
Step 7 – Attach 2 eye hooks on each side of the inside of the stuffed toy area.
Pre-drill a pilot hole and screw in the eye hooks. The ones on top are vertical and the ones on the bottom are horizontal. 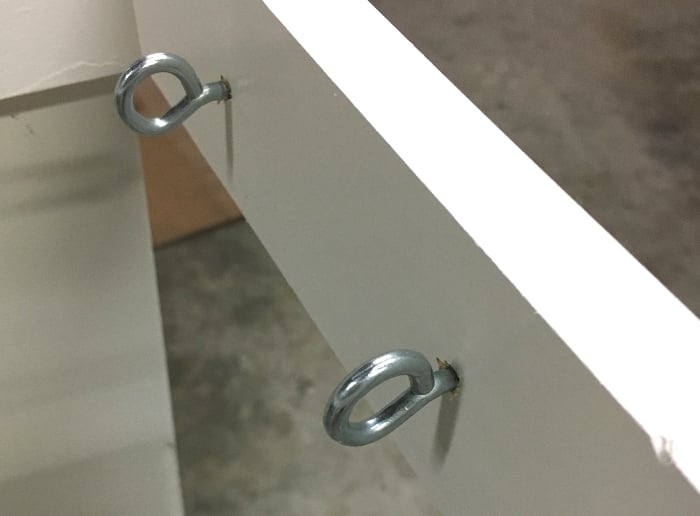
Step 8 – Create stuffed animal cage.
Tie the bungee cord to one on the bottom eye screws and thread them through each of the eye screws ending at one of the bottom screw eyes. This is what the bungee cord looked like when I was done.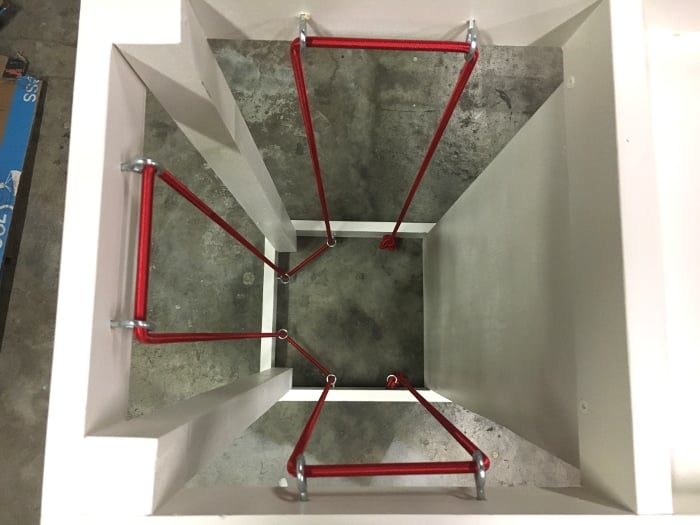
Just add the Trofast bins and we are done!!
It is ready to be loaded up! 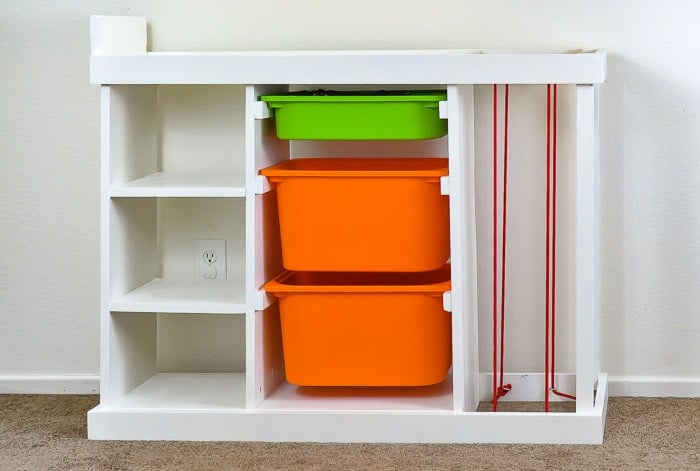
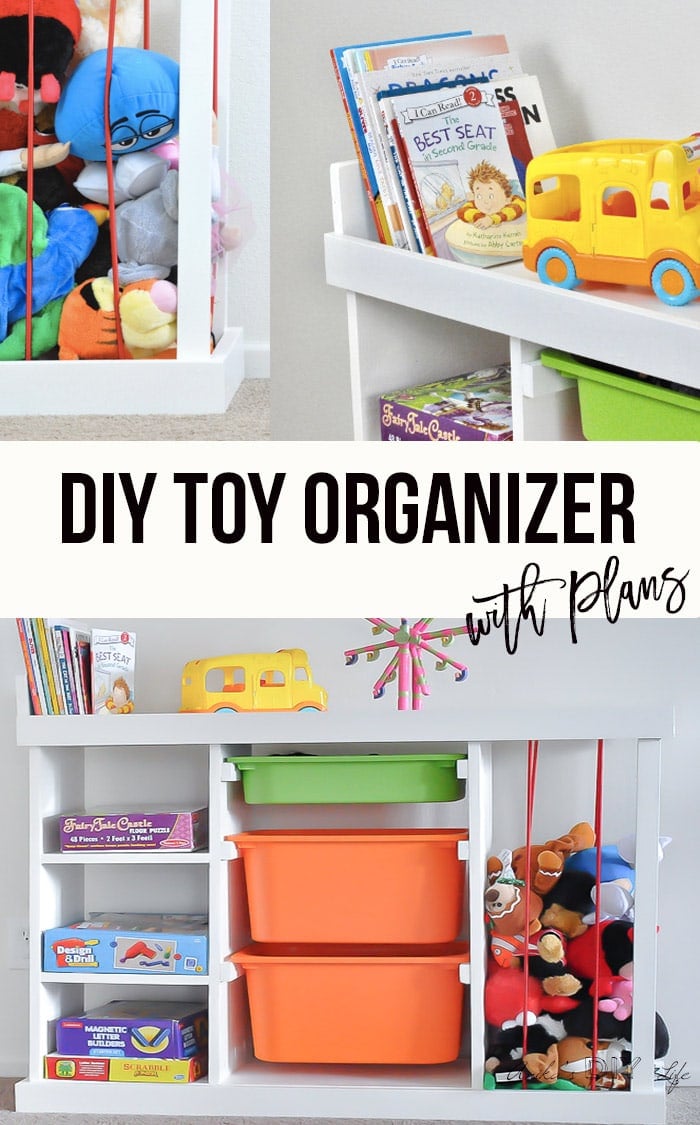
It has a place for stuffed toys –
Bins for the small and big toys and shelves to hold boxes of board games –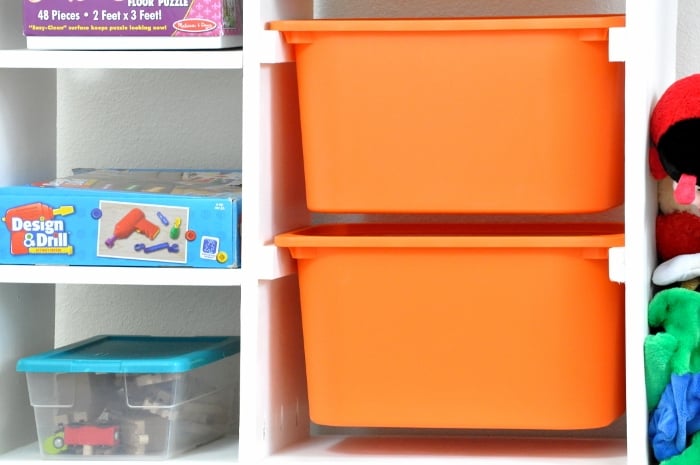 There is even a spot for books on top plus you can keep some bigger toys there too!
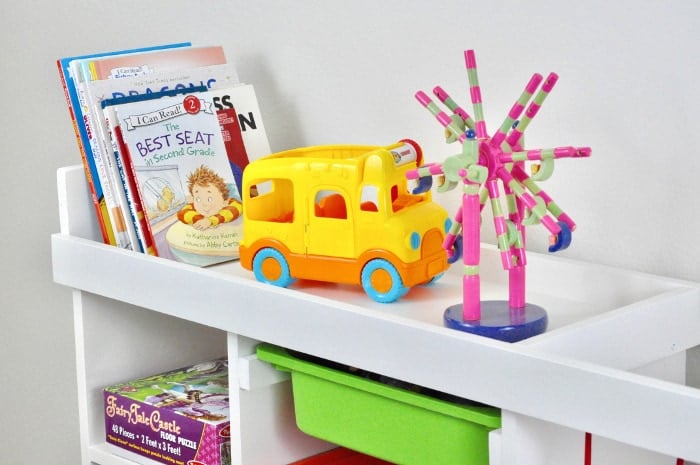
I am about to tell the kids that they get to keep only toys that fit in this organizer and everything else gets donated… Ha! Let’s see how that goes…
Don’t forget!! You can get printable plans in my Library of Plans!
How do you organize toys? I feel like I am on an eternal quest to organize all things kids.
If You Enjoyed This DIY Toy Storage Idea, Be Sure to Take a Look at These –
- A portable lego table to keep the little Legos off the floor.
- An easy desk organizer for my little girl to keep her homework from getting lost.
- A bedside table with book storage which has definitely made my life so much easier by taking care of the bedtime books!
Anika's goal is to inspire and empower beginners with woodworking, DIY, home improvement, and home decor ideas.
She wants everyone to unlock their creative potential and experience the feeling that comes with making something. Nothing feels better better than seeing something and saying "I can make that!"


This is such a fantastic project. The bungee cord is a perfect solution. We have one of those stuffed animal nets and it is horrible. Now to find a spot for one of these and a weekend to make it in. ?
Oh Anika, what can I say. Your plans are always so amazing and this just has to be the perfect toy storage. Beautiful job as always.
Haha, this is the second project of yours I clicked in a row at the Inspiration Monday Link Party! I love the addition of the bungee cord, nice touch. I went ahead and followed you on Pinterest 😉 Cheers.