DIY Roman Shades – How to Make Using Drop Cloth
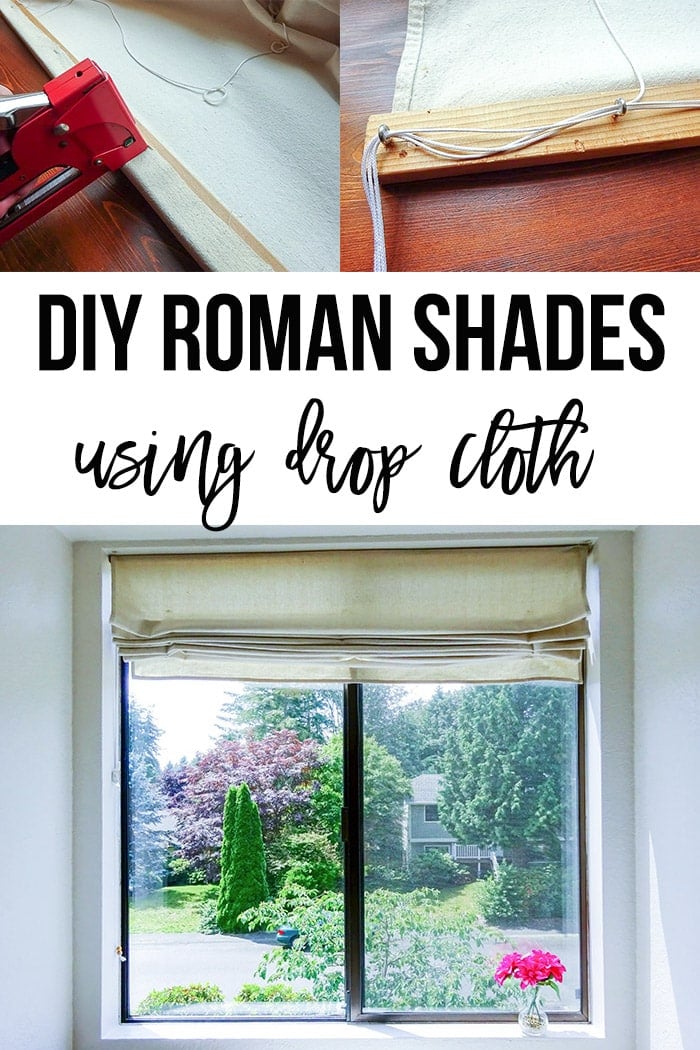
DIY Roman shades are a super inexpensive way to make your own stylish window coverings and create privacy. This tutorial walks you through exactly how to make this using drop cloth!!
You will also love 25 Amazing Drop Cloth Projects, Easy DIY canvas bins, and No-sew drop cloth curtains.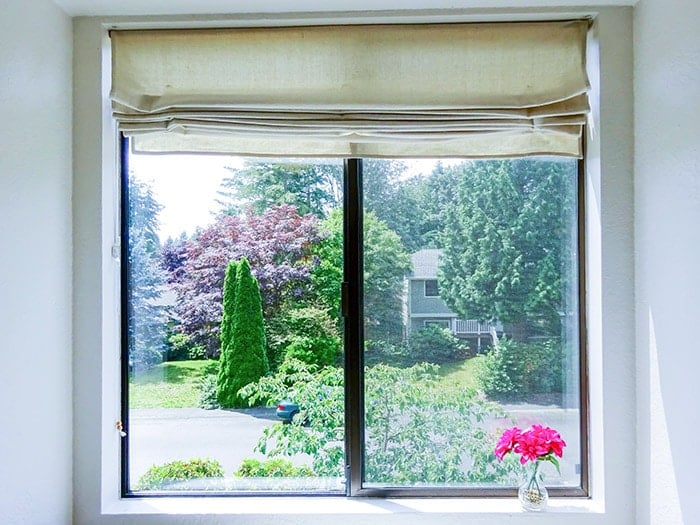
Today, I have Jenny from Single Girl’s DIY showing us how to make DIY roman shades!
She is a girl after my own heart who is on a mission to show everyone can do it! Here is Jenny –
Hello, fellow DIYer’s! My name is Jenny from Single Girl’s DIY.
Anika invited me over to share one of my thriftiest home decor projects with you – these drop cloth Roman shades that I made for my own home.
You see, I truly believe that everyone deserves to have a beautiful home, no matter their budget.
I know what it’s like when money is tight.
Parts of my house were literally rotting off when I bought it, but I had no money for updates. So, I got creative with thrifty DIY updates like this one.
I’m excited to show you how you can make your own Roman shades for just a few dollars. Let’s get started!
***This post contains affiliate or referral links. It is a way for this site to earn advertising fees by advertising or linking to certain products and/or services. Please read my full disclosure here ***
Materials Needed for DIY Roman Shades
- Canvas painter’s drop cloth
- 1″ x 2″ board the width of your window
- Plastic rings
- Drapery cord
- Eye screws
- 5/16″ wooden dowel the width of your shade
- Cord Cleat
- Sewing machine
- Scissors
- Needle & thread
- Staple gun
How to Make Your Own Drop Cloth Roman Shades
Be sure to measure your windows before you purchase your materials, so you know what size drop cloth to buy. They come in lots of sizes.
Step 1 – Cut drop cloth to size
Measuring from the hems on two sides, cut the drop cloth to size:
- Width = Window width + 1/2″
- Length = Window height + 3.5″ (Though you might want to give yourself a little extra. You can trim the length correctly when you’re nearly done.)
Be sure to keep the hems on both sides to save you lots of work.
Step 2 – Hem the Raw Side
Hem the cut side by folding ~1/4″ from the edge toward the back side of the fabric. Fold it under again to make a finished edge.
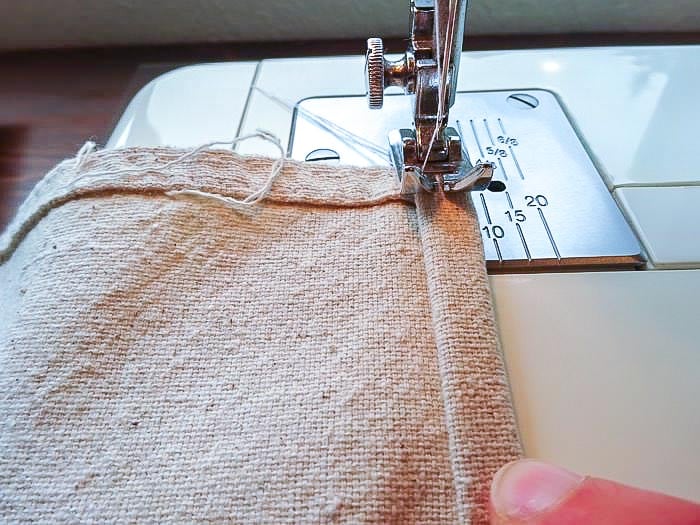
Note – You only have to do this on the side of the shade. Don’t bother finishing the top cut edge. You’ll see why when we assemble the shade.
3. Stitch a Bottom Pocket
Sew a small pocket near the bottom of the shade to insert a 5/16″ wood dowel. 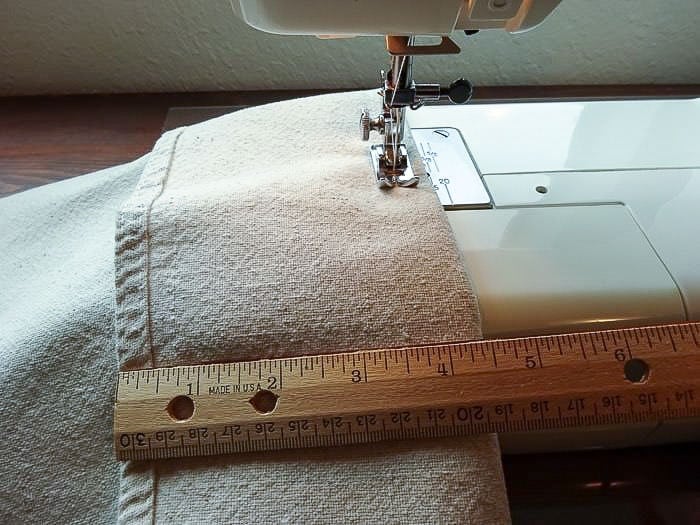 The dowel helps the shade keep its shape, and open smoothly.
Note – Be sure to fold the front sides together, so the pocket will be on the back of your shade.
Also, sew a straight seam, 3/4″ from the fold. When the shade is finished, the dowel will go into this pocket.
Step 4- Mark the lifting points
Measuring up from the pocket seam you just stitched, use a pencil to mark every 5″ along the center and both sides of the roman shade. 
Step 5 – Attach the guide rings
Stitch drapery rings by hand to all the positions you marked in Step 4. Use a thick thread, and make several passes to secure the ring. Use just a few threads of the drop cloth on each pass.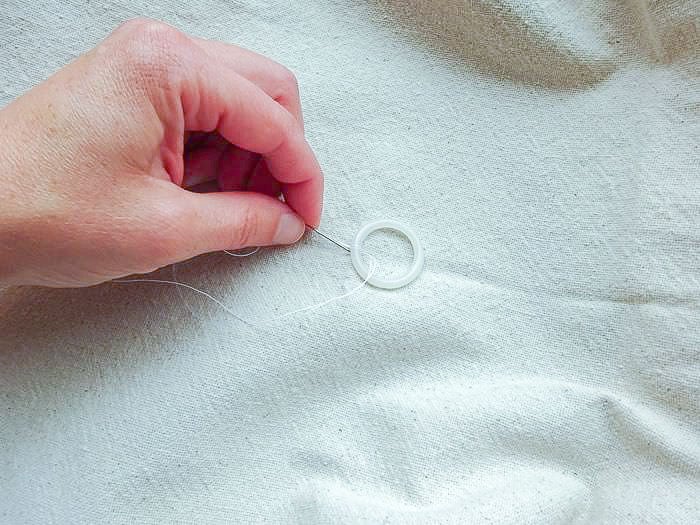
Be sure to attach the rings to the bottom pocket too.
Step 6 – Run the drapery cord
Start from the top of the shade and thread the cord down through each ring. When you get to the bottom ring on the dowel pocket, tie the cord to the ring.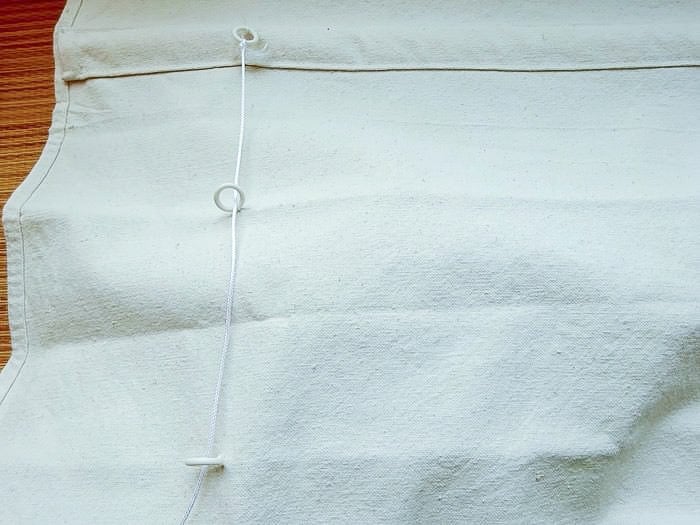
Be sure you have lots of length of cord to work with. You’ll need it to be the length of the shade, plus enough to run across the top of the window, and have extra to create a pull cord when the shade is closed.
The best way to make sure you have a long enough cord is to run it through the shade first, and then cut it.
7. Attach the Mounting Bar
Fold the top of the shade over the 1″x 2″ board and staple it with a staple gun. Cut off any excess drop cloth.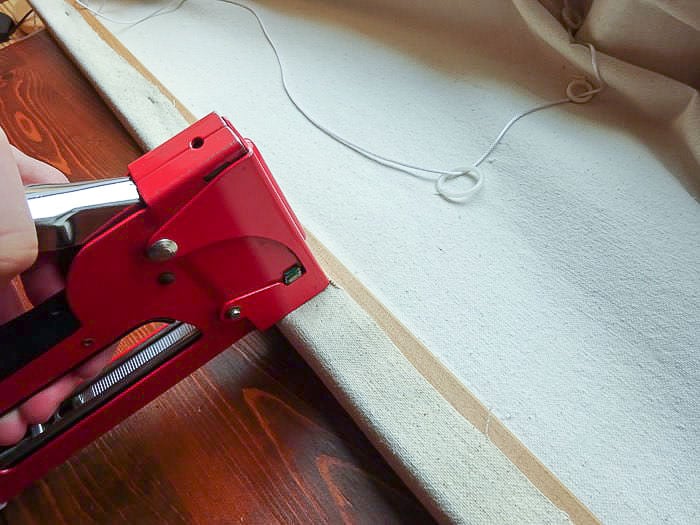
Step 8 – Attach Eye Screws
Above each row of rings, screw in a small eye screw to the underside of the board.
Also, add an eye screw on the side of the board for the pull cord. Run the drapery cords through the eyes.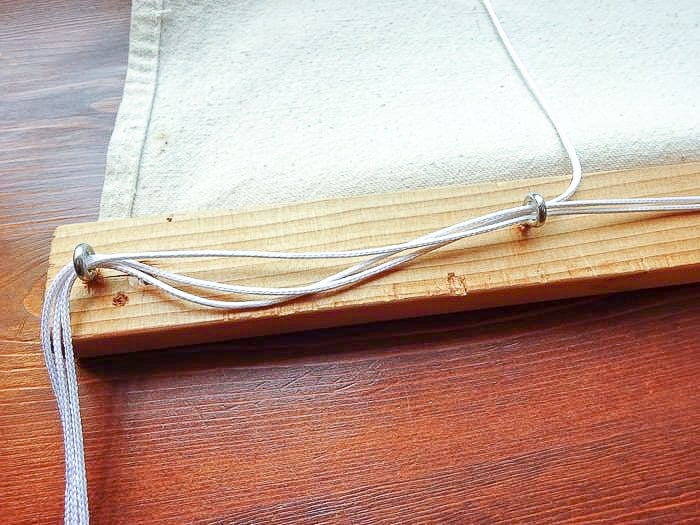
Stretch the shade out to its full length to determine how long the drapery cords need to be. Then tie a knot close to the end screw. The remaining tail is the pull cord. I braided my three strands together and added beads.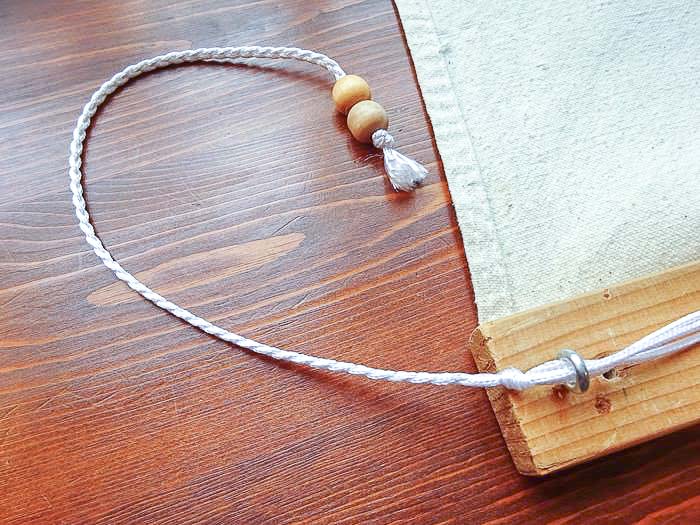
Step 9 – Hang the shade
Pre-drill holes through the top board and mount the shade by screwing it directly into the window frame.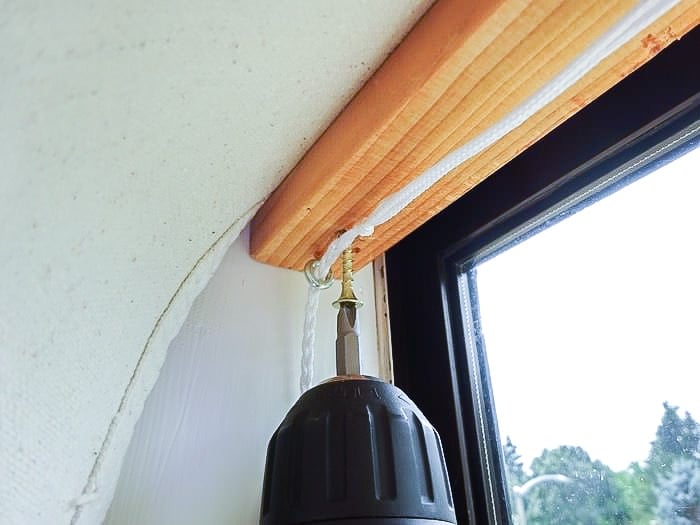
Step 10 – Install the cord cleat
The cord cleat is needed to hold the shade open. When you pull the drawstring to open the shade, just wrap it around the cleat.
Attach the cord cleat to the window frame such that there is enough length to wrap around.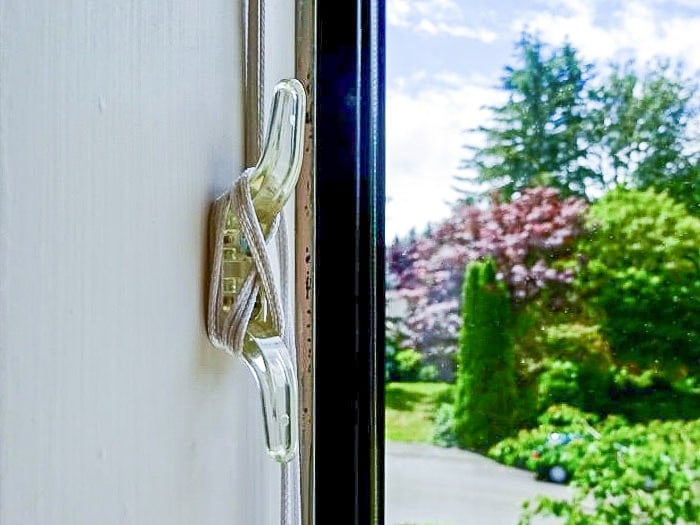
And that’s it!
Easy drop cloth roman shades in 10 easy steps.
I made these for my master bedroom as well as my guest room back in 2008, and I still haven’t replaced them with something more expensive. They still look great!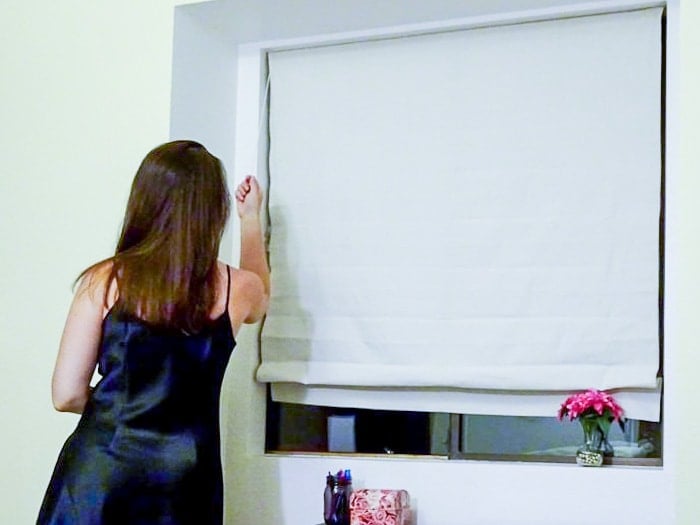
Thanks for letting me come by and share this project with you. I hope you enjoyed the tutorial.
This is exactly the sort of thrifty and pretty DIY project I love to share over at Single Girl’s DIY. I believe that everyone can create a home they love, even on a tiny budget. I know it, because I did it! And you can do it, too. As I like to say, “Because you don’t need someone else to do it for you.”
Until next time!
Other Budget-Friendly Drop Cloth Projects You’ll Love
Depending on how many window shades you need to make, you’ll probably have some drop cloth material left over. Don’t let it go to waste!
More drop cloth project inspiration –
- 3 Stylish drop cloth home decor projects
- Easy no-sew drop cloth curtains
- 25 Amazing drop cloth project ideas
Anika's goal is to inspire and empower beginners with woodworking, DIY, home improvement, and home decor ideas.
She wants everyone to unlock their creative potential and experience the feeling that comes with making something. Nothing feels better better than seeing something and saying "I can make that!"


The small budget is not a barrier to some changes in the design of our interior. The hand-made materials will transform our habitual style.
Great project! Thanks for sharing at Friendship Friday at Create With Joy! 🙂
Looks great! Thanks for sharing at To Grandma’s House We Go DIY, Crafts, Recipes and More Wednesday Link Party! Pinned it to Pinterest! Hope to have you join the party next week!
I love using drop cloth for so things and these are darling! Thanks for sharing the how to’s with SYC.
hugs,
Jann
Very budget friendly project. It turned out great!