DIY Rotating Bookcase
Learn how to build a DIY rotating bookcase that is perfect for lots of storage in the corner of a room with the full tutorial and plans.

My son’s room has turned into an explosion of books and legos!
He graduated from early reader books all the way to big chapter books but we never upgraded his book storage.
The books had completely outgrown the current storage solutions and definitely needed a change.
We needed a large bookcase but I didn’t want to build a huge bookcase that would accommodate all his books for the next few years but would also not be a beast in his room.
Instead, I decided to build this revolving bookcase.
This bookcase –
- Has shelves on four sides
- Sits nicely in a corner and doesn’t take up a lot of space.
- Has a total of over 13′ of storage space
- Easy to categorize and arrange books if needed
- BONUS! you can also store toys, craft supplies and lego creations in it!
- Let’s not forget, it’s fun to use!
***This post is sponsored by The Home Depot as part of the #THDProSpective program. Thank you for supporting the brands that help me bring you new projects.***
***This post contains referral or affiliate links. It is a way for this site to earn advertising fees by advertising or linking to certain products and/or services. Please read my full disclosure here ***
This bookshelf is made almost entirely out of plywood.
Cutting Plywood
Plywood is very prone to tear out when you cut it.
Cutting plywood – especially cross-cuts can end up being a frustrating experience if you aren’t using the right blade.
The key to getting the perfect cut on plywood with no tear-out is using a blade with the right number of teeth.

The Diablo 80-tooth blades are perfect for plywood. Not only plywood but it also cuts hardwoods, softwoods, melamine, paneling, and MDF leaving behind a clean edge.
The super-thin kerf minimizes material removal. The stabilizer vents absorb noise and vibration. This helps in reducing drag and friction and delivers a more precise cut.
I have a 10″ table saw so I use the Diablo 10″ 80-Tooth Ultra Finish Circular Saw Blade with it.
For my 12″ miter saw, I use the Diablo 12″ 80-Tooth Fine Finish Circular Saw Blade.
Cutting With a Jigsaw
I decided to add a small curvature to all the ends of the shelves using a jigsaw. The key to getting the best cuts with a jigsaw without tear-out is again the right blade.
Standard jigsaw blades cut in the upstroke hence causing tearout on the top surface.
There are reverse tooth jigsaw blades also available but these cause tearout on the bottom surface.
The Diablo Top and Bottom cut jigsaw blades are the best of both worlds. It has bi-directional teeth that give the best fine finish on the top and bottom of the wood.

It also has a 5x longer life than standard blades and can cut curves and angles.
Building the DIY Rotating Bookshelf
This is a fairly simple build and took me about 2 afternoons to put it together.
It is built with plywood and attached using pocket hole joinery.
I used birch plywood because my goal was to paint it but you can also stain it and use plywood with a nice veneer.
Material Needed
- Lumber per the plans (1.5 sheets of plywood)
- Diablo 12″ 80-Tooth Fine Finish Circular Saw Blade
- Diablo 10″ 80-Tooth Ultra Finish Circular Saw Blade
- Diablo Top and bottom cut jigsaw blades
- Diablo SandNet sanding sheets and sanding block
- 5/8″ Forstener bit
- 1 1/4″ pocket hole screws
- wood glue
- wood filler
- Heavy-duty lazy susan hardware
Tools Needed
- Miter saw and/or table saw
- Jigsaw (optional- to add shape to the corners)
- Power drill
- Pocket hole jig. I used this one.
- Random orbital sander
Instructions
Step 1 – Make the Cuts
- Make all the cuts per the plans.
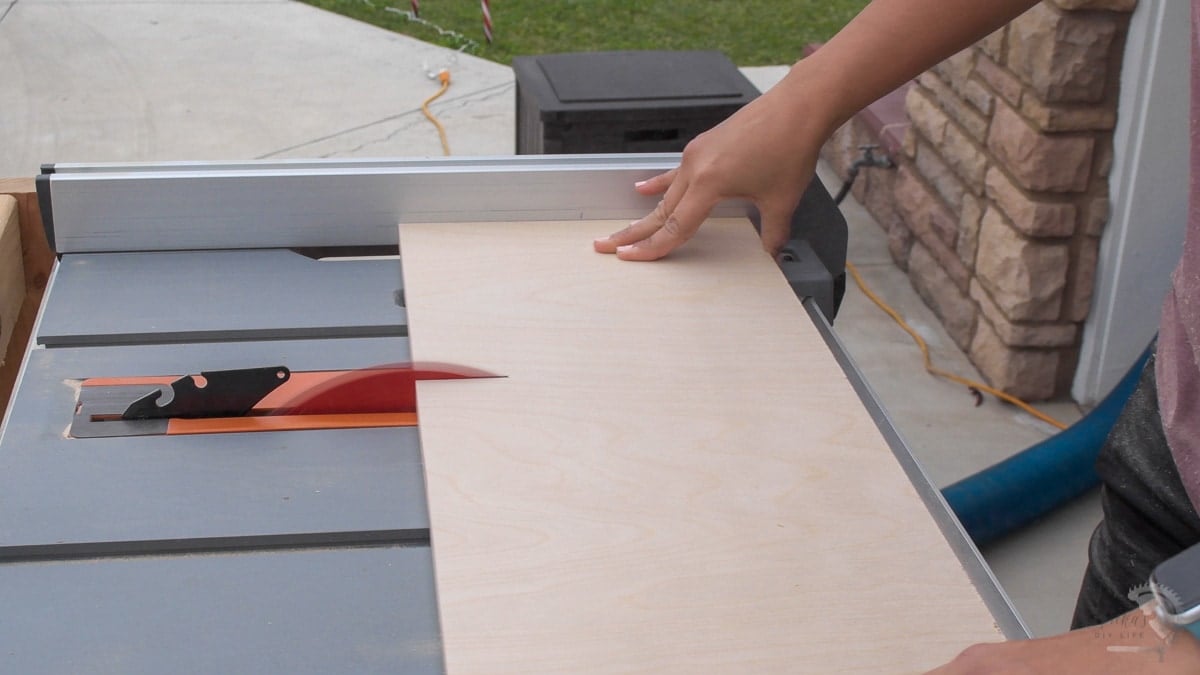
I broke down the plywood to strips on my table saw fitted with a Diablo 10″ 80-Tooth Ultra Finish Circular Saw Blade and then cut them down in length on my miter saw fitted with a Diablo 12″ 80-Tooth Fine Finish Circular Saw Blade.
- Cut the dowels. I used 5/8″ diameter dowels.

I cut all the dowels to 5.5″ on my miter saw. For repeated cuts like this, setting up a stop block is the best way.
- Cut the curved edges using a jigsaw fitted with a Diablo Top and Bottom cut Jigsaw Blade.
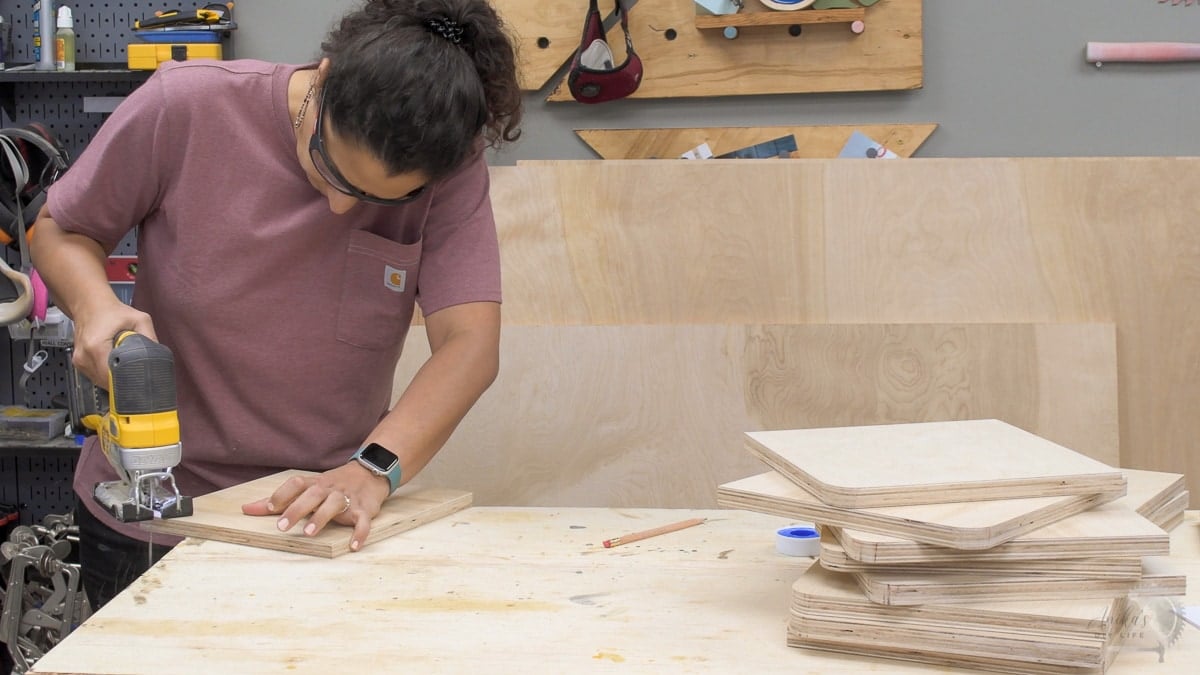
I used painter’s tape to draw curves on one of the corners of all the shelves and on all corners of the top and bottom.
Step 2 – Make Pocket Holes.
- Using a pocket hole jig, make pocket holes.

The shelves have pocket holes on two sides. The long dividers have pocket holes on the edge and the top and bottom.
Step 3 – Prepare the Plywood.
- Clean up all the corners.
Sometimes the curves aren’t cut perfectly. I used a SandNet sanding block and Sand Net sanding sheet to sand away any variations in the curves.
You could also use a round over router bit to round the edges of the plywood.

- Apply edge banding if needed.
This is optional. I opted not to do so since I was going to be painting the entire bookshelf.
Step 4 – Attach Dowels
Note that the dowels are on alternate sides of the shelves. Prior to attaching the dowels, you want to make sure all the shelves are sequenced and labeled.
- Measure and mark the location to attach the dowels.
- Drill a shallow hole using the forstener bit.

I made sure to make the hole about half the depth of the plywood. I simply eyeballed it to where the top edge of the bit was under the surface.
- Apply wood glue into the hole and tap in the dowels with a mallet.
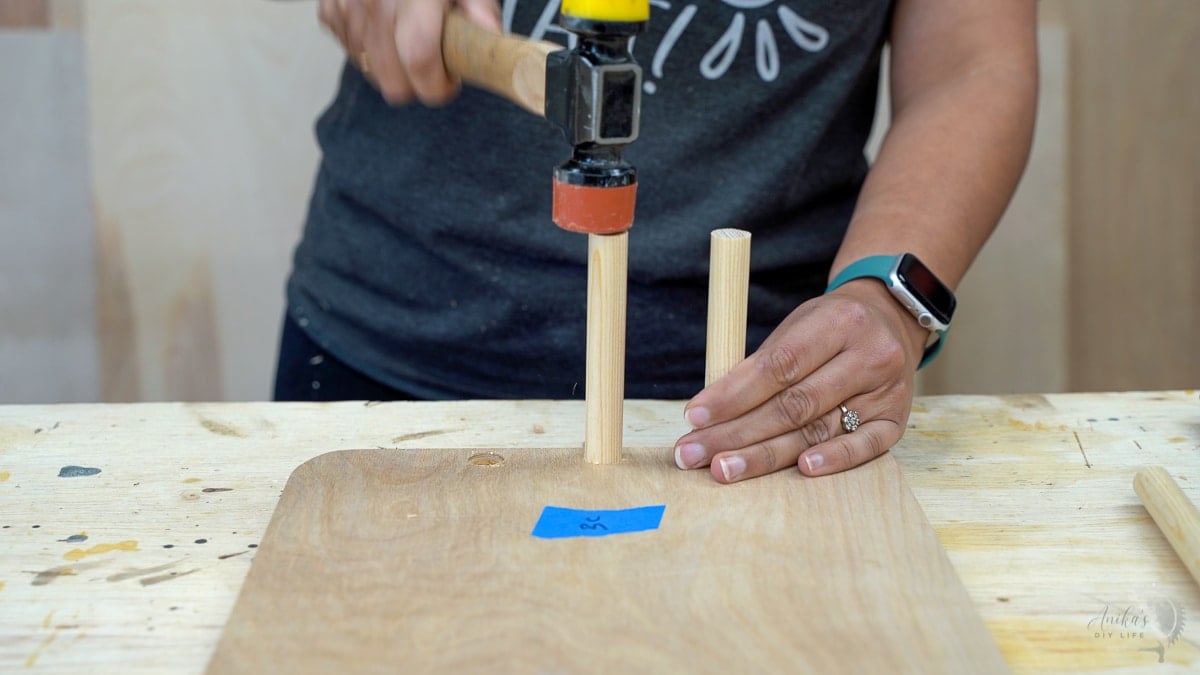
The dowels should be pretty snug and once the glue has cured, they should be nice and strong.
Step 5 – Assemble the Bookshelf
- Attach one side to the center divider using wood glue and 1 1/4″ pocket hole screws.
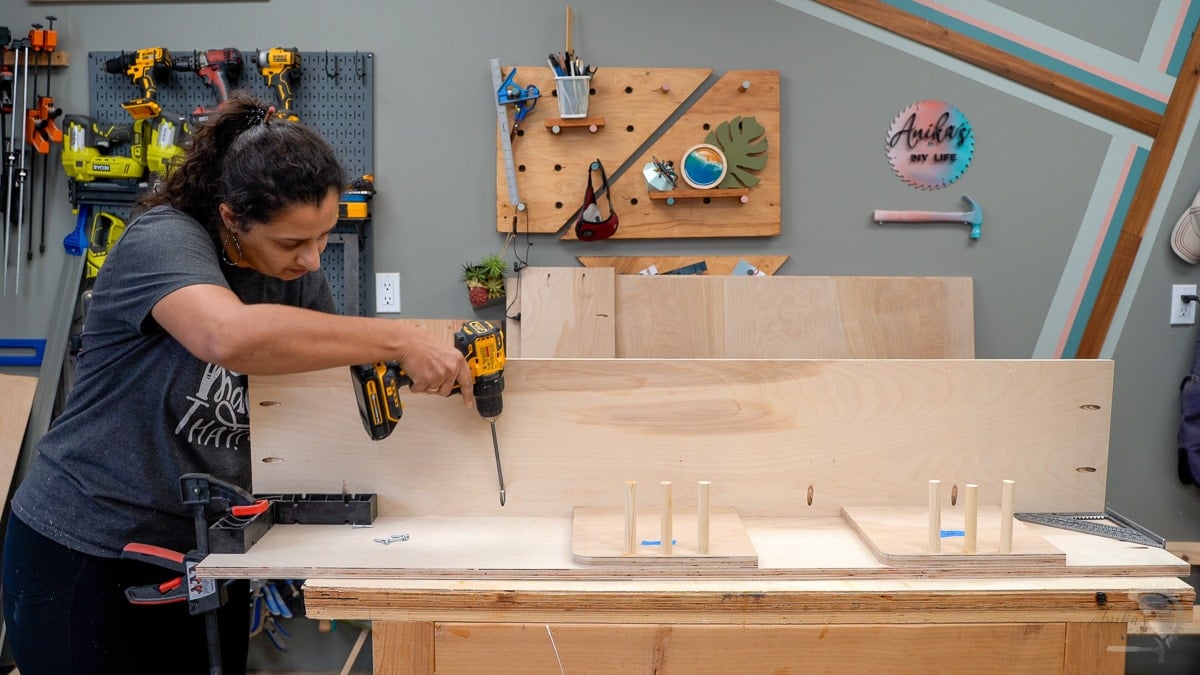
Ensure that the divider is well centered and square while attaching. This is critical to making sure the shelves attach perfectly.
- Attach the shelves using wood glue and 1 1/4″ pocket hole screws.
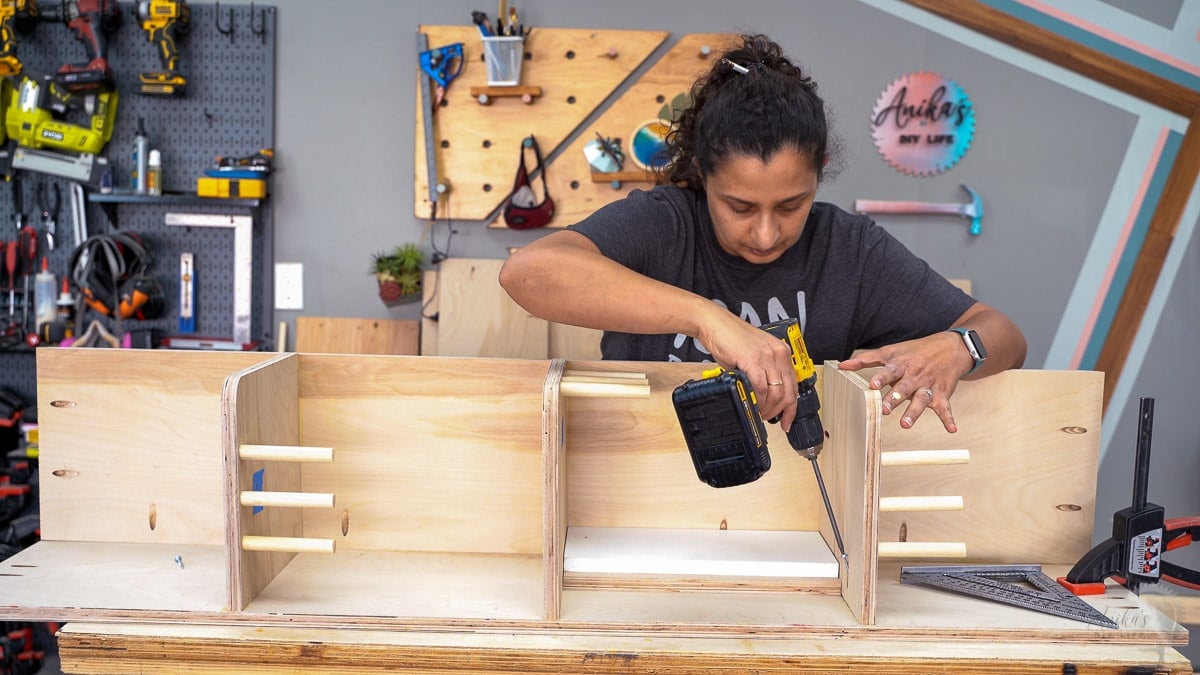
Ensure that all the shelves are square to the sides and equidistant. The best way to make sure they are evenly spaced is to use a scrap board for the spacing.
- After attaching shelves on both sides of the divider, flip the entire thing over and repeat for the remaining two sides.
- Atach the top and the bottom shelf using wood glue and pocket hole screws.

Step 6 – Finish
- Fill all visible pocket holes and caulk any seams (if painting).
- Apply stain or paint in color of your choice.
I decided to paint the entire bookcase so I made sure to cover up any defects and primed and painted it.

Step 7 – Attach the Lazy Susan Hardware
Turn the entire bookcase upside down and attach the Lazy Susan Hardware and the base to form the rotating base.

And done!
Fill it with all the books and toys you like!
It fits snugly into a corner. You just need to keep it slightly away from the walls to allow for it to rotate.
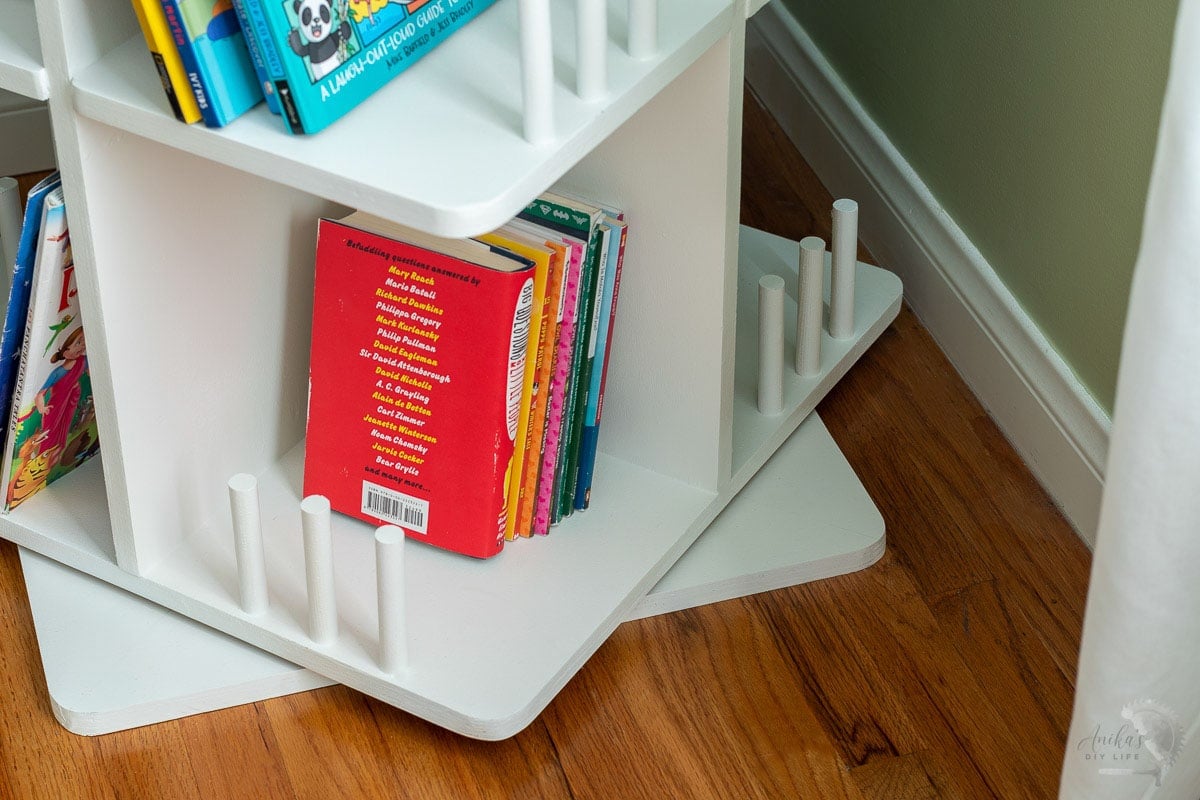
It makes a perfect addition to his room. I can’t believe that we barely even filled up half this bookshelf! Honestly, I thought that with all the books we had, this shelf would be almost full.

That’s great because it means we have room to grow and hopefully this bookshelf with last for a very long time!
Printable Plans for Rotating Bookshelf
As always, I have the printable plans available for you. Click the button below to have them sent directly to your email.
You Might Also Like
Anika's goal is to inspire and empower beginners with woodworking, DIY, home improvement, and home decor ideas.
She wants everyone to unlock their creative potential and experience the feeling that comes with making something. Nothing feels better better than seeing something and saying "I can make that!"




Nice looking shelves
What is the maximum height this could be?
I think you could go up to 60-65″ without it being a hazard. It is still pretty stable at 55″.