DIY Floating Kitchen Shelves
Learn how to build DIY floating shelves for your kitchen using plywood with this step-by-step tutorial and video for shelves of any size and length!

For my kitchen I needed floating shelves of various lengths and making my own was the way to go!
Floating Shelf Construction
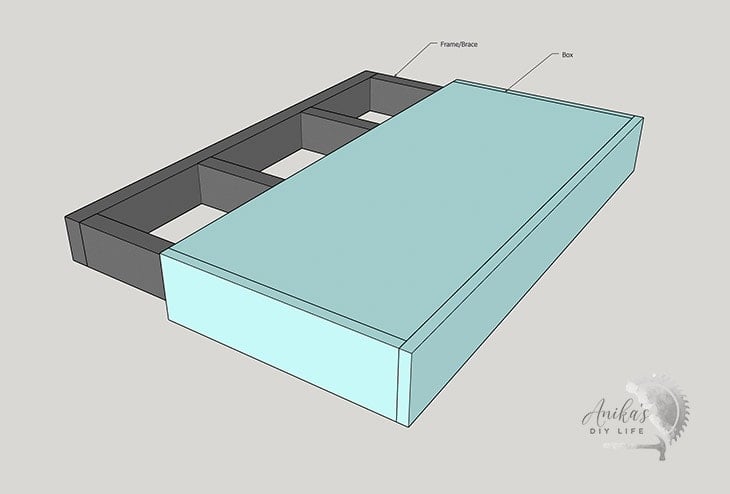
Floating shelves are typically built in two parts –
- The brace – this is the structural part of the shelf and attaches to the wall. You can purchase metal brackets to act as braces, or you can build your own.
- The “box” – this is the pretty part of the shelf. It can be made with plywood or 1x boards and wraps around the brace to make the shelf.

For DIY floating shelves, the brace is typically built using 2x boards like 2×2, 2×3, etc and this causes these shelves to be pretty chunky. I myself built a basic floating shelf for my garage a few months ago and it is quite strong but also very chunky.
For my kitchen, I wanted something that was thinner – in the range of 2″. I discovered the tutorial from my friend Sarah at Ugly Duckling House, where she built 1½” thick floating shelves.
She does have visible seams, and that is ok if you are painting the shelves, but I wanted to stain them, so I decided to add beveled cuts to all the edges to make them seamless.
Let’s build it!
Material Needed
- Lumber (length and quantity will depend on your shelf sizes)
- 1×2 boards
- 1×3 boards
- ¾” plywood (I used oak plywood)
- 4″ GRK Rugged Structural Screws
- 4″ Toggle bolts
- Kreg Jig (Check out my KregJig 101 page for all the details)
- 1¼” pocket hole screws
- Finish Nailer
- 1¼” finish nails
- Miter Saw (Check out my full guide on how to use a miter saw for beginners!)
- Circular saw or table saw
- Drill-driver or Impact driver
- Clamps – I used face clamps and trigger clamps.
- Sanding sponge
- wood putty
- Stain in the color of your choice. I used a mix 50/50 mix of Classic gray and Early American
- Topcoat. I used this one.
How to Build the Shelf
As always, I have a detailed video showing you exactly how I made the shelves below. Step by step tutorial follows below.
Step-by Step Tutorial
I built my shelves at 10″ deep and just over 2″ thick. Any measurements I provide below are meant for those shelves.
The brace for the shelf is made using 1×2 boards attached to the wall using structural screws and toggle bolts.
Step 1 – Attach Board to the Wall
- Determine where the floating shelf brace will be attached – leaving allowance for the plywood to wrap around.
- Mark locations of the studs and transfer that to the board.
- Pre-drill the holes at the stud locations plus any other locations where you need to add toggle bolts.
- Attach the 1×2 board to the wall using toggle bolts and structural screws (For details on using toggle bolts, please look at the video)

Why toggle bolts – Toggle bolts are the best possible anchor for drywall and have higher reliability than other anchors. Even though there may be 2 studs at each shelf, one extra toggle bolt brings peace of mind. Check out the complete details of how to attach toggle bolts in the video.
Step 2 – Build the Brace
- Cut the 1×3 boards and make pocket holes on both ends. I cut my 1×3 boards at 6¼”.
- Attach the 1×3 boards to the 1×2 board making sure you do not hit the location of the screws that attach to the wall (on the wall side)

- Attach to the board on the wall using wood glue and pocket hole screws. These need to be perfectly aligned. Clamps are your best friend for this!

Step 3 – Cut the Plywood
- Set the table saw blade to 45-degrees. I like using this angle gauge to get the perfect alignment. You can also use a track saw, or a good quality circular saw for this step.
- Cut the plywood into strips for the shelves with one long edge beveled and the other straight.

- My shelves are 10″ wide, so I set up my table saw fence at 9¼” inches. That is the distance between the straight edge and the short end of the beveled side.
- For the front and sides, the table saw fence is set at 1⅜”, so the overall width of the front was 2⅛”. (This final width will depend on the thickness of your plywood, so be sure to double-check that)
- I cut the short end of the shelves and sides on my miter saw set at 45° bevel. If your miter saw does not cut wide boards, you can make these cuts on the table saw using a crosscut sled or using a circular saw.

Important – Be sure to confirm alignment on all your saws before making the cuts. If it is even a couple of degrees off, the shelves will not come together seamlessly.
Step 4 – Put It Together
- Attach the plywood using wood glue and finish nails. Clamps are a great help to keep everything in place as you attach – especially if the shelves are long.

You can simply nail together the box so it slides in and out. I also nailed it to the brace to ensure it stays in place and doesn’t slide off by accident. Alternatively, you can add small countersunk screws at the back if you want to be able to take it off in the future.
Step 5 – Finish
Even though the edges are tight, they will not look seamless. To get that perfect seamless look –
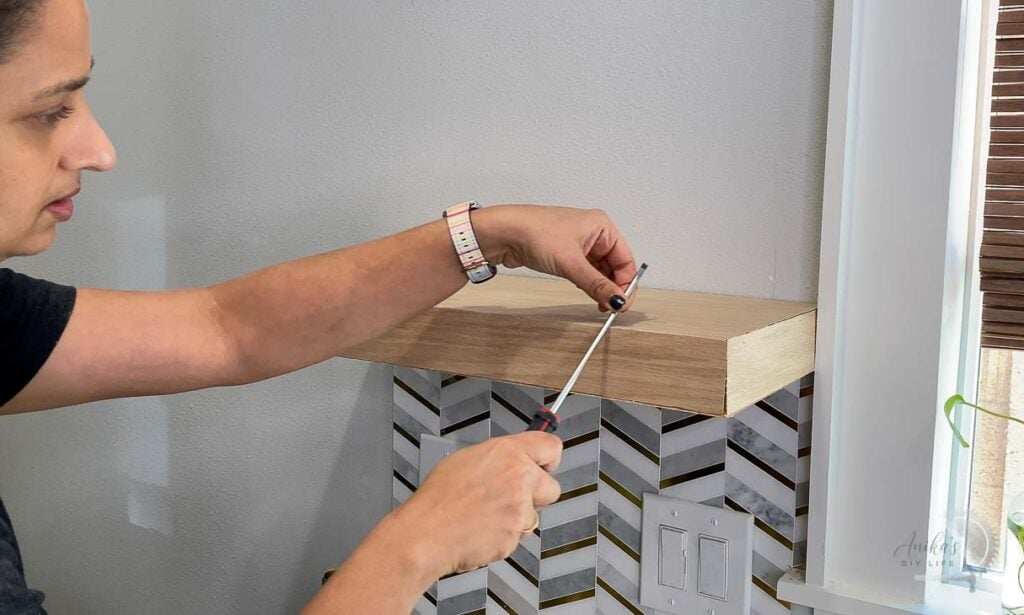
- Rub the shaft of a screwdriver along the edge and then sand it lightly with a fine sanding sponge.

This trick, however, only works when the joints are tight. I had a couple of spots that weren’t tight and I used stainable wood filler on them.
- Apply stain and finish as desired.
I used a 50/50 mix of Classic Gray and Early American stains to get the perfect grayish brown I was going for. It perfectly matches the shades in the window.

That’s it! Here is a close up of the gorgeous wood floating shelves in my kitchen.

You can use this process to make any size shelves. I made two sizes – 20″ and 55″ long shelves.

They look perfect in my kitchen.

This is the last major project in the kitchen remodel and I am SO excited to be so close to finishing it up!
Check out all the projects in my kitchen remodel here.
More Easy DIY Shelf Projects –
- DIY Floating ladder shelf
- DIY modern display bookshelf
- DIY modern wall shelf
- How To Build Thin Floating Shelves For A Nook
Anika's goal is to inspire and empower beginners with woodworking, DIY, home improvement, and home decor ideas.
She wants everyone to unlock their creative potential and experience the feeling that comes with making something. Nothing feels better better than seeing something and saying "I can make that!"


Thanks for sharing this tips, I wanna make a DIY floating kitchen shelves and then i see your blog thanks for helping me!