DIY Tiered Plant Stand – Using Scrap Wood
Build an easy DIY tiered plant stand with this step by step tutorial. The best part – uses scrap wood! Can be used indoors or outdoors!

You will also love the Easy Tiered Planter and DIY Lattice planter box
Yes! that’s right! I have a DIY plant stand tutorial for you today!
I am a self-confessed plant killer with a black thumb!
However, I love having plants around and I really try hard to help them! But there is something… I just can’t!
Thankfully, the husband has decided to take it on as a hobby recently and I cannot be happier!

I decided to build a tiered plant stand for some of my littlest pants!
Also, as a bonus, it is made from scrap wood! It really doesn’t get cuter than free!
***This post contains affiliate or referral links. It is a way for this site to earn advertising fees by advertising or linking to certain products and/or services. Please read my full disclosure here ***
Materials needed to make a plant stand:
- Lumber
- 1 – 1″x 6″ board cut @ 27″ long (main board)
- 2 – 1″x 6″ board cut @ 6″ long (shelves)
- 2 – 2″ x 2″ board cut @ 24″ long (legs)
- Jigsaw
- Compound Miter saw
- Drill
- Kreg Jig
- Wood glue
- 1 ¼” pocket hole screws
- #8 – 1 ¼” Spax screws
- Wood Filler
- Brad Nailer (optional)
Before we get started, make sure to follow me on Instagram, Facebook, YouTube, and Pinterest to keep up with all my latest builds and projects!
How to Build Your Own Plant Stand
You can download the printable plans for this project by clicking below –
Step 1 – Make the cuts

Start by making the cuts. For the 2″ x 2″ boards, measure and mark 2½” from the edge and draw a line from the opposite corner. Cut on this line with a jigsaw.

On the 1″ x 6″ x 6″ boards, cut one end of each at 30° degrees with your miter saw or miter box.
Step 2 -Attach Legs to the Main Board

Attach the angled cut end of the legs to the 1″ x 6″ x 27″ front board using wood glue and 1 ¼” Spax screws.
Tip – You can hold the legs tightly in place as you attach with screws or use a finish nail first to hold it in place which is what I used.
Tip #2 – Be sure to add the screw in a spot that is thick enough for it.
Step 3 – Attach Shelves
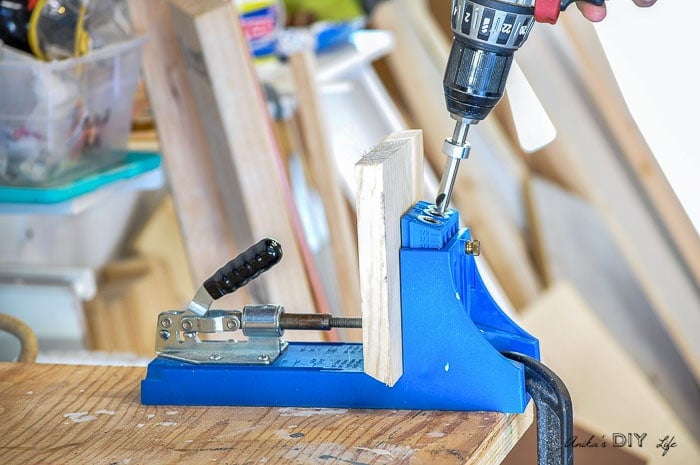
Make two pocket holes in each 6″ shelf using a Kreg Jig. The long end of the cut will be facing you as you drill the 3/4″ pocket holes. ( Check out the complete guide to using a Kreg Jig.)

Attach the shelves to the front board using 1 ¼” pocket hole screws.The first shelf is 8″ from the top and the second shelf is 8″ from the first shelf.
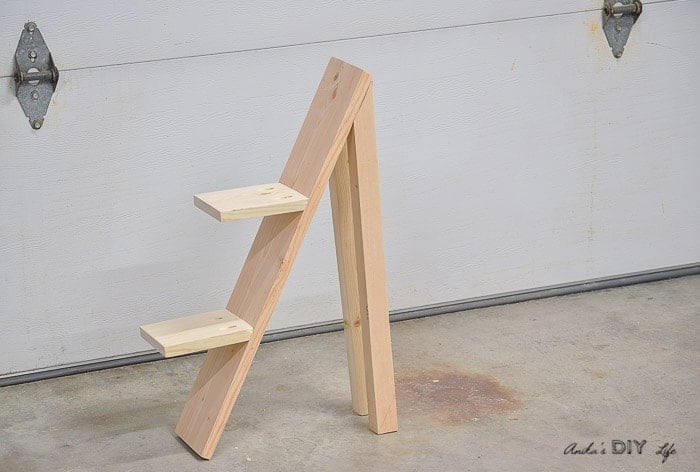
That’s it!
Fill the pocket holes with wood filler, sand, and finish with paint or stain.
If you paint your shelf be sure to prime first. Take a look at the full tutorial on how to paint pine wood.
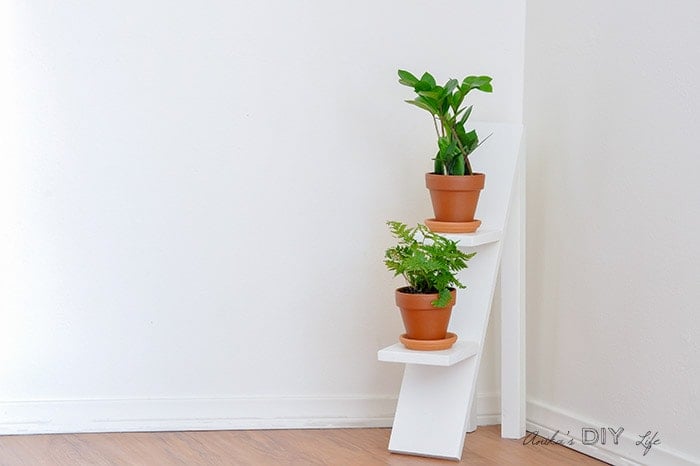
There you have it, a cute tiered plant stand. It looks perfect with the baby plants I got myself 🙂
Now, let’s see how long they last!
Remember, you can download the printable plans for this project by clicking below –
This project barely put a dent in my scrap pile which is always exploding with every new project!
But, I have a whole ton of projects planned! Can’t wait to get them all done!
In the meantime, don’t miss out all these easy scrap wood projects!
[mv_create title=”DIY Tiered Plant Stand” type=”diy” key=”43″]
Anika's goal is to inspire and empower beginners with woodworking, DIY, home improvement, and home decor ideas.
She wants everyone to unlock their creative potential and experience the feeling that comes with making something. Nothing feels better better than seeing something and saying "I can make that!"





What a great project, it looks great painted white with the pots and greenery. This would look great in my entryway. I used to have a lot of houseplants but now only have a few on my kitchen windowsill. Time to change that 🙂
Thank you, Toni! I am sure you are way better at plants than me! You should definitely get a lot more of them!
Good work, you’re raising the bar on what we learn from you! Is the Kreg jig your favorite tool? Thanks!
Thank you so much Linda!! Yes, absolutely!! Kreg Jig is my favorite!
huh. great idea, and perfect for smaller spaces.
b