$10 DIY Tiered Planter Box
Learn how to make an easy DIY tiered planter box with only $10 in lumber and in under 2 hours. It’s a great beginner project!

Sometimes, you need a really quick project to liven up your front porch. Or maybe you want to create a little herb garden on your patio, backyard, or balcony.
This simple tiered planter is perfect for it! It only cost $10 in material and took about 45 minutes to make! It is perfect for a beginner. How awesome is that?!
This project is perfect for a beginner and works really well in any outdoor space – big or small. And it looks so pretty, filled up with fresh spring flowers!
Lumber Used for the Planter
This planter uses cedar boards for the wooden planter boxes. Cedar planks work really well for planters.
In fact, I used cedar picket fences and cut off their dog ears to make boards to use. We don’t get a lot of cedar here in Southern California, so this was the option.
Plus, it is really quite budget-friendly!
The legs are made using 2×2 furring strips, which are also inexpensive.
Tools Needed to Build the Planter
This is a 2-3 tool project!
You need a way to cut the boards – a miter or circular saw. And a way to assemble everything. I used:
- A nail gun to put together the boxes (you can also use a hammer and nails or screws)
- Screws to attach the legs.
RELATED: Tiered plant stand using scrap wood
***This post contains referral or affiliate links. It is a way for this site to earn advertising fees by advertising or linking to certain products and/or services. Please read my full disclosure here ***
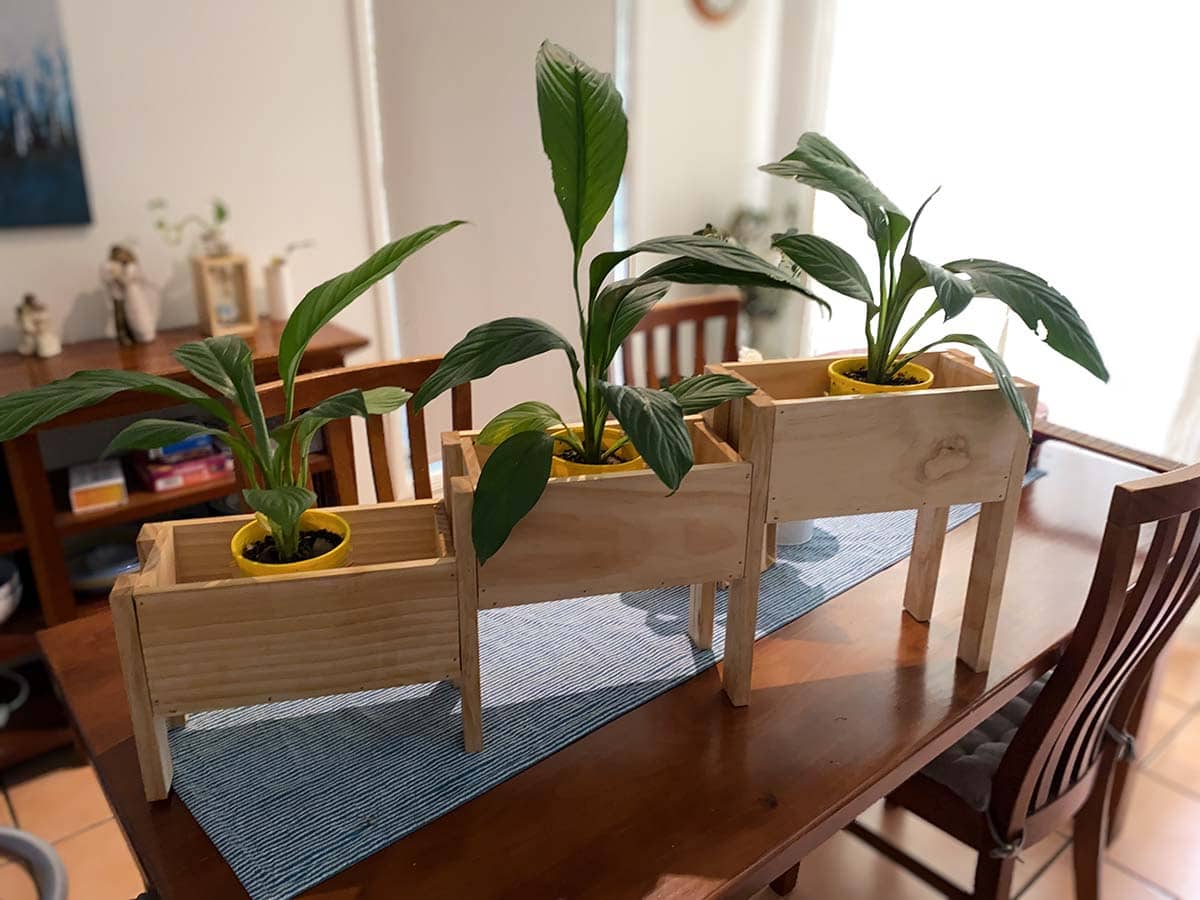
The planter is 45″ wide and 16″ tall. Get the printable plans by clicking the button below.
RELATED: DIY Tiered Raised vegetable beds
Building a Tiered Planter
Here is the video tutorial. If you would rather read about it, I have listed the steps below.
Instructions
Here is the step-by-step tutorial on how to build this easy planter.
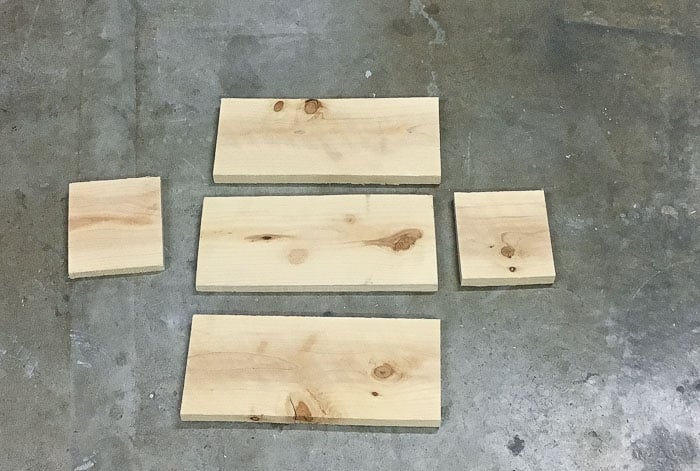
Step 1 – Make the Cuts
- Start by cutting up the cedar fence for the planter boxes per the planter box plans.
- Also, cut the 2×2 boards for the legs.
To make these cuts, you can use a miter saw, circular saw, or even a jigsaw. If you are using a circular saw or jigsaw, be sure to use a straight-line guide to get straight cuts. A speed square works well for this.
- Sand all the boards till they are smooth.
👉 Sanding before assembly makes it much easier to get the best finish.
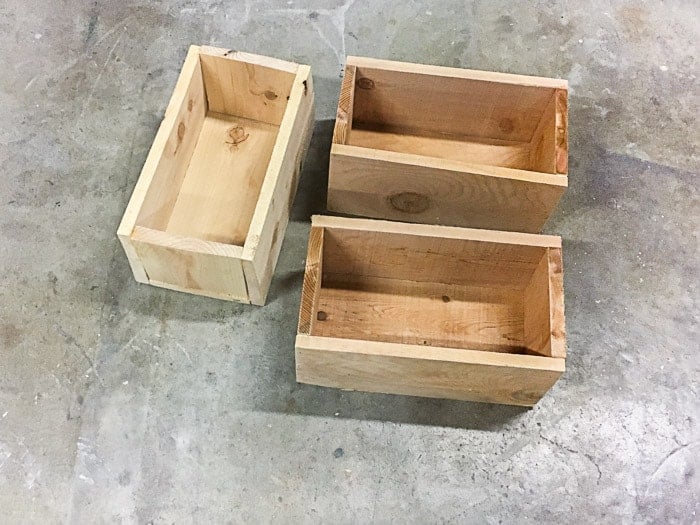
Step 2 – Build the Boxes
- Build the three planter boxes using wood glue and finish nails.
If you don’t have a nail gun, you can use exterior-grade screws or a hammer and nails. If using screws, be sure to pre-drill to avoid splitting the wood.
Step 3 – Attach the legs
- Attach legs to the boxes using wood glue and wood screws. They are screwed from the inside of the boxes.
The first level is attached as shown below –
- The first set of legs is flush with the top of the box.
- The second set is higher than the edge.

- The second set of legs is attached flush to the top of the second box
- The third set of legs is higher than the edge of the box.
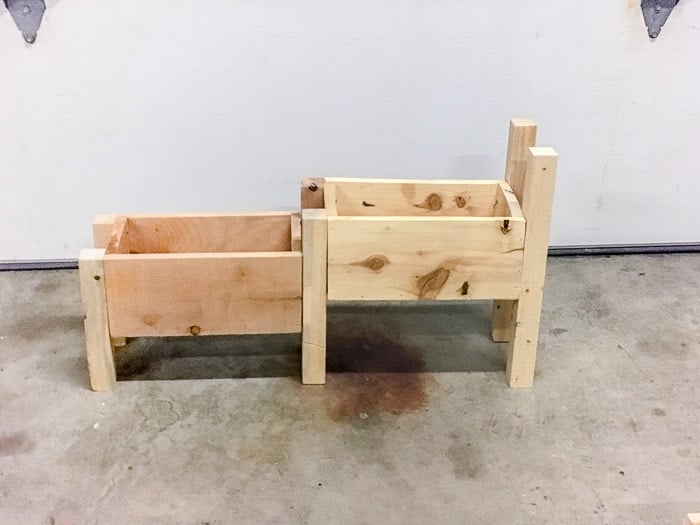
- The top of the final box is flush with the last two sets of legs.

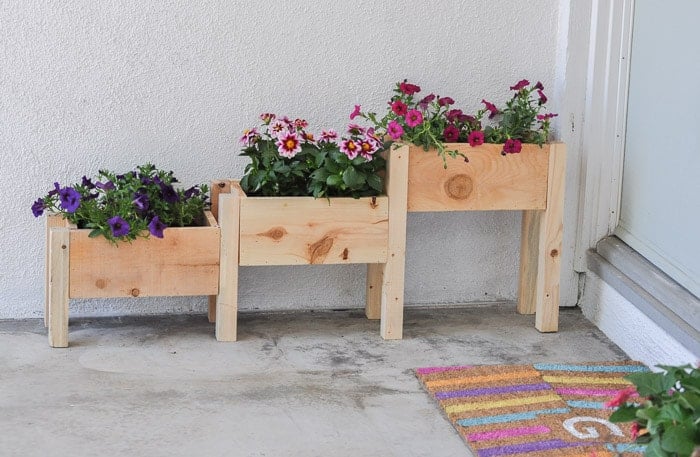
That’s it!
The DIY tiered planter is ready!
Step 4 – Final Finish
Before filling it with your favorite flowers or herbs, you want to go a couple of quick things.
- Apply waterproof silicone-based caulk to the inside creases of the planter to prevent water from seeping into the crevices.
- Once the caulk is dry, apply a Danish oil finish or oil-based urethane wood stain to the exterior of the planter.
- Drill a few drainage holes on the bottom of the planter.
- If you like, you can also staple landscape fabric to the insides of the planter boxes.
Fill it up with potting mix, your favorite flowers or herbs, and enjoy!
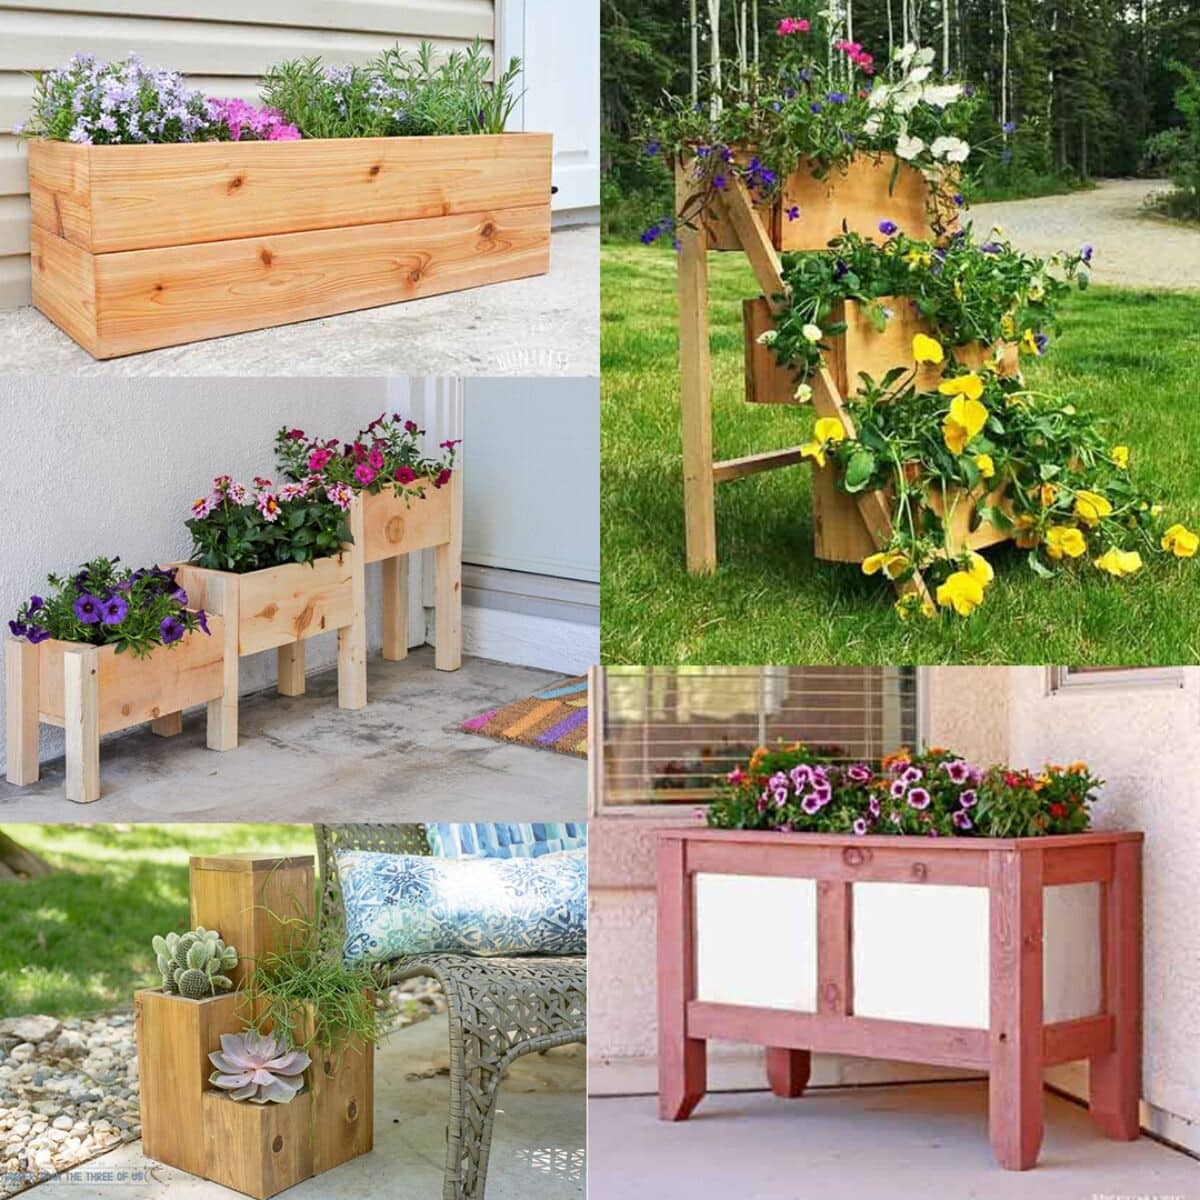
More Ways to Customize
Over the years, I have seen many readers build this project and modify these raised planter boxes to make it work for them. Some ideas include:
- Adding or reducing the number of tiers.
- Making the right and left back legs longer to attach a trellis to allow for plants or vegetables needing support.
- Cutting down the legs and mounting it up on the wall!
DIY Planter Box Plans
As usual, I have free plans for you! Click on the button below to grab them!
Reader Projects


If you build this project, I would love to see it! Email me at [email protected] or tag me on Instagram @anikasdiylife. I can’t wait to see it!
If you enjoyed this tiered planter box, you will also like –


Anika's goal is to inspire and empower beginners with woodworking, DIY, home improvement, and home decor ideas.
She wants everyone to unlock their creative potential and experience the feeling that comes with making something. Nothing feels better better than seeing something and saying "I can make that!"


This is so beautiful, and will be fervent for our small front stoop. What a fun project. Thank for sharing.
Hi Anika – Love this great, simple build. I had been looking for an easy and quick project to use when my niece visits next week. I will get the supplies and have it for her to help build. She loves to tinker around in my garage shop (kinda like her aunt!).
Thanks for sharing!
gail
This is a lovely project! To clarify, did you put soil right in the boxes? Or did you put tops in the boxes?
Thanks!
Hi Denise,
I actually put a whole pot with the plant inside the box. The post rests on the slats on the bottom of the box. That way I can easily switch out the plant too.
Thanks! I actually picked up some free plastic pots someone was giving away that will be perfect for this 🙂
Anika, These planters are gorgeous, Thanks for sharing.
I Love the planters. What program did you use to plan the blueprint?
Thank you. I use SketchUp.