How to Read a Tape Measure
Learn how to read a tape measure step by step. Simple guide to tape measure markings, fractions, and hidden features for accurate DIY projects.
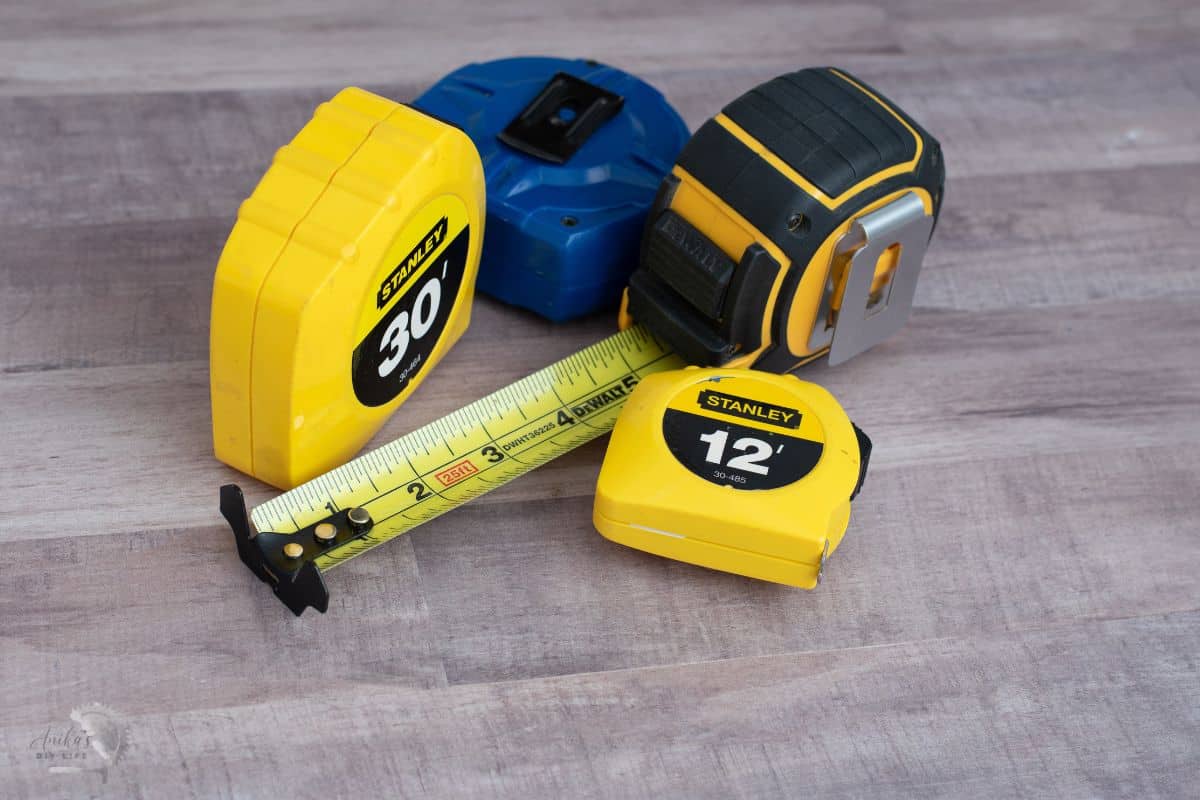
If there’s one tool you need for almost every project, it’s a tape measure! Measuring and marking accurate readings is extremely important to get the best results from your DIY projects. Whether you’re hanging a picture, adding trim to a wall, or building a cabinet, measuring correctly is the first step.
At first, reading a tape measure might look simple. But all those tiny lines, numbers, and fractions can get confusing fast. I know because I grew up using the metric system, and anything smaller than 1/4 inch used to leave me squinting and counting lines – “two ticks past the 1/8 mark,” sound familiar?
The good news is that once you learn what to look for, it all makes sense.
Let’s dive into how to read a tape measure step by step and share tips to help you get the most accurate results.
If you would rather watch the video where I walk you through all the things, you can do so below.
The Parts of a Tape Measure
Before we dive into measuring, let’s look at the basic parts of a tape measure. It’s more than just a yellow ruler in a box!
Depending on the model and manufacturer, they might differ in the look and how they operate, but their essential functions remain the same.
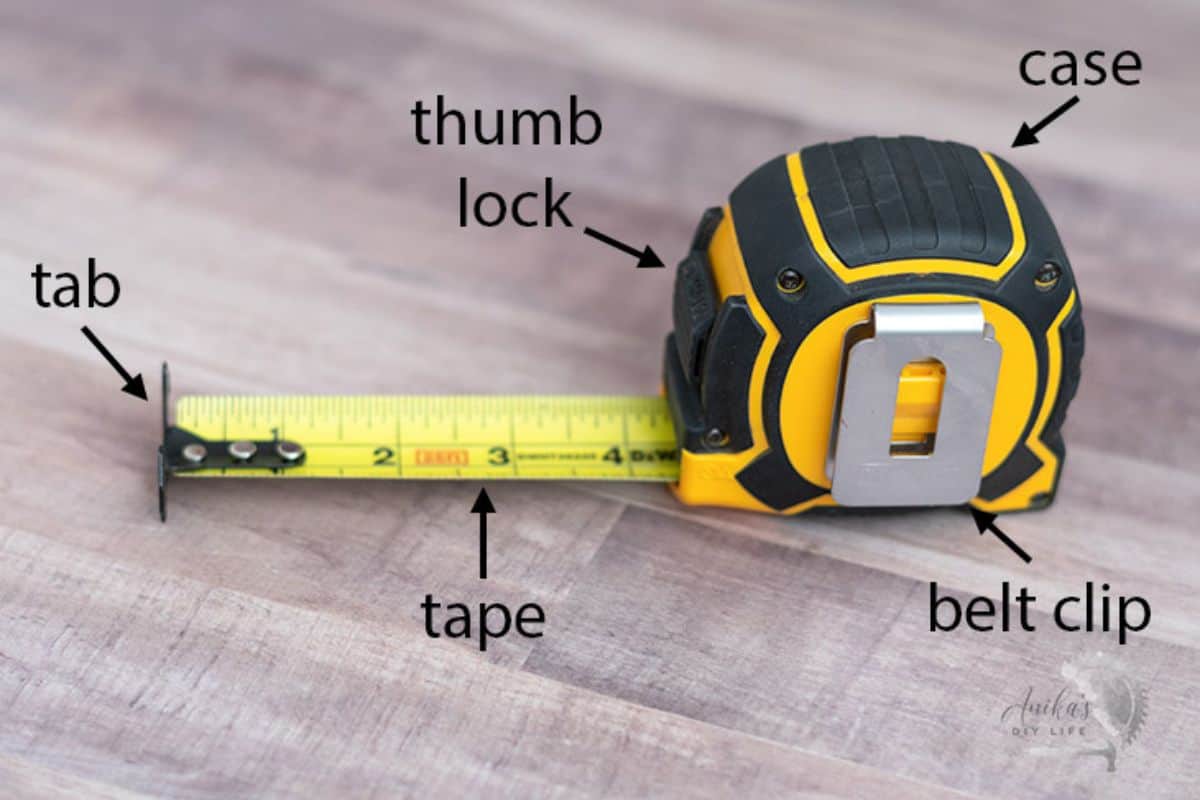
- The Tape: This is the long, flexible ruler part. It’s usually yellow and has a slight curve to help it stay stiff when you pull it out.
Specialized home improvement and woodworking versions are usually yellow and have special markings for stud intervals and truss locations. - The Case: This is the box that holds the tape. It is made of plastic or metal. It can come in various sizes depending on the length of tape it needs to house.
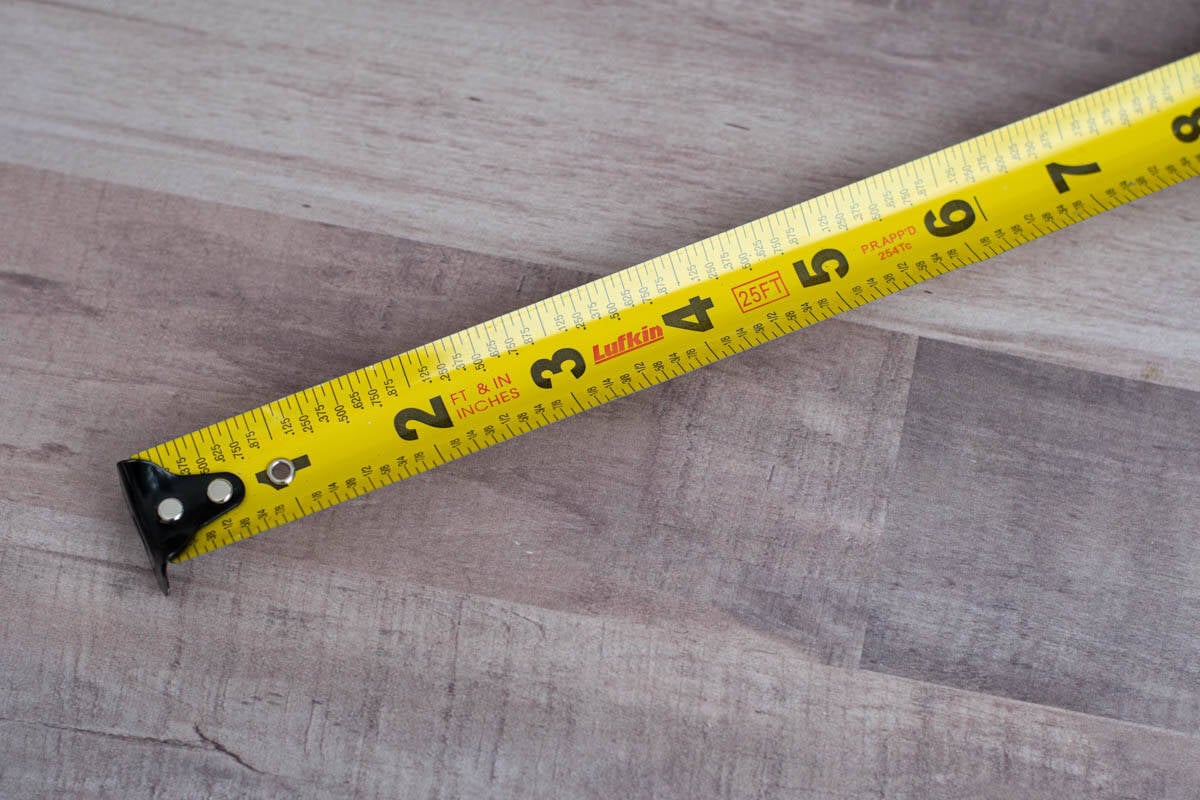
- The Hook: This is the little metal piece at the end. It’s very important, and we’ll talk more about it in a minute!
- The Thumb Lock: This button or switch holds the tape still so you can get a good measurement. Once the measurement is completed, you can release the thumb lock to retract the tape.
- The Belt Clip: The belt clip on the back of the case can be hooked onto your apron or tool belt to help keep your tape measure close!
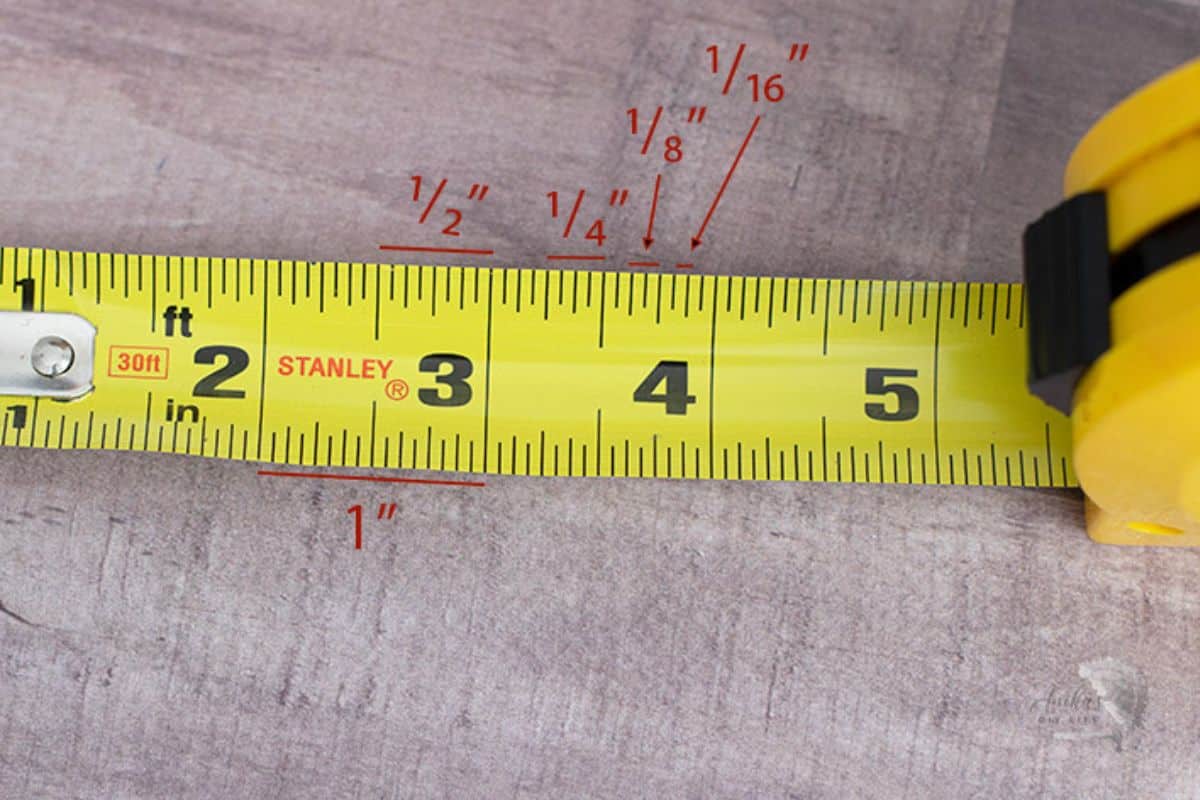
How to Read All Those Lines
Reading a tape measure is like learning to count in a new way. Most tapes have lines that go down to 1/16 of an inch and in some cases to 1/32 of an inch.
Here’s a simple way to remember what each line means:
- Longest Lines: These are the whole inches, like 1, 2, 3, and so on. They have the biggest numbers next to them.
- Next Longest Lines: These are the half-inches (1/2″). They’re halfway between the whole inches.
- Medium Lines: These are the quarter-inches (1/4″). They’re halfway between the whole inches and the half-inches.
- Short Lines: These are the eighth-inches (1/8″).
- Shortest Lines: These are the sixteenth-inches (1/16″).
If your tape measure goes into the 1/32 of an inch, you will have even shorter lines that sit between the 1/16 inch lines.
When you measure, just count the lines after the last whole inch. For example, if your measurement is three of the smallest lines past the 1-inch mark, that’s 1 and 3/16 inches.
If your fraction homework from grade school is still not fresh in your mind, don’t worry – it takes some practice to read tape measure markings and figure out the fractions quickly, but it gets easier with time!
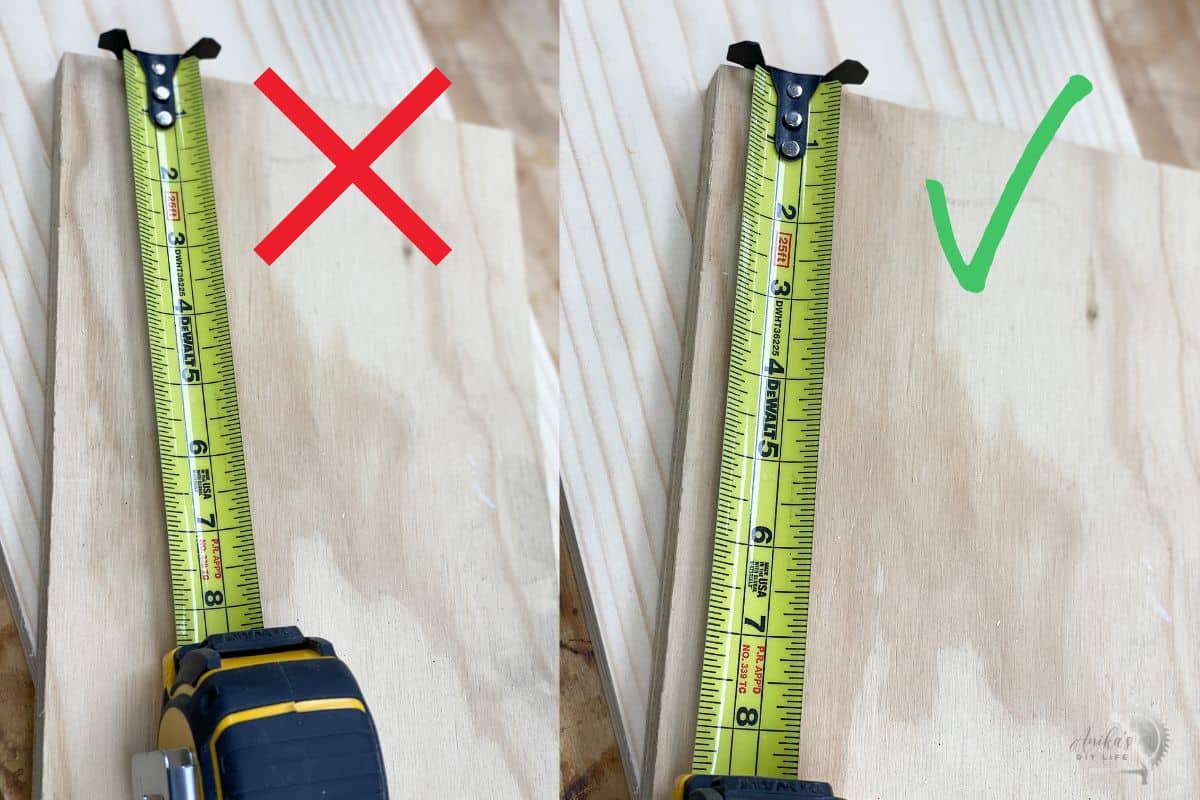
Tips for Getting Accurate Measurements
Getting a great measurement is more than just reading the numbers. Here are some simple tips to make sure you get it right every time.
But first, to keep your tape measure working properly, treat it gently and protect it – don’t let the tape twist or bend, as this can damage it and ultimately lead to inaccurate measurements.
- Keep the tape straight: Make sure the tape is completely flat and straight when you measure.
- Any sagging will make the measurements inaccurate.
- If the tape is at an angle, the measurement will be inaccurate.
- The “Burn an Inch” Trick: If you’re measuring a small object and want to be extra careful, start your measurement at the 1-inch mark instead of zero. Then, just subtract one inch from your final number.
Tape Measure Safety
Yes, you read that right! Though seemingly harmless, there are a couple of safety measures to follow while using a tape measure.
Very important – don’t let the tape reel back into the case at warp speed.
The metal tape can be extremely sharp (think paper cut but with metal!). It can cause bruises if left to recoil uncontrollably. It can also flail around hitting others or surroundings. It can also flail around and hit other people or objects in the surrounding area.
To safely recoil the tape measure, hold it near the mouth of the case and use your fingers to control the speed at which it retracts.
Cool Tape Measure Features You Should Know
Did you know your tape measure has secrets? These little tricks will make your life so much easier!
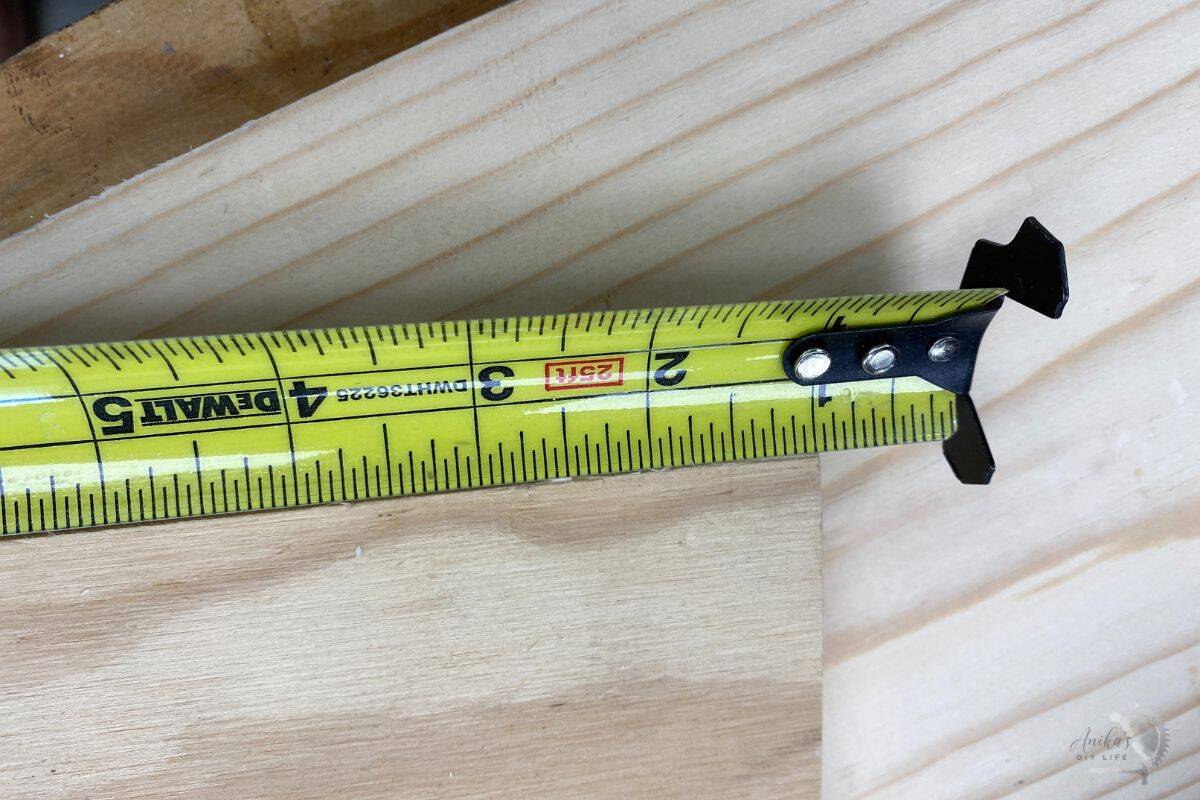
1. Why Is the Tape Measure Hook Loose?
I can’t tell you how many times I have heard – “Is my tape measure broken? Why is this silver tab moving so much?”
No. The tape measure is NOT broken.
The little metal hook at the end of the tape is supposed to wiggle! In fact, its motion helps you get accurate readings. This is one of the tape measure’s most important and genius features.

The metal tab moves the exact thickness of the hook.
When you pull to measure, the tab extends out so the zero starts on the inside edge of the tab.
When you push to measure – like inside a box – zero starts at the outside edge of the tab.

This makes sure you get a perfect measurement every single time.
2. The Hole in the Tab?
The hole in the tab can help with 2 things –
- Hook it – if measuring from the middle of a surface and your arms are not long enough to reach the other end, simply add a nail or thin screw to hook the tab onto and measure.
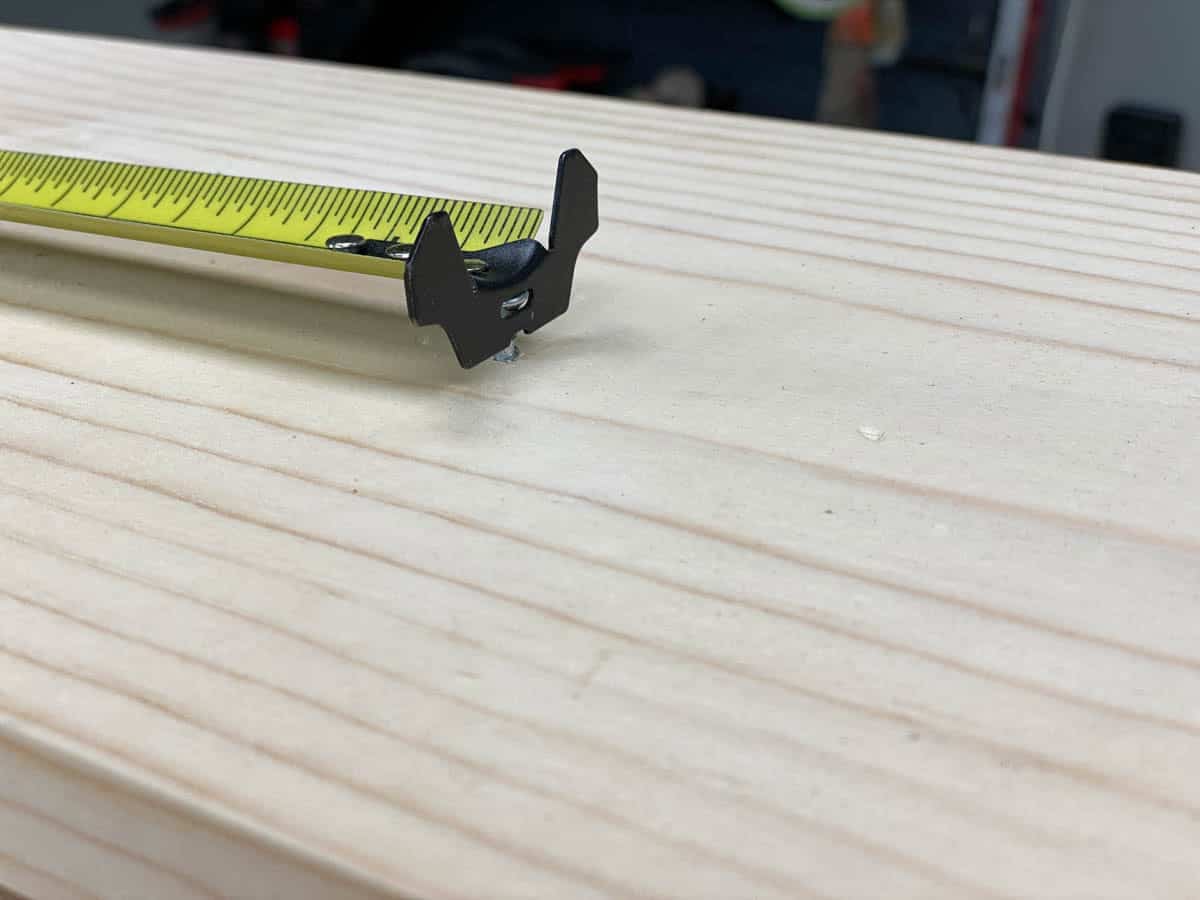
- Making circles – With the tab hooked on the nail/screw, you can hold the pencil to the desired reading to draw a circle at any size.
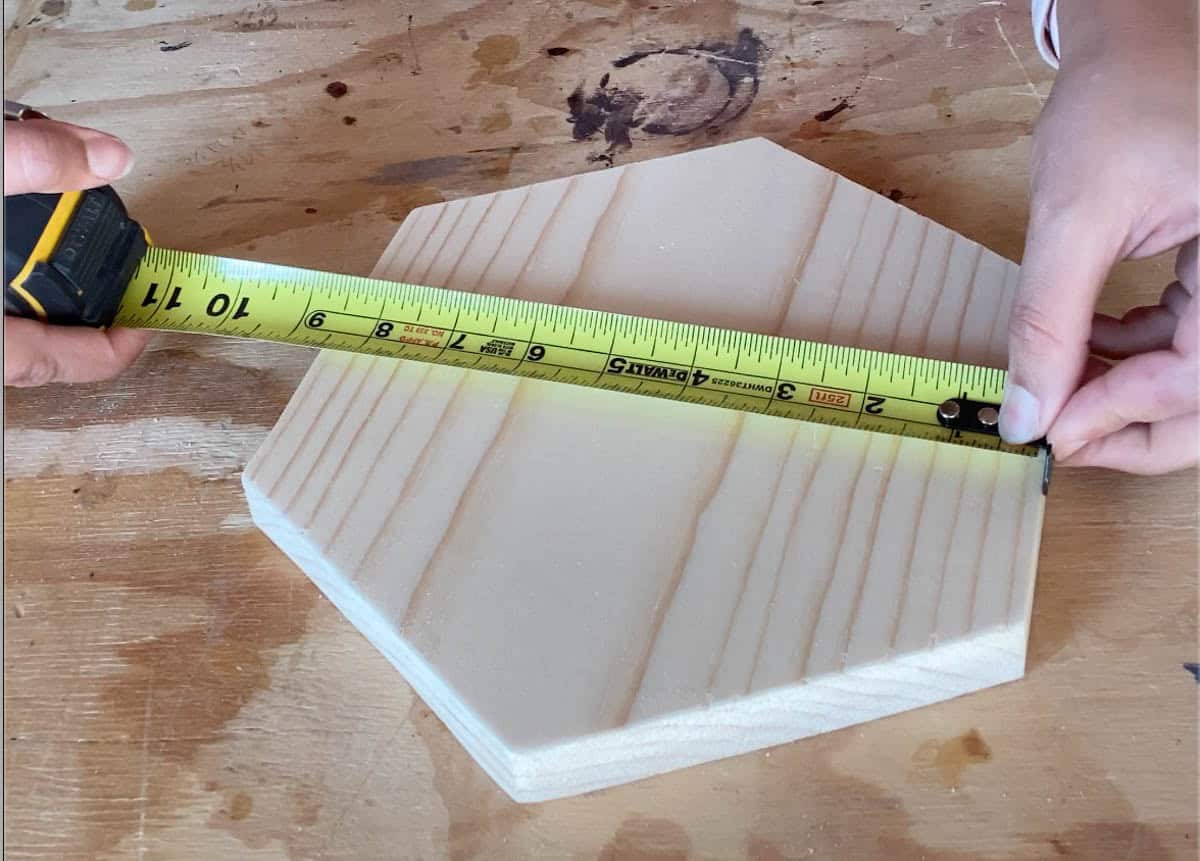
3. What Is the Number of the Case?
Look at the side or back of your tape measure case. There’s a number there.
This number is the exact length of the case!

This is super helpful when you’re measuring the inside of a box or a window frame. Just put the case all the way into the corner, read the number on the tape, and then add the number from the case. No more bending your tape to guess the last bit!
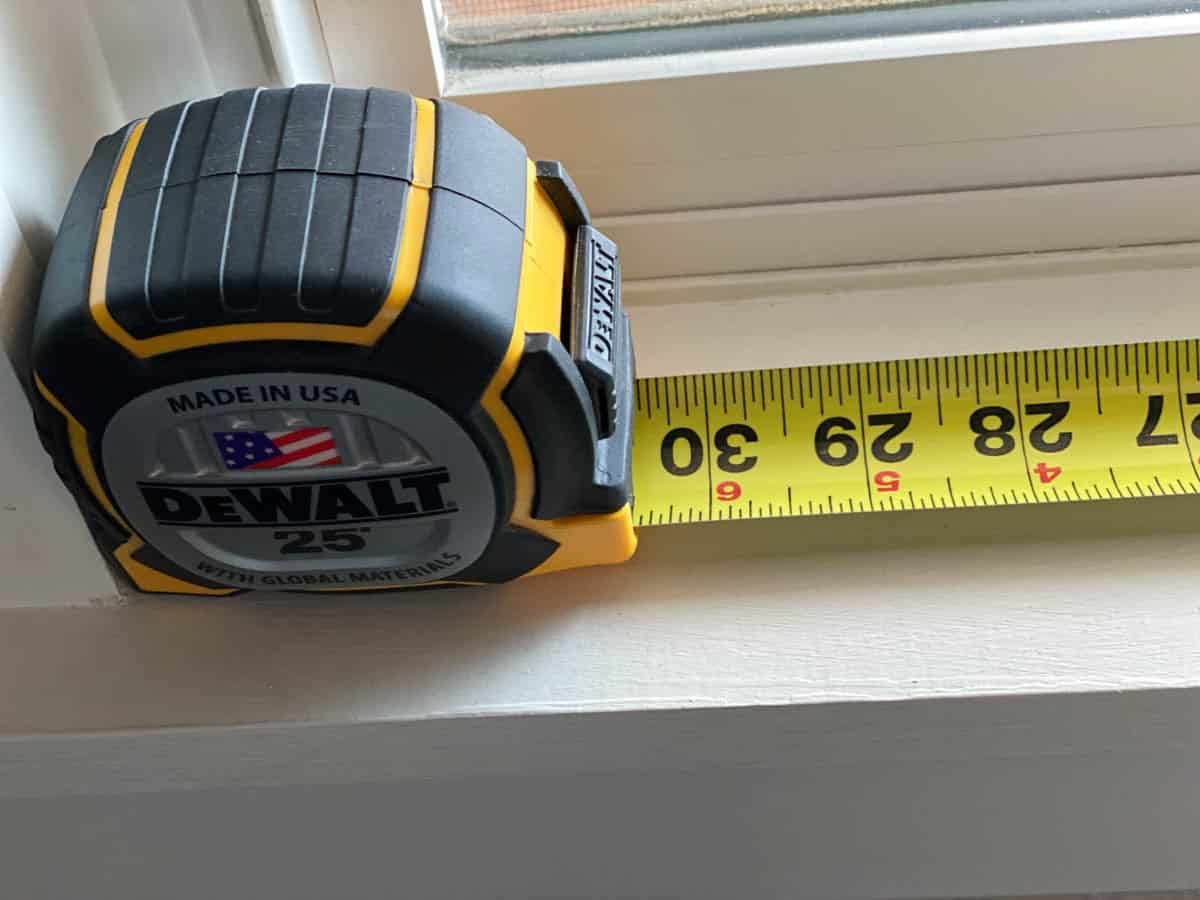
For example, my tape measure is 3-3/8″ wide. The above measurement will be 30-1/2″ + 3-3/8″ = 33-7/8″.
4. Black Diamond and Red Boxes on the Tape Measure
The black diamonds are the truss spacing. Each black diamond is 19.2″ apart and will appear at those multiples until 96″, or 8′.
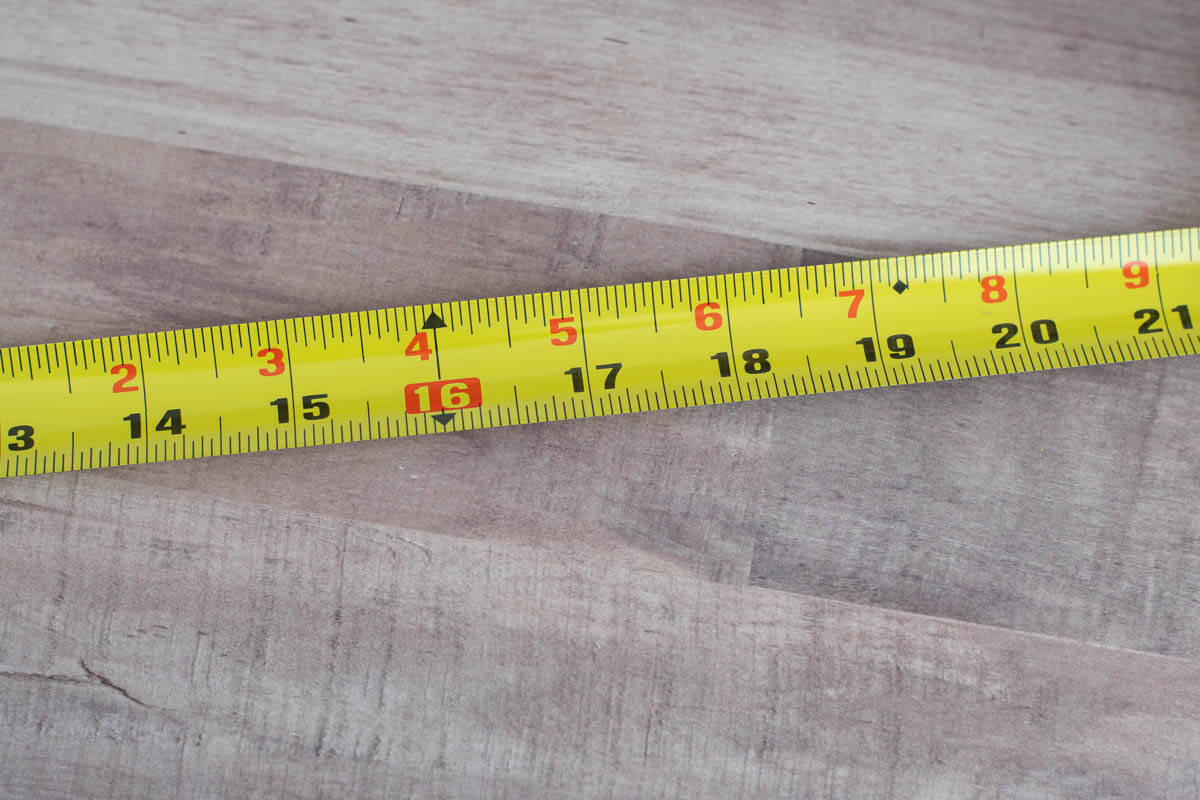
Typical stud spacing is 16″, so you will find many measuring tapes that mark the 16″ increments with red boxes in addition to the black diamonds.
Apart from these, every tape has the total length of the tape written at the very beginning.
5. Makeshift Marking Tool
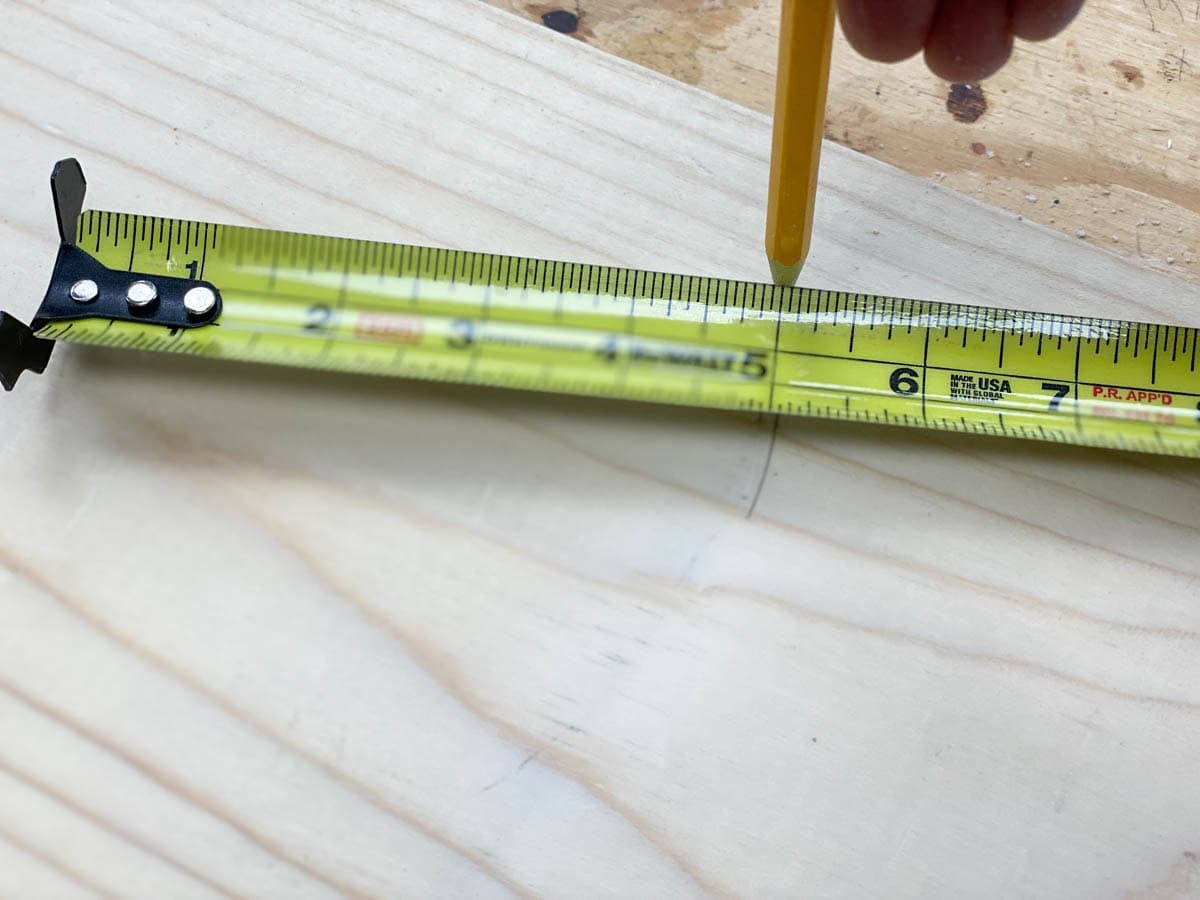
Lost your pencil? No problem! The sharp end of the tape’s hook can be used to scratch a tiny mark into wood or drywall.
My Favorite Tape Measure
For those of us who still get cross-eyed looking at all the tiny marks, there’s a solution! You can get a tape measure that has all the fractions AND decimals clearly labeled on the tape. This is my favorite tape measure to use. It may not be the most heavy-duty tape, but it makes measuring a breeze.
What do you think?
Was this article helpful? Aren’t these little hidden features super-clever?!
More Beginner Woodworking Articles


Anika's goal is to inspire and empower beginners with woodworking, DIY, home improvement, and home decor ideas.
She wants everyone to unlock their creative potential and experience the feeling that comes with making something. Nothing feels better better than seeing something and saying "I can make that!"


Excellent information and impressive pictures, I thought my tape has defective tab. This information made me clear off so many doubts and also new information. I’m kind of still adjusting to imperial units kind of confusing.
Well I, for one, learned a lot from this post; for instance I didn’t realize that ‘our’ system of measurement is called ‘imperial’ as opposed to metric! I grew up learning the ‘imperial’ way of measuring, and everybody else groaned when the teacher told us to learn the metric system, since it was far more precise! But wouldn’t you know it, I was too stubborn to try. And I’m too old now. Ha! I appreciate this post considerably, and will do my best to commit it to memory!
Excellent, simple & very useful explanation. I knew some of the tape features, but she brought out some I hadn’t paid attention to. Thanks for the tips.
Amazing work!! Looking for more from you.