How to Get Rid of Popcorn Ceiling
Learn how to get rid of popcorn ceiling with this complete step by step guide including prep and how to paint it for a whole new ceiling!
When we moved into this home, the first project we tackled was the bedroom that was stuck in the 60s – complete with pink carpet and of course – popcorn ceiling.
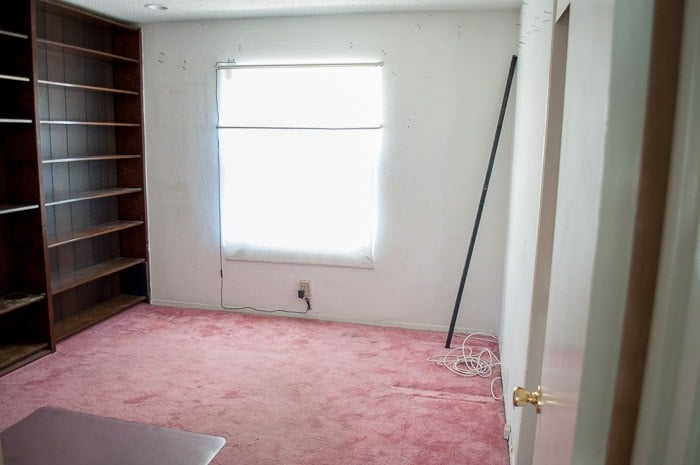
Our goal for the room was to update it and turn it into the kid’s bedroom.
We got rid of that pink carpet (and found original hardwood underneath!!!) and the built-in and it already looked so much better and bigger…
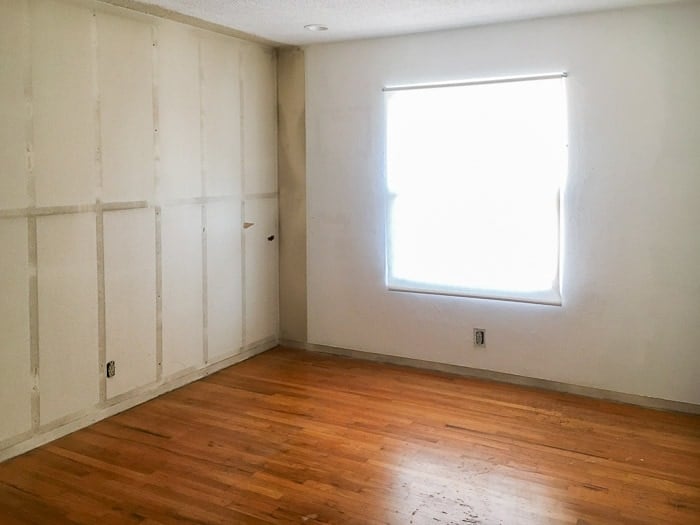
Now, it was time to tackle the popcorn ceiling.
Table of Contents
- What’s the point of popcorn ceiling?
- What is so bad about popcorn ceiling
- Can I remove popcorn ceiling myself?
- Before removing popcorn ceiling
- What to do if popcorn ceiling contains asbestos and/or lead
- Tools needed
- How to remove popcorn ceiling
- Other techniques of removing popcorn ceiling
- Pin this to Pinterest
We researched online and saw many different ways it’s done. We decided to start with the simplest process and tried a few different techniques.
We learned the do’s, the don’ts, and the quick tricks that make the whole process easier. I am sharing all of that with you today!
What’s the point of popcorn ceiling?
Popcorn ceiling was applied as a way to cover up imperfections in the ceiling. It was easy to apply and cost effective. Plus, its texture helped dampen and absorb sound which is why it is also referred as an acoustic ceiling.
What is so bad about popcorn ceilings?
Apart from not being visually pleasing, the popcorn ceiling texture is very easily damaged. If you nick or bump it, little pieces can come apart creating dust. If it contains asbestos, inhaling it can lead to diseases such as cancers.
Can I remove popcorn ceiling myself?
It depends on if it contains asbestos or not. If it doesn’t, it can be easily removed with the right precautions. If it does contain asbestos, you cannot remove it and will need to hire a professional asbestos removal company.
BEFORE removing pop corn ceiling
There are 2 important items to address before starting to remove the popcorn ceiling.
1. Test for asbestos
If your house was built before 1980, there are chances it could contain asbestos.
How to test for asbestos in popcorn ceiling – get an asbestos test kit and send to a lab for the test.
If the test comes back negative, you are all clear! If it is not, DO NOT remove the popcorn ceiling yourself – consult a professional.
You can get lots more information about it on the EPA website.
Our house was built in 1965, but we got a report from the previous owner that we were clear. He had removed popcorn ceiling in the rest of the home. This was the only room left.
2. Lead Paint
It is also possible that the paint used on the ceiling contains lead. Lead paint was banned in 1978. A lead paint test kit is the easiest way to figure out if you have lead paint or not.
If there is lead paint, you would need a certified professional to help remove it.
What to do if popcorn ceiling contains asbestos and/or lead
In this case, you have 2 options –
- Hire a certified professional to handle the removal. This can cost money but it is the safest way!
- Cover the ceiling in sheetrock or hardboard and create a “new ceiling” so the popcorn ceiling gets encapsulated. You can then proceed to paint it as you like for a smooth ceiling.
***This post contains affiliate or referral links. It is a way for this site to earn advertising fees by advertising or linking to certain products and/or services. Please read my full disclosure here ***
Even though the popcorn ceiling does not contain asbestos or lead, the dust generated is harmful for you. It is highly recommended to take lots of precautions and wear the right PPE (personal protective equipment)
Tools needed
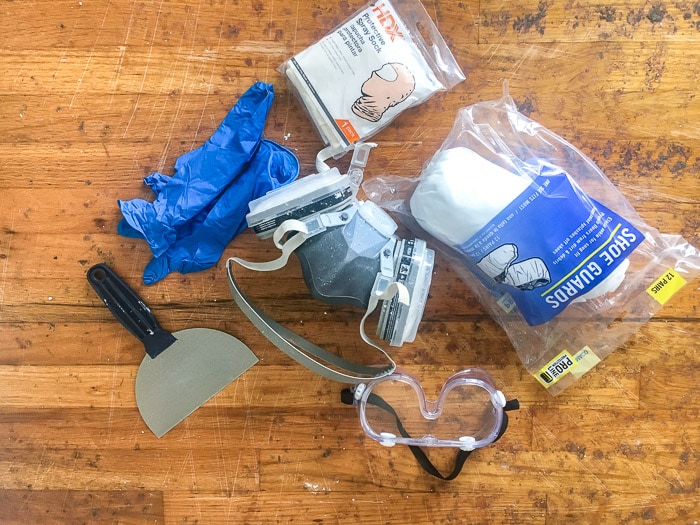
- 6″ Putty Knife or a wider one.
- Spray bottle/Tank Sprayer – depending on the area you are removing. We used a spray bottle but really really should have got a tank sprayer.
- Plastic sheets and Painters tape
- Respirator
- Spray Sock
- Safety glasses – you need these – trust me!
- Shoe covers
- Gloves
- Drywall sanding sponge
- Drywall Primer
- Paint roller or EZ twist paint stick
- Drywall compound
- Putty knife
How to remove popcorn ceiling
We tried a few different methods to remove the popcorn ceiling based on our internet research. I am sharing below what worked best for us.
I will share more about the other methods and their drawbacks at the bottom.
Step 1 – Prepare the room
- Remove any light fixtures and cover up the vents.
- Cover your walls and floor in plastic sheets using the painter’s tape.
Yes, walls too! You won’t regret it!
We covered only the floor because we were going to be removing wall texture anyway. Big mistake!
We had to later wipe down dried up residue from all the walls – NOT fun! A sheet would have been easy to simply roll it up and dump!
Step 2 – Get dressed for removal
Wearing protective gear is very important!
- The respirator is the most important. You don’t want to be breathing in any of that stuff even though it might be free of asbestos.
- Spray sock to cover your face and hair – you DO NOT want that in your hair!
- Safety glasses that are sealed from all sides – things will be falling from above you. Regular safety glasses are open on the sides and stuff can easily get through into your eyes.
- Shoe covers -you don’t want to walk around in that big huge mess on the floor sticking to your regular shoes!

Step 3 – Remove the popcorn ceiling
1. Spray and soak the popcorn ceiling
Patience is key here! You need it to be completely soaked. Takes about 10-15 minutes.
If it is well soaked, it will come off like butter. If it is not, it will be very frustrating to scrape!
We started with a spray bottle which was way too small for a 10 x 12 room and we had to refill it every 5 minutes! Definitely use a tank sprayer!
2. Scrape off the wet texture
Use a wide putty knife to scrape off the wet popcorn ceiling. If it is well soaked, this will be super quick and easy!
- Use long even strokes to get as much in one sweep as possible.
- Work in small manageable sections. We found a 2’x2′ section was best.
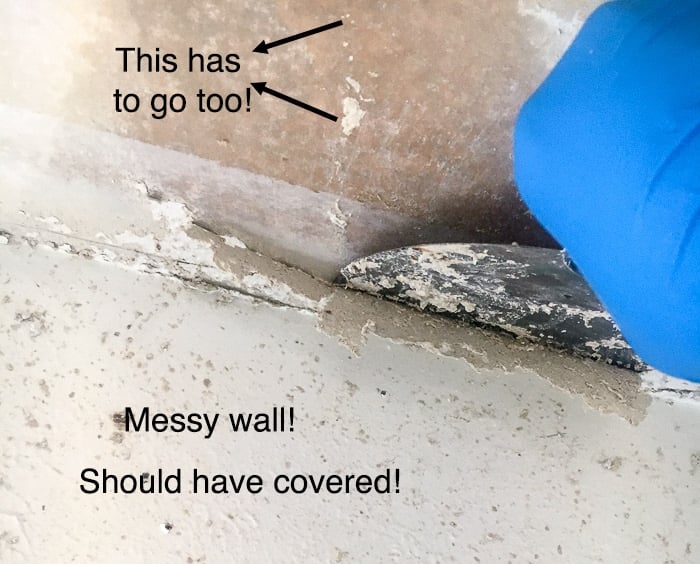
Make sure you get rid of all the residual white stuff… everything has to go!
After inspection, go back, re-spray and scrape any leftover residue.
I hope you remembered to put that tarp on the wall and floors because the walls will look like above and the floor will look like this!
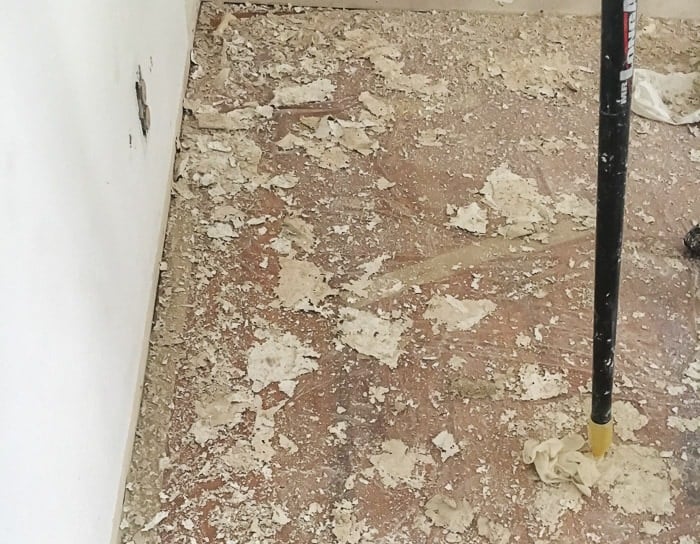
What to do after removing popcorn ceiling
Step 4 – Smooth out ceiling
Once all the popcorn ceiling has been removed, the ceiling will have scrapes from the putty knife. These need to be fixed before painting.

- Sand the scrapes using a drywall sanding sponge.
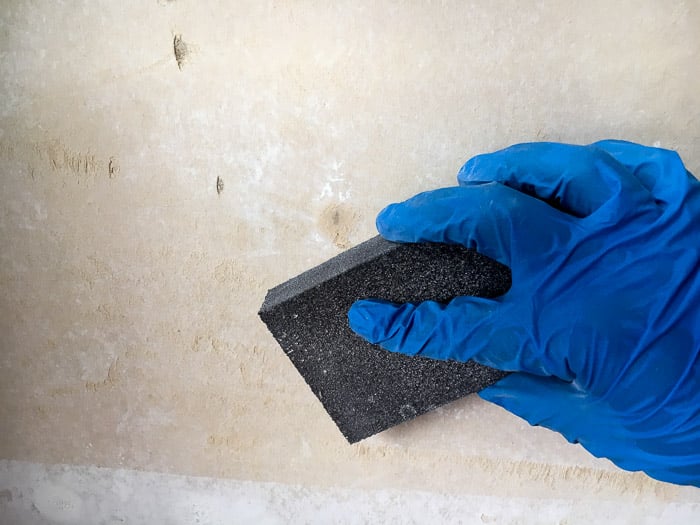
Sanding Tip – Sand perpendicular to the direction of the scratch. If you go in the direction of the scratch, you will only make it worse.
The ceiling will look much better but you might still have deeper scratches to fill in.
Step 5 – Apply primer
Add a coat of primer to the ceiling. This helps really see which scratches need to be filled
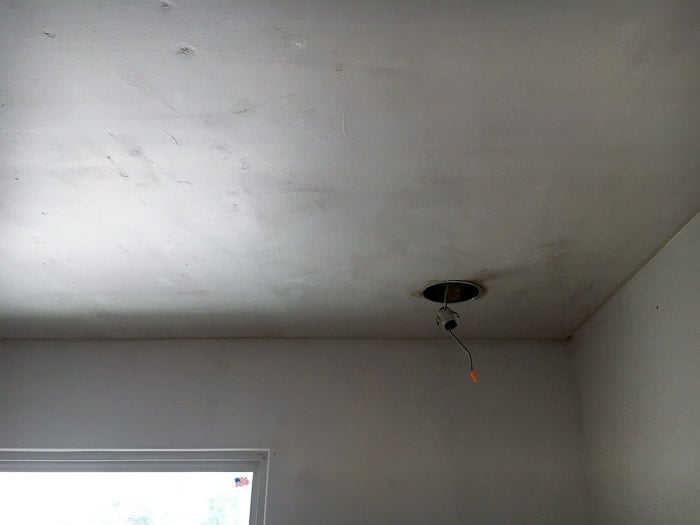
The HomeRight EZ -twist paint stick is perfect for this. I only had to refill paint one time for my 10 x 12 room.
RELATED – How to paint a room fast.
Step 6 – Apply joint compound
- Use a drywall compound and fill any leftover scratches.
We pretty much found it easier and more efficient to simply apply compound across large areas and cover lots of scratches in one go.
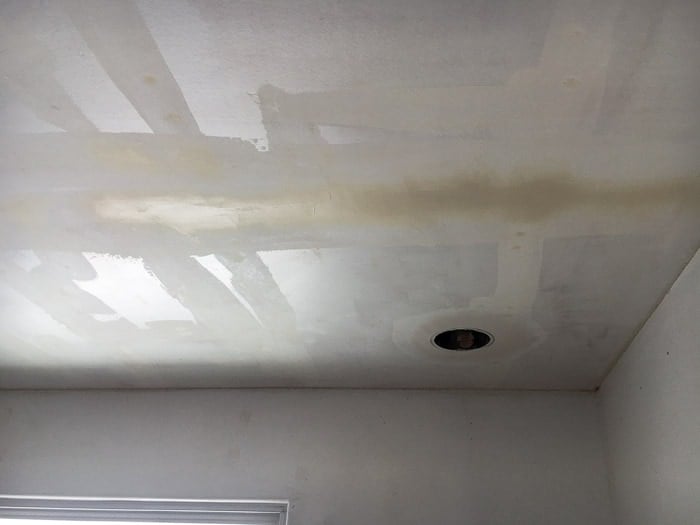
Step 7 – Prime and paint!
Apply another coat of primer and paint in color of your choice!
That’s it. No more popcorn ceiling.
Other techniques of removing popcorn ceiling
Now let’s get back to the other ways of removing popcorn ceiling and why we didn’t use them.
- Using a popcorn ceiling remover – This was so tempting to use since you can attach a bag underneath to catch the residue. Nope. Didn’t really catch much. Also, it was just impossible to use it at the angle we needed for scraping.
- Removing popcorn ceiling with a shop vac – We attached the putty knife to the end of the shop vac nozzle and scraped. While it did suck in a lot of it, it also started clogging the insides of the hose because of its mushy nature.
Ultimately, we ended up doing it the good old fashioned way and it worked like a charm!
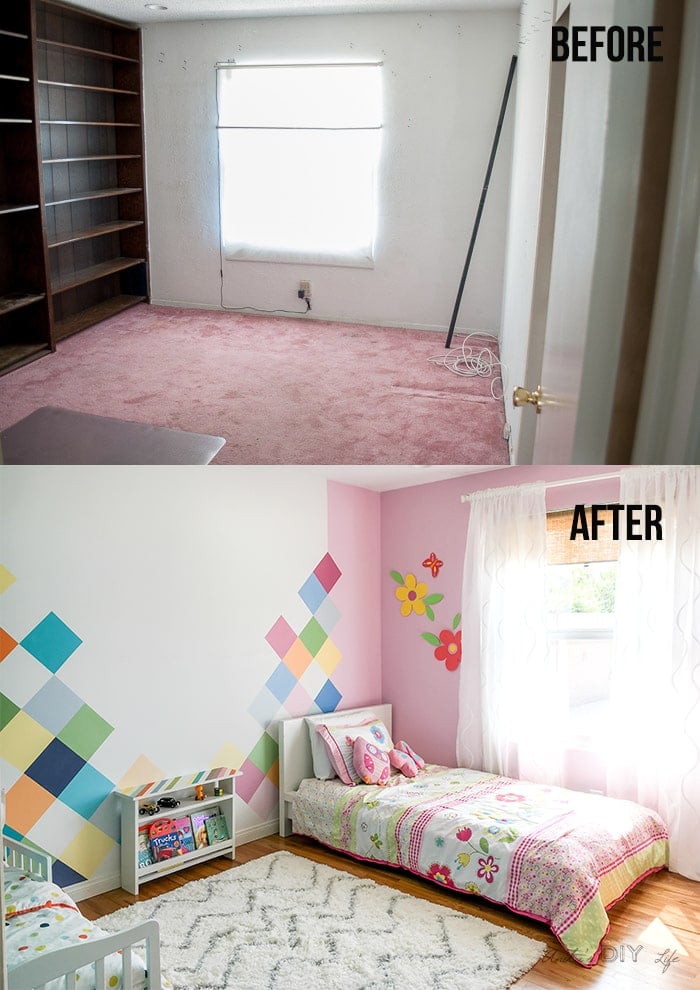
The room has come a VERY long way today – the wall texture has been removed, the wall and ceiling have been painted, the floors have been refinished and it is now a colorful kids room!
More in home improvement –
- How to use gel stain without sanding
- How to trim a window with bullnose corners
- A complete guide to DIY Board and Batten
See many more home improvement tutorials.
Anika's goal is to inspire and empower beginners with woodworking, DIY, home improvement, and home decor ideas.
She wants everyone to unlock their creative potential and experience the feeling that comes with making something. Nothing feels better better than seeing something and saying "I can make that!"


LOTS of hard work and elbow grease! But so WORTH it, huh!? 😉 We did that in our kitchen/dining rooms and it was a pain in the neck-literally. Ultimately, we out up styrofoam ceiling tiles and are very happy we did, since we like the French country look. Actually, we could have put them up over the popcorn, but Denis thought they would adhere to the ceiling better without the popcorn, so we went that way. That is another picture needing to come your way! 😉
Great job so far! I really like the floor and am wondering what you plan to do with the room!?
That’s a lot of yucky work but I bet it was worth doing it. That paint stick had to make it so much easier to paint the ceiling. The kids are going to be so happy when it’s all finished. I can’t wait to see it!
So much work! You’re a workaholic! 😀 Excellent job, it looks soo beautiful afterwards… I can’t believe you got such a nice, smooth ceiling out of the “before”. The room is going to be gorgeous! 🙂 Thanks for the tutorial.
I’m so pleased that I don’t have popcorn ceilings in my house as it seems such a pain to remove. However, my friend has lots of popcorn ceilings in her home so I will be directing her to your post. By the way we call the artex ceilings in the UK.
Great info Anika!! I have never taken down popcorn ceiling, but I would love to take the texture out of our ceiling…I just love it all nice and smooth!!