Cricut Foil Transfer System – A Guide & Project Ideas
A simple and complete step by step guide to using the Cricut Foil Transfer System. Learn how to use it with the help of two detailed project tutorials!

This is a sponsored post written by me on behalf of Cricut. All opinions are 100% mine.
Cricut released their brand new Cricut Foil Transfer system earlier this week. It is a really easy and fun way to add shine to projects! It has my wheels turning with all the exciting possibilities!
Let’s dig into it.
Table of Contents
- What’s included in the Cricut Foil Transfer System
- What is the Cricut foil transfer tool?
- What machines does it work with?
- What materials can you use with the Cricut Foil?
- How does it work?
- Do you need a special type of foil?
- How to set up foil projects in Cricut Design Space
- How to set up a foil project for Cricut
- Making a foil project on the Cricut
- Materials used
***This post contains referral or affiliate links. It is a way for this site to earn advertising fees by advertising or linking to certain products and/or services. Please read my full disclosure here ***
What’s Included in the Cricut Foil Transfer System?
It is the new set of products from Cricut that help you embellish your paper crafts and other home decor projects. It consists of the foil transfer tool, 3 tips in various thicknesses, and a suite of special transfer foils along with the compatible tape.
The Foil Transfer Kit package comes with everything to get you started right away with the tool, 3 tips, and a sample pack of 12 silver and gold foils.

What Is the Cricut Foil Transfer Tool?
This new tool allows you to add metallic embellishments to projects using your Cricut machine. It uses pressure to transfer foil accents on to the surface of the substrate material. The interchangeable tips can create fine, medium, and bold accents. It is great for papercrafts, making gifts, and home decor. Keep reading for some fun examples.
What Machines Does It Work With?
The foil transfer tool works in the Cricut Maker and the entire Cricut Explore series – even the older machines. It does not, however, work with the Cricut Joy. Also, it only works with the desktop version of Design Space and not on mobile devices.
RELATED – How does a Cricut maker work?
What Materials Can You Use With the Cricut Foil?
Currently, it can work with the following materials –
- Cardstock and paper
- Kraftboard
- Faux leather
- Printable vinyl
- Clear printable sticker paper
- Vellum
Cricut is extensively testing more and more materials and will keep adding to them to the list but I think the above list is an awesome starting point to make lots of cool projects.
I tried it on a cardstock, faux leather and Kraftboard and I loved the results. See below for the pictures and detailed projects.
How Does It Work?
The foil transfer tool presses down over the lines where you want the foil to be transferred on to the material. The tool is added to the B-clamp of the machine just like any other Cricut tool. There is no heat or electricity required.
The best part?! You can foil AND cut in the same project!
Do You Need Special Type of Foil?
YES. You need to use Cricut foil transfer sheets with the foil transfer tool for it to work. Cricut has specifically engineered these sheets to work with its pressure transfer system.
Cricut’s foil sheets come in multiple colors and sizes. There are variety packs in 4×6 inch and 12×12 inch sheets. All the packages also come with special pre-cut tape designed to work with the foils.
Also, stay tuned! More foil colors will be available soon!
How to Set up Foil Projects in Cricut Design Space
The foil transfer system integrates seamlessly with the Cricut Design Space (on the desktop version only). Below is the step by step tutorial on how to do that!

- Add text or pick the design/image you want to create from the design library. It is important to pick an image that is “draw only” from the right menu.
- In Design Space, choose line type, select foil, and the thickness you want the design to be.
- Select the color for the foil. You CAN use two different colored foils or different line thicknesses in the same project! Design Space with guide you through it.
- If you have a layer/design you want to cut after foil, be sure to select all layers and attach before hitting “Make it”
How to Set up a Foil Project for Cricut
Once you have designed your project in design space, it is time to set up the material to be foiled/cut.
- Apply the base material to the compatible mat and smoothen.
- Lay the foil transfer sheet over the material. Leave about ¼” from the edge of the material. Be careful not to touch the foil on the sticky mat or the foil will transfer onto it.
- Use the included tape to tape the foil onto the material. Try to make the foil as taught as possible. Getting it wrinkle-free is nearly impossible so don’t worry too much about the smaller wrinkles. The foil will work just fine.

A quick note about the tape – The tape has a slight electrostatic quality to it and you will see that when you go close to the foil, it pulls up and sticks to the tape. It can be a bit frustrating in the beginning but after a little practice, I actually like this feature. It helps you attach the tape to the foil and pull it to attach to the material.
Making a Foil Project on the Cricut
Like with all projects, Design Space Guides you step by step through the project.
- Pick the base material in Design Space.
- Load the tip with the thickness you need into the foil transfer tool and load the tool into clamp B.
- Move the star rollers to the side (VERY important. You don’t want foil transferred from those rollers.)
- Load mat and proceed with the project.
- Once the foil transfer is complete, the machine with eject the mat just enough for you to remove the foil. At this stage, Design Space will prompt you to the next steps – change tips or change to the cutting tool.
- Follow the machine prompts and complete the project.
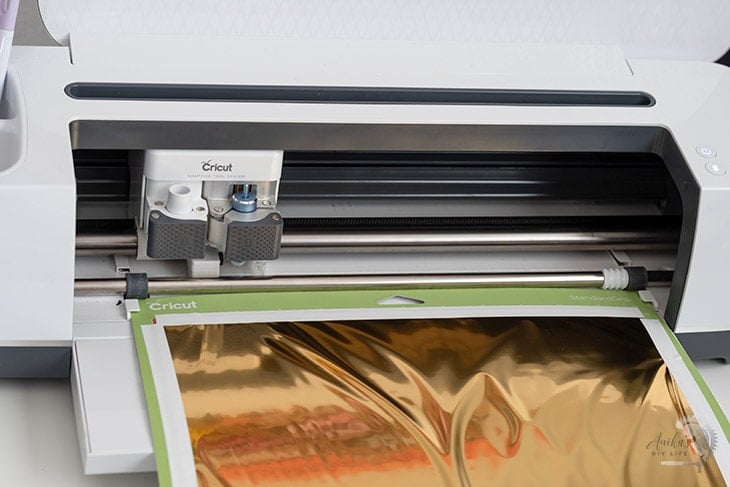
This is how the foil transfer looks like once the machine ejects out.

I had a lot of fun playing with various settings and materials using the foil transfer tool.
I created this little quote on Kraft board using the medium and bold tips and cut it out too.

I wanted to see how it would work with detailed graphics and I made this horse mandala on card stock and I absolutely love how it turned out!

So, I went ahead and got my fall crafting hat on and created these two easy Fall decor projects –
DIY Floating Fall Sign
When I though about foil and fall, all I could think of was golden foil of leaves. So, I created this simple design in Design Space using the Cricut Access designs.
Step 1 – Foil and Cut Letters on the Cricut.
- Follow the step by step tutorial above to transfer gold foil on to orange card stock.
- Once the foil transfer is complete, the machine will eject it out just enough for you to remove the foil.

- Switch out the blades and continue with cutting the “FALL” letters.
Don’t they look just amazing?!!

- Cut out the black “happy” letters from black cardstock..
Step 2 – Apply to Plexiglass
Using spray adhesive, apply to a sheet of plexiglass.

Step 3 – Add Stand
I ran a scrap piece of 1×2 through the table saw at half thickness setting to make the stand and stained it a warm brown.
That makes a simple fall sign that is perfect at an entryway or over a mantle!

You could also simply place it on a table without the stand or hang it up on the wall using offset screws.
DIY Modern Wreath
For this project, I decided to try cutting faux leather!
Step 1 – Foil and Cut the Maple Leaves.
I used the StrongGrip mat for the faux leather and placed it face up. Then, I attached the sheet of gold foil with tape. I also added masking tape to keep the faux leather from shifting.
I increased the number of copies of the design and followed the prompts in Design Space to transfer foil then cut out the leaves.

I was left with 9 very pretty maple leaves!

Step 2 – Attach to Hoop
Attach the leaves to one side of the hoop using hot glue.

To add a punch of color, I wrapped a section of the hoop in orange embroidery floss.

The foil transfer tool can be used in so many ways to add the perfect touch of shine and glamor to projects.
Material Used in the Projects –
- Cricut Maker
- Cricut Foil Transfer Kit
- Foil Transfer sheets sampler, Jewel
- 12 x 12 Cricut foil transfer sheets, Gold
- 12 x 12 Cricut foil transfer sheet, Silver
- Fine Point Blade
- Kraft board, Natural
- Cardstock in Teal, Orange and Blue
- Cricut Faux Leather, Brown
- LightGrip Machine Mat
- StrongGrip Machine Mat
- StandardGrip Machine mat
- Plexiglass
- 12″ metal hoop in gold
Anika's goal is to inspire and empower beginners with woodworking, DIY, home improvement, and home decor ideas.
She wants everyone to unlock their creative potential and experience the feeling that comes with making something. Nothing feels better better than seeing something and saying "I can make that!"


Hey Anika,
loved this project. I can’t wait to get my hands on a cricut machine and try this one out myself.