DIY Bench With Shoe Storage
Build a simple yet modern A-frame DIY upholstered bench with shoe storage underneath with easy to follow plans and tutorial!

Making your own bench is a great weekend project! It is also a great project to get your feet wet with woodworking if you are just starting out!
I built this bench for our entryway so we have a place to sit to put on or take off our shoes AND store them because, no one likes a big pile of shoes in front of the door!
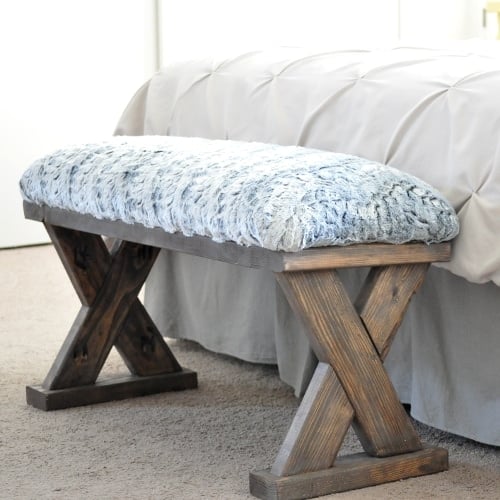
In case you haven’t noticed, I am in love with the A-frame design and decided to make the bench based on it!
Table of Contents
- Material needed
- How to build the bench (video)
- Tutorial for bench
- Plans to build the storage bench
- Pin this to Pinterest
***This post is sponsored by Arrow Fastener. All opinions are my own. Thank you for supporting the brands that help me bring you fun projects***
How Hard Is It to Build This Bench?
Not hard at all!
It is a basic project that needs a few cuts on the miter saw and pocket holes. If you opt for the upholstered top, you will need a do tackle a little bit of upholstery which is not hard at all!
Just follow the step by step instructions and the supporting video and you should have a gorgeous bench in the end!
Do You Need a Lot of Tools to Build This Bench?
Nope! Just a miter saw, power drill and a pocket hole jig to build the frame, a circular saw to cut the top plywood (which can be cut at a lumber store too) and a staple gun to upholster the top.
RELATED: How to make accurate cuts with a miter saw.
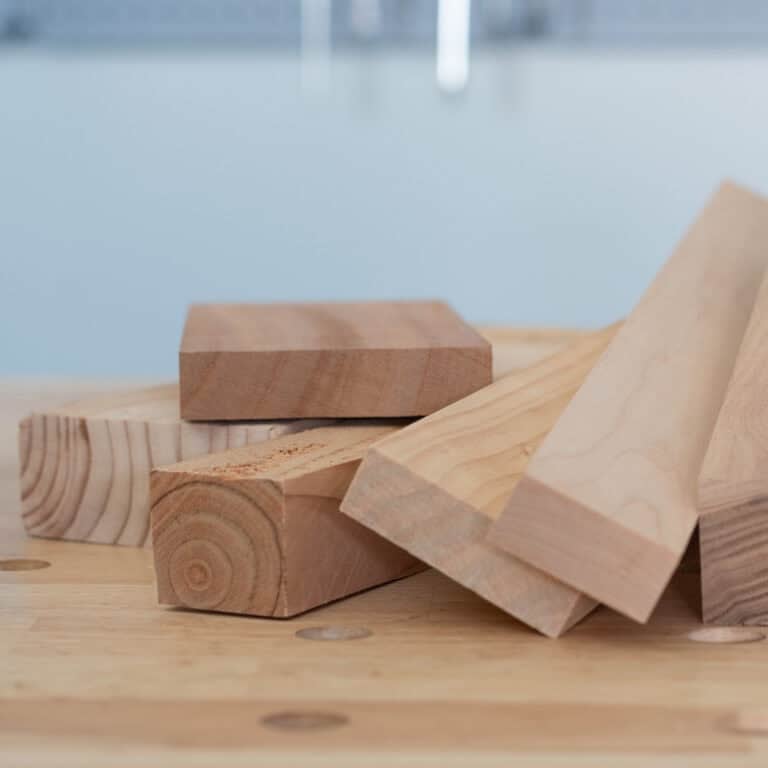
What Kind of Wood Do You Need?
This bench is made of all 2×2 boards for the frame and plywood for the upholstered top.
For the 2×2 boards – You could use furring strips but you need to be very careful when picking them – make sure they are straight which can be hard to find.
Finding straight boards is especially important when working with angles.
You can make your own 2×2 boards by ripping 2×4 boards on a table saw. I used Select Pine because they don’t have knots and are already sanded smooth. Although they can be expensive, it cuts down on a lot of time and stress.
Material Needed
- Lumber per the plans
- Arrow Fastener T50X TacMate Heavy Duty Staple Gun
- Arrow Fastener T50 staples (5/16″)
- Arrow Fastener T50 Heavy Duty Staple Gun
- Arrow Fastener T50 staples (9/16″)
- Batting
- Fabric of your choice. I used this rug.
- Foam – I used 1″ thick
- Spray adhesive
- Wood glue
- Power Drill
- Circular Saw
- Kreg Jig
- Miter Saw
- 2-1/2″ pocket holes screws
- 2″ wood screws
How to Build the Bench
Below is the full video showing how to build. Written step by step instructions follow.
Tutorial to Build the Bench
Step 1 – Make the Cuts
- Start by making the cuts per the plans.
- Sand the boards.
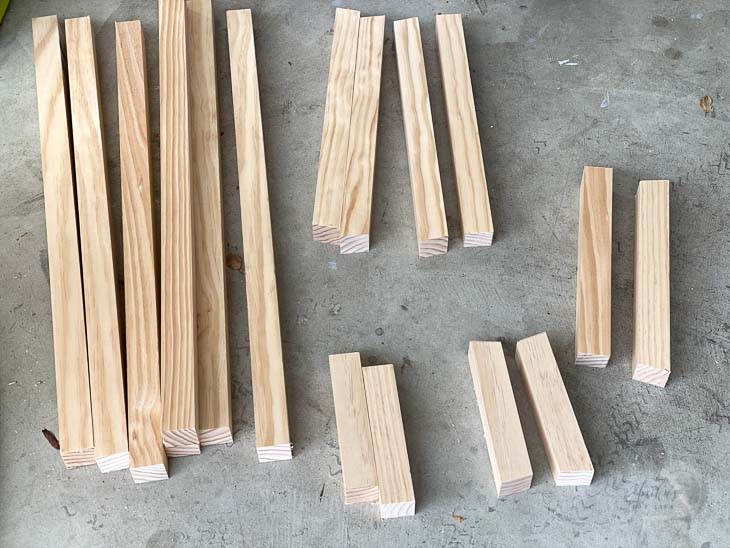
I used premium 2×2 boards because I was short on time and didn’t want to spend time ripping and sanding boards. But you can use 2×4 boards and rip them down to save money.
Tip – all the angles are cut at 10 degrees. Be sure to set the saw at 10-degrees and make all the angled cuts in one go so they are all consistent.
Step 2 – Make the Pocket Holes
- Make all the required pocket holes as shown in the plans.

The pocket hole jig and the drill bit is set at 1½” thickness.
Step 3 – Build the Sides
- Using wood glue and pocket hole screws, build both the side frames.
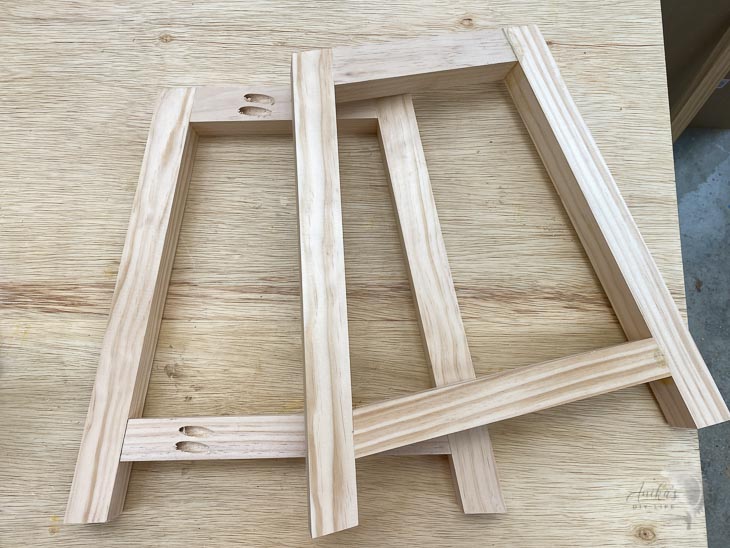
Make sure that all the pocket holes face in the same direction.
Step 4 – Attach Rails and Aprons
- Attach all the rails and top aprons to one of the sides using wood glue and pocket hole screws.
- Flip that onto the other side and attach.
- Add supports in the middle of the top aprons to complete building the bench frame.

As you build the frame, pay attention to the direction of the pocket holes. All the pocket holes for the slats will be towards the bottom and the holes in the top aprons will face upwards.
Step 5 – Finish the Bench
- Sand, stain or paint the bench in the color of your choice.
I decided to stain my bench a rich walnut color.
- Once the stain dries, apply a top coat to seal the bench. This is my favorite top coat.

Step 5 – Upholster Top
- Cut plywood to size and apply foam using spray adhesive.
Tip – make sure foam is about ½” wider that the plywood on all sides. This will help cover the sharp edges.
- Cover in batting using the staple gun and staples.

I like to staple one end first and then stretch it out and staple the other end. Then turn in the corners and staple the remaining sides.
- Cover in the fabric of your choice using a staple gun and staples using the same process as with the batting.
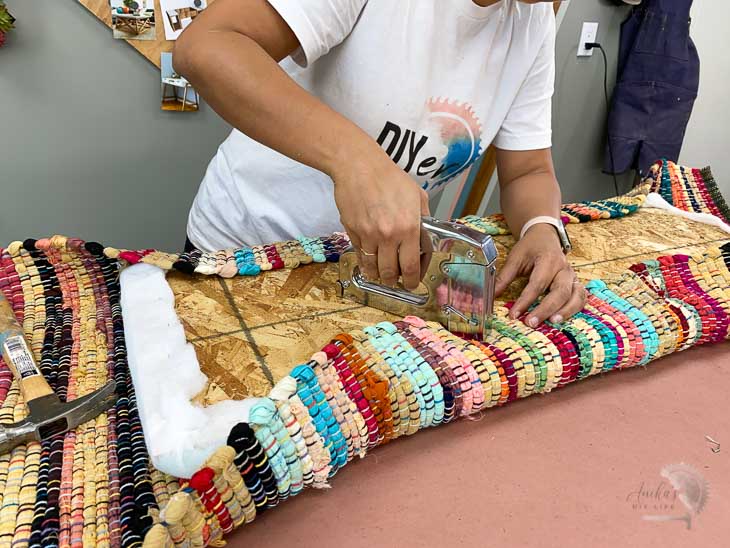
I decided to use a rug for the top because I really wanted all the colors. It became a little bulky at the ends to staple in. I used 9/16″ staples in the heavy-duty T50 staple gun and stapled such that I was only stapling one layer at a time.
Step 6 – Attach Top
- Attach the upholstered top to the frame using wood screws from the bottom.
If you are using an upholstered top, use 2″ wood screws. If you are using a slatted top, use 2½” screws.
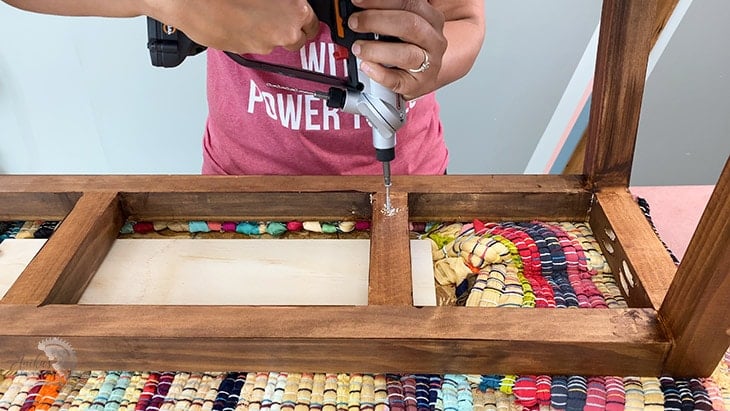
In my case, because the rug was bulky, I had to add a ¾” plywood scrap underneath to fill the gap and use 3″ screws.
That’s it!
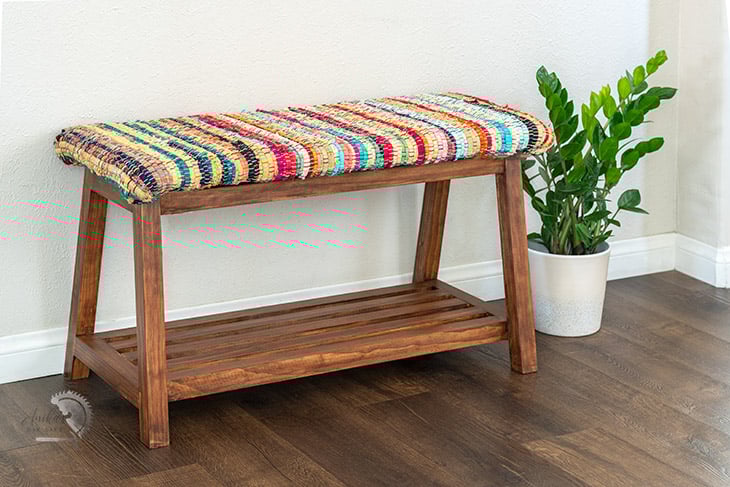
A simple yet stylish bench perfect for any entryway with a simple shelf underneath to store all the shoes.
It was a little harder to work with than fabric but the finished product makes it so worth it!
And the T50 heavy duty staple gun was a definite help!

DIY Bench With Shoe Storage Plans
Please click the button below to download the building plans for this storage ottoman cube including the cut list and 3-D drawings.
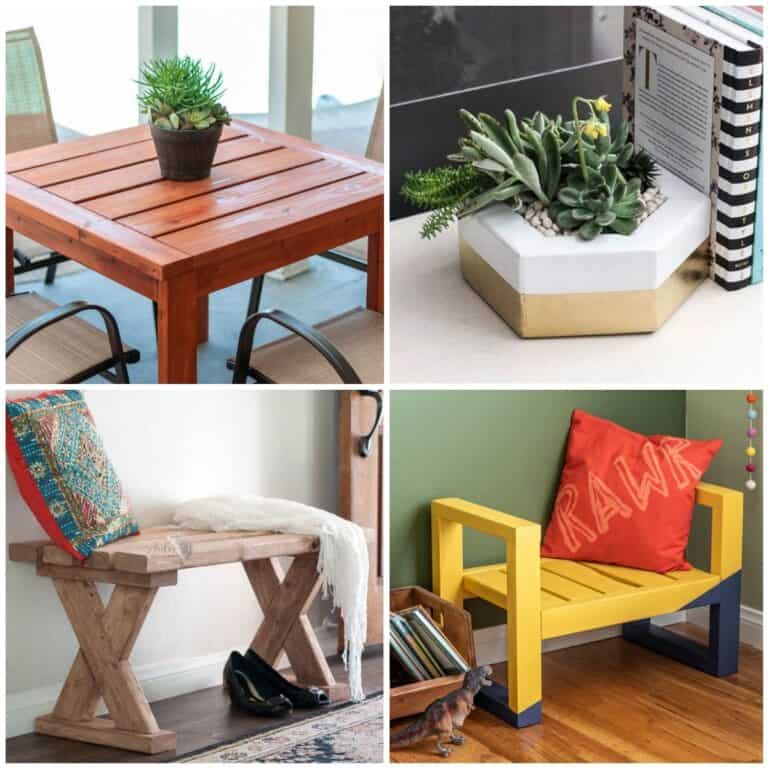
You Might Also Like –


Anika's goal is to inspire and empower beginners with woodworking, DIY, home improvement, and home decor ideas.
She wants everyone to unlock their creative potential and experience the feeling that comes with making something. Nothing feels better better than seeing something and saying "I can make that!"


You know if you make the bench shorter you could use a throw rug on top instead of buying fabric.
This is actually a rug like I mentioned in my blog post.
All your projects are very impressive. Looking forward to see what is next.
Great job. Your post is very informative.
Brilliant!! Thank you for the information.