DIY 3-D Floating Decorative Letters Using a Cricut Maker
Learn how to make these amazing 3-dimensional floating decorative letters and names using the Cricut Maker. Use them to decorate on a table or the walls!
This is a sponsored conversation written by me on behalf of Cricut. The opinions and text are all mine.
Its been a couple of months since I got my Cricut Maker and I have been using it almost daily to make projects and try all sorts of new materials.
I have had a few questions from a bunch of you about the machine and if it really is worth it to get one.
I thought I could make a project using some of my favorite materials AND answer all your questions by showing why I love the Cricut Maker so much!
5 Things I Love About My Cricut Maker
1. It Can Cut 300+ Materials!
We all know that cutting machines are great for cutting paper, cardstock, Iron-on Vinyl and regular vinyl to make decals and stencils.
But the Cricut Maker can cut so much more than that!
It can cut –
- Felt
- Fabric
- Leather
- Thin woods
- chipboard
The list goes on and on! Obviously, the wood and the veneer is what I am most excited about!
Cutting is not the only thing!
It can even engrave plexiglass and aluminum!
That’s right! I am sure your mind is exploding with possibilities like mine is!
I have already tried cardstock, poster board, fabric, Vinyl, Iron-On vinyl, chipboard, veneer, and basswood.
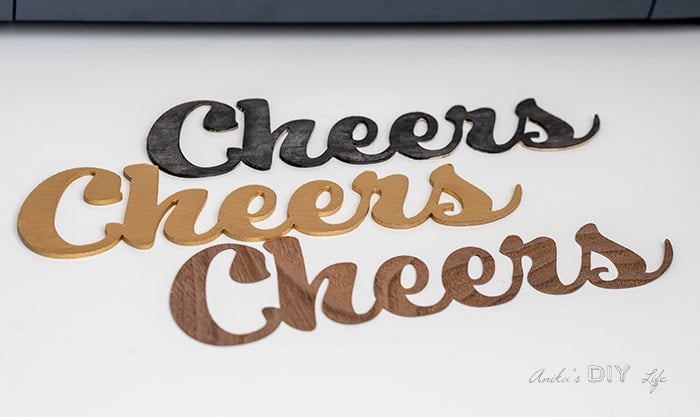
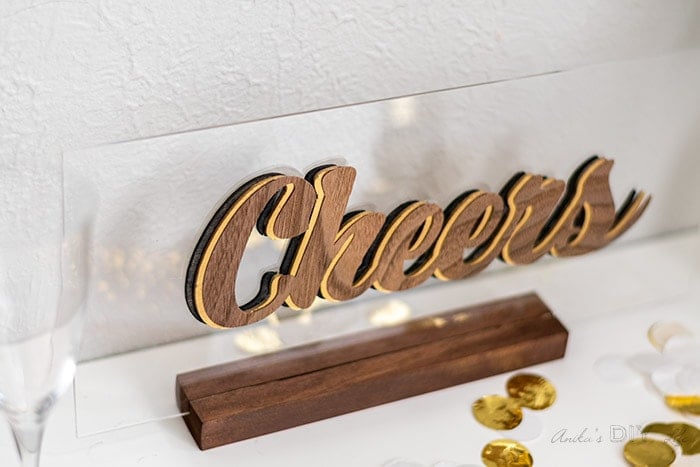
For this “Cheers” sign, I cut chipboard, basswood, and veneer!
2. It Is Very Intuitive and Beginner-Friendly
Even though it is a powerful machine, it is very intuitive to set up and use.
I walked you through how I set it up right out of the box and even made my first few projects!
The interface gives you all the instructions you need – from selecting the material to which tool to load, to what button to press – there is no guesswork involved.

It is so easy to use that my 6-year-old can pretty much do it all… if I let him 🙂
3. So Easy to Personalize Everything!
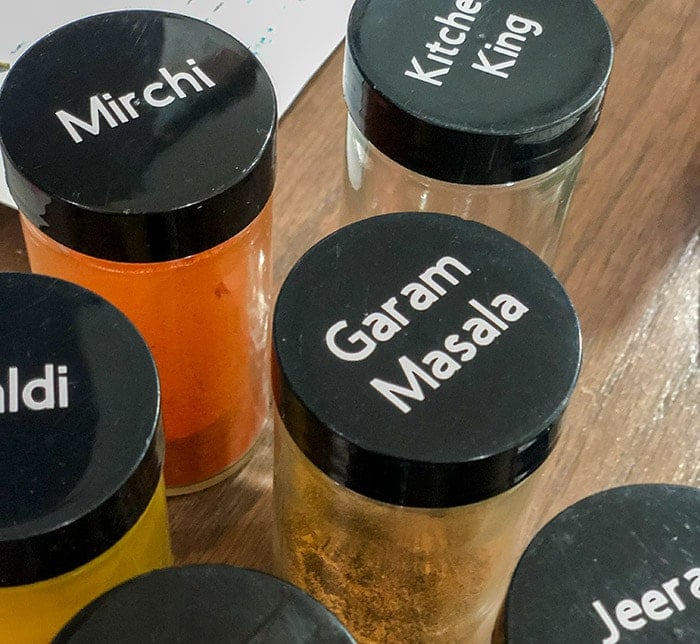
As soon as I got this, the first thing I did was create labels for my spice jars.
I love having my spice rack but I can obviously never find spice jars with Indian spice labels.
With my Cricut, I whipped up about 10 labels in a matter of 30 minutes.
Finally, my dream of having a fully labeled spice rack is a reality!
The kids’ water bottles have been personalized with it.
Plus, we recently made a bunch of personalized gifts for our friends when we visited them for Thanksgiving!
I made this “Cheers” sign – but you could write whatever word or words you like! Think names, quotes, signs, art…. so many ways to use it!
4. They Are Constantly Innovating
The Cricut Maker is equipped with an adaptive cutting system which makes switching out blades super easy!
They have blades for cutting, scoring, engraving, debossing, and so many other decorative effects.
Plus they are constantly innovating new blades and technologies making the Cricut a really powerful machine for all your DIY project ideas!
For the “Cheers” sign, I cut Chipboard and basswood using the knife blade and the veneer using the deep point blade!

5. The Huge Design Library!
If you are not feeling crafty or just don’t want to spend time figuring out how to create a design and what materials to use, the Cricut Design Space has thousands of projects and designs to choose from.
The projects walk you through all the materials and tools you need. All you have to do is follow the instructions, load material and run the machine!
But if you want to the change to customize the project, you can easily customize it too!

Or you could add certain elements to your own design…
The possibilities are endless!
This “Cheers” sign is available in the Cricut Design Space here.
DIY Floating Decorative Letters
Now let’s make this pretty Cheers sign!
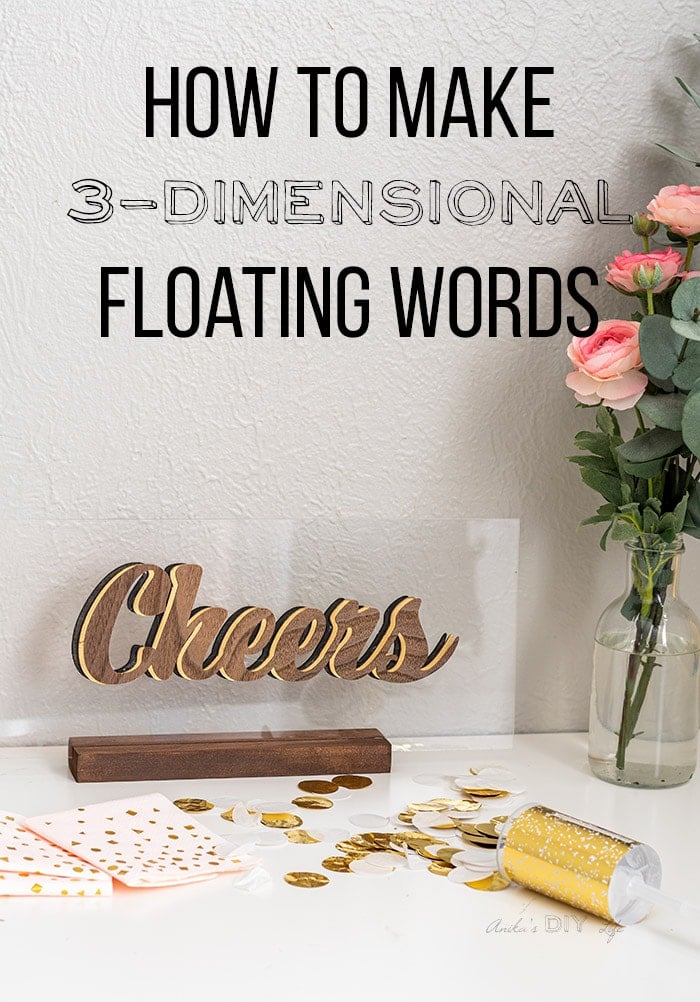
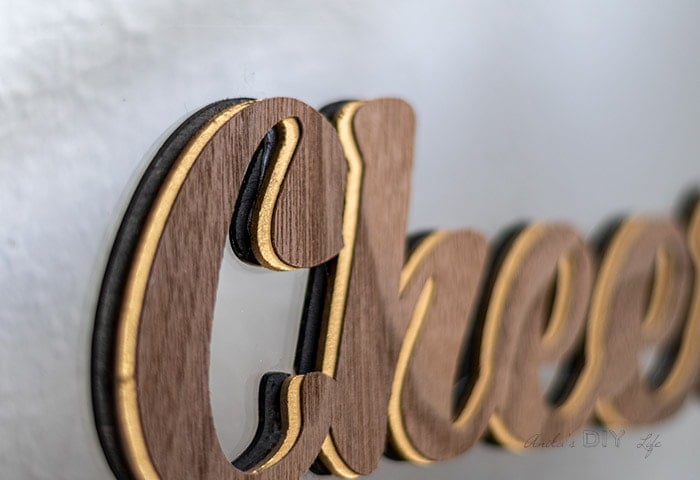
The sign is essentially the same word cut in 3 different materials and glued with a slight offset to give the 3-dimensional effect.

Like I mentioned above, you can easily do this with any name or quote or event simple shapes and art.
Materials Needed to Make Floating Wooden Word Sign
- Cricut Maker
- Knife Blade
- Deep point blade
- StrongGrip cutting mat
- 1/16″ Basswood
- Chipboard 2mm
- Veneer ( I used Walnut)
- Masking tape
- Stain and paint of your choice. This is the stain I used and this is the gold paint I used.
- Plexiglass – size as needed.
- Strong glue. This is the one I used
- Small 1×2 for stand or you can use stand-offs to mount to wall.
- Table Saw (for making stand)
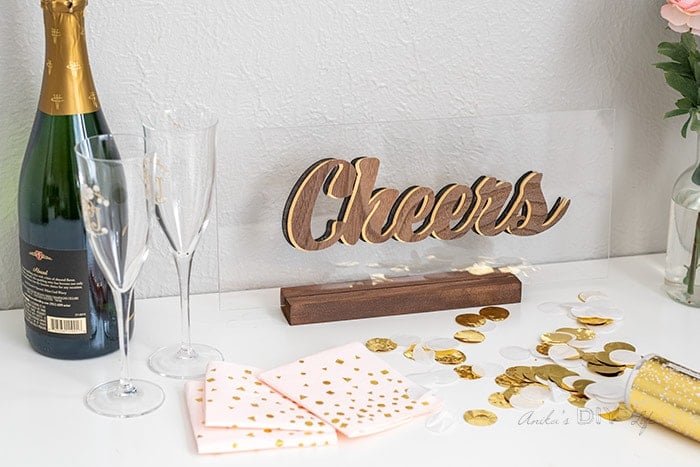
This easy 3-dimensional decorative floating wooden word sign makes a great addition to any decor. Put it on a table with a simple stand or hang it up on the wall.
Total Time: 2 hours
Set up the design you want to cut
The “cheers” sign I cut can be accessed in the design space.
If you want to use your own words, you can easily create them in Design Space. I used the font Retro Script. Be sure to weld all the letters together and set the size of the text to fit on your material. (11″ x 11″ in this case)
Cut basswood
Load the knife blade in the machine and the basswood on the StrongGrip cutting mat and cut. I stained this in ebony stain.
Be sure to add masking tape on the edges to hold it in place during the cut. 
Cut chipboard
Cut the same pattern in Chipboard mounted on the StrongGrip cutting mat using a knife blade.
Chipboard is thicker and takes a little longer to cut compared to the basswood.
I painted the chipboard layer gold.
TIP: Always peel away the mat from the chipboard and not the chipboard from the mat to prevent breaking the design in thinner delicate spots.
Cut veneer
Load veneer on the StrongGrip mat and tape the edges.
Use a brayer to make sure the veneer is well attached to the mat.
Load the deep point blade and cut the veneer.
Be very careful as you pull the mat off of the veneer as it can crack easily. 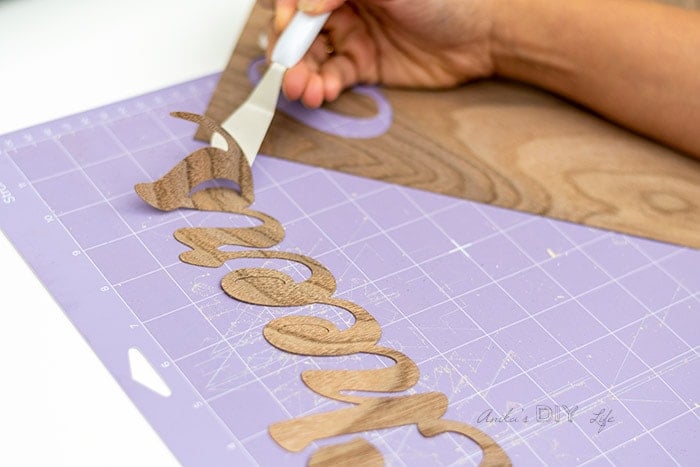
Attach to the plexiglass
I used a strong glue to attach each word cut out one by one. with a slightly offset in every consecutive layer.
TIP: Be very careful as you apply glue – less is more. You don’t want it to squeeze out and get on the clear acrylic. 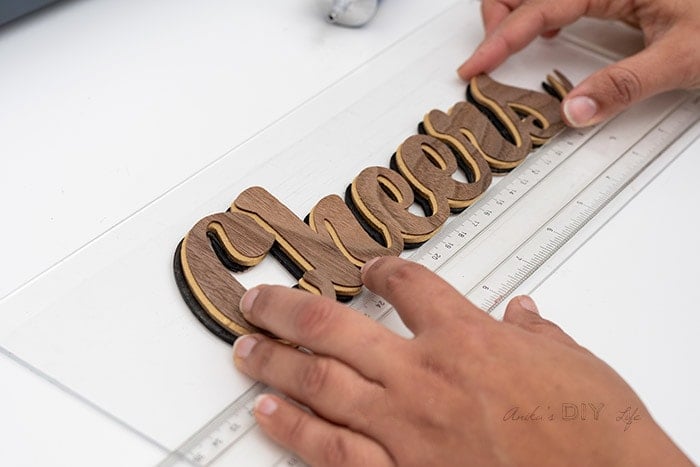
Add a stand (optional)
You could make a stand like I did or you can use stand-offs to mount to a wall.
to make the stand – I just made a pass on the table saw with the blade at 1/2″ depth and then sanded and stained it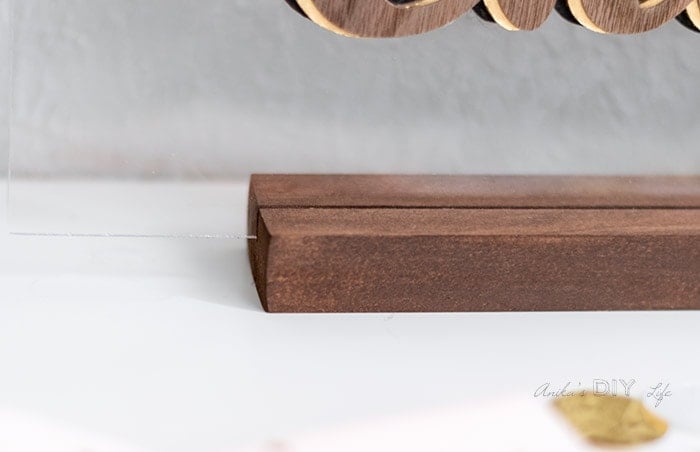
That’s it!
I chose the chipboard layer in the middle as it was thickest of all the three materials. The stained basswood makes a nice base and the walnut finishes it off nicely.
As I said, you can easily make any word or phrase or art using this technique.
The options for colors are endless too!
And you could also mount it on a wood frame like this one.
What word or phrase will you make?
More Easy Cricut Projects –
Anika's goal is to inspire and empower beginners with woodworking, DIY, home improvement, and home decor ideas.
She wants everyone to unlock their creative potential and experience the feeling that comes with making something. Nothing feels better better than seeing something and saying "I can make that!"


Love love love this! Now you’re ready for the New Year 😁