Easy Wooden DIY House Number Sign
Learn how to make a DIY house number sign with this full tutorial and video. Add a unique look using a fun wood-burning technique and increase curb appeal.

It took us almost 2 months before we figured out there was no house number on our house!
Yeah… we never noticed!
We wondered why everyone visiting would park across the street and call to check.
As soon as we realized it, making a house number sign went straight on my list of things to do.
It took almost 2 years… but here it is!
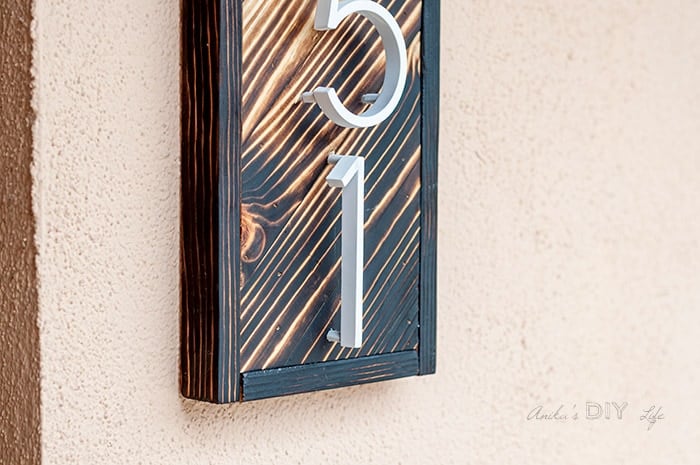
And I CANNOT be happier with it!
I mean… can we talk about that gradient charred wood effect?! You won’t believe how easy it was to achieve!
Plus, it didn’t even cost a lot in lumber to make – just the price of a couple of boards. A major part of the cost was for the house numbers themselves.
***This post is sponsored by Bernzomatic. All opinions are my own. Thank you for supporting the brands that make it possible to bring you fun projects***
***This post contains referral or affiliate links. It is a way for this site to earn advertising fees by advertising or linking to certain products and/or services. Please read my full disclosure here ***
Materials for the DIY House Number Sign
- Lumber
- 3/4″ plywood (cut to size as needed by numbers)
- 1 x 3 x 8 board (may need more if more numbers)
- 1 x 2 8 board (cut to frame plywood)
- BZ4500HS Heat Shrink Torch
- Bernzomatic Propane Tank
- House Numbers of choice. I used these.
- Miter Saw
- Circular Saw or Table Saw
- Brad Nailer and 1-1/4″ finish nails
- Sandpaper (220 grit)
- Heat Resistant Gloves
- Wood Glue
- Clear spray paint
- White spray paint (optional)
- Hanging hardware (I used keyhole hangers)
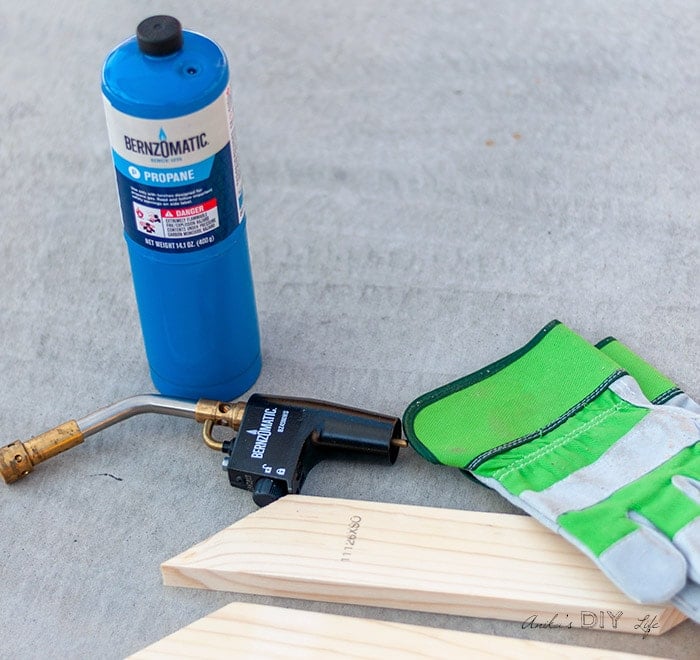
How to Make a Wooden House Number Sign
Below is the video of how to use the Bernzomatic torch and to make the wooden house number sign.
Step by step instructions follow below.
Click here to subscribe to my YouTube Channel for more great videos!
DIY House Number Sign Tutorial
Step 1: Make the Cuts
- Cut the 3/4″ plywood to the size you need depending on the number of digits in your house number. I have four digits so I used 23″ x 7″.
- You could also use 1/2″ plywood for this but I wanted the trim to be flush with my sign, so the numbers stood out.
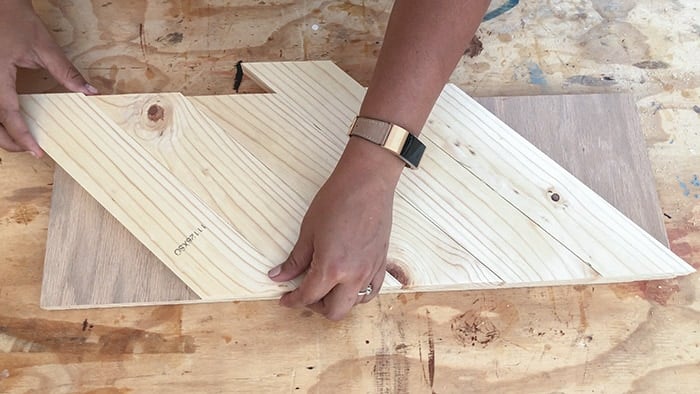
- Set the Miter saw at 45 degrees and cut pieces of the 1 x 3 boards into planks. Make sure to dry-fit to make sure they are slightly larger than needed.
- Cut 1 x 2 boards to the size needed to trim out the 3/4″ plywood.
Step 2: Mark Location of Planks
- Dry fit the mitered planks and mark location of each plank and what shade you want it to be. I decided on dark, medium and light.
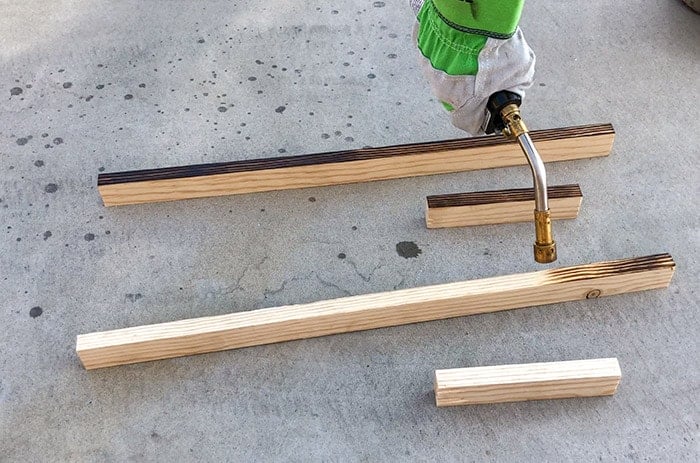
Step 3: Torch the Wood
- Lay the wood pieces on a concrete surface outdoors in the order you want them darkened.
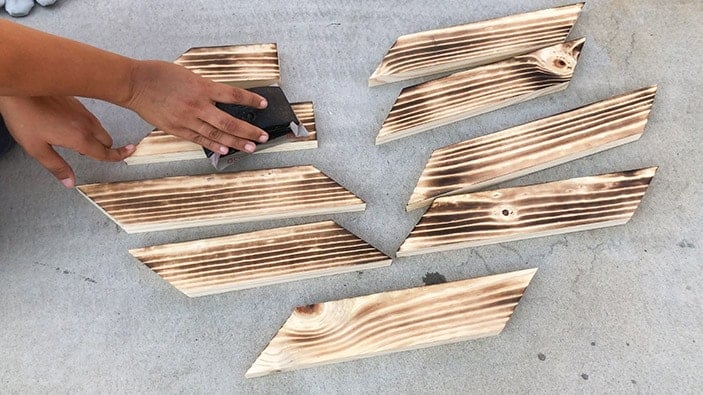
- Using the Bernzomatic BZ4500HS Heat Shrink Torch and the Bernzomatic propane tank, torch each piece of wood.

Tip – Keep the Torch moving slowly across the surface for a uniform look.
- The number of passes will determine how dark the wood gets.
- I found that I needed at least 5 passes to get the darkest tone I wanted.
- The medium tone wood got 3 passes
- The light tone wood got 2 passes
Tip – Be sure to sand between each pass to make sure the surface is as smooth as you can get.
Step 4: Assemble Sign
- Attach the wood burned pieces to the plywood using wood glue and finish nails. Be sure to keep 2 sides completely aligned.
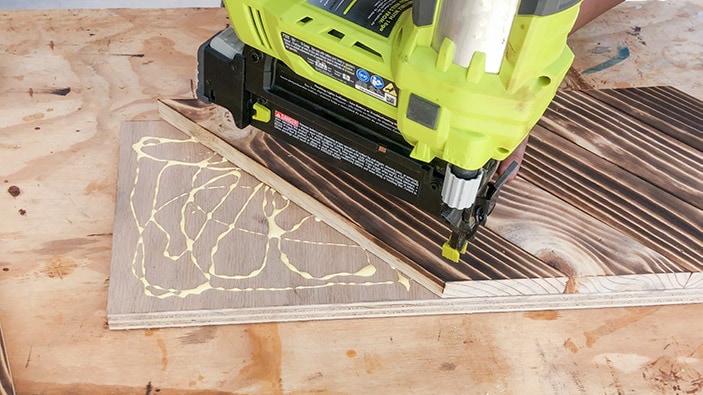
- Cut off extra parts of the planks using a miter saw, table saw or circular saw.
- I used a miter saw for the short side and a table saw for the long side.

Step 5: Attach Trim
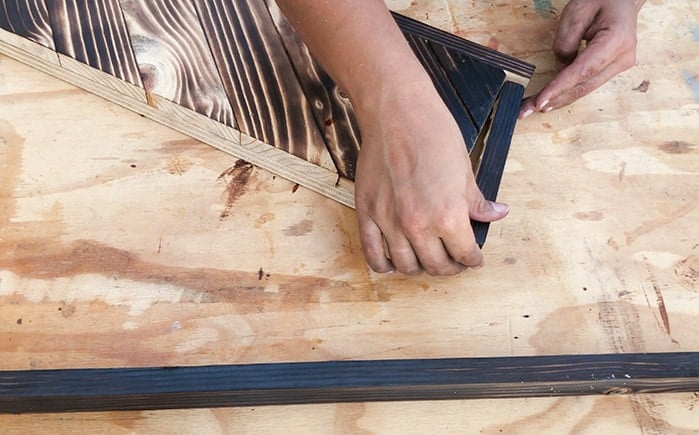
- Torch the trim 1×2 pieces to the desired tone. I went for the darkest color and gave it 6 passes. Remember to sand between passes!
- Attach the trim all around using wood glue and finish nails.
Step 6: Seal the Sign
- Spray a few coats of clear coat sealer on the sign to protect the charred wood.
- I used an outdoor matte clear coat.
Step 7: Attach Numbers
- Using the template and instructions that came with the house numbers, attach them to the sign.
- I felt like the silver didn’t stand out against the background so I spray painted them white.

Step 8: Hang It Up
- Add two keyhole hangers to back in a straight line.
- Hang the sign up on the wall using appropriate screws and anchors for the wall.
That’s it!
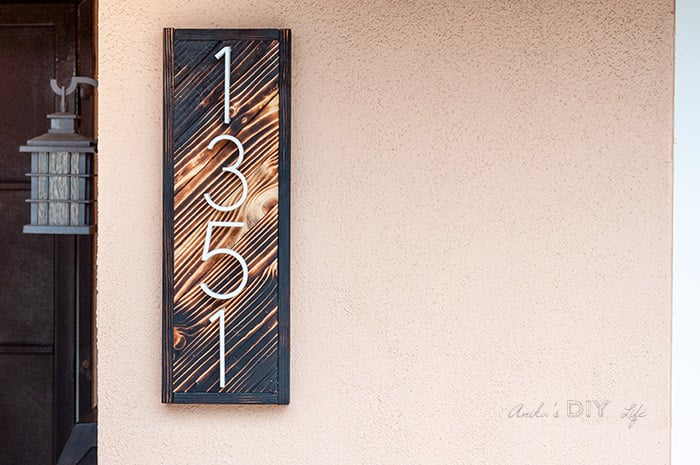
The unique gradient and effect created by the wood-burning give this piece all its character.
Plus now we won’t have visitors wondering if they are the right house. 🙂
If you are curious about Bernzomatic torches and all the things it can do, you are in for a treat! Check out more at Bernzomatic.com
Give wood burning a try!
It really is so much fun and is not intimidating at all!
More Project Ideas Using a Blowtorch –
Anika's goal is to inspire and empower beginners with woodworking, DIY, home improvement, and home decor ideas.
She wants everyone to unlock their creative potential and experience the feeling that comes with making something. Nothing feels better better than seeing something and saying "I can make that!"


I am not usually a fan of this technique but your sign looks awesome!
Real cool , great art
Anika,
Wood burning is always fun and one of my favorite finishes as well… however what you’re showing here isn’t actually Shou Sugi Ban
The japanese method chars the entire piece, then uses a brush on the softwood to create the contrasts. Shou Sugi Ban leaves an amazing texture as well as the beautiful finish instead of the flat ‘surface burn’