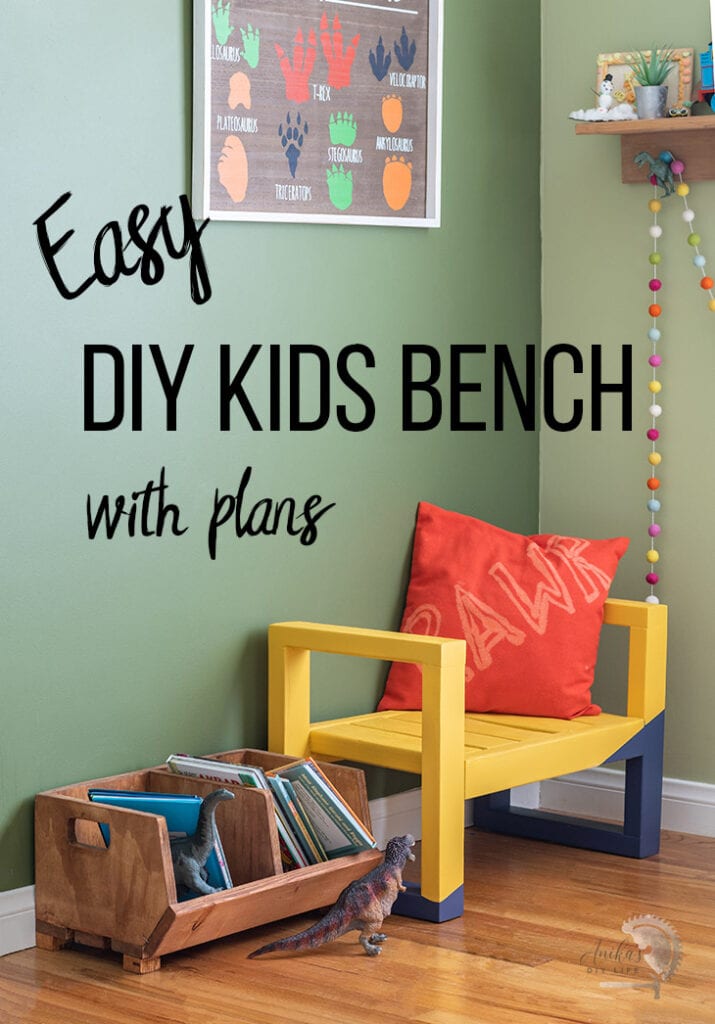
Modern DIY Kids Bench
Build a simple DIY kids bench with a modern design with easy to follow plans and tutorial. It is a quick one day project perfect for beginners!
A few weeks ago, my friend Joanie and I had a did a fun challenge together.
We each built a secret project and then exchanged half way for the other to finish – without telling what it was meant to be.
Take a look at what I made for Joanie and what she turned it into (spoiler: its mind blowing!)
For me, Joanie made this frame –
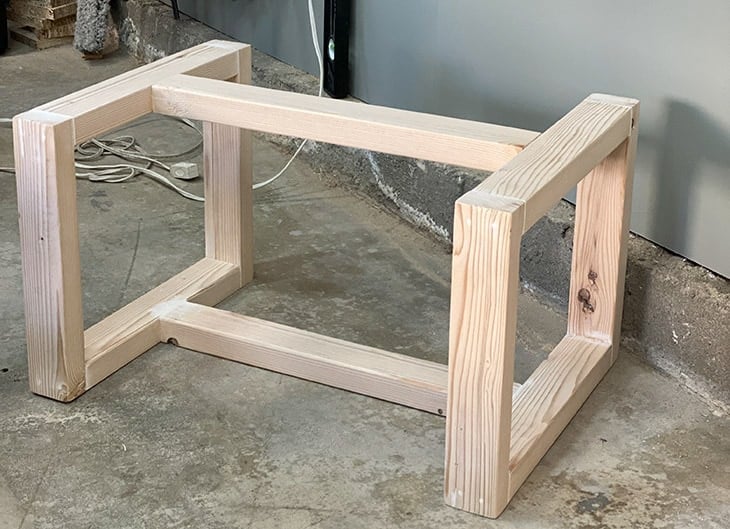
I LOVED the lines on it and all the different ways I could finish it.
DIY Kids bench
After a lot of iterations, I decided to turn it into a bench for my little boy.
Based on a lot of requests for plans for the bench, I decided to draw them up for you with a short tutorial below.
This bench is a quick afternoon project. It’s a few simple cuts and can be made rather quickly.
In fact, this bench can be used indoors or outdoors! You could even involve the kids in building this bench.
Table of contents
How hard is it to build this bench?
This bench is the perfect beginner project!
You need a few cuts, a few pocket holes and screws to complete the build.
If you are just starting out, take a look at the starting guide for beginner woodworkers. You will find lots of resources there.
Do you need a lot of tools?
Nope! You just need 3 basic tools – a saw to cut the boards, a pocket hole jig, and a power drill.
I used a miter saw to cut my boards but you could use a circular saw with a straight edge, although the miter saw is definitely more accurate.
RELATED: How to make accurate cuts with a miter saw.
For pocket holes, you can use any pocket hole jig – the Kreg K4 and Kreg 320 are my favorites. I used the Kreg K4 for this project.
We do use countersunk screws on a few joints, so you need a countersink bit.
What kind of wood do you need?
This bench is built using 1-1/2″ thick construction lumber which is very inexpensive.
You need a total of 4 boards and the price should come to $10-$15 depending on where you live.
Be sure to look for the straight and good quality boards when you buy them.
The sides of these boards are curved and I like them which makes it safe for kids.
Optional – If you are looking for a cleaner look, you could trim off the edges on a table saw. Of course that is totally optional and you would have to modify the plans to account for it.
How do you finish the bench?
This is really up to you! If you want to paint it, I urge you to read my guide for painting unfinished wood to make sure it lasts a long time.
If you would like to stain it, I love using deck stain – it is water-based and waterproof and lasts well!
Material Needed
Printed plan
Supplies
- Lumber (per the plans)
- 2-1/2″ pocket hole screws (use the Blue-Kote pocket hole screws if using the bench outdoors.
- 2-1/2″ wood screws
- Countersink bit
- Wood glue
- Wood Filler
- Stain or Paint as needed
Tools
How to build
Step 1 – Prepare lumber
Make all the cuts per the plans. Make the pocket holes in the rails and the slats as shown in the plans.
Step 2 – Build the sides
The sides are built using countersunk screws. They are simple rectangles. Make sure they are all square and level. It helps to use a speed square as you assemble.
I love using my assembly squares for this.
Step 3 – Attach the rails
Attach rails between sides using pocket hole screws to complete the frame of the bench.
If you are going to be using the bench indoors, regular 2-1/2″ pocket hole screws will work just fine. If you intend to use it outdoors, you will need to use the Blue-Kote pocket hole screws.
Step 4 – Attach the slats
Attach the slats between the rails with 2-1/2″ pocket hole screws.
Step 5 – Finish
Fill all screw holes and sand smooth. You can paint or stain it in any color you like.
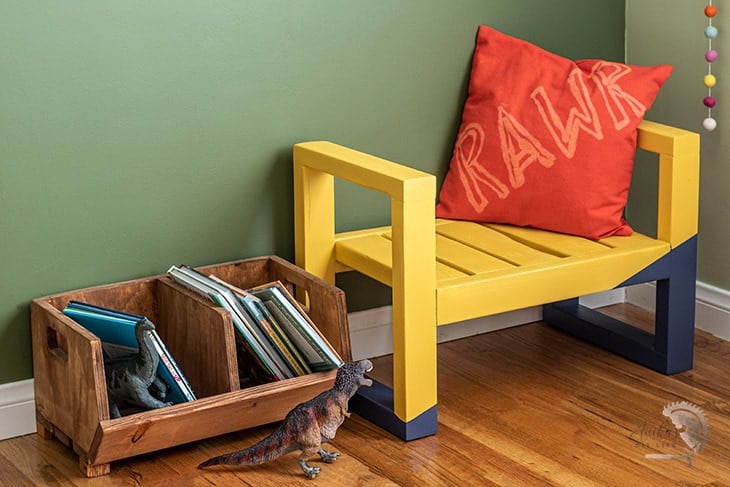
I decided to paint it a nice bright yellow and add a little navy contrast.

It makes a great addition to any little kid’s room or really anywhere in the home.
Be sure to download the plans for the bench here!
You might also like these kid’s room projects
See 28 other adorable kids room ideas.
Anika's goal is to inspire and empower beginners with woodworking, DIY, home improvement, and home decor ideas.
She wants everyone to unlock their creative potential and experience the feeling that comes with making something. Nothing feels better better than seeing something and saying "I can make that!"


