How to Use a Nail Gun for Beginners
Learn everything you need to know about the different types of nail guns, different gauges, how to use a nail gun, and which one is right for you.
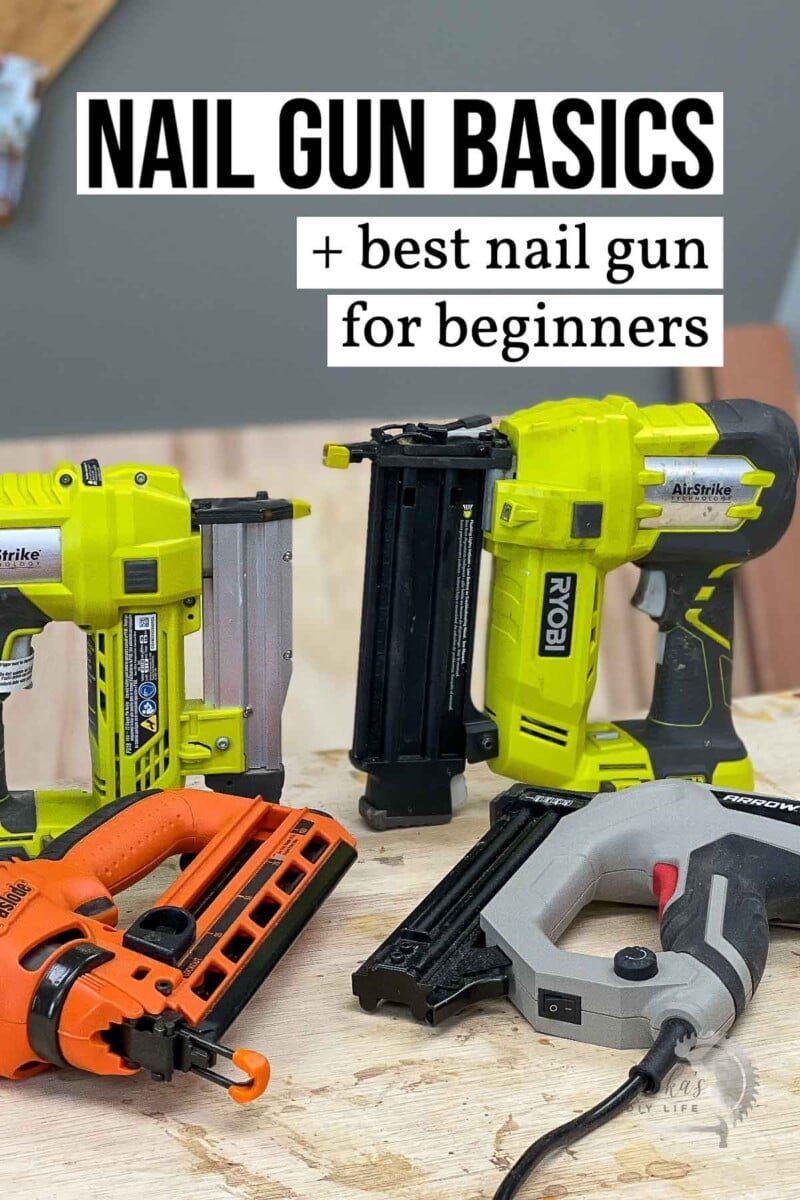
While nail guns might not seem like an essential tool to have, they are worth every penny to have in the workshop.
But I get it. They can be very confusing if you are just starting out.
There are so many features you need to consider – gauge, angled vs not, pneumatic vs not…
Every time I use a nail gun or showcase it in a project, I get lots of questions. Let’s get to all the details and get your questions answered!
What Is a Nail Gun?
A nail gun is a power tool used to drive nails into wood and other materials.
It takes the place of the traditional hammer and nails. The main advantage of nail guns:
- saves fingers
- makes projects quicker
- projects easier to finish.
- Since it is a nail, they can’t be seen, unlike a screw.
What Do You Use a Nail Gun For?
This is probably the most basic question you have.
Nail guns are very handy in woodworking and home DIY projects. It is a quick way to attach wood or trim.
It can be used anywhere the joint doesn’t need to bear a shearing force. If it has a shearing force, you are better off using a screw.
Here is a sample list of projects you can accomplish with it:
- Assemble small wood projects
- Apply trim on furniture
- Install baseboard and crown molding
- Trim work
- Install board and batten
- Installing wood flooring
- installing decks.
And so many more!
I promise you will be reaching for your nail gun very often and it is worth every penny.
Video
Which Nail Gun Do I Need?
The type of nail gun you need depends on the type of project you will be working on most often.
There are a few considerations with a nail gun.
- The gauge of the nail gun
- Pneumatic vs. Cordless
- Angled vs. straight
Don’t let them intimidate you. We will discuss these in detail below.
What Is Gauge?
Gauge size refers to the number of nails per inch when lined up next to each other. Hence, the gauge is an indication of the thickness of the nails, ultimately defining the strength of the nail.
The higher the gauge, the more nails per inch, meaning thinner nails.
The lower the gauge, the lesser the number of nails per inch, meaning thicker nails.
The most common gauge sizes are 16-gauge, 18-gauge, and 23-gauge.
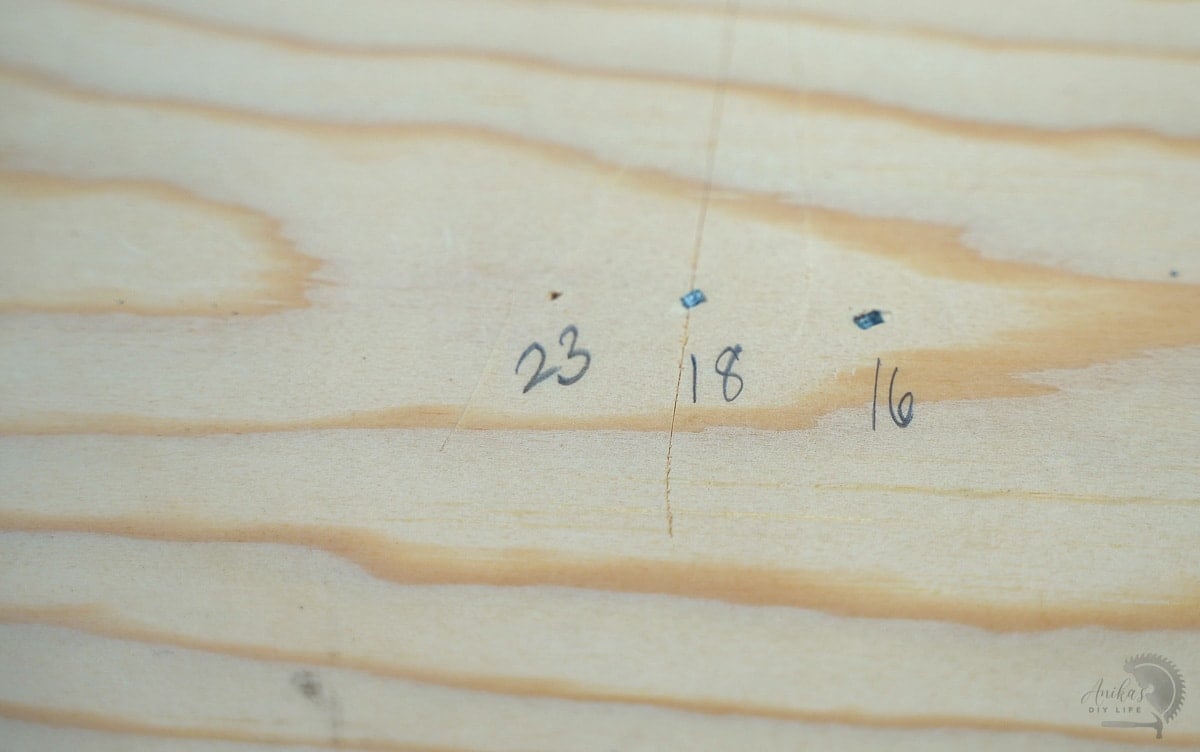
Here is a comparison of the nail heads Top is 16-gauge, followed by 18-gauge and bottom is 23-gauge.

And here is a comparison of the thicknesses. Top is 16-gauge, followed by 18-gauge and bottom is 23-gauge.

And here they re when embedded in a board. You can see that the 16-gauge is the largest. The 18-gauge is in the middle and the 23- gauge almost disappears into. the board.
Depending on the gauge of nails a nail gun accepts, we have three different types of nail guns:
- Finish nailer or trim nailer – generally accepts 15 or 16-gauge nails
- Brad nailer – accepts 18-gauge nails
- Pin nailer – accepts 23-gauge nails.
Let’s get into the details of these.
Types of Nail Guns
Finish Nailer
A finish nailer or trim nailer uses 15 or 16-gauge nails.
These nails have a pretty large head and is best to use when you need a good strong hold.
These are pretty strong nails and can be used without glue.
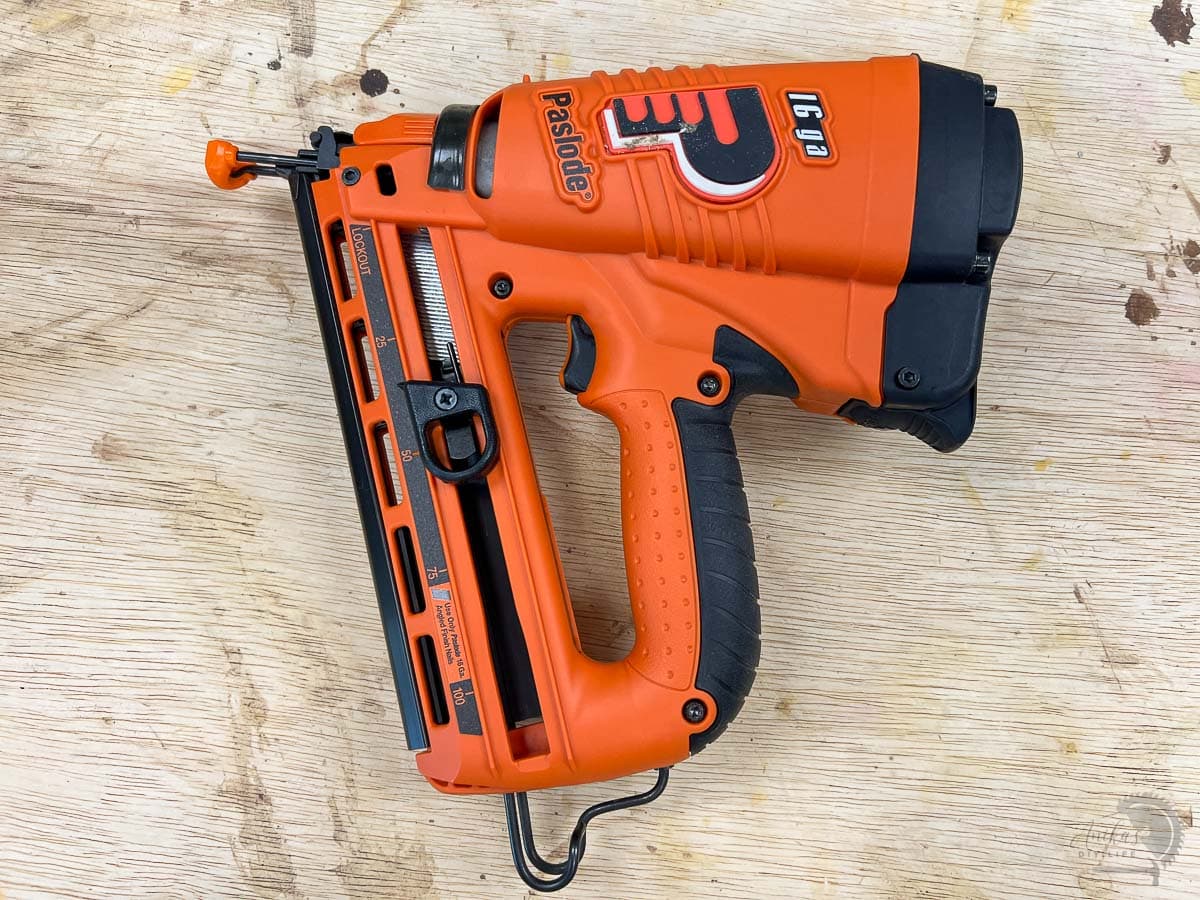
Finish nailers can be used to:
- install crown molding
- baseboards
- cabinets
- and even hardwood flooring.
- can be used in furniture building projects.
Many finish nailers are angled nailers and we will talk about that in detail below.
Brad Nailer
A brad nailer uses 18 gauge nails. The nails have heads but are much smaller and can be easily hidden under the surface of the wood.
Brad nail guns are pretty general-purpose nailers and is great for delicate projects where you may run the risk of splitting the wood.

You need to use wood glue with a brad nailer except in home improvement applications like attaching baseboards or decorative trim.
Brad nailers are great to use for
- baseboards
- trim, paneling
- crown molding
- holding together small woodworking projects while the glue dries.
- Attach drawer backs
- attach trim to furniture
These are super easy to cover up with wood putty and paint or stain.
Pin Nailer
Pin nailers use 23-gauge headless pins that will disappear into your project.
They are a great helping hand to hold projects together while glue dries where you may not be able to use a clamp.
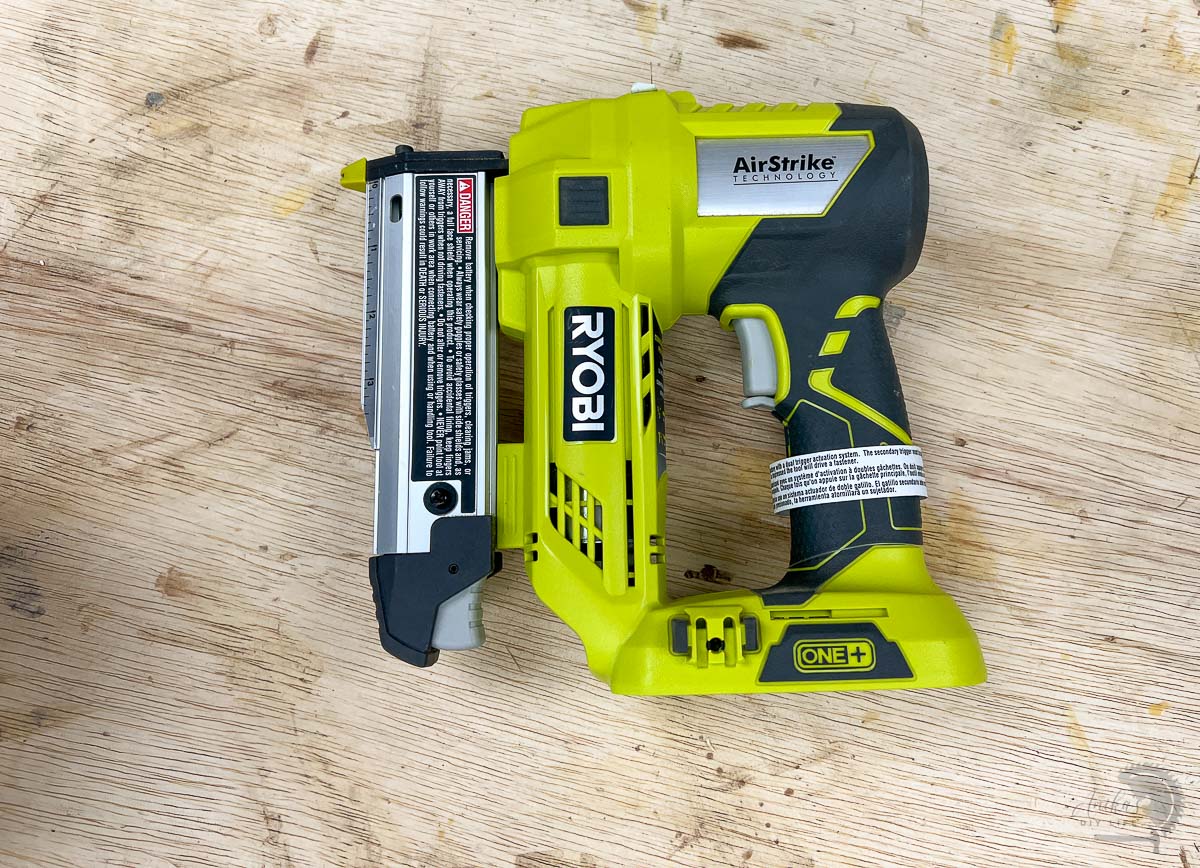
You can also use a pin nailer for finishing details on woodworking projects.
Difference Between a Pneumatic Nail Gun and a Cordless Nail Gun
The main difference between pneumatic and cordless nail guns is in the mechanism of how the nails are shot out.
A pneumatic nail gun is powered by compressed air.
A cordless nail gun is battery-powered.
There are advantages and disadvantages to both.
Pneumatic Nail Guns:
- Are lighter than cordless versions.
- Are cheaper to buy if you already have an air compressor.
- Runs continuously without needing to “recharge”.
- Has an air hose running to the compressor so you have to watch out for trip hazards.
- This also means moving around with the large compressor can be a bit tedious.
- Air compressors can be very loud in general and when the nail is shot, it makes a loud sound.
- Air compressors take up storage space.
If you don’t already have an air compressor, the cost can be high to buy one along with the nail gun. However, the air compressor can be used with other tools.
Cordless Nail Guns:
- They are heavier than pneumatic nail guns because the battery is attached.
- They are more expensive but if you already have the batteries from other tools, it’s much cheaper than buying an air compressor.
- Much quieter than pneumatic versions and only hear it when it shoots the nail.
- When using continuously, you may have to switch out or recharge batteries.
- Since they are cordless, you can easily move around with them.
Angled Finish Nailer vs Straight
Angled Finish Nailer
An angled finish nail gun has an angled magazine – the compartment that holds the nails.
The angled nail gun accepts an angled strip of nails.
Even though the magazine is angled, the nails shoot out straight.
The advantage of angled nailers is that it is easier to get into tight corners.
Straight Finish Nailer
The straight finish nailer has a magazine that is straight and takes straight strips of nails.

Parts of a Nail Gun
Here is a quick run-through of the parts of the nail gun.
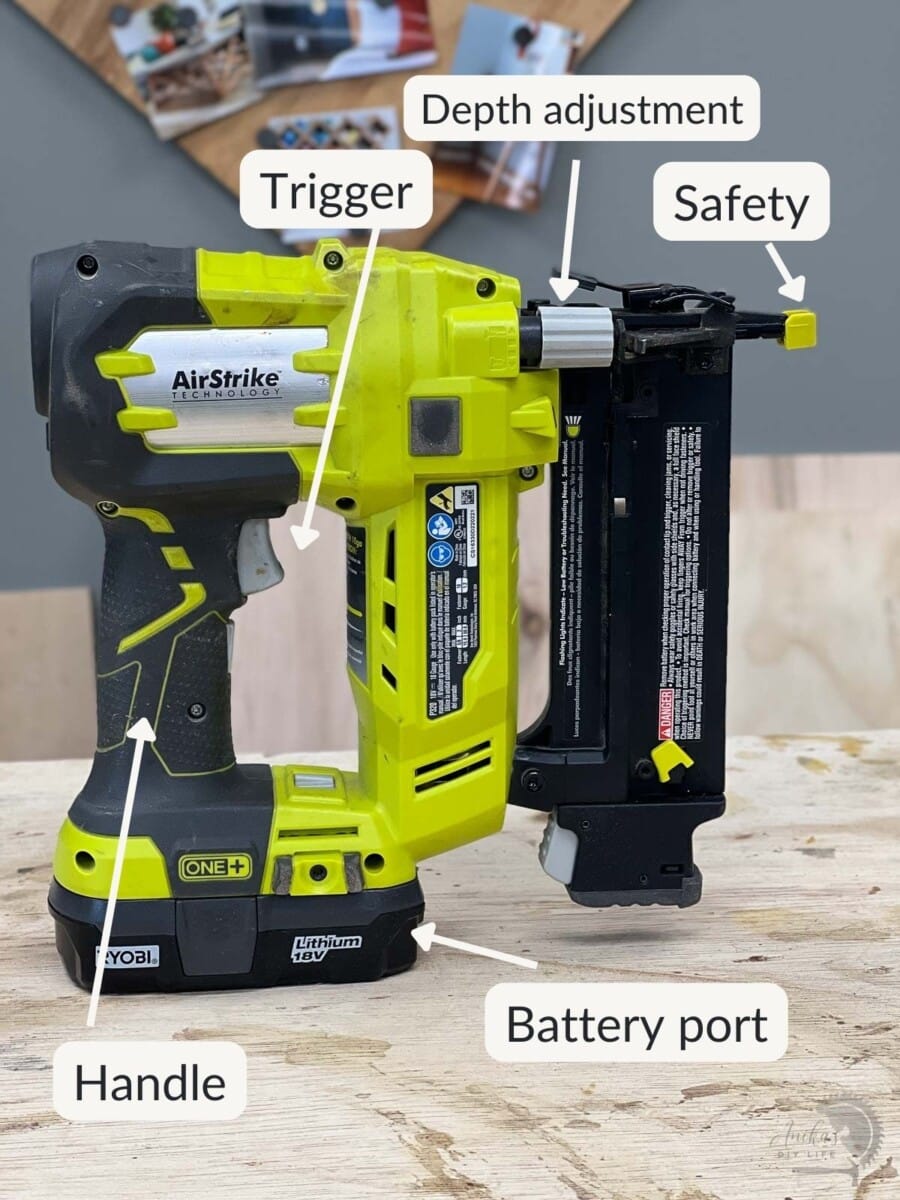
- Handle: Only hold your nail gun by the handle.
- Trigger: Used to discharge nails from the nail gun.
- Compressed air connection (in pneumatic nail guns): Used for attaching the hose from an air compressor.
- Battery port (in cordless nail guns): to attach battery.
- Magazine latch: Keeps the nails in the magazine.
- Magazine: Holds the nails.
- Safety: Is on the nose of the nail gun and must be depressed for a nail to discharge.
Safety
Like any other power tool, you always need to take precautions when operating a nail gun.
On all models, except for a pin nailer, the nose of a nail gun must be depressed against the surface for it to fire a nail. This makes it nearly impossible for there to be an unintentional discharge of a nail from the gun.
You should always:
- Read the owner’s manual prior to operating.
- Make sure all cords and hoses are in good condition.
- Wear PPE – especially eye protection.
- Disconnect from the power source when not in use or to clear jams.
- Make sure it is placed firmly against your project before pulling the trigger.
- Keep hands and fingers away from the nose of the nail gun – especially when nailing into projects because nails can turn out (like shown below) and pierce your fingers.

How to Use a Nail Gun
Before you start using it on your project, I always recommend doing a test on scraps to make sure you get the settings right.
- Adjust the depth of the nail as needed. This is done by adjusting the pressure on the compressor or the dial on a cordless nailer.
- Make sure you have the right nails for your nail gun and the project you are working on.
Typically, you want the nail to be double the thickness of the board you are fastening. - Connect to the power source. If you are using a pneumatic nailer attach the air compressor hose and if you are using a cordless nailer install the battery.
- Hold the gun perpendicular to the surface to avoid shooting at an angle.
- Press the tip of the nail gun firmly to the surface of your project and pull the trigger.

So Which Nail Gun Is Best for Beginners?
In summary, if you need maximum holding power, you need a 16-gauge nail gun.
For delicate projects, you want a 23-gauge pin nailer.
The 18-gauge nailer is right in the middle and can mostly work for both situations. You do want to use glue with it though.
If you are looking to buy a nail gun then I highly recommend starting with the 18-gauge brad nailer. This is the one I use.
***This post contains referral or affiliate links. It is a way for this site to earn advertising fees by advertising or linking to certain products and/or services. Please read my full disclosure here ***
Nail Guns Shown
- Ryobi 18-gauge brad nailer – Great starter nailer gun!
- Paslode 16-gauge angled finish nailer – Amazingly powerful!
- Ryobi 23-gauge pin nailer – simple pin nailer
- Arrow 18-gauge electric nailer – budget-friendly option.
You might also like:
- How to Use a Drill: A Beginner’s Guide
- How to Use a Speed Square for Beginners
- How To Read a Tape Measure Accurately + Tips and Tricks
Anika's goal is to inspire and empower beginners with woodworking, DIY, home improvement, and home decor ideas.
She wants everyone to unlock their creative potential and experience the feeling that comes with making something. Nothing feels better better than seeing something and saying "I can make that!"




Thanks for a great article. I have the ryobi brad nailer, I chose it from watching your videos as well as it was recommended in some groups. I love it so far, it’s addictive and I look forward to using it for some fun projects in the future. I’ve only used it for skirtings and trim in our old house. Thanks for the tip to use wood glue for projects.
You are so good and knowledgeable. I think you are the greatest.
Love your posts. Gary in Perry Florida.
A good demo on the Nail Guns thanks Anika