How To Make Pocket Holes In Miter Joints
Learn how to make pocket holes in angled boards using a Kreg Jig. Get all the details using pocket holes in miter and bevel joints.

A few weeks ago, I shared how to use a Kreg Jig to make joints to build furniture using butt joints and edge joints.
Although these simple joints can help you make a vast variety of furniture, one of the ways to add character and interest to furniture is to add angles – miters and bevels.
Can you make miter joints using pocket holes?
Yes, you absolutely can!
However, it can feel a tad tricky because you might not be sure about how to align the board on the jig or what setting to use.
Basic Kreg jig set up
If you are not familiar with the Kreg Jig to make pocket holes, be sure to check out my full guide on how to use Kreg Jig for beginners.

Here is a quick recap – set the jig height and the drill bit collar based on material thickness, clamp the material, make the pocket hole. Easy peasy!
I show you step by step how to set up the Kreg Jig, what settings to use for which material, and how to make pocket holes.
RELATED: 10 Pocket hole tips and tricks to build like a pro
Pocket holes and angles
Let’s talk about how to make pocket hole joints in angled cuts.
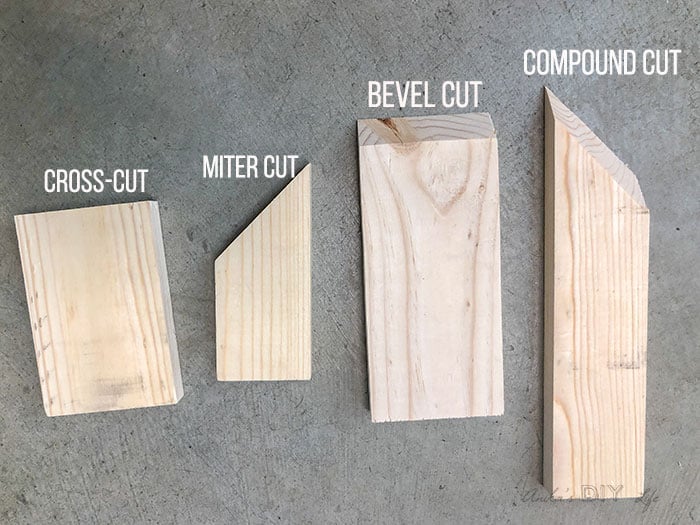
Let’s break angled cuts down into 2 types of cuts –
- Mitered cuts– although 45 degrees is the most common, this basically means any angle that is not 90 degrees.
- Compound cuts – This can be just beveled or a combined bevel and miter which is called a compound cut.

Want to know more about these cuts and how they are made – take a look at my video on how to use a miter saw.
Pocket holes in mitered joints –
This is probably the most common type of angled joint and used in many places – from making simple picture frames to angled legs in furniture.
This is the simplest situation and really you treat the edge you are joining just as you would in the case of a butt joint.
Here are the basic steps –
- Set the jig height and the drill bit collar to the thickness of the wood.
- Place the board on the jig, with the mitered end against the base.
- Drill pocket hole as usual.

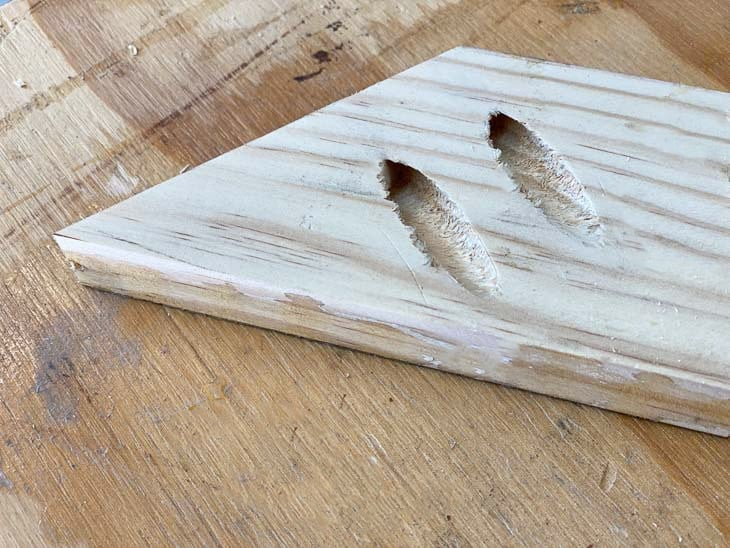
IMPORTANT – Before drilling the hole, be sure to check on the back of the jig to make sure that the hole in the jig isn’t exposed.

If it is, the pocket hole will create a hole on the side of the board – something we don’t want.

In the example above, drilling through the exposed hole was not a good idea. But drilling through the other two holes would have been just fine.
Pocket holes drilled the right way on mitered boards look like this –

Pocket holes in beveled or compound miter cuts –
These are the tricky ones!
On a K4 or K5, it is impossible to clamp it into the jig to drill holes because of all the angles.
In this case, you need to either use a Kreg 320 or take out the top drill guide from your K4 or K5.
Personally, I am a huge fan of the Kreg 320. It is really easy to clamp and use with materials of any width.
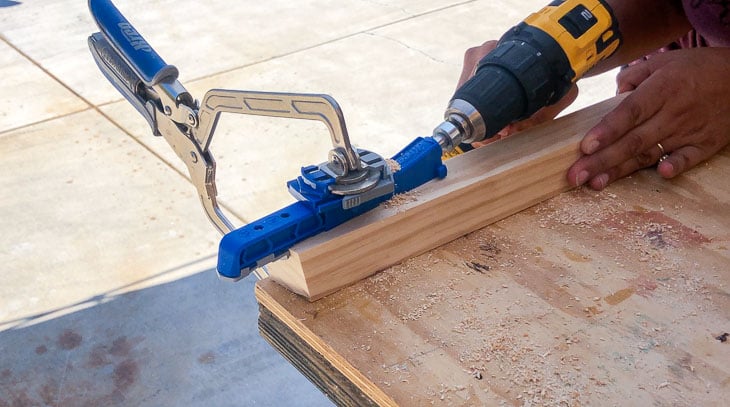
In the below picture, I am making pocket holes in a compound miter cut using the Kreg 320. This piece has a 10-degree bevel and 30-degree miter.

Here are the key steps –
- Set up jig depth and bit depth collar according to the material thickness.
- Align the drill guide to the edge where you need the pocket hole.
- Clamp securely to make sure there is no movement while you drill the hole.
- Drill the pocket hole.
Pocket holes inside miter corners
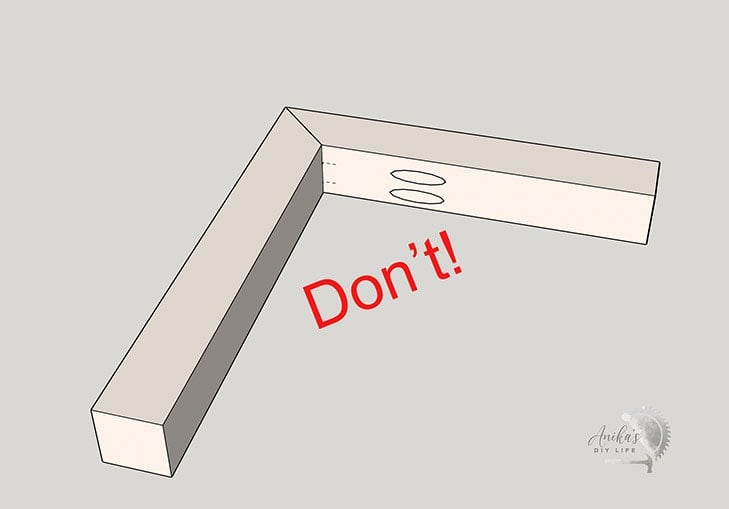
This is one application where pocket holes do not work.
You cannot join mitered ends with pocket holes as shown below.

For pocket holes to work, you need to have enough wood left on the piece you are joining to. If not the joint will not be strong.
How to join mitered cuts with pocket holes
Once the pocket holes have been made in mitered/beveled/compound miter cuts, the technique for joining is pretty similar to when making butt joints pr edge joint.

Here are a few basic tips to make sure you get the perfect joint –
- Use clamps when possible to keep the workpieces from moving. I have a list of my favorite Kreg accessories to help you pick the right one.
- Use the recommended pocket hole screw size based on the thickness of the material you are using. I have a full guide to that in this article about everything you need to know about using a Kreg Jig.
- Be sure to use wood glue. It will not just help make strong joints (because just pocket hole joints are pretty string anyway), it will also help with the movement of wood as it goes through temperature and humidity changes.
With the above in mind, you should be able to make a pocket hole joint in any angled cut pretty easily.
If you have any questions, be sure to send me an email!
For ideas on various ways you can join the mitered boards, Saws on Skates has a great article about planning the pocket holes to get the best joints
Kreg Jig Projects using Angled boards –
See 37 Kreg Jig project ideas for beginners.
Anika's goal is to inspire and empower beginners with woodworking, DIY, home improvement, and home decor ideas.
She wants everyone to unlock their creative potential and experience the feeling that comes with making something. Nothing feels better better than seeing something and saying "I can make that!"


