DIY Cement Feature Wall
This DIY cement feature wall is going to blow you away! Learn how to make the coolest concrete accent wall with the complete source list, tutorial, and video!

Are you ready for the coolest feature wall I have created yet (if I may say so myself.)
Sometimes you literally wake up with the craziest idea, have no clue if it will work, but you give it a try anyway. This is one of those projects.
I have wanted to create an accent wall in my entryway for quite some time now. I have considered wallpaper, board and batten, and murals. They were all ok but didn’t carry the punch I was looking for.

I wanted gray and gold to be a part of the accent wall to tie in with the kitchen on the other side of the entryway. As I was walking through The Home Depot, I saw bags of cement, and the next day, the idea for this accent wall was born!
***This post is sponsored by Scotch Painter’s Tape. All opinions are my own. Thank you for supporting the brands that make it possible to bring you new projects***
***This post contains referral or affiliate links. It is a way for this site to earn advertising fees by advertising or linking to certain products and/or services. Please read my full disclosure here ***
Material Needed –
- Scotch Painter’s Tape. I used –
- 3M Hand-Masker M3000 Dispenser
- 3M Hand-Masker Advanced Masking Film.
- Gray cement
- White concrete pigment
- Gold paint
- Trowel
- Putty knife
- container for mixing
- Respirator
How to Make a DIY Concrete Accent Wall
Step 1 – Prep
Every successful project starts with the right preparation.
- Remove any outlet covers and tape off the outlets.
- Tape any adjoining walls and door frames with ScotchBlue Original Painter’s Tape.
- Tape of the baseboards and protect the floor with with ScotchBlue Original Painter’s Tape and 3M Hand-Masker Advanced Masking Film. I love using the 3M Hand-Masker M3000 Dispenser for this. It applies the tape to the masking film as it rolls out and makes it super quick and easy to apply.

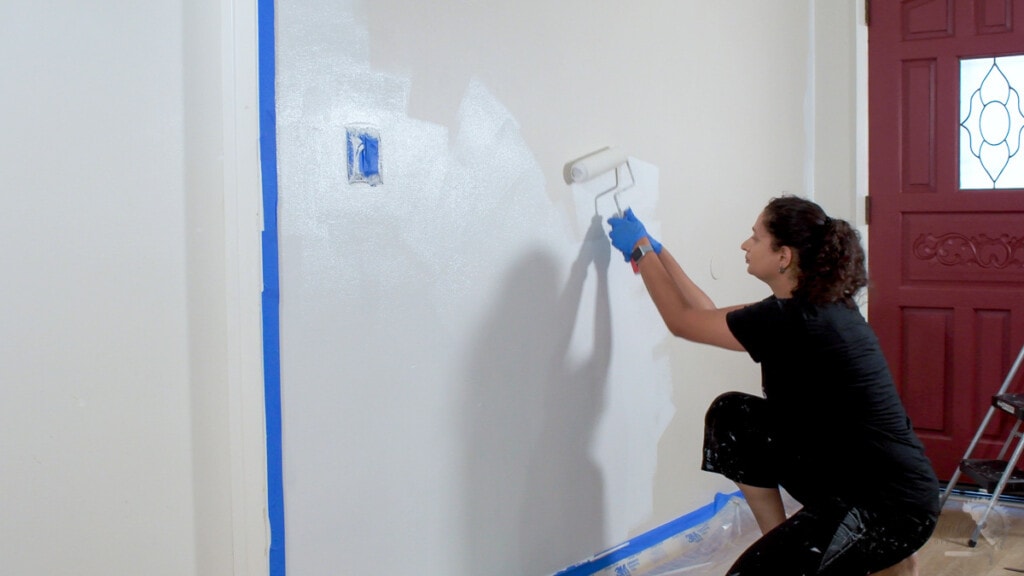
My wall was originally beige in color, so I decided to paint it white before proceeding with the cement accent wall.

Step 2 – Draw the Design
Figuring out the perfect design was probably the hardest part of this project. I drew and re-drew designs on paper before coming to the final plan. (Spoiler- I modified it slightly in the final version when I drew it on the wall.)
I used a laser level to draw it out on the wall, but a chalk line or just plain old measuring and marking works.

RELATED: Colorful Sunburst Wall
Step 3 – Tape the Design
- Tape alternate stripes to get them ready for the first “color”.
Since I had freshly painted walls, I used the Scotch Delicate Surface Painter’s Tape, which is meant specifically for accent walls and has a gentle adhesive.

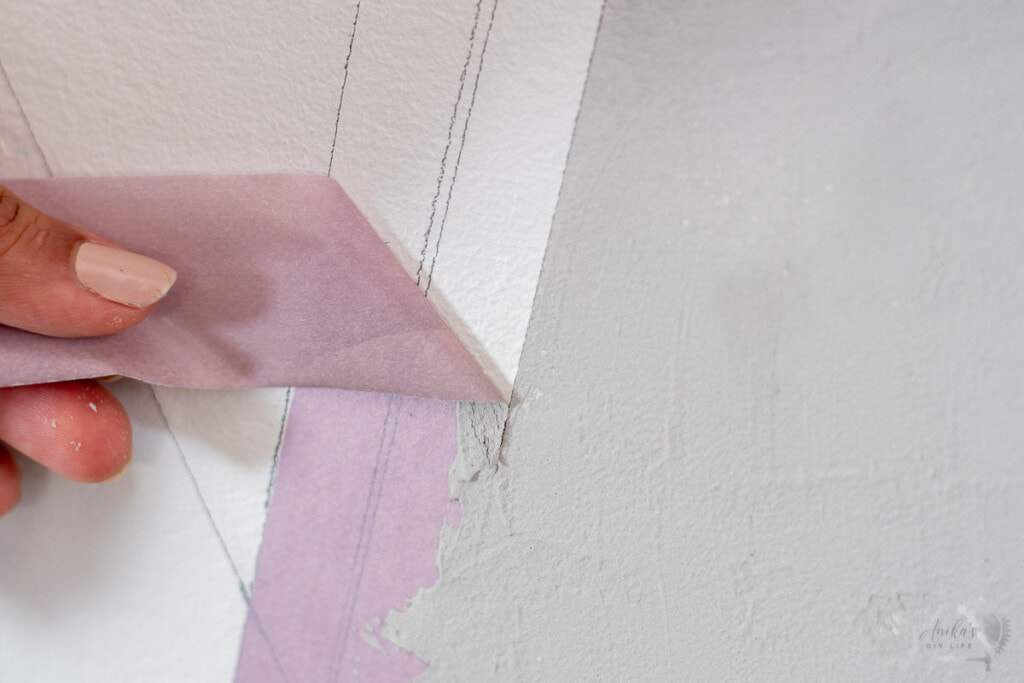
The best way to apply the tape is to slowly guide it into place, come back, smooth it out, and burnish the edges with a sharp edge to seal the tape to the wall. Be careful not to pull at the tape as you apply it as this will distort the edge, and you won’t get a straight sharp line.
Step 4 – Mix Cement
Important – Be sure to wear a respirator during this step as the cement is pretty fine and can blow everywhere.
- Start with water in the mixing can and add cement to it.
- Mix with a paint stick until uniformly mixed.
I found that a thick pancake batter-type consistency works best. It should be thin enough to spread and evenly coat the wall and not too thick that it starts drying up way too fast.

I did have to make a bit of trial and error to get to the consistency I was looking for.
Another important thing to remember is that the final color depends on the amount of water and consistency. Therefore, you want enough cement mix to cover a given stripe. You CANNOT use two different batches on the same stripe. (Ask me how I know or watch the video to see)
It is a delicate balance – having enough cement mix for your stripe while also not mixing too much as to waste it. It took me a couple of stripes to get the hang of it.
Step 5 – Apply to the Wall
- Smooth out the cement mix onto the wall
I found that the best way to apply was to use a putty knife to transfer large globs of the cement mix onto the wall and then smooth it out with the straight edge of the trowel.

You want to make sure that the cement is thin and even but at the same time not too thin that you can see the wall through it.
It is impossible to make it perfectly even without any lines or variations, which is totally fine and actually desired to get the look of cement.

Step 6 – Tape Next Set of Stripes
Once all the concrete is on for the first set of stripes and has started to dry a little bit, remove the tape carefully at a 45- degree angle.

After the concrete has completely dried, it is time to tape for the next concrete stripes.
I used the Scotch Rough Surface Painter’s Tape, which has a strong adhesive and is specifically made for rough surfaces like concrete, stucco, brick, and rough wood.
I guided it into place aligned with the previous cement edge and then pressed it down and sealed it by burnishing the edge.

Wherever I was applying tape to the wall, I continued to use the Scotch Delicate Surface Painter’s Tape.
Step 7 – Mix and Apply the Lighter Cement
For the next steps, I mixed the cement to be lighter with the help of white concrete pigment.
- Start by mixing the white pigment in the water
- Add the cement to it and mix until desired consistency
I mixed different amounts of white pigment for different stripes to get variations in the colors.
- Apply the lighter cement to the wall like in Step 5.

Step 8 – Gold Stripes
Once the concrete stripes have dried, I taped off the areas which were going to be gold using Scotch Rough Surface Painter’s Tape on the cement edges and the Scotch Delicate Surface Painter’s Tape on the wall.
I started painting the gold but found that the eggshell finish of the wall meant very light coverage for the gold paint, so I applied a coat of primer to the stripes before applying the gold paint.

It still took about 3 coats of gold paint to get the rich deep gold look but can you see the wall coming together now?
That is it!
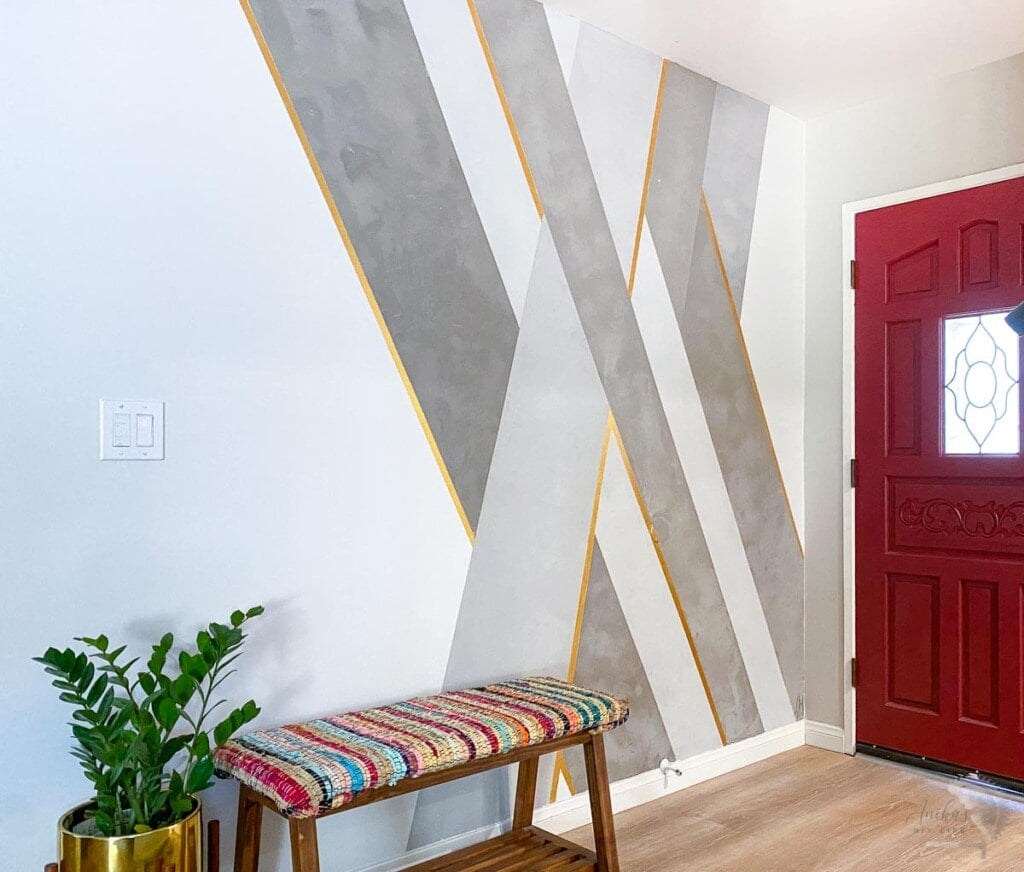
Peel back all the tape and enjoy the gorgeous DIY cement accent wall!

I was completely blown away by how gorgeous the gold looked against the gray concrete.

The entire wall turned out to be even better than I had imagined in my head!

What do you think? Are you going to make one of these in your home? I think it would look absolutely amazing in a bedroom or living room.
More DIY Accent Wall Ideas –
- DIY Board and Batten Wall
- DIY colorful shared girl-boy room accent wall
- DIY paint and wood workshop accent wall
Anika's goal is to inspire and empower beginners with woodworking, DIY, home improvement, and home decor ideas.
She wants everyone to unlock their creative potential and experience the feeling that comes with making something. Nothing feels better better than seeing something and saying "I can make that!"


Was your drywall okay to use as a backdrop or were you concerned about using cement board/waterproofing membrane?
Yes, there was no issue using it on drywall. The layer is very thin and it dried up pretty quickly – within about 2 hours.