Painting Stripes On A Wall – My Garage Accent Wall Reveal
Learn how to create a gorgeous DIY accent wall with paint and wood by painting stripes on the wall. Plus see what my garage accent wall looks like now!

You have no idea how excited I am for this project!
Ever since we moved into this house 2 years ago, I have wanted to create a nice organized backdrop in my garage for pictures and YouTube videos.
Not just that, in general, the garage – although had a lot of cabinets and “storage”, it was really poorly put together and inefficient. Some cabinets were so greasy, I didn’t want to touch them. Some were falling apart. Some had shelves with really narrow spacing making them essentially useless.
This is the main wall. The wall you see in most of my videos and pictures.
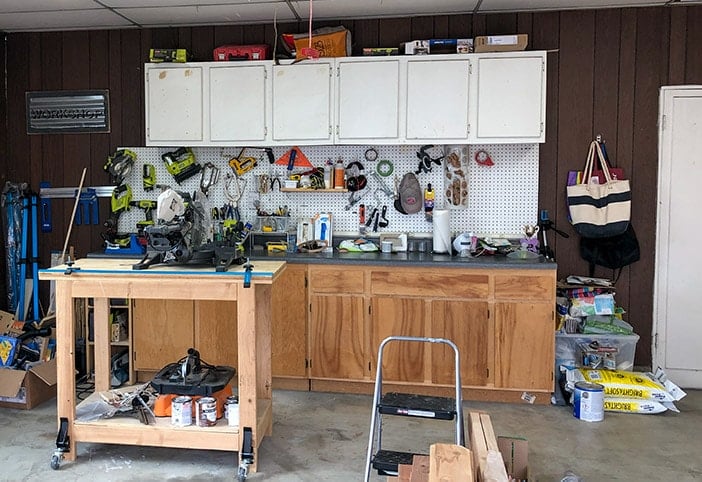
The upper cabinets – they are empty because they are falling off the wall. The cabinets are nailed into the old dark paneling which is already pretty damaged in many places.
We removed all the cabinets and pegboards, added new thin panels and primed and painted them for a nice clean slate to start with! I will have another post with all the details about it on the blog soon.
DIY Painted Accent Wall
Now let’s talk about this accent wall.
I wanted a simple wall but wanted to add some color.
I opted for a simple pattern. It reflects some of my favorite colors and the wood brings in much-needed warmth.
***This post is sponsored by FrogTape. All opinions are my own. Thank you for supporting the brands that make it possible to bring you great projects.***
Materials needed for DIY striped accent wall
- Multi-Surface FrogTape (green)
- FrogTape Delicate Surface Painting Tape (yellow)
- Paint colors of your choice. I have all the colors I used listed at the bottom of the post.
- 4″ wide 1/4″ thick poplar board
- 1×2 board – 4′ to 6′ long.
- Stain of your choice
- Paintbrush. This is my favorite one.
- Paint roller
- Paint tray
- Staple gun
RELATED: How to paint a colorful geometric accent wall for kids
How to paint the stripes on the accent wall
As always, I have a full detailed video showing you exactly how to I painted the wall.
Click here to subscribe to my YouTube Channel for more great videos!
A full written step by step tutorial along with a lot of tips follows.
Tutorial for creating the accent wall
Please note – this tutorial is great for painting the stripes on a smooth wall. If you have textured walls, always apply a layer of the base color over the tape before painting the accent color.
Time needed: 1 day.
Learn how to create a gorgeous DIY accent wall with paint and wood by painting stripes on the wall. Plus see what my garage accent wall looks like now!
- Pick colors
Pick your favorite colors for the wall.
The main color I picked for the wall was a dark color and the stripes were going to be lighter hence, I painted the stripes before the rest of the wall.
Note: If you pick colors the other way round, you can definitely paint the base wall color first. - Mark the stripes
To make things easier, you can choose thicknesses for the stripes based on boards you have available.
I used a 4″ wide poplar board and a 1 x 2 board to create 1-1/2″ and 3/4″ wide stripes.
Cut one end of the poplar board at 20 degrees and use that to start the pattern.
Use the 1 x 2 board to finishing drawing out the rest of the pattern.
- Tape and paint first stripe
For the first few lines, you can use the green FrogTape to tape off the lines.
Paint a couple of coats, then with the paint still wet, remove the tape slowly away from the wall.
TIP: Be sure to burnish the edge of the tape with a fingernail or a hard edge like a credit card to seal it.
- Tape and paint the next set of lines
Once the painted strip is dry to touch (in my case, about 30 minutes later), you can tape with yellow delicate surface FrogTape and paint the next set of stripes.
NOTE: It is very important that the tape follows the previously painted edge. To be ultra sure, I like to keep a very small offset between the tape and paint line. That way, you don’t get white spaces between the two colors. Alternatively, you could paint the teal over the tape to make sure there are no white spots. - Paint the main wall color
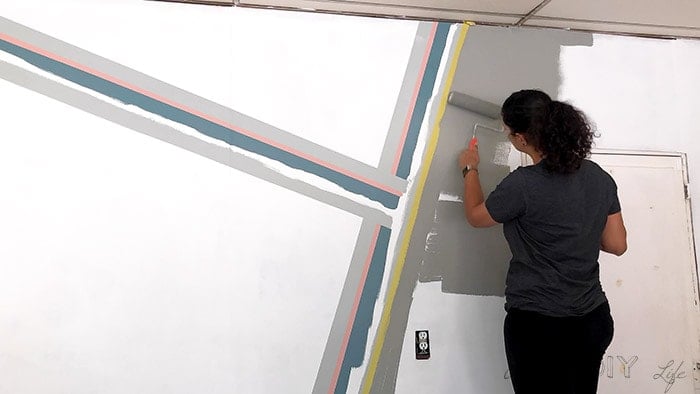
Finally, tape the stripes with yellow FrogTape since its fresh paint and paint the main wall color.
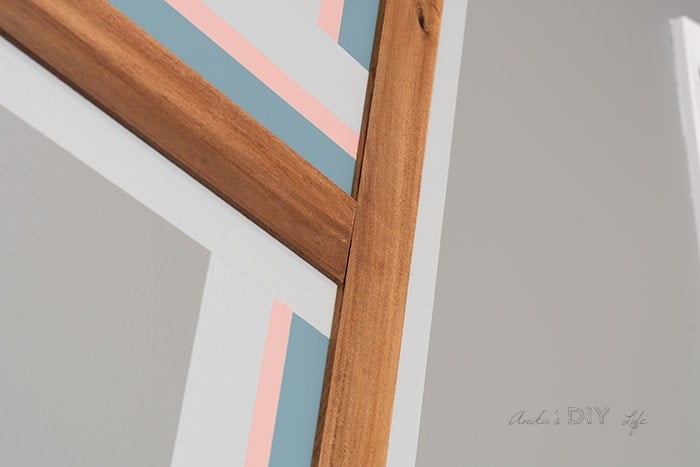
- Add wood board
Stain the wood board in color of your choice. I used gel stain in nutmeg.
Attach the wood board to the wall using a staple gun.


That is it!
Here is my pretty striped accent wall!
I already added some awesome tool storage on one end of the wall.
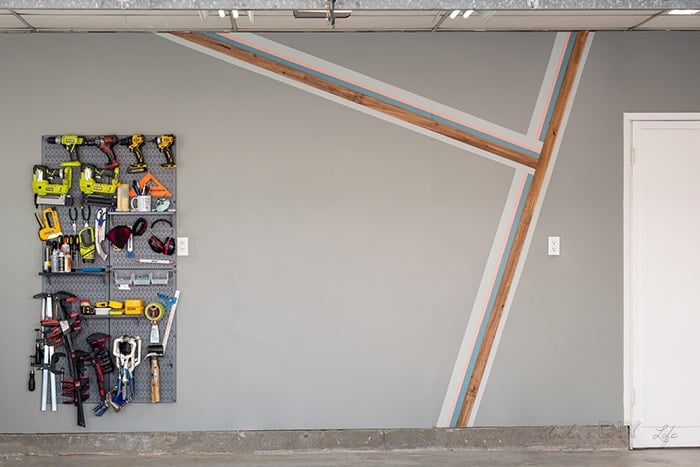
There are many projects left for this wall… like adding shelving and some decor.
But I am VERY excited about this new beginning!
And now I can’t wait to get building in my “new” workshop!

And a workbench is on the list too!
Be sure to join my mailing list because I have many more projects and posts coming soon as I build stuff to make this workshop more efficient and fun!
I used Behr Marquee for all the paint. The paint colors used are –
- Battleship Gray
- Dragonfly
- Bubble Shell
- Weathered Moss
Anika's goal is to inspire and empower beginners with woodworking, DIY, home improvement, and home decor ideas.
She wants everyone to unlock their creative potential and experience the feeling that comes with making something. Nothing feels better better than seeing something and saying "I can make that!"


I’m encouraged by you ideas. your appreciated
What a positively perfect start. Can’t imagine what it would be like to have a dedicated space for all my diy stuff.
lovely! and the wall is nice too! That’s a good photo of you modeling the workbench.