Easy DIY Kids Desk With Storage: Weekend Build Idea
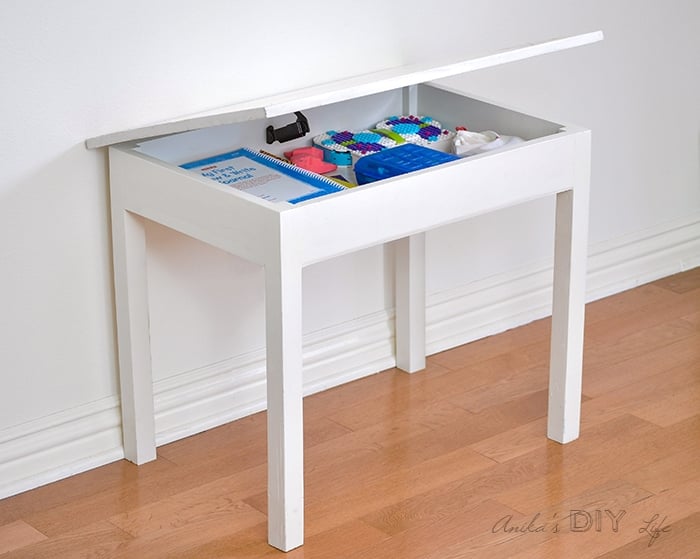
Learn how to build a DIY Kids Desk with storage. The hidden compartment under the top keeps all the clutter on the children’s desk hidden!

When I first designed this DIY kids desk, it was for my daughter’s fifth birthday. I remember watching her pull up a chair and immediately start stashing her “treasures” inside the storage compartment.
Years later, this is still one of the most popular builds on the site because it solves the #1 problem every parent has – clutter.
This kids activity table or a student desk is all about independence. It gives your little one a dedicated space for “big kid” homework while keeping the messy art supplies hidden away.
Just lift the tabletop, and they can get what they need. When they are done, everything is stored away almost as if nothing happened 🙂
Why This Build is Different (And Why I Love It)
Most store-bought kids’ tables are either flimsy or lack storage. I wanted something that felt like a “real” piece of furniture but was also practical.
- The lift-top lid is deep enough for small bins, paper, or those half-finished Lego sets you don’t want to step on.
- If you are intimidated by furniture building, don’t be. If you can use a saw, a drill and a pocket hole jig, you can build this. This was one of the first projects I built!
- It’s sized perfectly for children to access their own materials, which helps build independence.

I also built a few different designs over time for friends and family.
Be sure to check out all the pictures at the bottom to get all your inspiration on the designs and modifications!
Related: DIY Lego Table with Storage for Small Spaces
***This post contains referral or affiliate links. It is a way for this site to earn advertising fees by advertising or linking to certain products and/or services. Please read my full disclosure here ***
Materials Needed
- Lumber per the plans
- Standard hinges
- Toybox lid support – you may need 1 or 2 depending on the weight and size of the top. Alternate hinges
- 1 1/4″ pocket hole screws
- Wood filler
- 1 1/4″Brad nails
Tools Needed
- Brad Nailer . You can also use a hammer and nails. This is what I did before I owned a brad nailer.
- Wood glue
- Jigsaw
- Miter Saw
- Pocket hole jig. I used this one (Check out my complete Kreg Jig resource)
- Kreg right angle clamp
- Power Drill. I also used the Switch Driver
Watch me build it!
I have a detailed video showing you how I built this kids desk with storage and the chair to go with it. Step-by-step written instructions follow below.
Plans for the DIY Kids Table with Storage
You can get the downloadable step-by-step plans with a cut list and schematics from the button below.
How to Build the the Kids desk with storage
Step 1: Prepare the lumber
- Make all the cuts per the cut list in the plans.
- Make all the pocket holes as shown in the plans. The pocket holes are made with the pocket hole jig guide and the depth collar at the 3/4″ setting. See how to use a pocket hole jig here.
- Sand all the boards down to 150 grit for painting or 220 grit for staining. See how to sand wood for the best results here.
Step 2: Build the Leg Frames
- Attach the 2 x 2 legs and the long apron using 3/4″ pocket holes and 1 1/4″ pocket hole screws and wood glue to build two sets of legs.
Tip: Make sure to use right-angle clamps to hold the boards as you are attaching using pocket holes to keep the boards aligned.

- Attach the short aprons to the two leg structures to complete the leg frame. Use 1-1/4″ pocket hole screws and wood glue.
Pro Tip: This is a great time to check for square and make any corrections as needed. See how to check and correct for square.

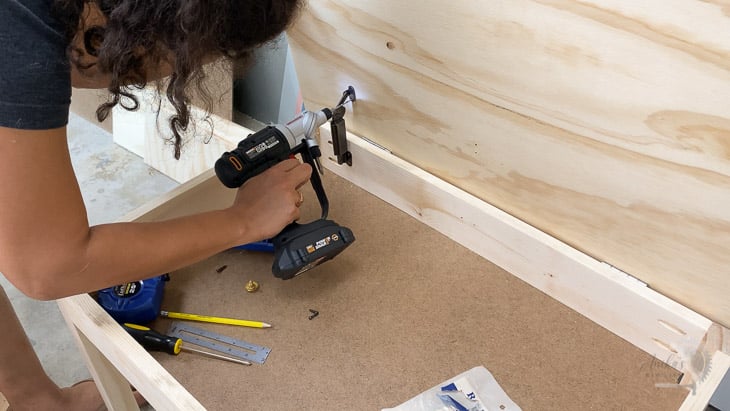
Step 3: Cut and Attach Base
- Use the leg frame to trace the exact location for the leg cutouts.
- Cut out the corners on the 1/4″ thick plywood sheet or hardboard using a jigsaw.

- Place the frame upside down and attach the 1/4″ plywood to the frame using finish nails and wood glue.

Step 4: Paint or Stain
- Fill all visibale holes with wood filler.
- Sand and clean off any glue squeeze out
- Paint or stain the entire frame and the tabletop in teh color of your choice
See how to stain wood.
See how to paint unfinished wood.
Step 5: Attach Top
- Place the tabletop upside down and the frame on top.
- Leave 3/4″ space on the front and the sides and 1″ on the back. Attach the top to the frame using the hinges.

Step 6: Add Support Hinges
This is the most important – attach the toy box lid support hinges on the inside of the table per instructions from the manufacturer.
This supports the lid when it is open and keeps the little fingers from being pinched.
That’s it… it is fairly straightforward and a great beginner woodworking project.
And the kid’s love the storage compartment and I am pretty sure the parent’s love it too 🙂
Plans for Children’s Desk With Storage
You can download the plans for this desk with the hidden storage PLUS a matching chair to go with it below.
I built this set for my daughter’s 5th birthday.
She couldn’t decide between rainbows and frozen and so “rainbow snowflakes” is what she got!
The design is from Jessica Sawyer Designs, which I printed on fabric at Spoonflower, covered with iron-on vinyl, and upholstered the chairs.
You can find the details in the DIY kid’s chair tutorial.

More Ideas – Kid’s Art Table With Storage
These pictures were taken from a phone camera a long time ago and aren’t the best quality but you get the ideas!
This one with the Moroccan lattice pattern was one of the favorites.

It has an art paper roll holder on one end too.

Here is one with a retro print with a removable art paper holder.
It was a lot of fun to make! I traced the pattern on the fabric and painted the top.

Those holes on the top are for a removable art paper roll holder. The holder has 4 dowel stubs on the bottom which go into the holes on the tabletop.

And here is another one with a permanent art paper holder. It was easy to make – just split the top – attach a 1×3 at the end and subtract that from the top.
All of these have vinyl -covered seats. They are definitely a godsend for all the messy paint-filled activities!
So… there you have it!
A whole bunch of ways to design the kid’s play table with storage and make it fun yet functional!
Which design is your favorite? Mine is still the rainbow snowflakes 🙂
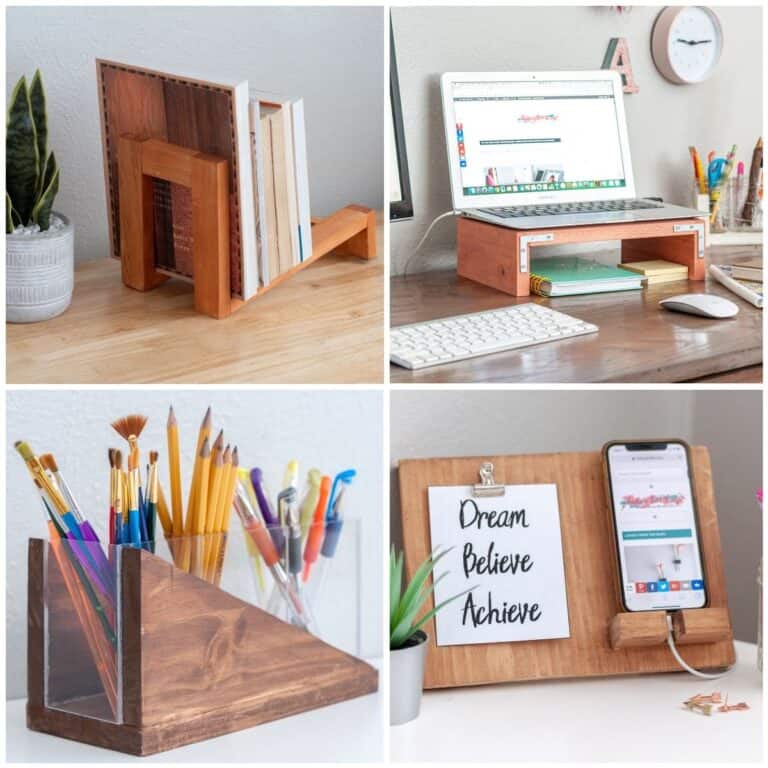
More Kid’s Furniture Ideas –
- A bedside table with book storage is great for all that bedtime reading!
- Or how about a place to store all those toys with a DIY Toy Organizer?
- A 5-in-1 kid’s art station to keep them busy for hours!
Check out 29 other DIY ideas for Kid’s rooms!
Anika's goal is to inspire and empower beginners with woodworking, DIY, home improvement, and home decor ideas.
She wants everyone to unlock their creative potential and experience the feeling that comes with making something. Nothing feels better better than seeing something and saying "I can make that!"


Great build, esp. with the fun designs on top. Great way to hide kids “stuff” that accumulates on their desktops.
Thanks, Victoria!! It is definitely collecting a lot of “treasures” 🙂
Loving this table anika – and that it has hidden storage too!
Thanks Medina! 🙂
You really make me want to go get all the power tools! This table is awesome. I love the rainbow snowflakes, and all the different variations with the paper roll. My kids have an art easel, but hardly ever use it. But they use their table all the time. Having the roll attached to the would make art time so much easier.
Great ideas for creating art desk for kids. I like it. I have to make it for my kids. I think they love it. It will inspire their creativity. Thanks for this idea.
Hello would like to know if you sell this table, if so, how much would u charge?
Hi Ann, I certainly do. Please email me at [email protected] and we can discuss.