DIY Modern Farmhouse Desk (Plans and Video)
This DIY Modern Farmhouse desk with storage is a great beginner build! The simple plans will help you build your own desk in no time.

I built a modern farmhouse desk! I am so excited to share it with you!
I had been using a basic table from Ikea… NO storage and barely enough space for my laptop and a notebook.
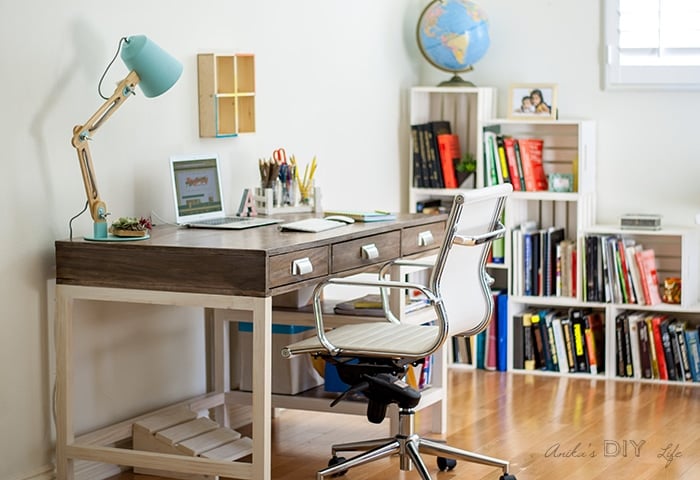
Now, look at this –
RELATED: 20 Stylish and affordable desks for your home office
Pssst: Like that footrest? See how I made it using scrap wood.
I partnered with PureBond® Plywood to bring you this DIY modern farmhouse desk with lots of storage – three drawers and 2 shelves!
*Even though this is a sponsored post, all opinions are my own.*


PureBond plywood is my go-to plywood for building furniture because it is formaldehyde free so I don’t have to worry about it off-gassing in my home and around children. Especially, since I will be spending more than half a day at this desk! It comes in gorgeous finishes and is exclusively available at Home Depot. The best part, PureBond project panels are available online and I can get them shipped right to my door! For my desk, I chose red oak.
DIY Modern Farmhouse Desk
Let’s get started on building that desk! You can grab the printable plans by clicking below.
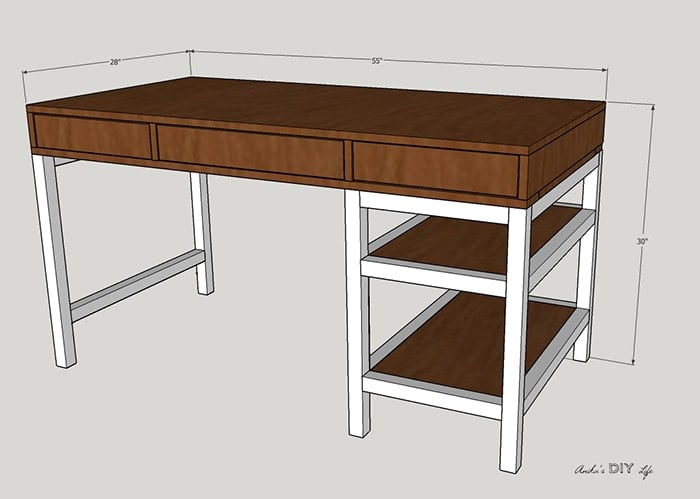
The desk is 55″ wide and 28″ deep with 3 drawers. I almost put doors and created a covered cabinet on the bottom but decided that knowing me, it would just end up as a dark deep dungeon of unknown crap. So open shelves it was!
Plus, these plans are flexible, you can easily switch the side you want the shelves to be on when you build it or even build the shelves on both sides!!
Here is a quick 2-minute video showing you the basic steps to building it –

Check Out All My Favorite Tools Here!
***This post contains affiliate or referral links. It is a way for this site to earn advertising fees by advertising or linking to certain products and/or services. Please read my full disclosure here ***
Materials Needed for a Building a DIY Desk –
- Lumber per the plans
- Circular saw
- Miter Saw
- Kreg Jig
- 1 1/4″ pocket hole screws
- Jigsaw
- 1 1/4″ finish nails
- Brad nailer or hammer
- Wood glue
- drill
- 2½” pocket hole screws
- 1¼” spax screws
- Knobs or pulls of your choice. I used these.
- wood glue
- Drawer slides
How to Build a Desk –
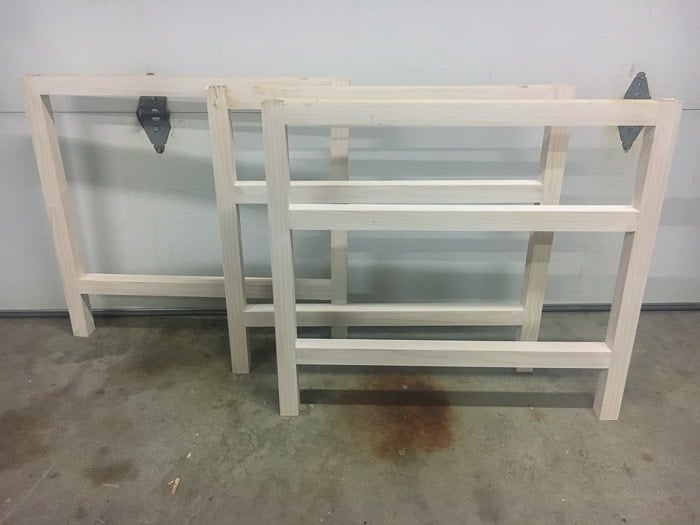
Step 1 – Start by building the leg frames using 2″ x 2″ lumber.
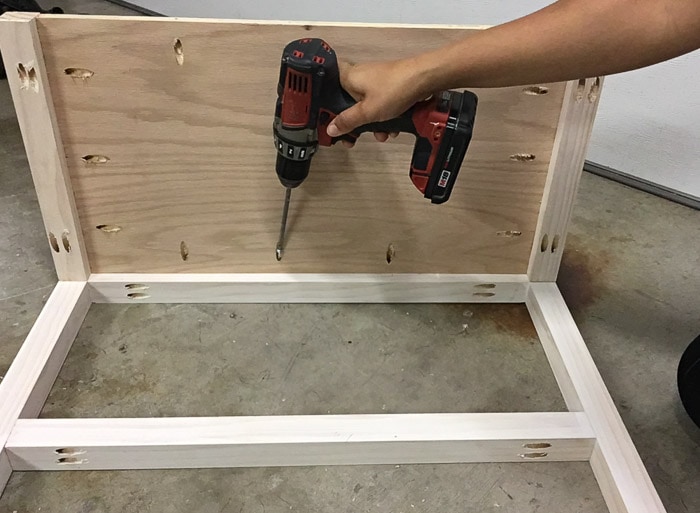
Step 2- Put the shelves together by first adding the 14″ short shelf trim on the two sides using pocket holes and screws.
See a Detailed Video Tutorial on How to Use a Kreg Jig Here!
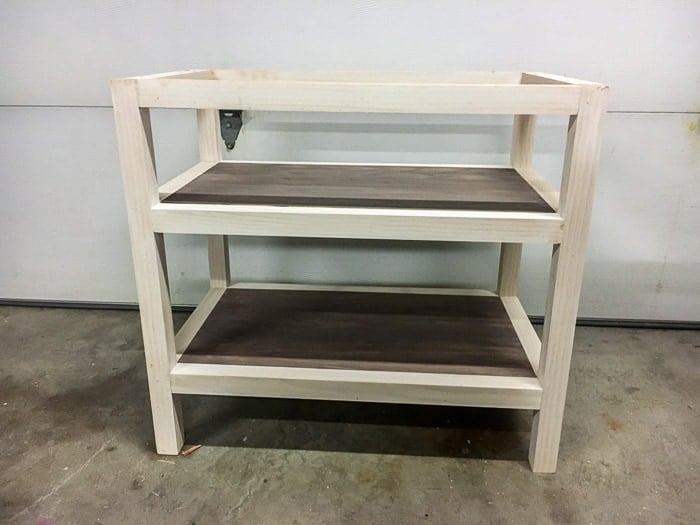
Step 3 – Attach the shelves to the leg frames and create the shelving part of the desk.

Step 4- Attach the long aprons to join the left leg frame and shelf structure and form the desk structure.
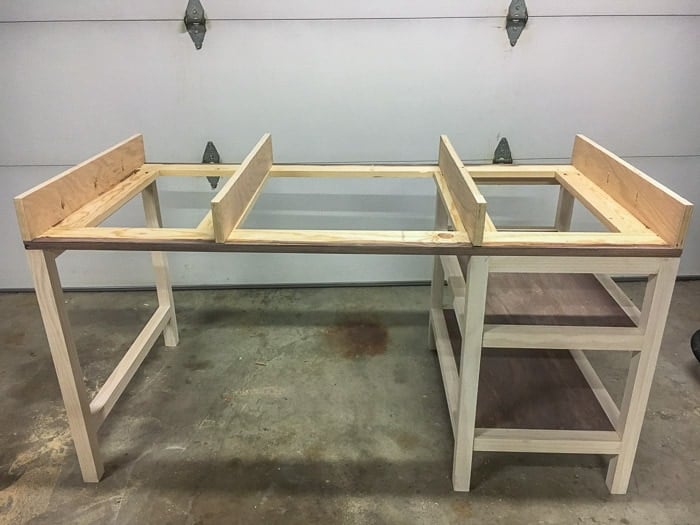
Step 5 – Add the side spacers and ensure everything is square.
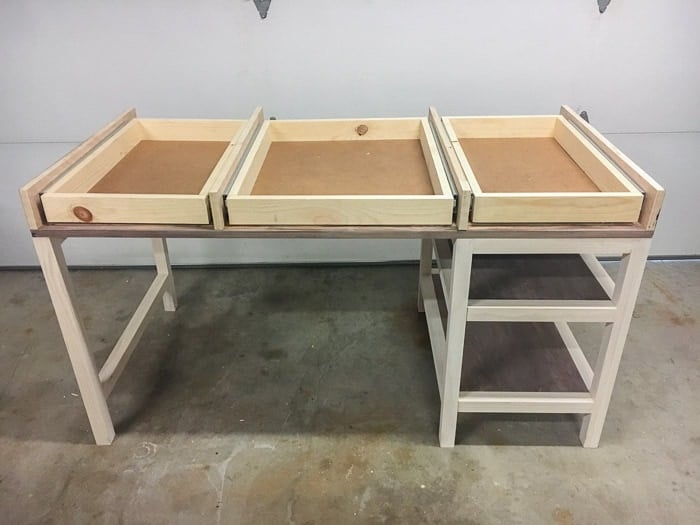
Step 6 – Build the drawers and install them.

Step 7 – Put the plywood table top on, align and attach using finish nails.
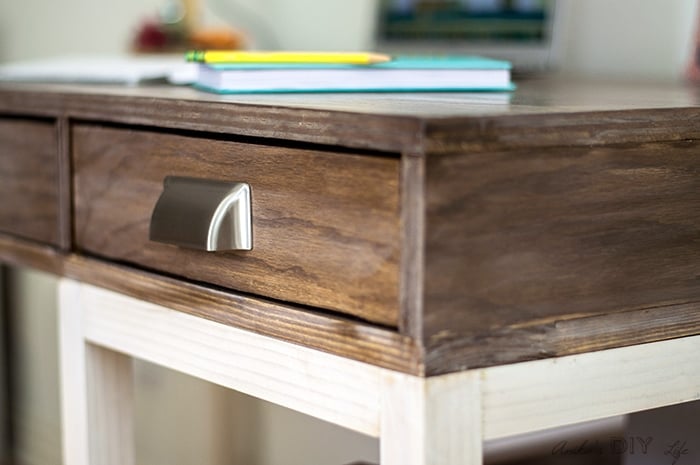
Step 8 – Attach the drawer faces and knobs or pulls! For the drawer faces, you could also use 1 x 4 boards. I decided to use plywood because I wanted the stain to look uniform all around. I am in love with these rectangular pulls.

Sand, prime and finish the desk as desired. For a dual tone finish like mine, the boards need to be stained or whitewash separately before attaching them.
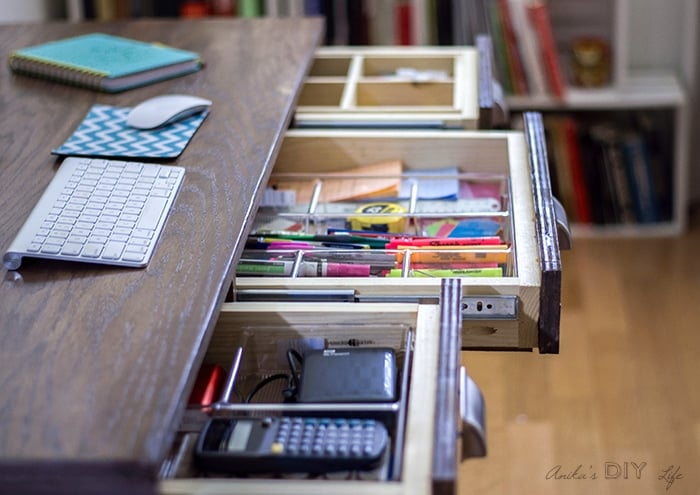
That’s it! It really is quite a simple build. Don’t let the drawers intimidate you! The only thing in the entire project that affects the drawer function are the spacers and the drawers themselves. If you can make sure to keep the spacers perfectly parallel to each other and the drawers square, the entire thing will be a breeze!
Now I have 3 large drawers with more space than I have stuff… but that won’t be the case for too long… right?!! haha..

And how gorgeous is that plywood table top!! I used a special staining technique to get the gray-brown weathered look! Look out for a tutorial on that soon.

I am totally in love with my new workspace! Lots and lots of posts are going to be coming to you from this very spot! Before I go, here is my Mini-me showing you the desk in action 🙂
RELATED: 19 stylish and comfortable office chairs
Sources –
- Lamp – I got mine at HomeGoods but an almost similar one is available here.
- Pencil Organizer – DIY – See full tutorial
- Footrest – DIY – See full tutorial
- Bookshelves – these crates painted and stacked up.
- Desk chair
- Drawer organizers
- Divided shelf – get it here. I painted it.
- File organizer on bottom shelf
I can’t wait to see what you build!


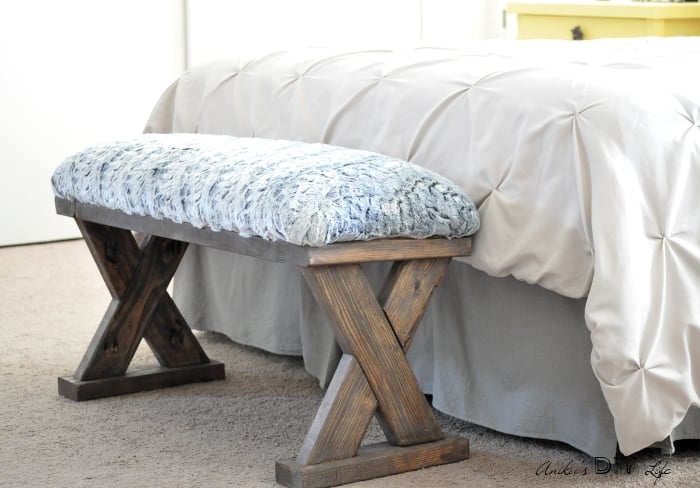
If you loved this build, you might also like this upholstered bench made from 2×4 boards. It is perfect for any spot in the house!
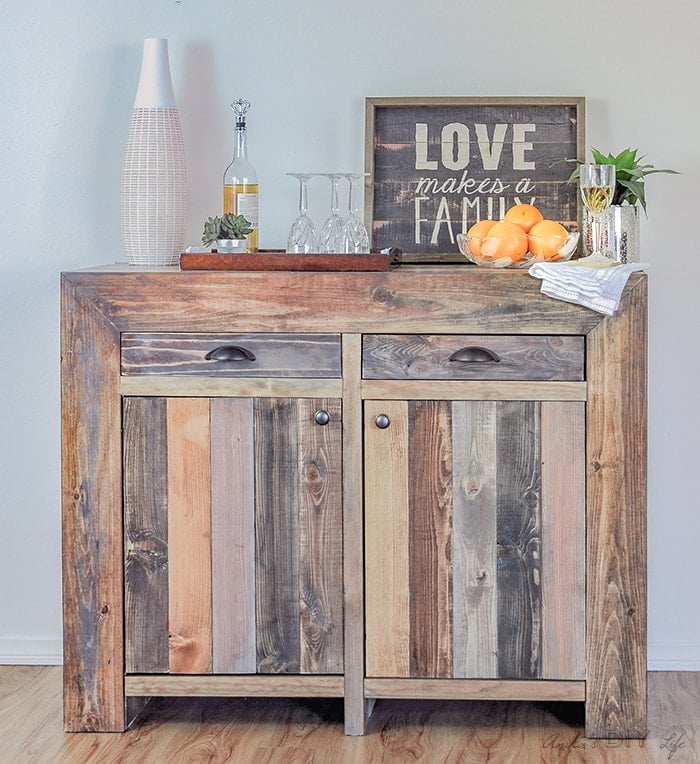
Or you might also want to check out how to build this West Elm inspired Emerson buffet.
You may also like:
Anika's goal is to inspire and empower beginners with woodworking, DIY, home improvement, and home decor ideas.
She wants everyone to unlock their creative potential and experience the feeling that comes with making something. Nothing feels better better than seeing something and saying "I can make that!"




I love this desk! Thank you so,much for sharing! What size drawer slides do you use?
Thanks Frances! I used 22″ drawer slides. I have added them to the list of materials with a link to the exact ones I used.
hi
Anika thanks for the idea i just love it. i was thinking about build a table but i don’t know how i think now i will able to all thanks to you
Regrads,
David
i love the result, such an artistic table ! incredible work mam
Hi I love this project. My desk doesnt have drawers, if I did it all again I would definitely make one with them. I saw you said you would post on how to do the stain, which I love and matches other for tire I have bought. I looked around your site a little and didn’t see it. Can you let me know if you ever made that post? Thanks!
Hi Miranda, I never got around to writing the post. But I did show how to do this on Facebook. Here is the link – https://www.facebook.com/anikasdiylife/videos/1353827948031639/
Let me know if you have any questions.
Thank you! I will check it out
You difinitely hit the target! The steps are very doable and the build seems durable as well. I have made one for our newly renovated house before but it was an epic fail. But thanks to this. I guess I can build one which is durable. This would make a good working space for any house renovations.
Thanks Anika!